Affiliate Pro
Mageplaza Affiliate extension for Magento 2 is the greater choice than ever if you want to build an Affiliate program that is crazy enough to drive traffic and sales increase promptly, get qualified leads, and also enhance your brand awareness. Our Affiliate program allows you to pay affiliates an amount of commissions. Mageplaza Affiliate User Guide will provide detailed instructions on how to use it on the frontend and how to configure it on the backend.
Outstanding Features
| PRO | Outstanding features | Description |
|---|---|---|
| 1 | Create effective affiliate marketing campaigns at a low cost | Create and manage affiliate marketing programs: Allow admins to create and manage affiliate marketing programs with options like percentage or flat commissions. This marketing method will encourage affiliates to promote products across the Internet and across multiple sales channels, helping to drive sales, increase traffic, bring in quality leads, and improve SEO rankings. "Refer a friend" feature: - Allow affiliates to easily refer friends across multiple channels to reach a wider audience. They can send referral URLs and invitations via email, share on social media with over 250 social buttons, refer friends on Product Detail and Product List pages, and embed snippets on affiliate websites. This is a low-cost marketing method that many businesses are using to promote their brand. - Allow you to place attractive banners and referral links right on your Affiliate profile pages. This eye-catching display will attract more clicks, driving visitors straight to your store. Unlimited Affiliate Program: - Store owners can launch as many affiliate marketing programs as possible without limits, ensuring they suit different groups. - Promote your affiliates naturally by adding multiple commission tiers with different benefits. |
| 2 | Provide an absolutely transparent and easy-to-use affiliate marketing network for affiliates | Providing a separate page for payment requests helps affiliates check withdrawal history and receive commission payments more conveniently. This creates transparency in receiving commissions, creates trust, and attracts affiliates. Automatic email notification to affiliates about their commission status, including balance updates, affiliate transactions, withdrawal status, and rejected/ canceled requests. This feature will keep affiliates updated on any changes that arise so they can address them promptly. Additionally, admins can easily display commission expiration times to ensure transparency. |
| 3 | User-friendly and effective marketing strategy management interface for admin | Provides a clear and easy-to-use dashboard for administrators, allowing them to track campaign performance and revenue in detail and in a timely manner: - Flexible payment request management: Admins can configure when their next affiliates are eligible to receive commissions (possibly when the referred orders are completed). This fast reward system ensures that affiliates are credited to their limits quickly, keeping them happy with the affiliate program. Additionally, store owners can set commissions to be deducted from affiliate balances when customers refund or cancel orders. - Timely rules and restrictions settings: Admins can make specific adjustments to affiliate earnings withdrawals as well as changes or withdrawal requests from affiliates. Owners can customize important parameters such as the minimum balance to request a withdrawal and the minimum/maximum withdrawal amount. Customizing limits allows owners to adjust the withdrawal process and ensure compliance with financial policies, maintain stability and manage the affiliate program effectively. - Automatic email to admin in time: Immediately notify the administrator whenever a withdrawal request and registration are made. This feature not only helps the store owner to know about new members immediately but also provides a means to effectively manage the related payment fees. - Admin can backup link data when there is any change in the system. The Import and Export functions have also been added. Stores can import link data from other systems as well as export existing link data easily. |
| 4 | Flexible Payment | Allows affiliates to withdraw their commissions using the most popular and secure payment methods, including PayPal, offline payments, bank transfers, and Skrill. This increases customer and affiliate reach. |
Installation Guide
We offer two methods for installing our plugins: the Copy & Paste method and the Composer method. Please follow the detailed instructions provided below.
Method 1: Installation via Copy & Paste
To install our plugins using the Copy & Paste method, kindly follow the instructions at the link below:
How to Install Magento 2 Extension via Copy & Paste
Method 2: Installation via Composer
Composer name: mageplaza/module-affiliate-pro
To install our extensions using Composer, please refer to the comprehensive guide at the link below:
How to Install Magento Extension via Composer
By following these guides, you can ensure that the installation process is handled correctly, allowing you to fully utilize the features and benefits of our plugins.
Module Update Guide
Keeping your module updated ensures optimal performance. Follow one of these steps to update your module:
- By Account Dashboard: Log in to your
Mageplaza account > My Licenses > Download > choose the latest version from the popup. - By composer: Kindly use the following commands to update the module via composer
composer require mageplaza/module-affiliate-pro
php bin/magento setup:upgrade
php bin/magento setup:di:compile
Updating a module by Composer ensures efficient dependency management, version control, and integration with development tools, making the process faster and more reliable.
How to Use
After installing the Affiliate module, an Affiliate link is available on the footer of your site. Click on the link and go to the Affiliate Page.
Affiliate Home Page
Affiliate Home Page is already set up with CMS Block, including Welcome Message and How does Affiliate Program work? If you want to change the text, it is possible to edit from the backend. In addition, all of the active Affiliate Programs will be displayed on the Affiliate Home Page.
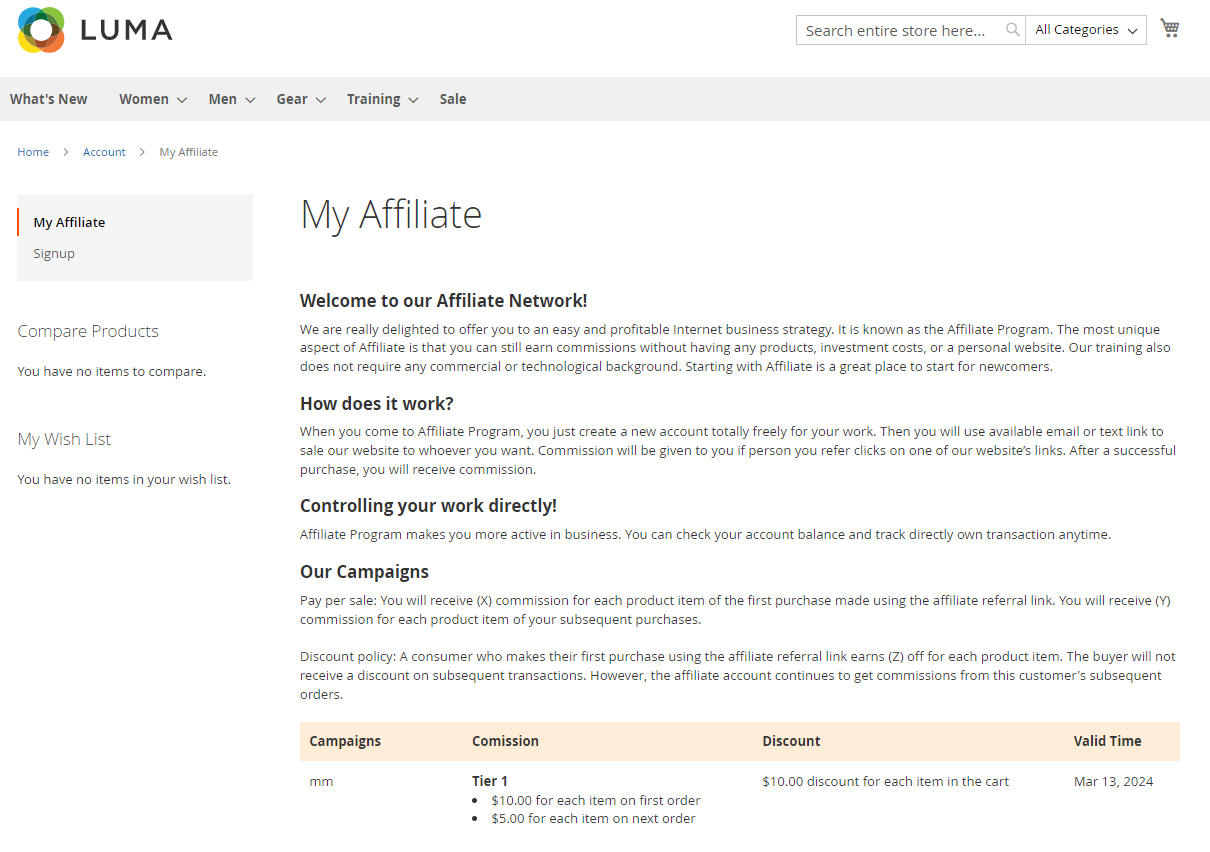
Look at the left panel on the page; customers can sign up to become affiliates.
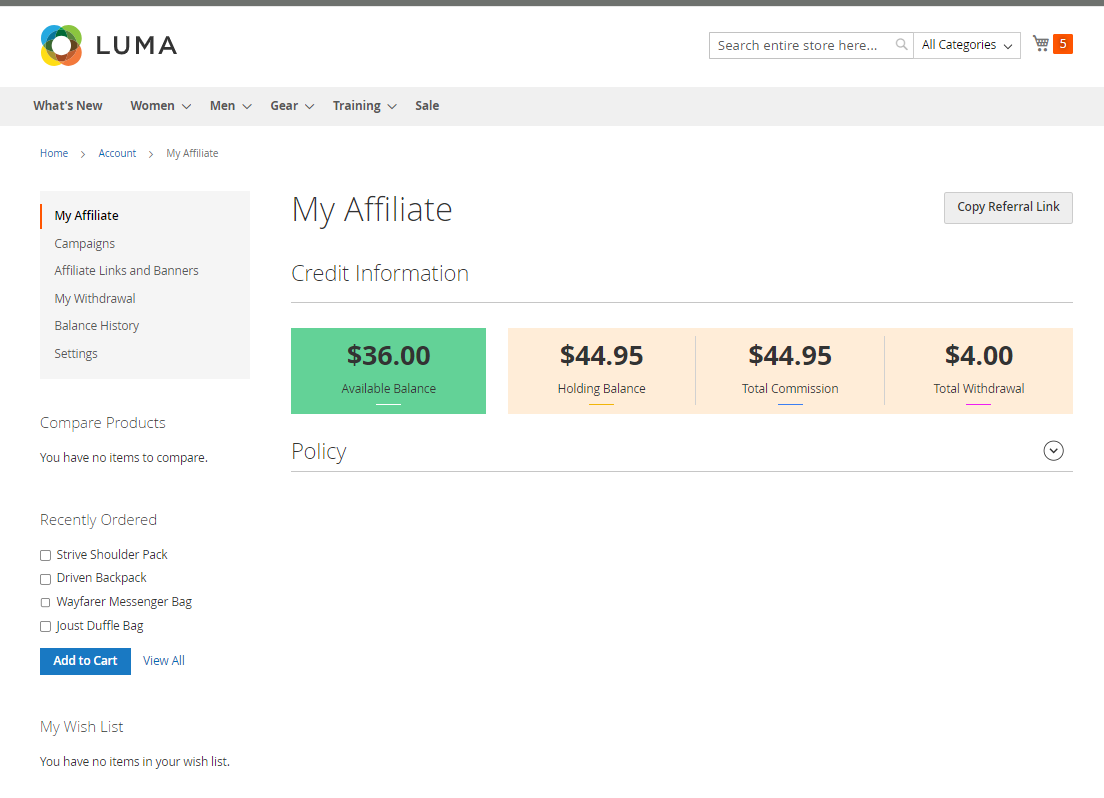
My Affiliate
Each affiliate can manage all credit information, such as available balance, holding balance, total earned and total paid, and all transactions related to the account, which are listed in detail.
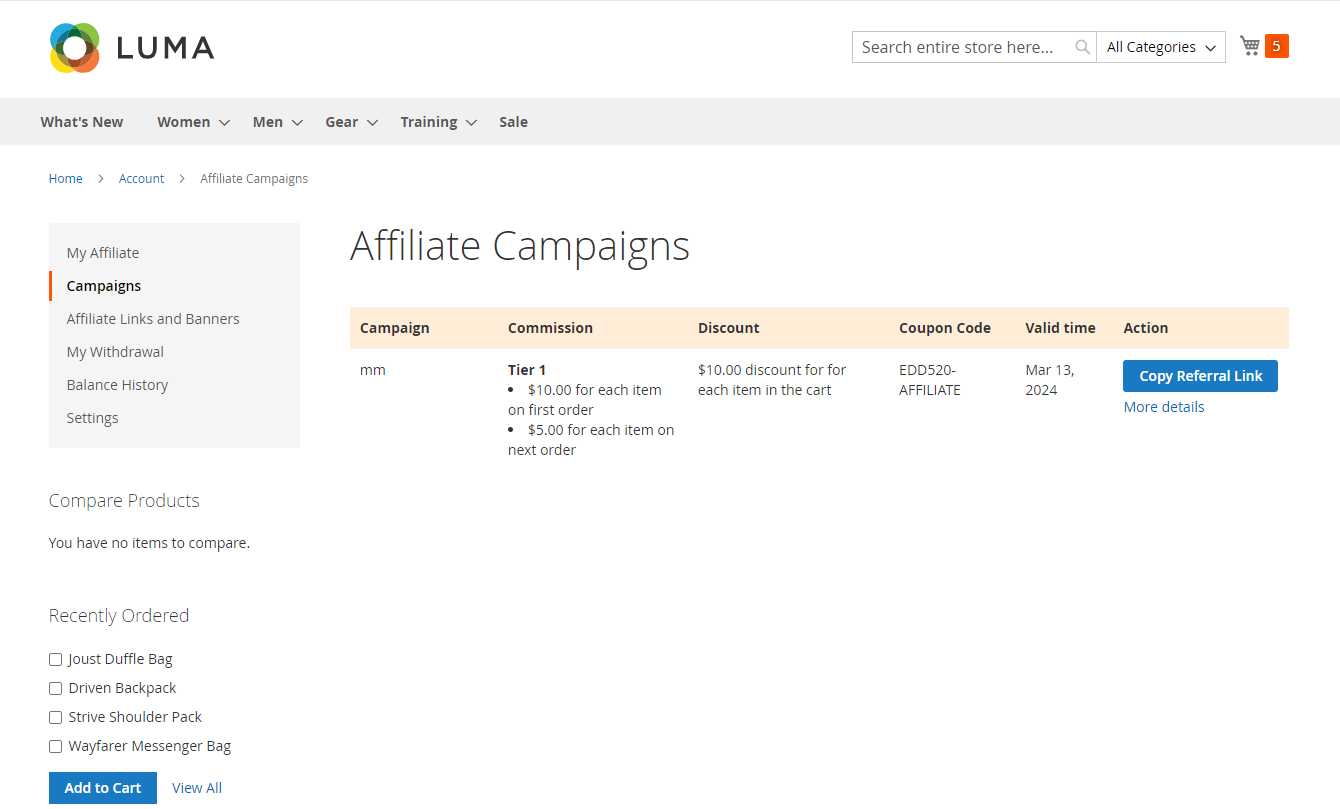
Campaigns
Campaigns, Commission, Discount, Coupon Code, Valid Time, Copy Referral Link button, and More Details will be shown here:
Affiliate Links and Banners
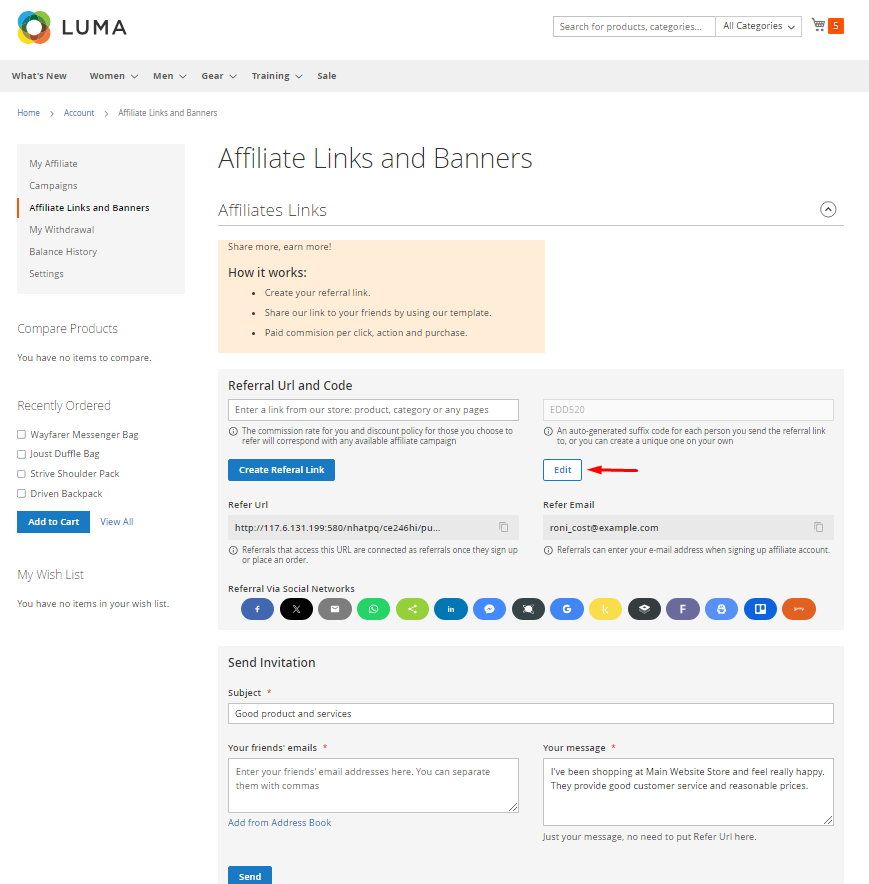
Affiliate Links
Affiliate module by Mageplaza allows the affiliates to refer friends via referral URL, code, and email.
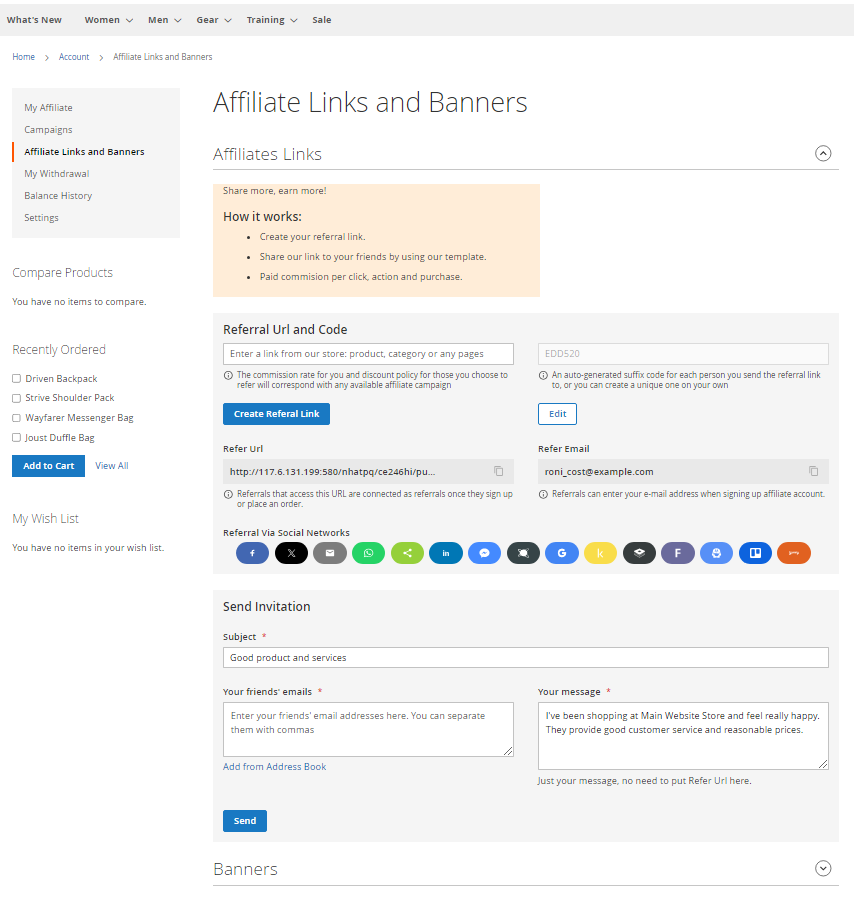
Just insert friends' email addresses together with a message to send invitations instantly on the Affiliate Links and Banners page. Besides that, they can edit the Referral Code or share Referal URL via social media. Customers can edit the Referral Code in this section:
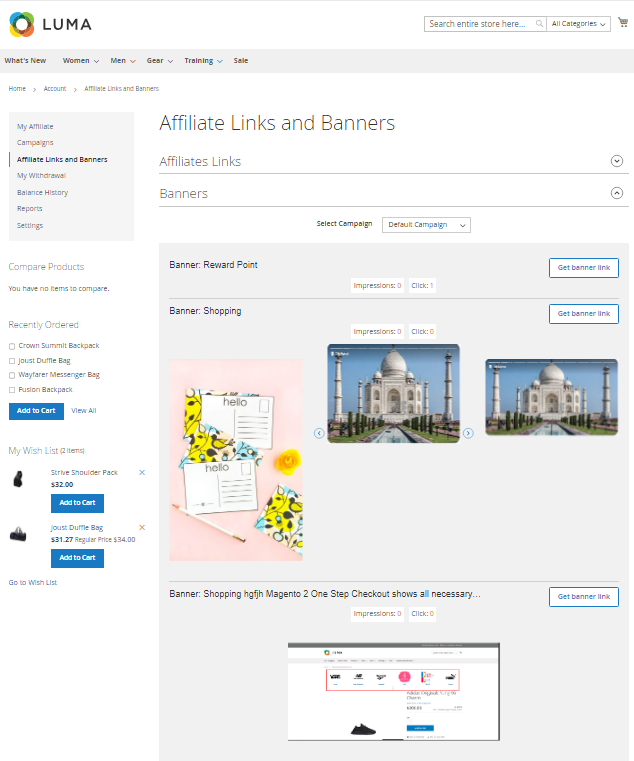
Banners
At the Banner Page, all available banners according to each campaign will be listed here:
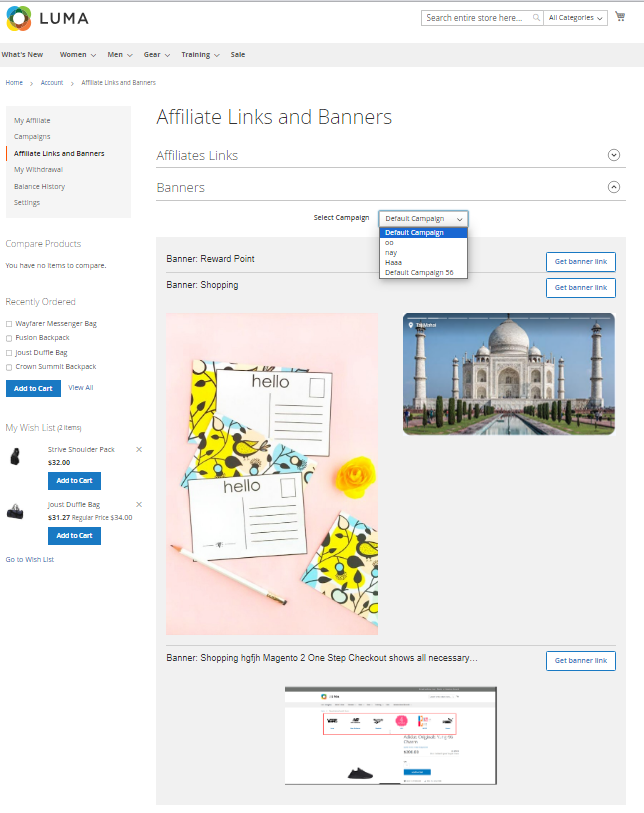
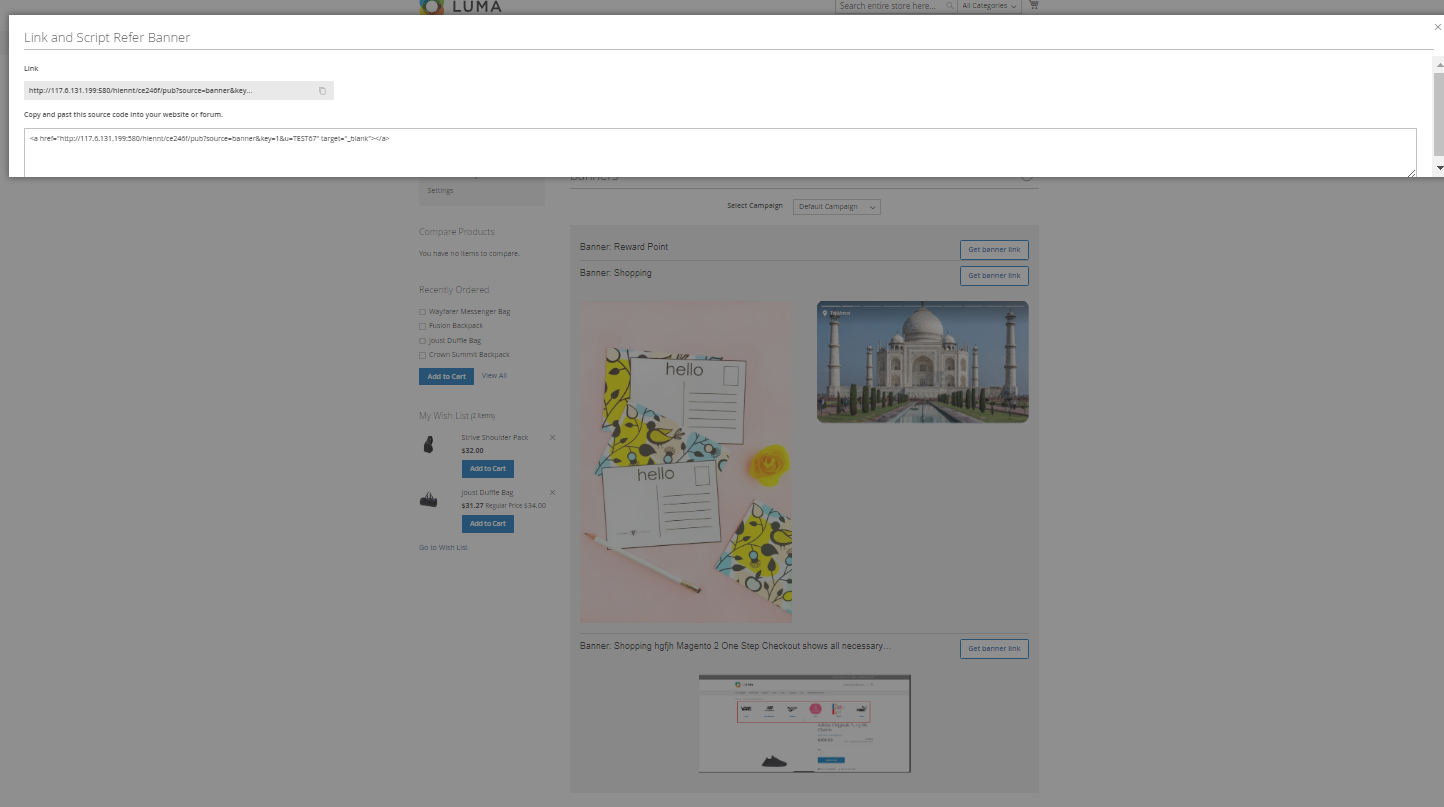
When clicking on “Get Banner link”, the HTML and Banner Link will show as below:
My Withdrawal Page
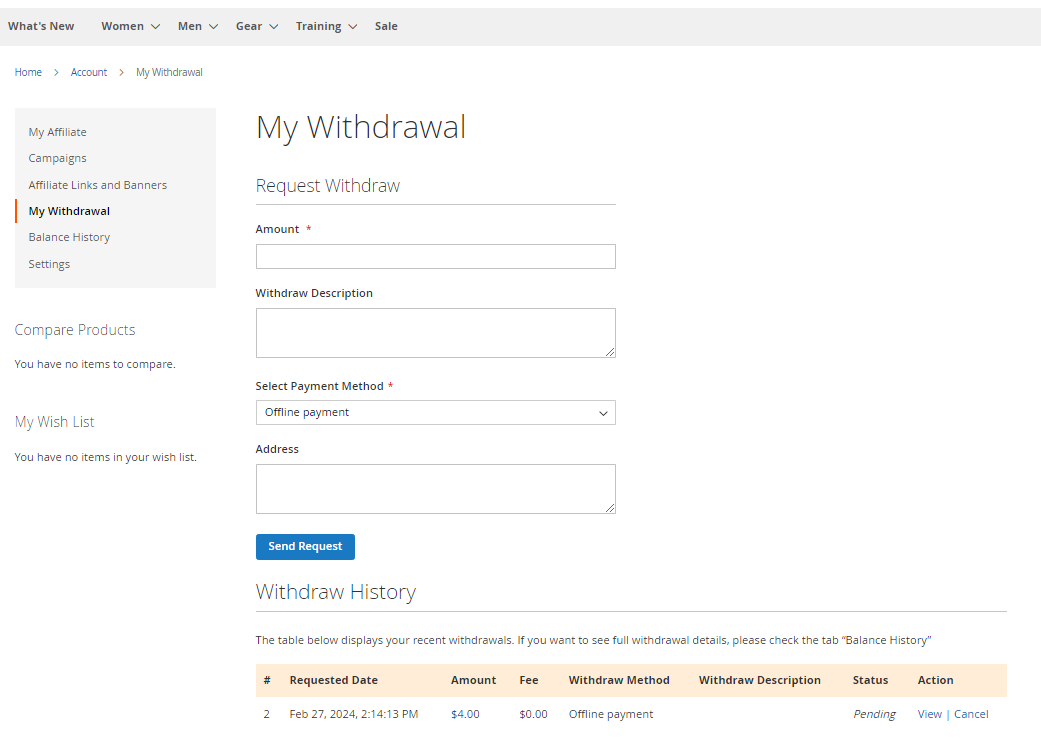
Mageplaza Affiliate supports offline payment and PayPal payment for the withdrawal. You can check the 10 most recent withdrawals. Each created withdrawal will be saved and managed in Withdraw History. Let's check its status to see where the request is in progress.
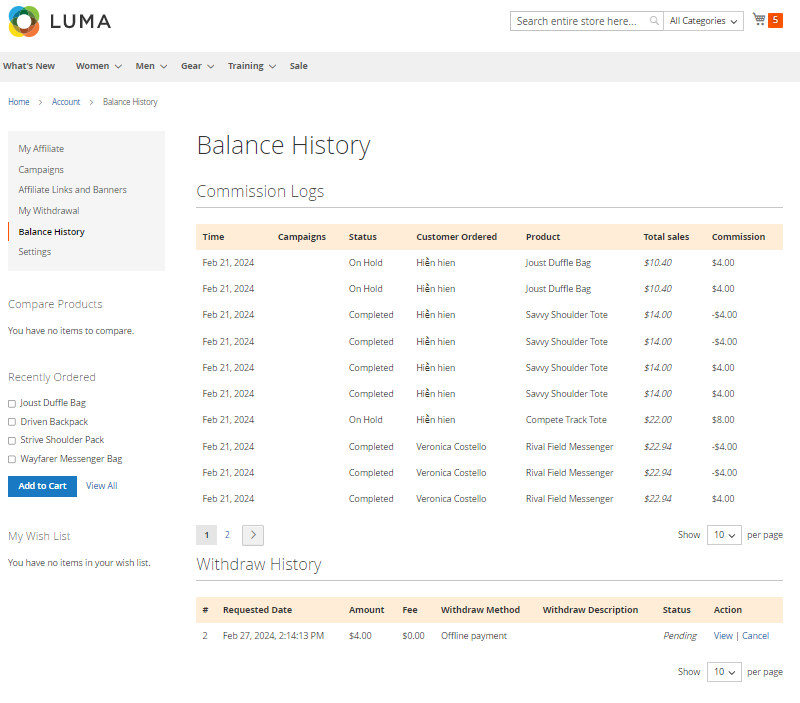
Balance History Page
Affiliate allows you to check Commission Logs with detailed information about the affiliate account's commission receipt including time, campaigns, status, customer ordered, product, Total sales, and Commission. Besides that, the Withdraw History is also displayed to record affiliate account withdrawal details (Amount, Fee, Withdraw Method, Withdraw Description, Status, and so on).
Commission Logs and Withdraw History are displayed in the following screenshot:
Setting Page
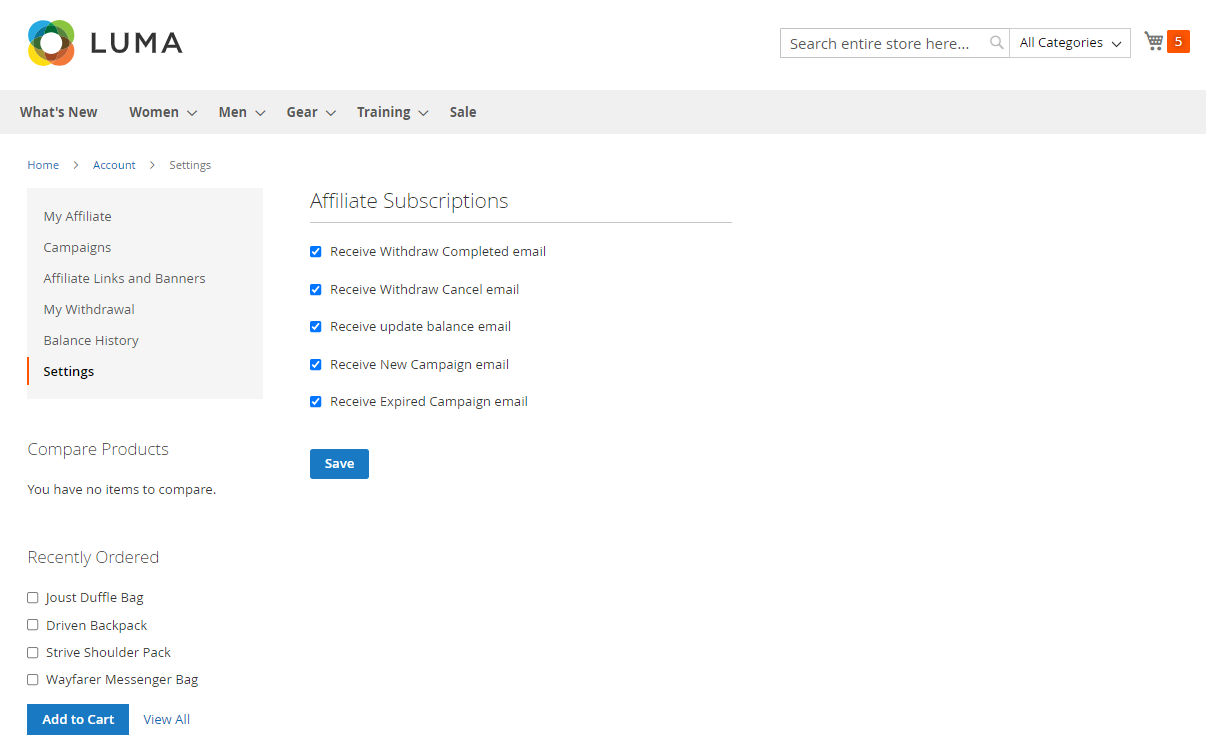
When the affiliate account selects which email to receive, that email will be sent.
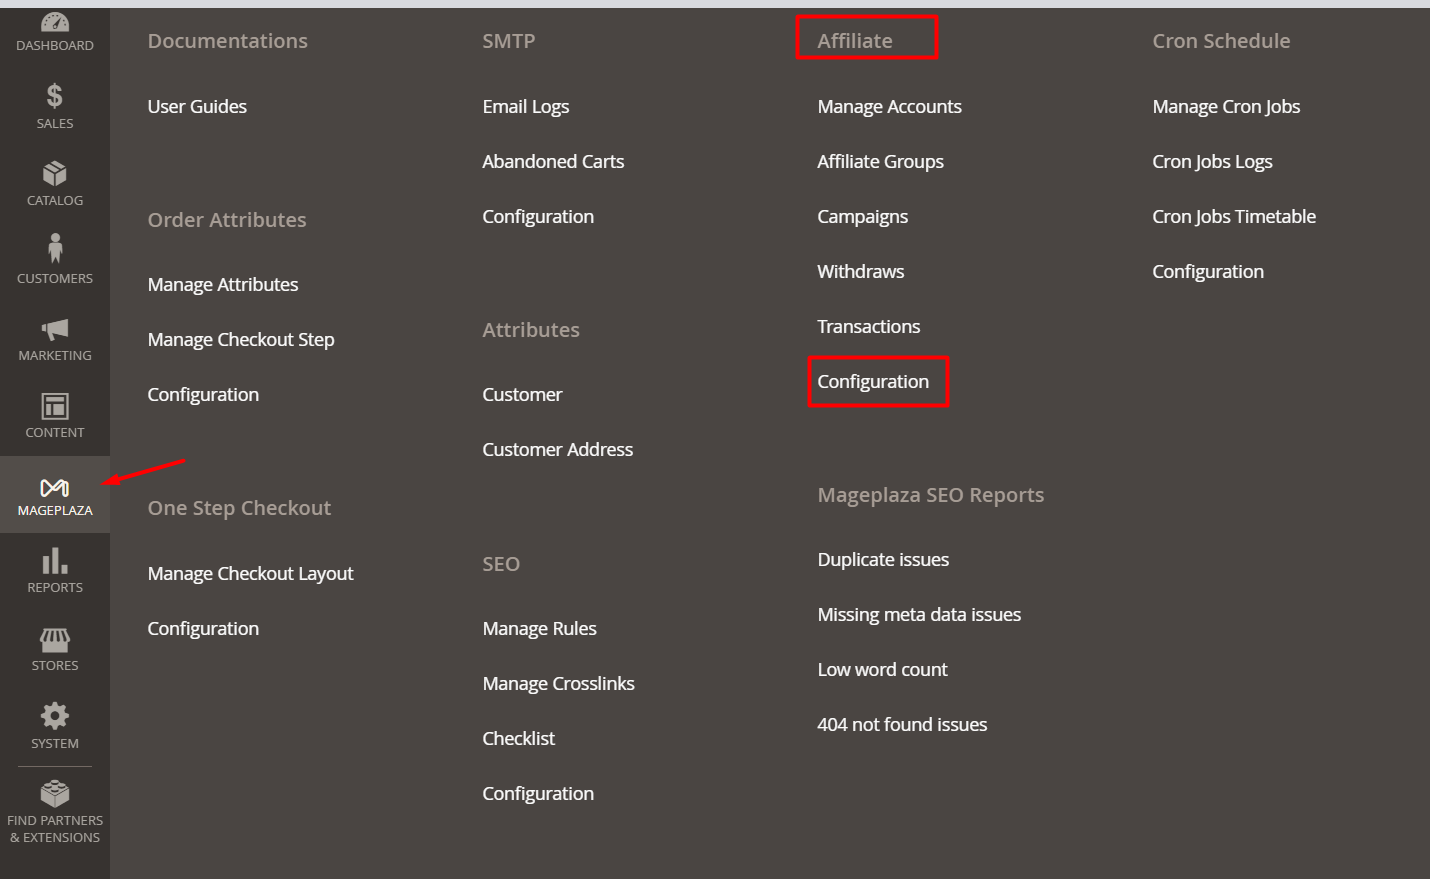
How to Configure
From the Admin Panel, go to Mageplaza Extensions > Affiliate > Configuration
1. Configuration
In this section, the admin can set up general module settings, status settings, discount code formats, affiliate links, general policies, and affiliate account types.
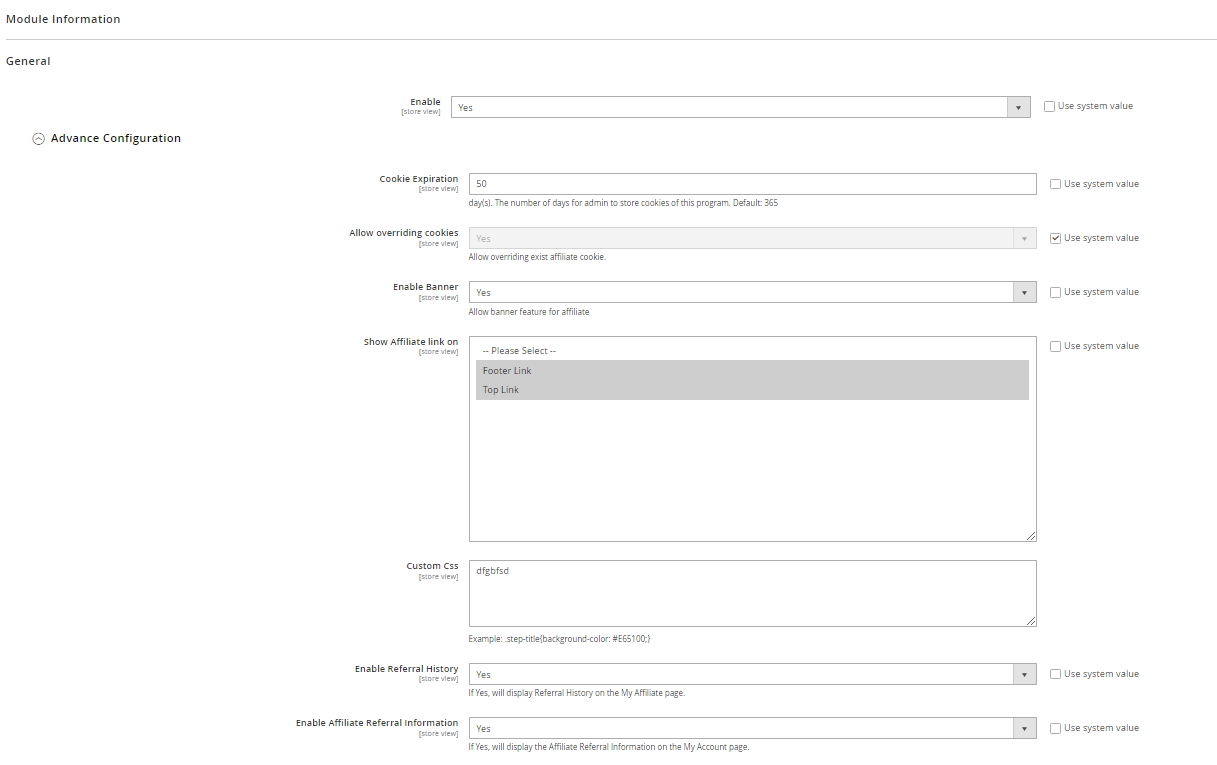
1.1. General
- Enable: Choose
Yesto apply the feature of the module
1.1.1. Advanced Configuration
Cookie Expiration
- Enter the number of days to store cookies of this program.
- If you skip it, the default (365) is used, which means Lifetime Commissions can be active.
Allow overriding cookies: Choose
Yesto override the Affiliate code when a customer is referred by many Affiliates.Enable Banner: If
Yes, the banner will be shown on the Affiliate Links and Banners page on the frontend.
Show Affiliate link on: Choose the display position of the Affiliate link
- Show Affiliate link on = Footer Link: Display the Affiliate link at the bottom of the page
- Show Affiliate link on = Top Link: Display the Affiliate link at the top of the page along with the link
My Account
- You can choose to display in both positions
- If the admin does not choose the position to display the Affiliate link, the link only shows on Frontend at the My Account Page when customers log in.
Custom CSS
- Admin can freely customize the display of the Affiliate site
- Supports HTML, CSS
Enable Referral History: Select
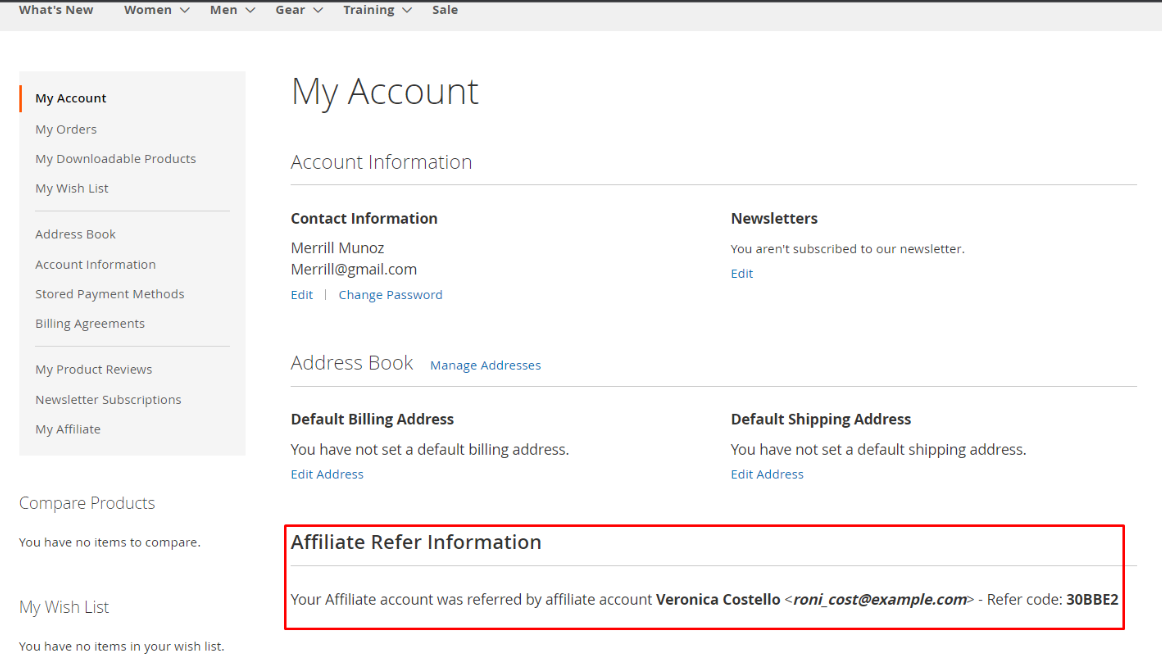
Yesto show Refer History page in My Affiliate. Display information of customers invited using Refer URL or Coupon Code, including columns such as ID, Customer Name, Customer Email Address, Date.Enable Affiliate Referral Information: Select
Yesto show Parent Affiliate customer information on the My Account page. Note that, the customer account has Sign Up Account Affiliate and the Affiliate account has been active.
1.1.2. Default Page

Affiliate homepage content
- Select CMS Block for Affiliate homepage content
- The default display is: Affiliate Welcome homepage content
Affiliate Policy content
- Select CMS Static Block for Affiliate Policy content
- The default display is: Affiliate Welcome homepage content
1.1.3. Coupon code
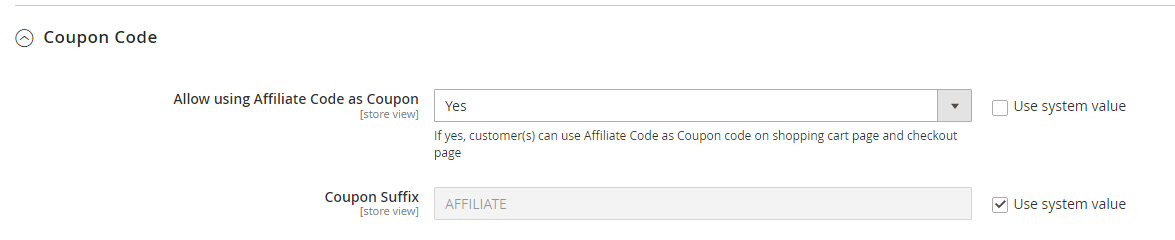
- Allow using Affiliate Code as Coupon: Select
YES, so customers can use Affiliate Code as Coupon code on the shopping cart page and checkout page. - Coupon Suffix: Enter the Suffix you want to set for the Affiliate Code.
1.1.4. Affiliate URL
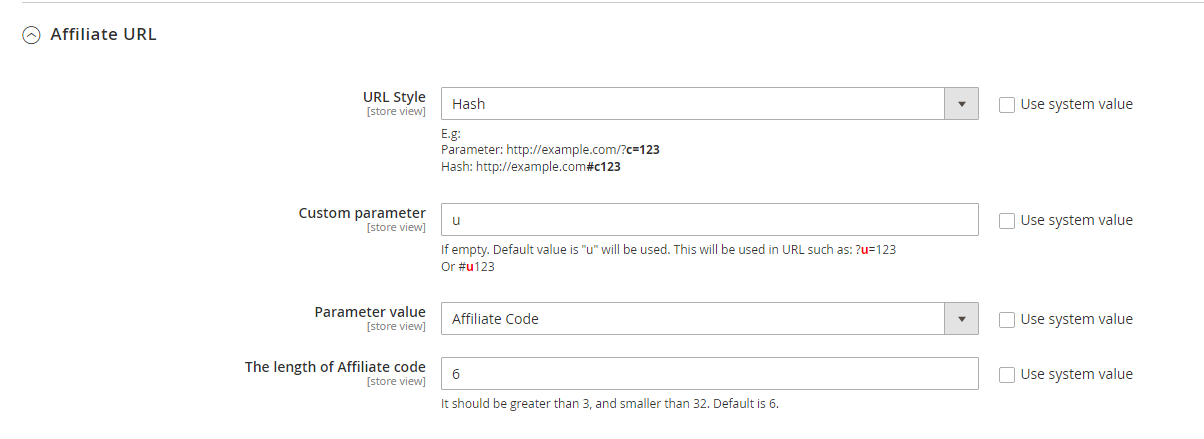
URL Style: Choose the type to display URL
- URL Style = Hash: Display URL as http://example.com#c123
- URL Style = Parameter: Display URL as http://example.com/?c=123
Custom parameter
- Enter the letter for the customization of Affiliate URL. Those parameters here will be inserted in front of the Refer code
- If this field is left blank, the default value is "u".
For example: refer code is 123, and the Custom parameter is ABC
Parameter: http://example.com/?abc=123
Parameter value
- Parameter value = Affiliate ID: Display the ID of Affiliate account on the Refer URL link in My Account/ My Affiliate/ Refer Friend outside the frontend. For example: ?u=1 or #u1
- Parameter value = Affiliate Code: Display the code of Affiliate account on the Refer URL link outside the frontend. For example: ?u=b1dc or #ub1dc and display the code of Affiliate account in the Refer Code field in My Account/ My Affiliate/ Refer Friend outside the frontend
Length of Affiliate code
- Enter the length of Affiliate code
- The default length is 6 characters
- It is recommended to enter a length between 3 and 32 characters to ensure safety
1.2. Account Configuration
1.2.1. Affiliate Sign up
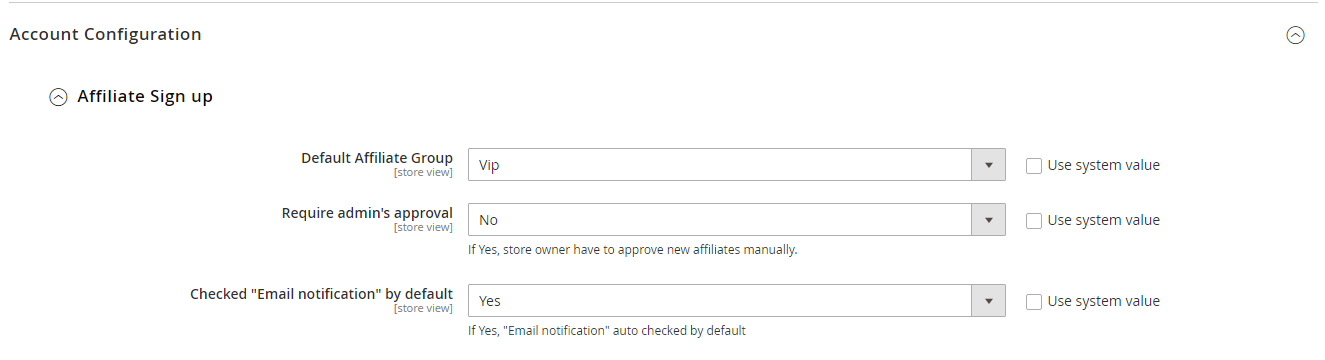
Default Affiliate Group
- Choose the default group whenever an account is registered as an Affiliate account
- The original default group is General
Require admin's approval: Choose
Noso that when registering as an affiliate account, you don't need to go through the censorship of the storeChecked "Email notification" by default: Select
Yesto automatically check the Receive affiliate email box on the My Account/My Affiliate/Setting tab outside the frontend whenever an account is registered as an Affiliate account.
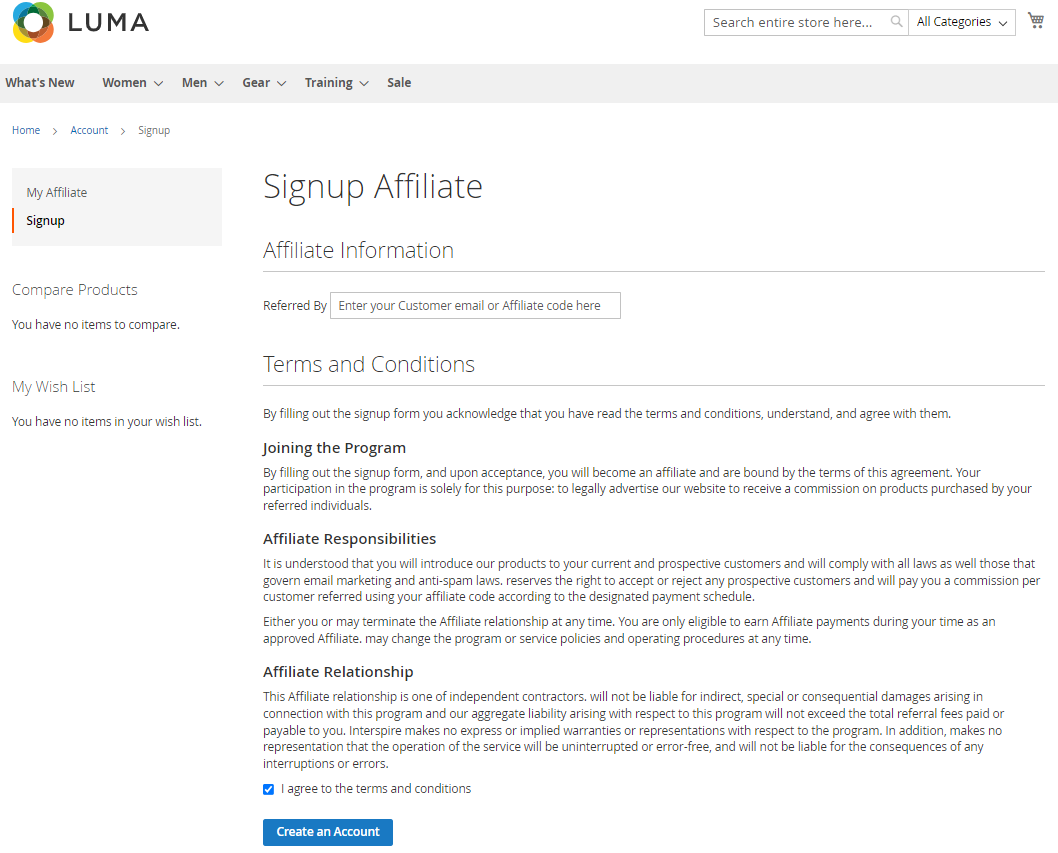
1.2.2.Terms and Conditions
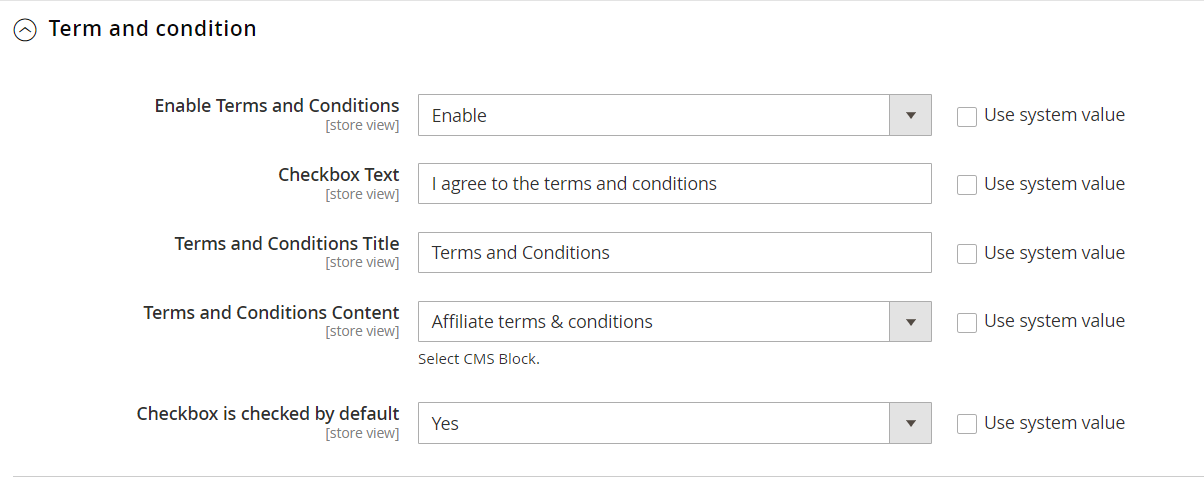
Enable Terms and Conditions: Choose
Yesto display Terms and Conditions in the Sign Up section, which is outside the frontendCheckbox Text: Enter the checkbox text that is in the right of Terms and Conditions checkbox.
Terms and Conditions Title: Enter the title for Terms and Conditions
Terms and Conditions Content
- Select CMS Block for Terms and Conditions Content
- The default content is Affiliate terms & conditions
Checkbox is checked by default: Choose
Yesto tick in the checkbox automatically
1.2.3. Account Balance
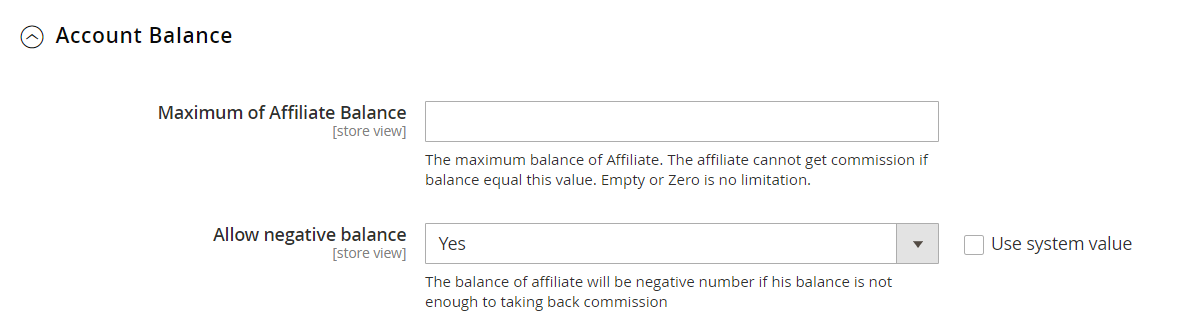
Maximum of Affiliate Balance
- Enter the Maximum of Affiliate Balance
- If Affiliate reaches the milestone, none of the commission is added
- If the field is left empty or entered as zero, Affiliate Balance will have no limitation
Allow negative balance: If Affiliate's account balance is not enough to take back commission, allow the balance to be negative number by choosing
Yesin the respective field
1.3. Commission Configuration
This section allows admins to set up the commission calculation process. Admin can set the time for the affiliate to receive a commission, hold commission for a certain number of days or deduct commission when order is canceled.
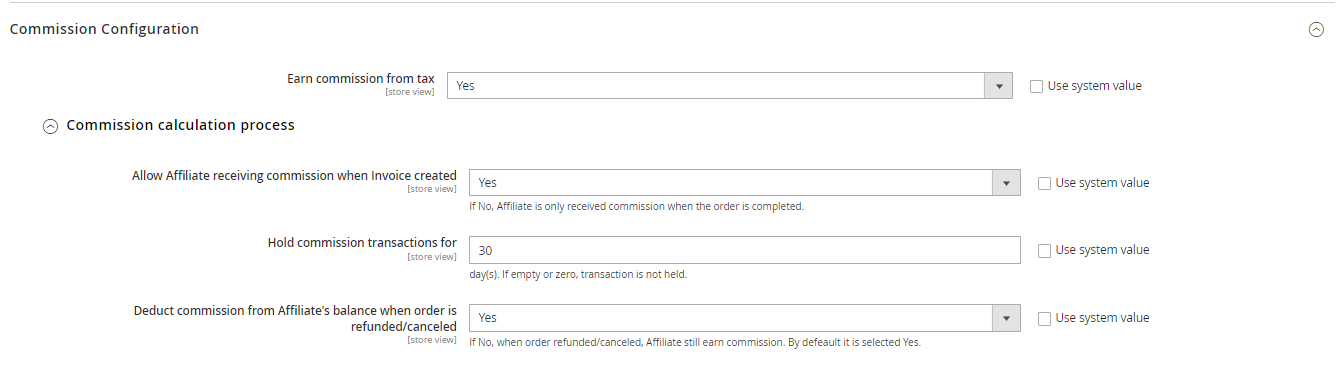
- Earn commission from tax: Choose Yes to earn commission from tax
1.3.1. Commission calculation process
Allow Affiliate receiving commission when Invoice created
- Allow Affiliate receiving a commission when Invoice created = Yes: Commissions received when creating an invoice
- Allow Affiliate receiving commission when Invoice created = No: Commissions are only received when the order is in the completed state
Hold commission transactions for
- Enter the days between commission transactions for accounts. After that period of time, the transaction will no longer be kept
- If the field is blank or entered as 0, the transaction will not be kept
Deduct commission from Affiliate's balance when the order is refunded/canceled
- Choose
Yesto allow deducting the commission from the balance of the branch when the order is refunded or canceled - The default allows deducting
- Choose
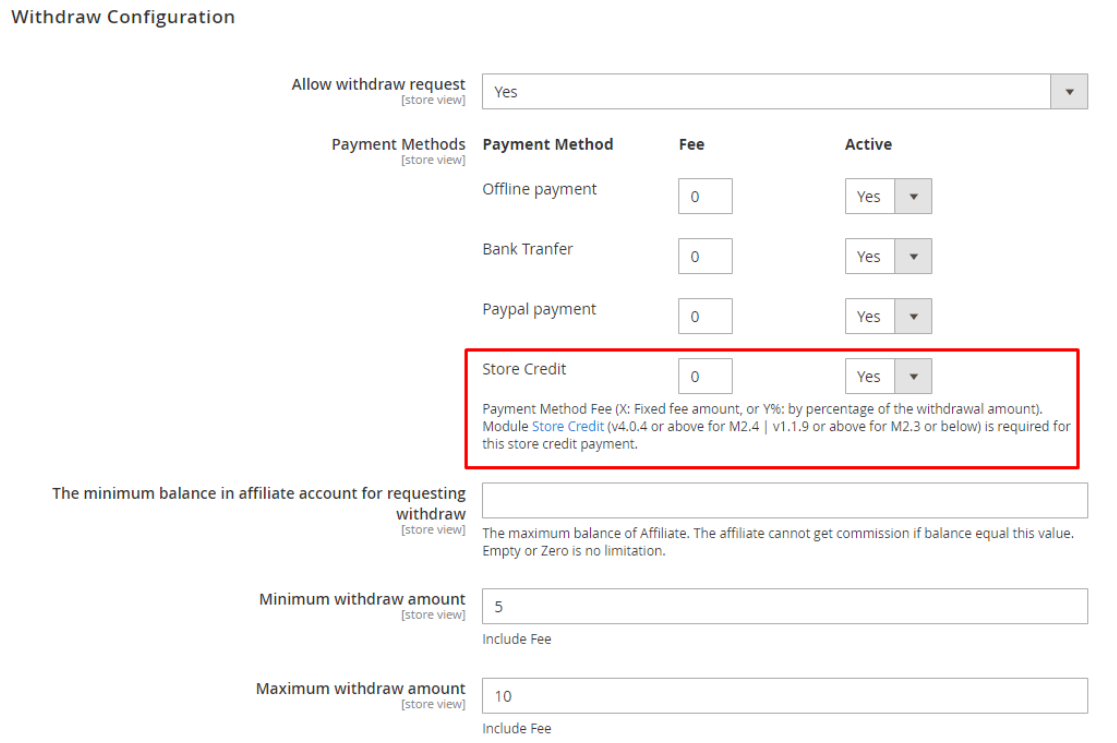
1.4 Withdrawal Configuration
In this section, the admin can set general conditions for commission withdrawal fees as well as the minimum commission that the affiliate can withdraw. This feature helps affiliates manage commissions transparently, giving them confidence and commitment for the next transactions.
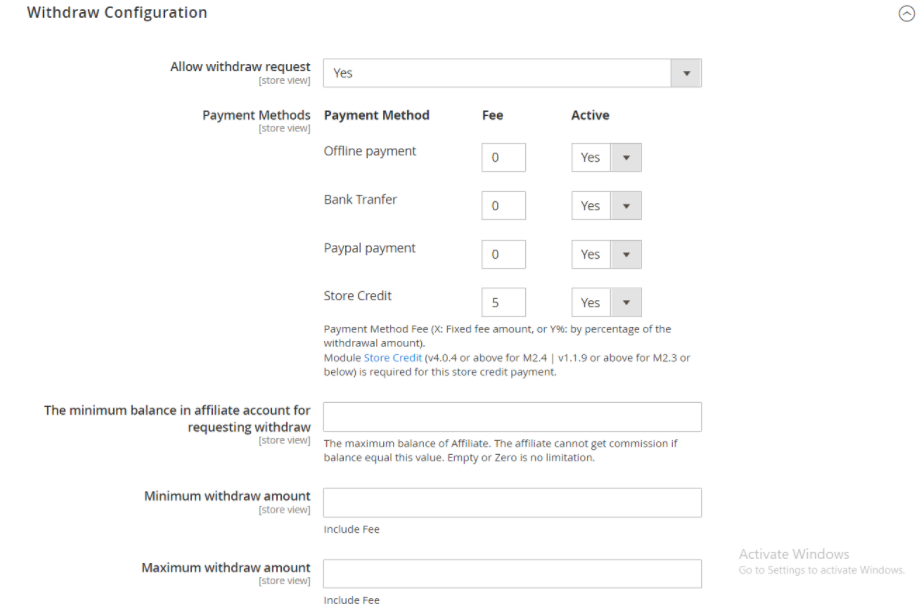
Allow withdrawal request: Select
Yesto display the withdrawal request outside the frontendPayment Methods
- There are three withdrawal methods: Offline payment, Bank Transfer and Paypal payment, and Store Credit. Affiliate extension is completely compatible with Mageplaza Store Credit (v4.0.4 or above for M2.4 | v1.1.9 or above for M2.3 or below) to support withdrawal with the store credit payment.
- Enter the withdrawal fee for each form of withdrawal. You can enter the charge as a specific amount or a percentage of the total amount withdrawn
- To allow displaying a withdraw’s form outside the frontend, select Active = Yes corresponding to that form
The minimum balance in affiliate account for requesting withdrawal
- Enter the minimum balance in the linked account to request a withdraw
- If you leave blank or fill in as 0, you will not be limited when withdrawing
Minimum withdrawal amount
- Enter the minimum amount for each withdraws
- The withdraw fee will be included here
Maximum withdrawal amount
- Enter the maximum amount for each withdraws
- The withdraw fee will be included here
1.5 Email Configuration
Admins can set up automatic welcome emails for new affiliates or send instant notification emails to admin whenever withdrawal requests and registrations are made. In addition, the admin can send notification emails to affiliates when there is any change in the affiliate account commission balance. This feature not only helps store owners to know about new members immediately but also provides a means to effectively manage related payment fees.
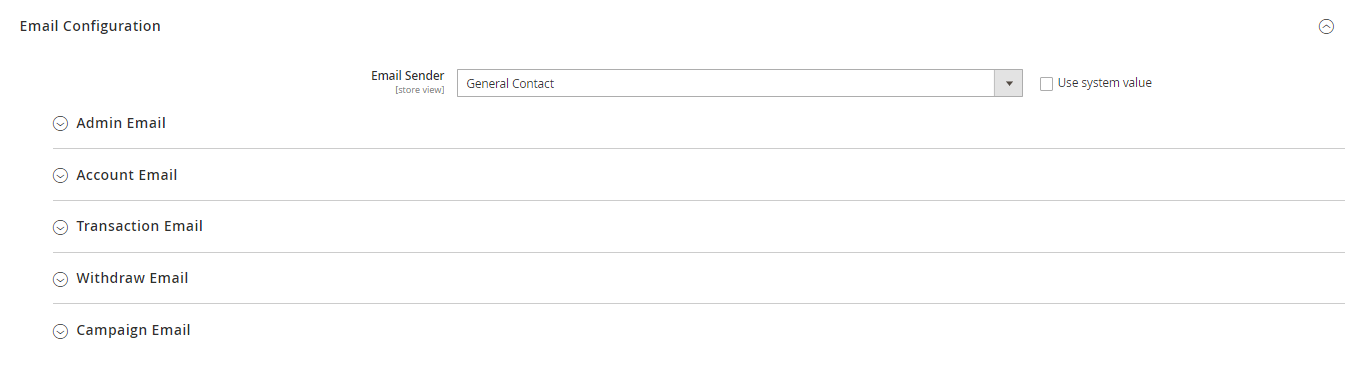
Email Sender
- Select the email sender
- The default email sender is: General Contact
1.5.1 Admin Email

- Send Emails To: Enter the email address so that admin can receive notifications. You can fill in multiple emails and separate them by commas ","
- New Affiliate Sign Up: Select
Yesto let admins receive notification emails when a customer signs up for affiliate program. This will show the Sign up Template field - New Withdraw Request: Select
Yesto let the admin receive a notification email when a customer requests to withdraw. This will show the Withdraw Request Template field.
1.5.2. Account Email
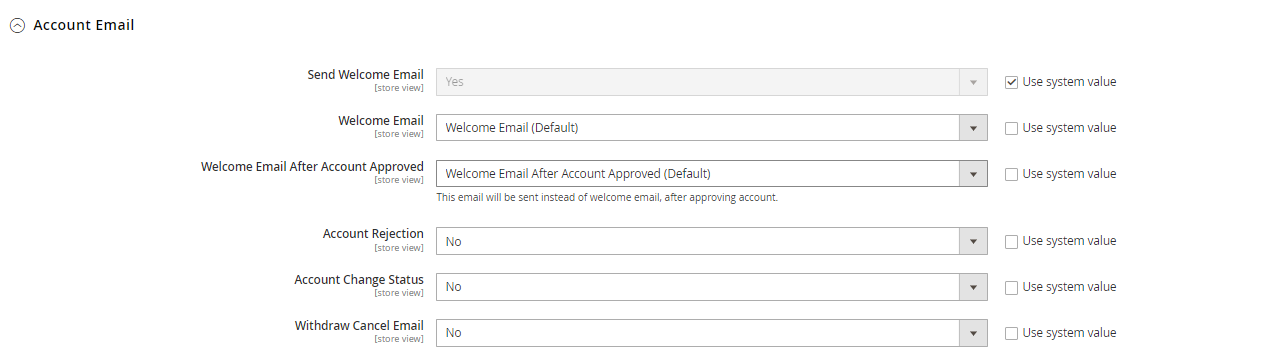
Send Welcome Email: Choose
Yesto send the email when an account is registered as an Affiliate accountWelcome Email
- Choose the email template sending when an account is registered as an Affiliate account
- The default content of the template is Welcome Email (Default)
Welcome Email After Account Approved
- Choose the email template sent when the registered account is approved to be an Affiliate account by the store owner
- The default content of the template is Welcome Email After Account Approved (Default)
Account Rejection: Select
Yesto send an email to the customer whose request to register for an affiliate account is rejected. This shows the Account Rejection Template fieldAccount Change Status: Select
Yesto email the customer when the status of the affiliate account changes. This shows the Account Change Status Template fieldWithdraw Cancel Email: Select
Yesto email the customer when the customer's withdraw request is canceled. This shows the Withdraw Cancel Template field
1.5.3. Transaction Email

Send Transaction Email: Select
Yesto send a notification email whenever there is a transactionUpdate Balance Email
- Select the sending email template when there is a change in the balance
- The default content of the template is Update Balance Email (Default)
1.5.4. Withdrawal Email

Send Withdrawal Email: Select
Yesto send a notification email when you withdraw moneyWithdrawal Complete Email
- Select the sending email template when there is a change in the balance
- The default content of the template is Withdraw Complete Email (Default)
1.5.5. Campaign Email
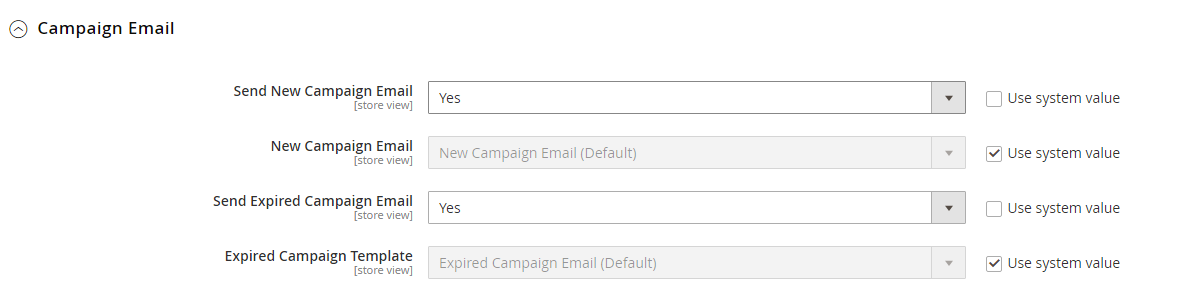
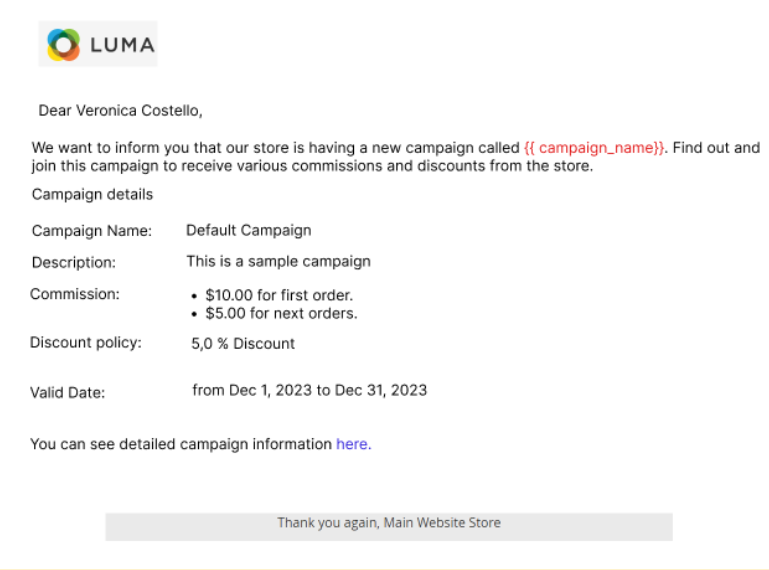
- Send New Campaign Email: Select
Yesto send a New Campaign Email to the affiliate account when a new campaign is created and that affiliate account must meet the campaign conditions. - The receiver will receive the email as this form
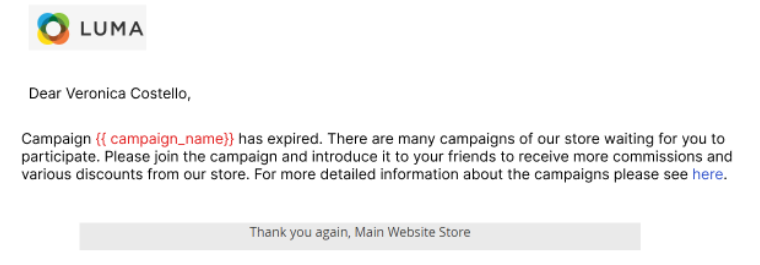
- Send Expired Campaign Email: Select
Yesto Send Expired Campaign Template to the affiliate account when the campaign expires and that affiliate account must meet the campaign conditions - The Expired Campaign Template will be in this form:
Note: These emails will be sent at 0 a.m every day.
1.6. Refer Friends Configuration
In this section, admins can set up the format and rules for generating referral links for affiliates to share, determine the commission level that the affiliate will receive when the referred person completes an order, manage the cookie duration of the referred person, determine the time period for which their orders are credited to the referring affiliate, or limit the sharing channels such as email, social networks, etc., that affiliate can use to send referral links. These settings help admins control how and to what extent they are rewarded when partners refer new customers.
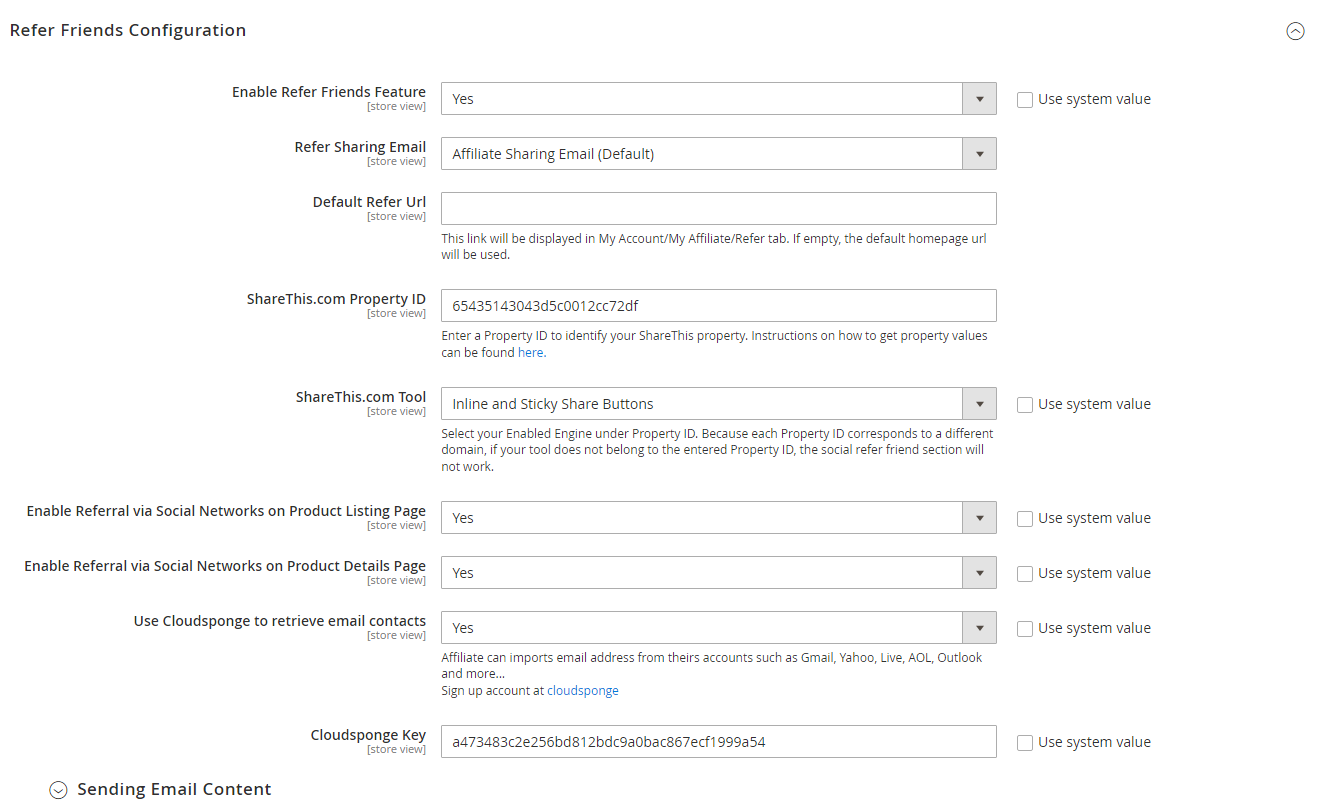
Enable Refer Friends Feature: Choose
Yesto activate the introduce to friends functionRefer Sharing Email
- Choose the email template that will be sent when introducing friends through email
- The default content of the template is Affiliate Sharing Email (Default)
Default Refer URL
- Insert the referral link. This link will display in the My Account/My Affiliate/Refer Friend tab
- If empty, the default homepage URL will be used.
ShareThis.com Property ID
- Enter the Property ID to identify your ShareThis property.
- If empty, default Public ShareThis ID 65435143043d5c0012cc72df will be used
- Instructions on how to get property values can be found here
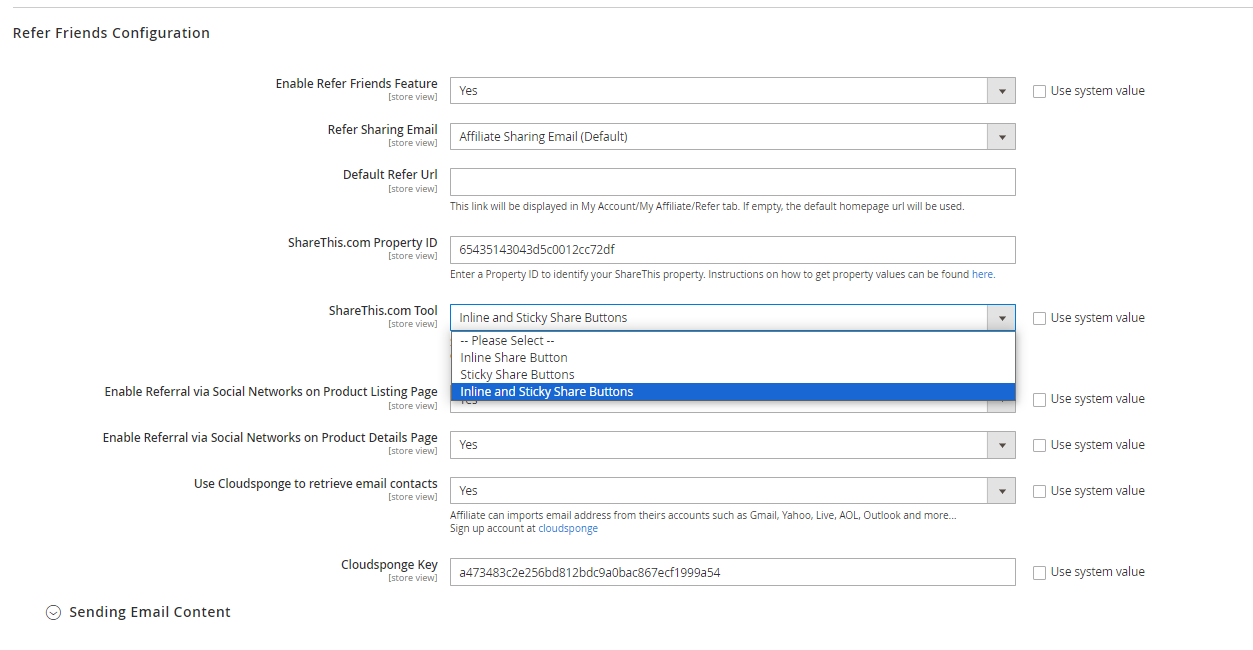
ShareThis.com Tool
- Select your Enabled Engine under Property ID. Because each Property ID corresponds to a different domain, if your tool does not belong to the entered Property ID, the social refer friend section will not work.
Use Cloudsponge to retrieve email contacts: Select
Yesto allow access to contacts from customer's accounts such as Gmail, Yahoo, Live, AOL, Outlook, etc.Cloudsponge Key
- Enter the Cloudsponge key
- The default key used is a473483c2e256bd812bdc9a0bac867ecf1999a54
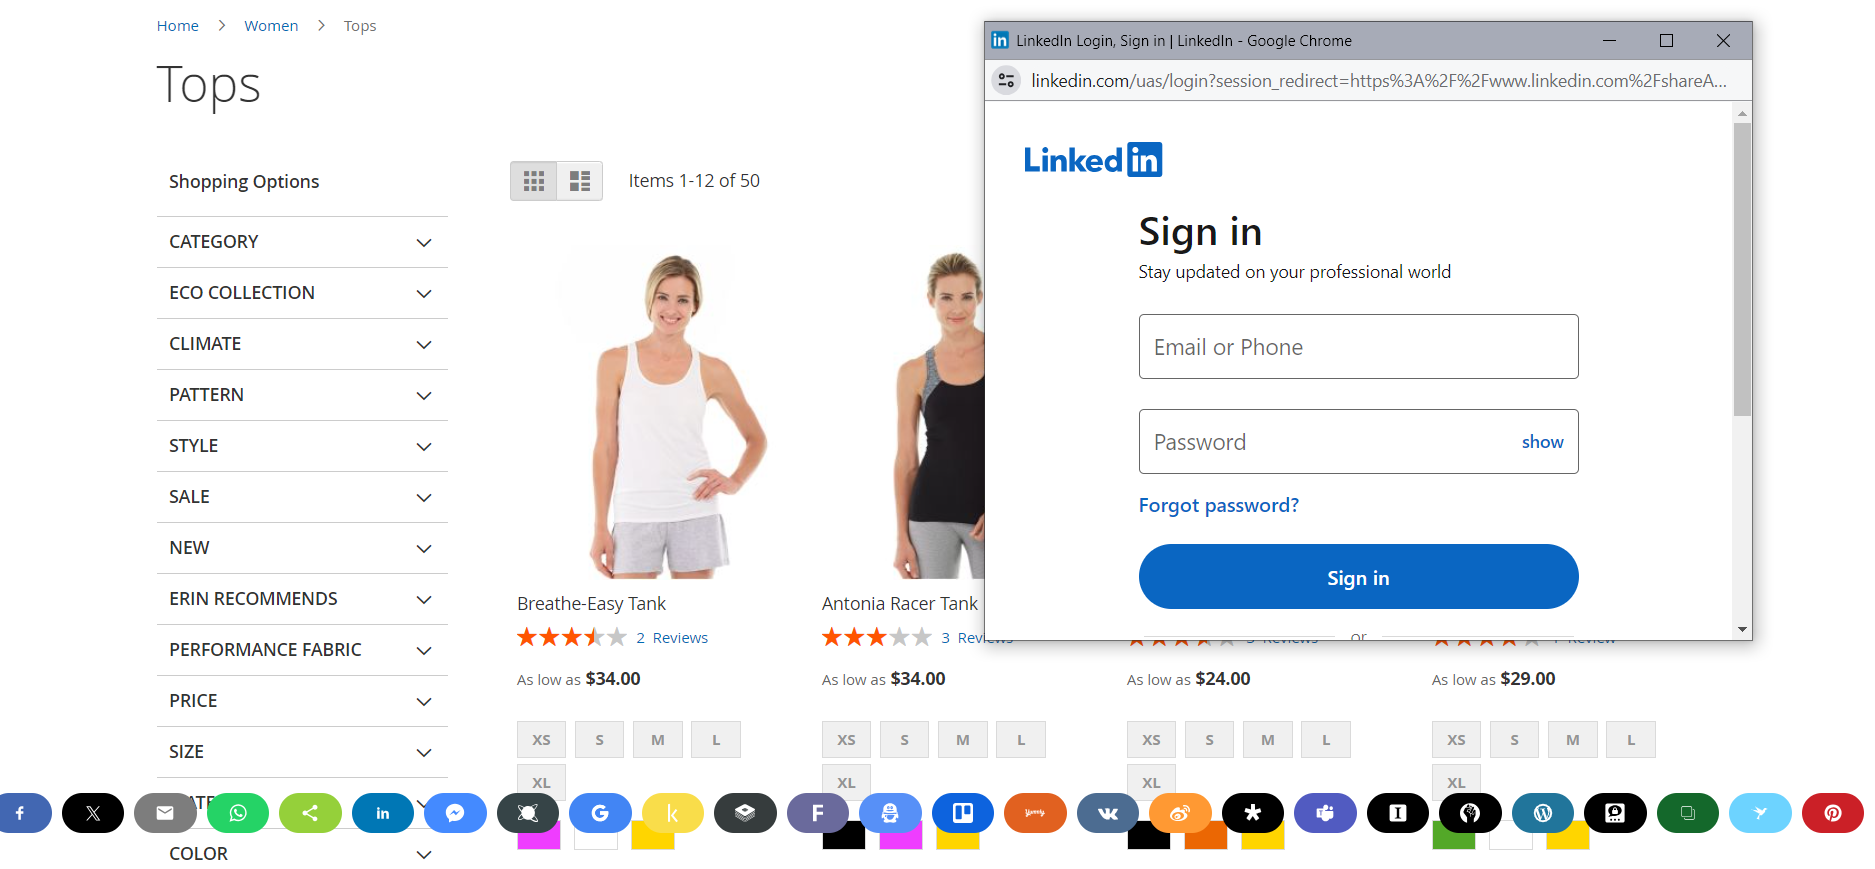
Enable Referral via Social Networks on Product Listing Page: If
Yes, the Referral via Social Networks will be displayed in the product listing page, helping customers to share and introduce to their friends to join the campaigns and get certain promotions.
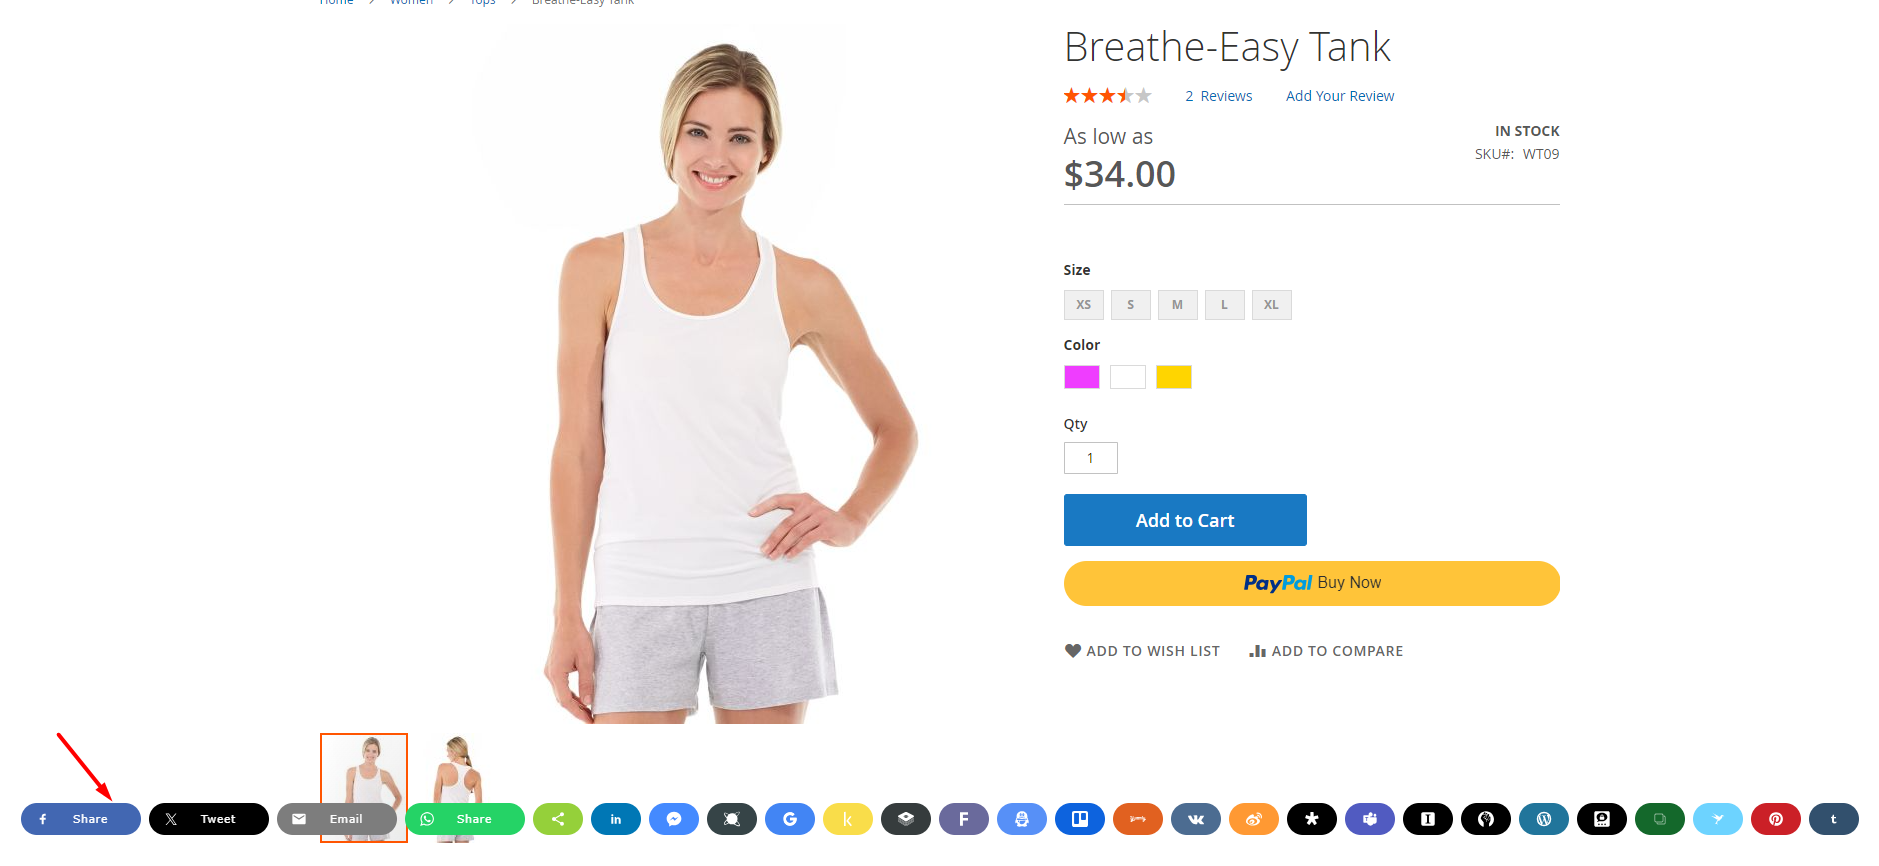
- Enable Referral via Social Networks on the Product Details Page: If Yes, Referral via Social Networks will be displayed on the product details page.
Note: As AddThis.com no longer supports, the features in this section have accordingly stopped working since May 31st, 2023.
1.6.1. Sending Email Content
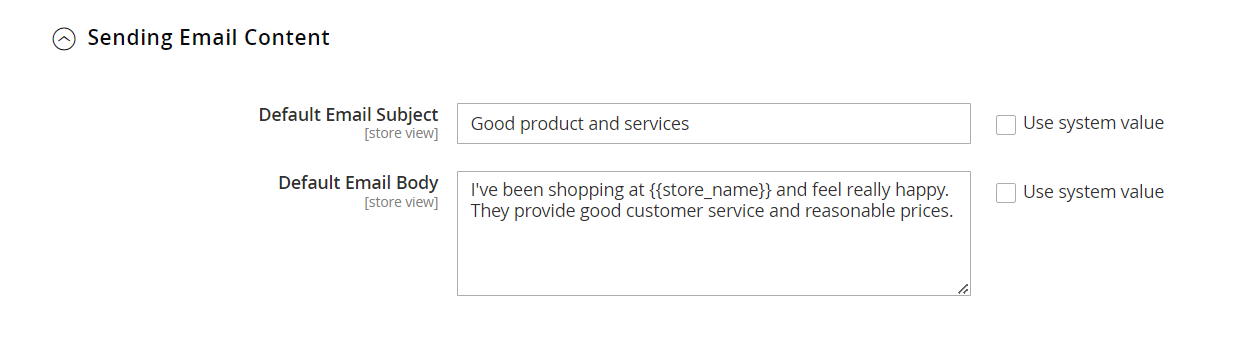
Default Subject Email
- Enter a title for the sending email
- The default title is Good Product and Services
Default Email Body
- Enter the content for the sending email
- The default content is I've been shopping at {{store_name}} and feel really happy. They provide good service and reasonable prices.
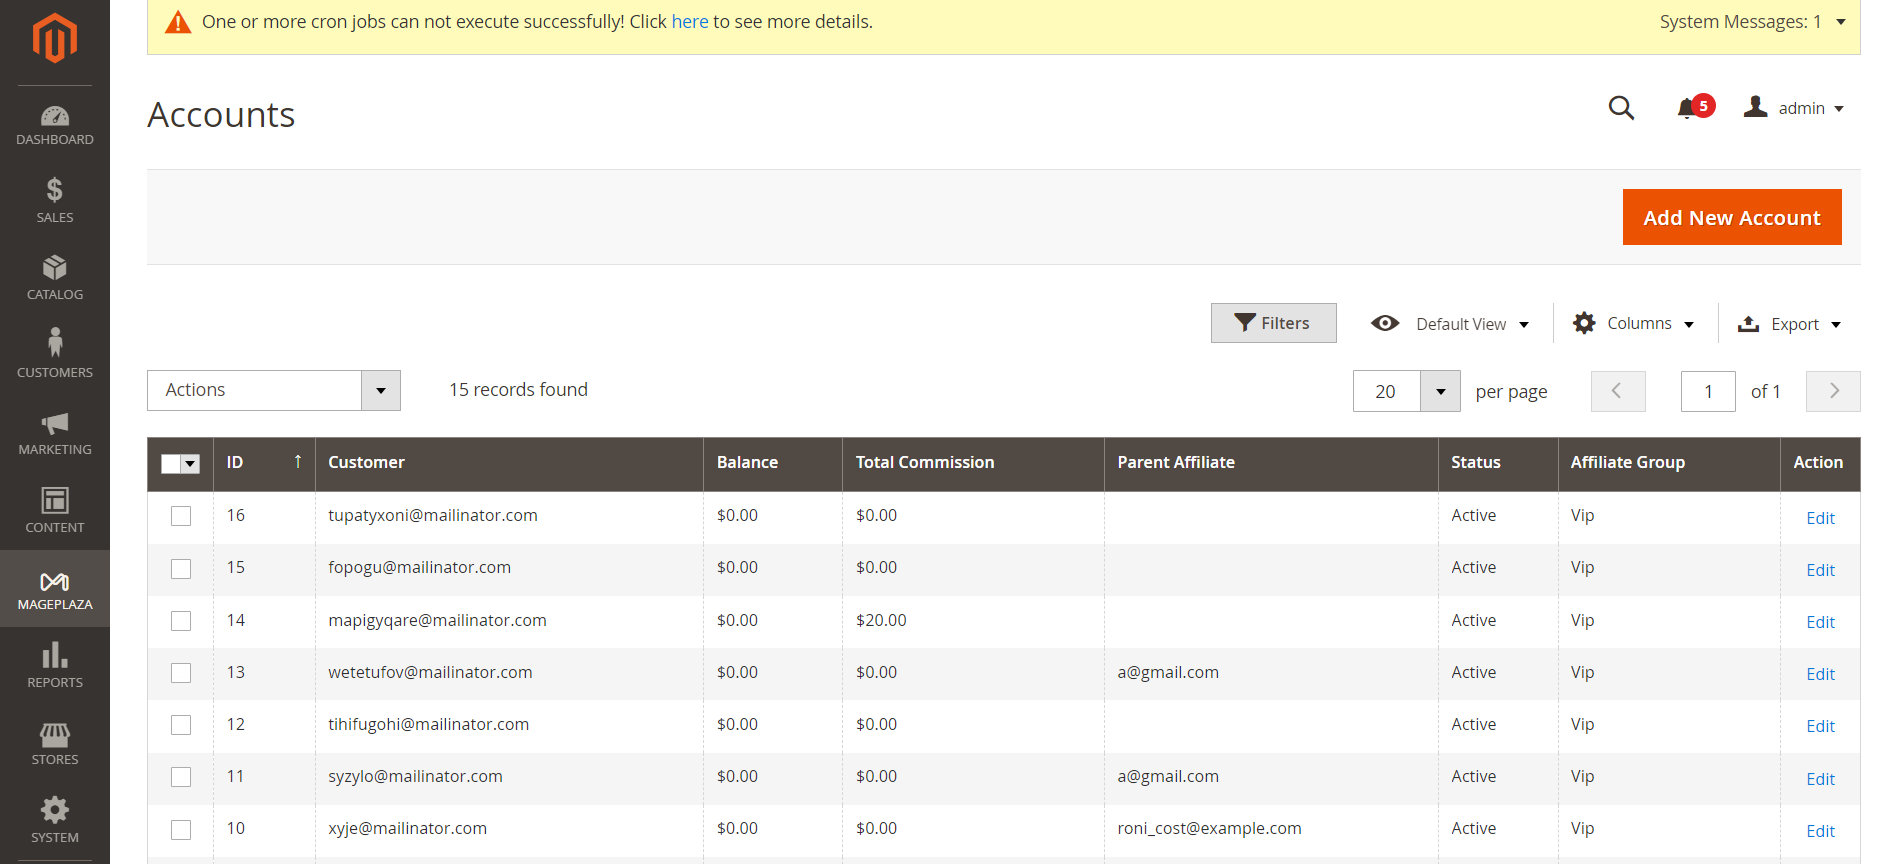
2. Manage Accounts
This section allows admins to display affiliate account information: account balance, total earnings, account activity status, etc. You can click the Edit link to view account details.
From the Admin panel, go to Marketing > Affiliate > Manage Accounts
2.1. Manage Grid
- Display affiliate account information, such as account balance, total earned amount, account activity status, etc. Click the Edit link to see the account details.
- In this panel, admins can delete the account by clicking on the account checkbox, then choose Action > Delete
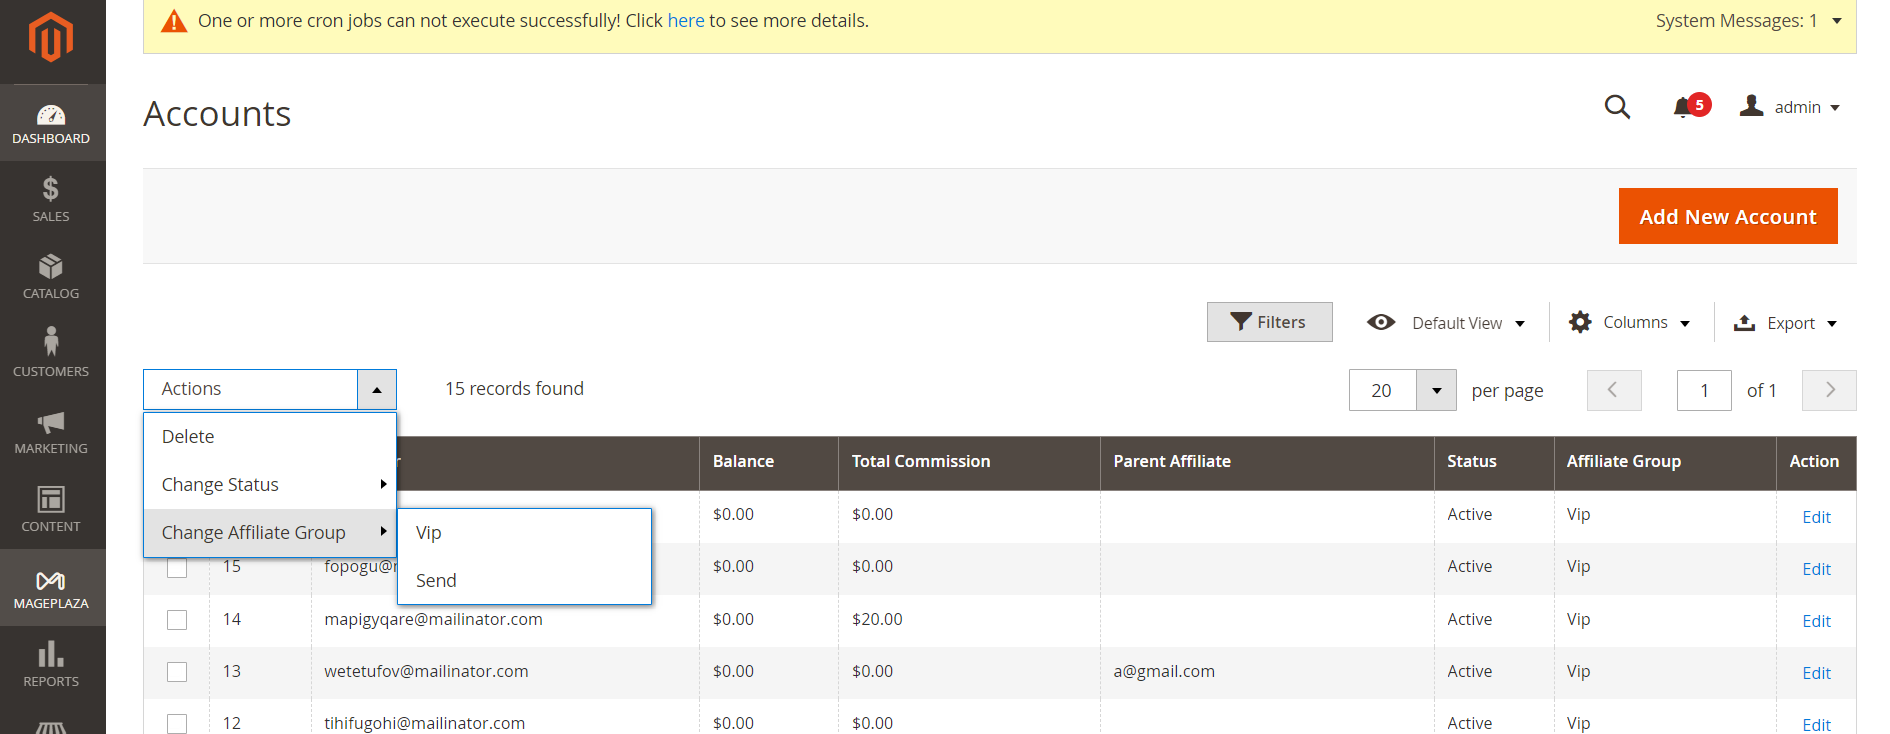
2.2. Mass action: change affiliate group
Admin can change the affiliate group with one click:
2.3. Add New Account
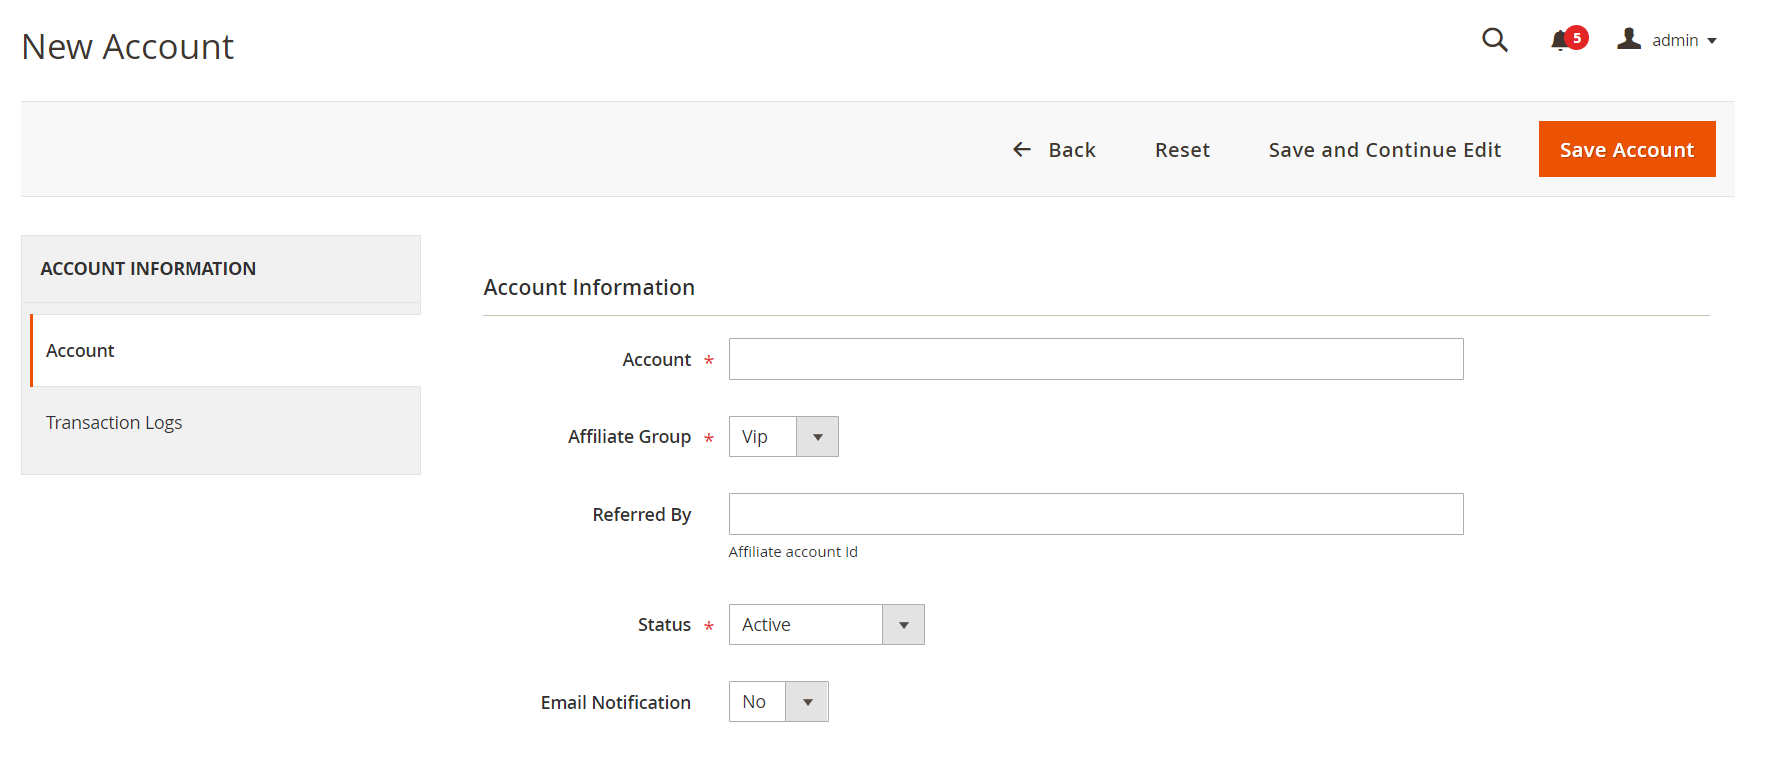
Account: Choose account
Affiliate Group: Select the group for the created Affiliate account
Referred By: Enter the ID of the previously registered Affiliate account
Status
- Status = Active: The Affiliate account which is just created can start working now
- Status = Inactive: The Affiliate account which is just created can't start working yet
- Status = Need Approved: The Affiliate account which is just created needs to be approved by admin
Email Notification: Choose Yes to receive notification emails when there is a change in your Affiliate account balance
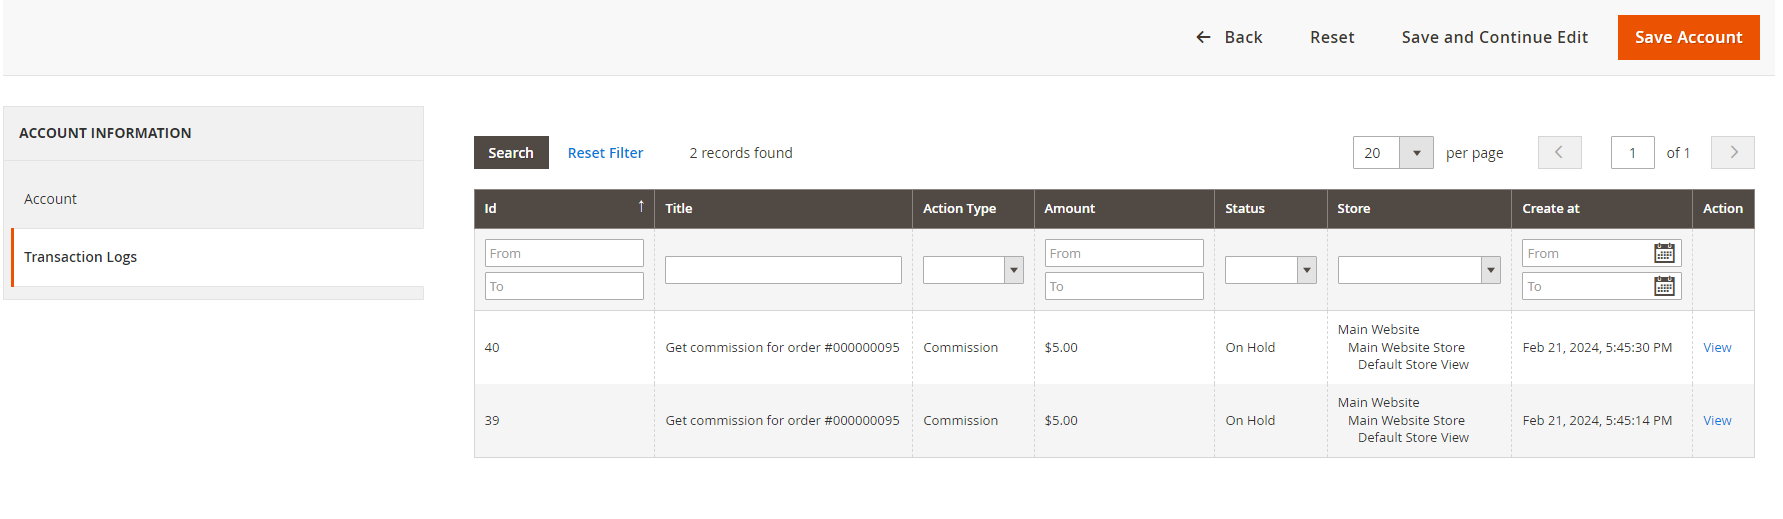
2.4. Edit Account
Admin can edit the account and check the transaction log of the affiliate account here:
3. Affiliate Groups
Here, admins can manage affiliate marketing groups according to specific rules and terms in 1 table. Store owners can divide affiliate partners into different groups based on criteria such as sales, performance, or campaigns they participate in and then set different commission levels. This brings more flexibility and efficiency in marketing programs.
From the Admin panel, go to Mageplaza Marketing > Affiliate > Affiliate Groups
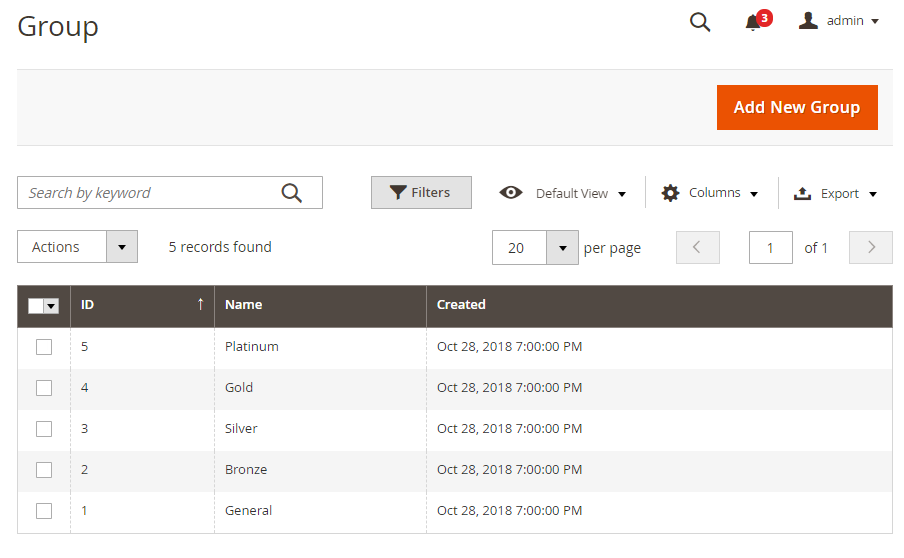
3.1. Manage Grid
There are five default groups: General, Bronze, Silver, Gold, Platinum
3.2. Add New Group
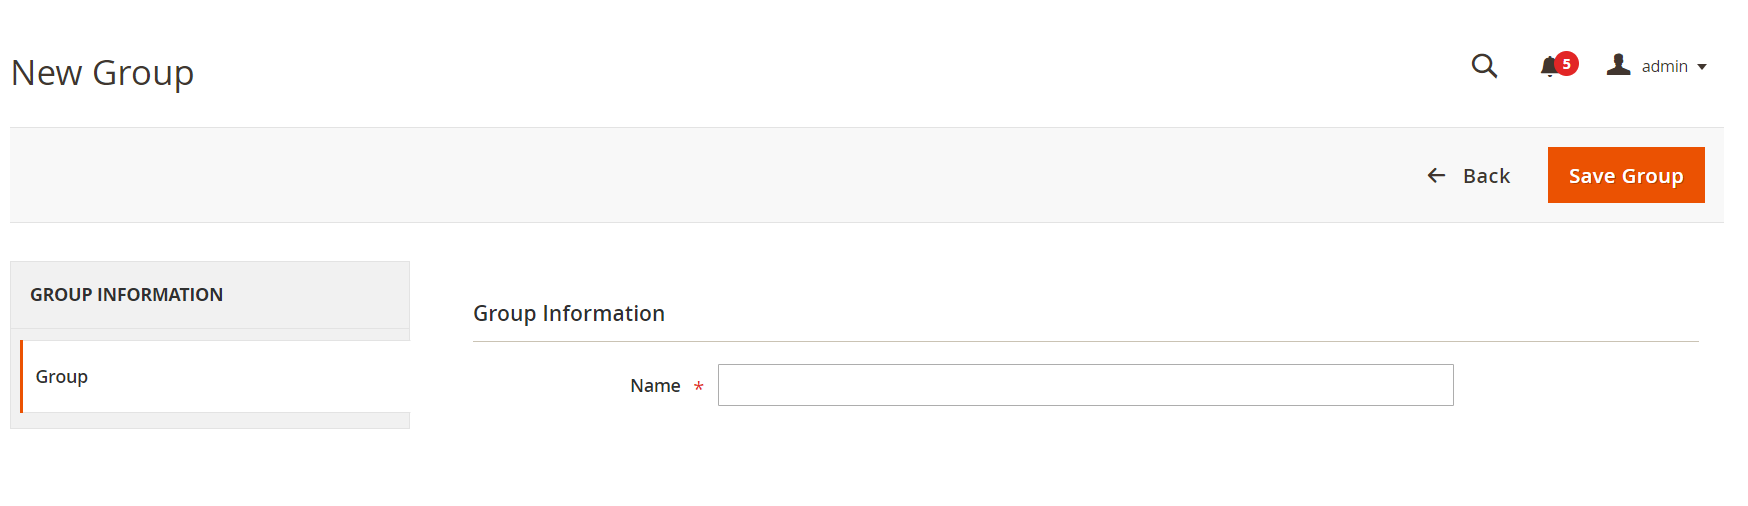
Name
- Insert the group name
- This field is compulsorily required
4. Campaigns
Admins can create campaigns, conditions for campaigns, as well as actions and the amount of commission that affiliates can receive from each campaign here.
From the Admin panel, go to Mageplaza Marketing > Affiliate > Campaigns
4.1 Edit Campaigns
- Step 1: Fill in the Campaign Information
- Step 2: Choose the conditions for applying the campaign
- Step 3: Set up Actions
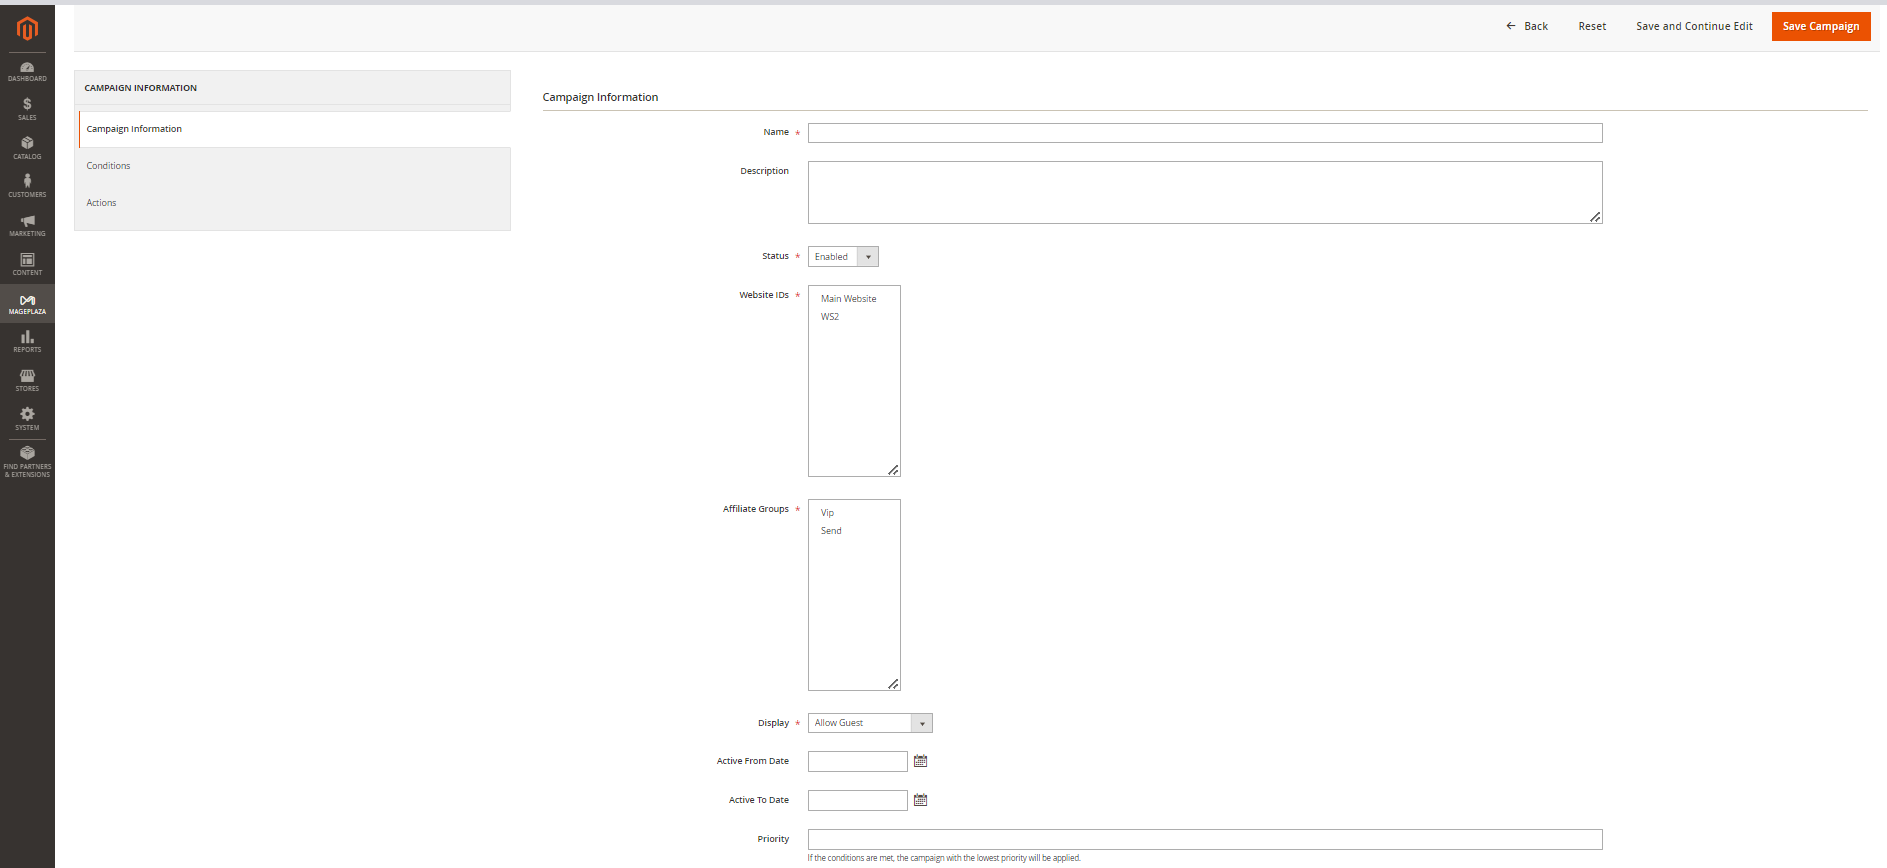
Step 1: Fill in the Campaign Information
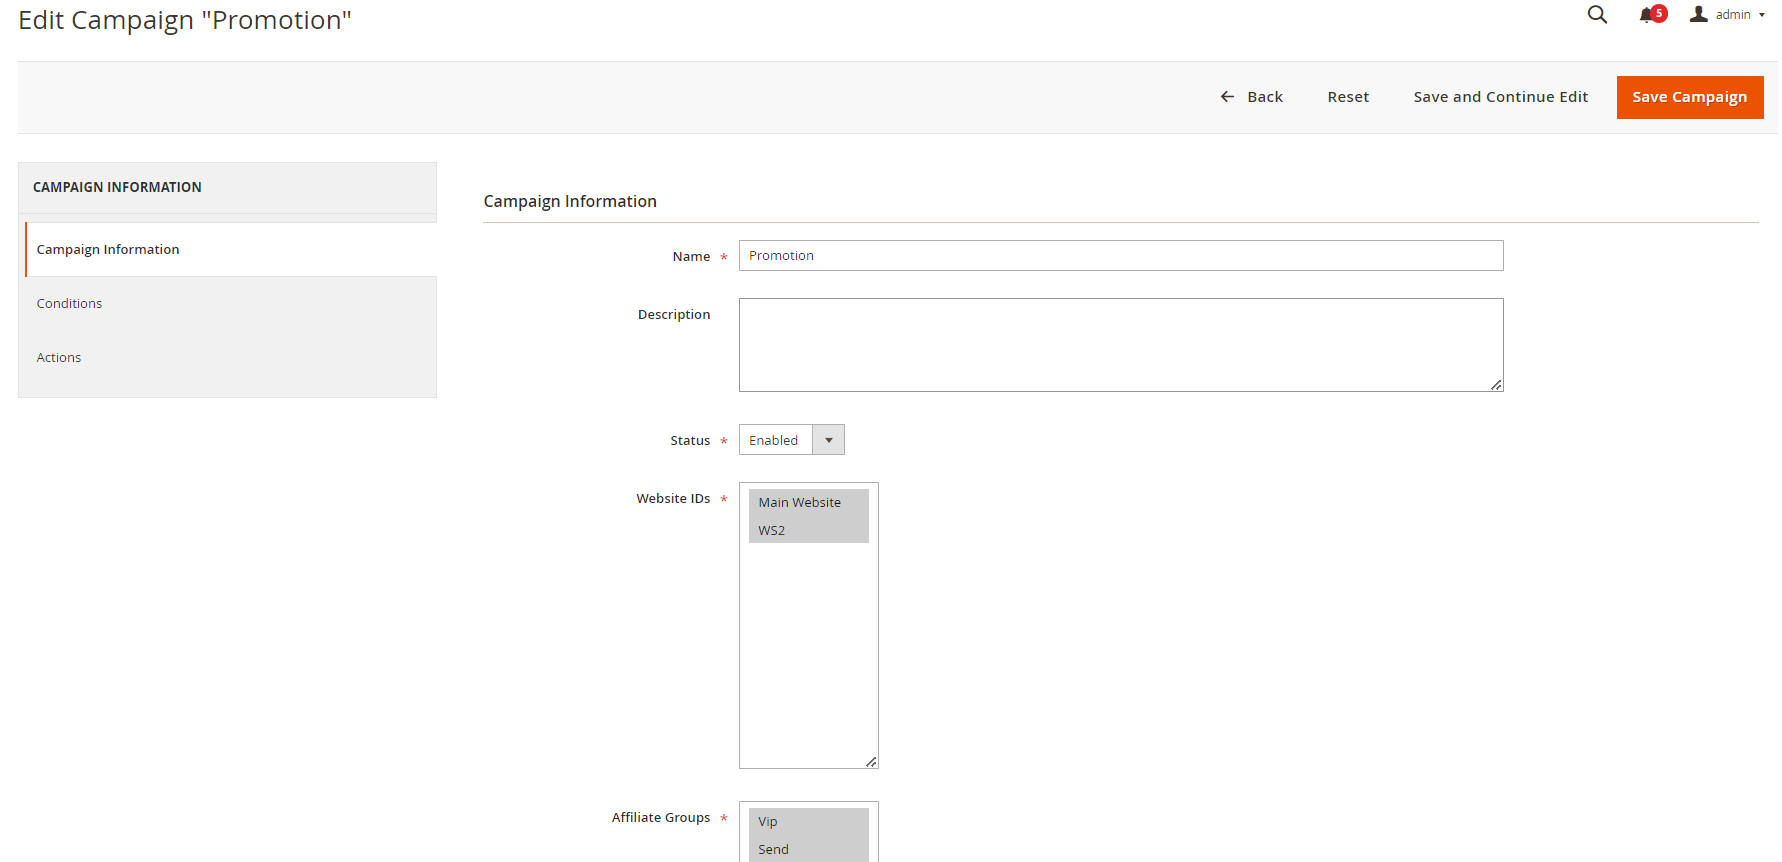
Campaign Information
Name
- Name your campaign
- This is a required field
Description: Fill in the description of your campaign
Status: Select enable to apply the campaign
Website IDs
- Choose the website to conduct the campaign
- This is also a required field
Affiliate Groups
- Choose the group you want to conduct the campaign
- This is another required field
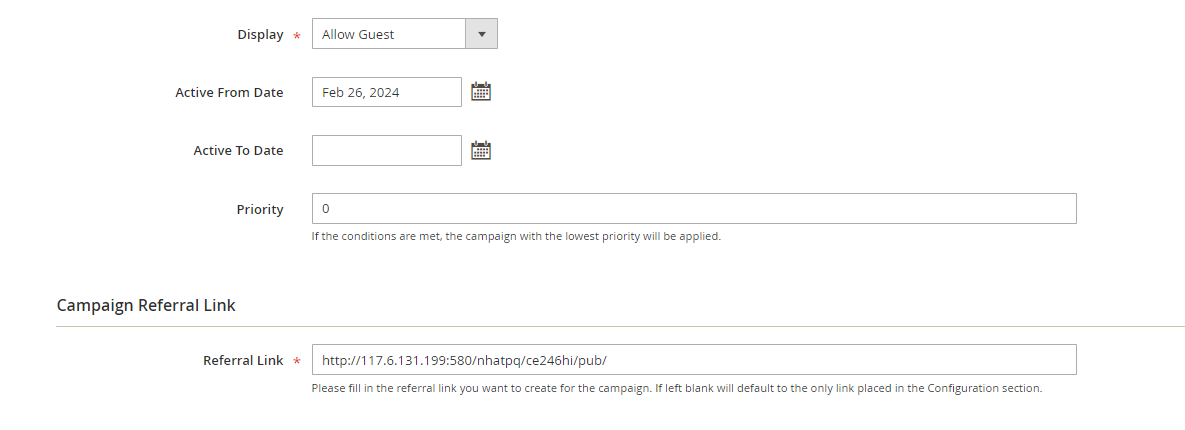
Display
- Display = Allow Guest: Show the campaign for all visitors
- Display = Affiliate Member Only: Show the campaign for Affiliate only
Active From Date: Select the starting day for your campaign
Active To Date: Select the finishing day for your campaign
Priority: Enter the number of priorities for each campaign. If the conditions are met, the campaign with the lowest priority will be applied.
Campaign Referral Link
This includes the Referral Link field to create referral links for the campaign. If left blank, it will default to the only link placed in the Configuration section.

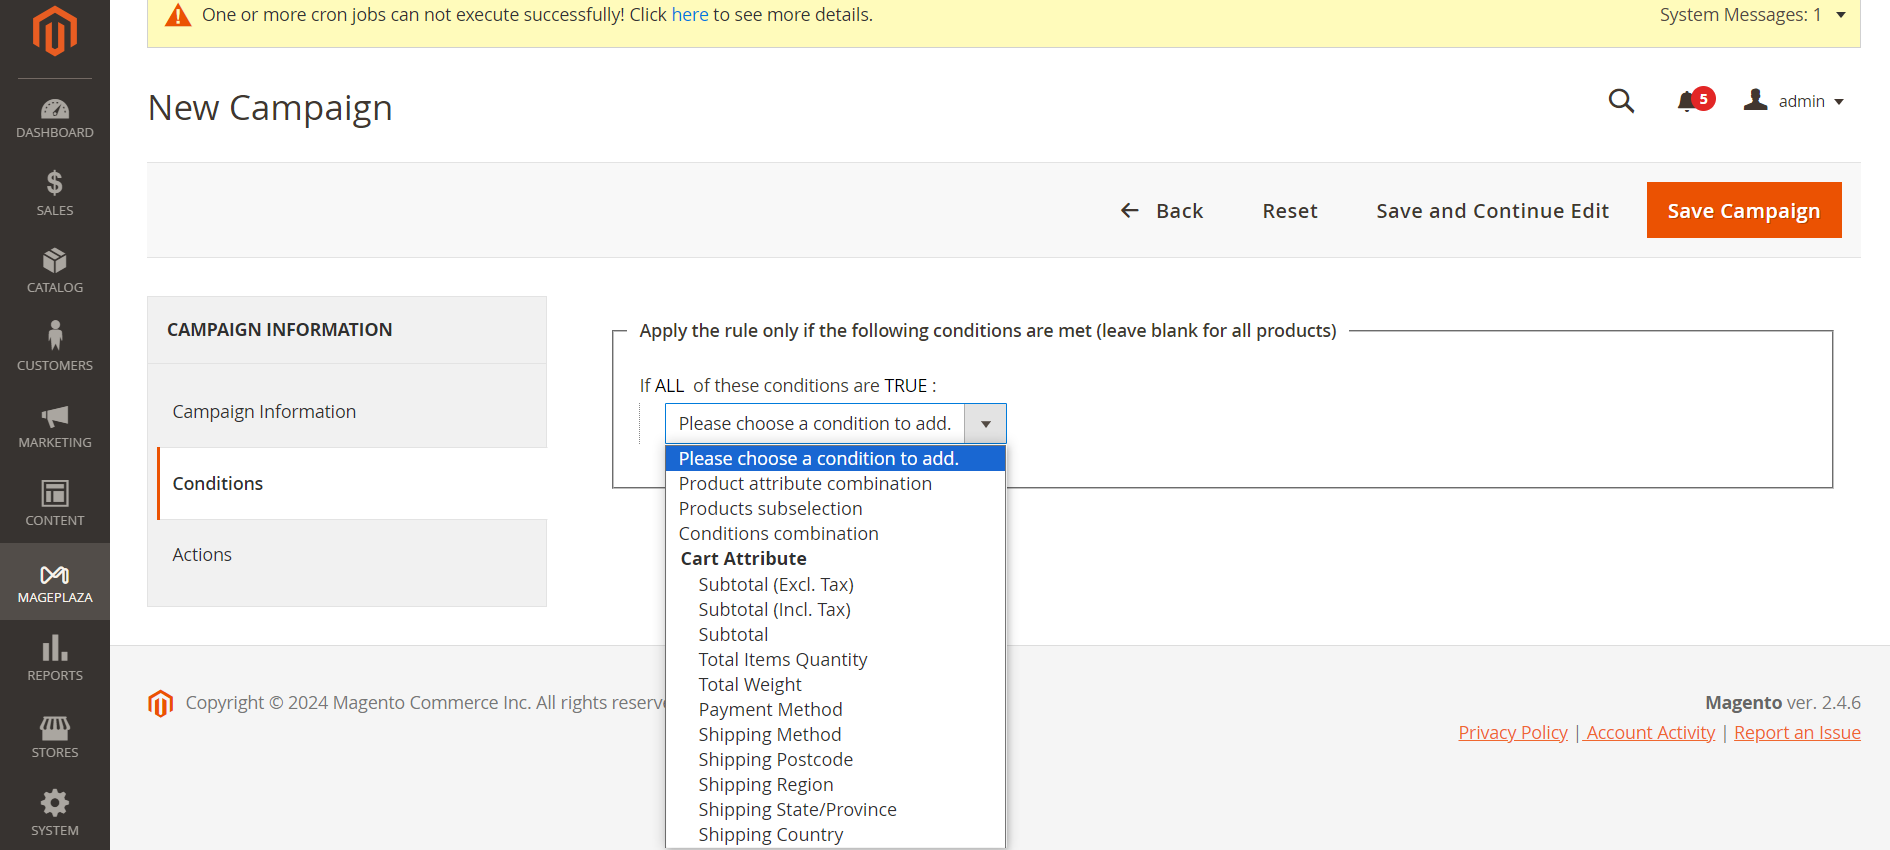
Step 2: Choose the conditions for applying the campaign
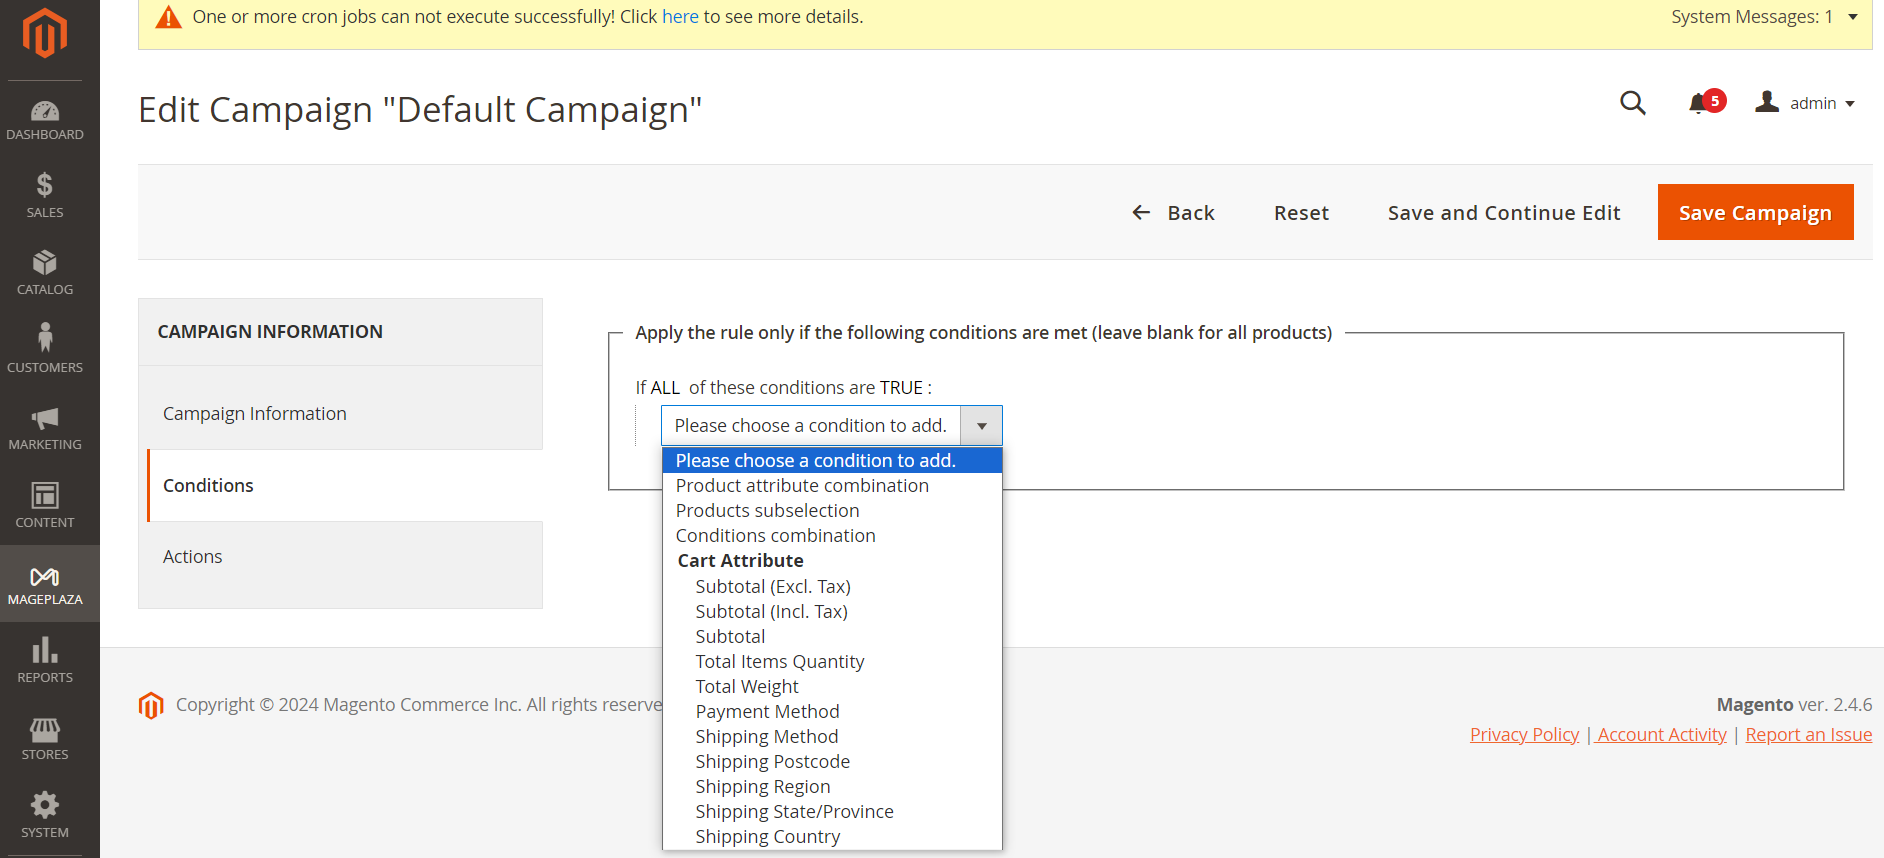
- You can choose the products for a specific campaign by setting the rules for those products
- You can also choose the categories for applying the campaign
- If you satisfy the conditions in the cart and the conditions here (for each specific item), you will receive a discount and commission
Step 3: Set up the Action
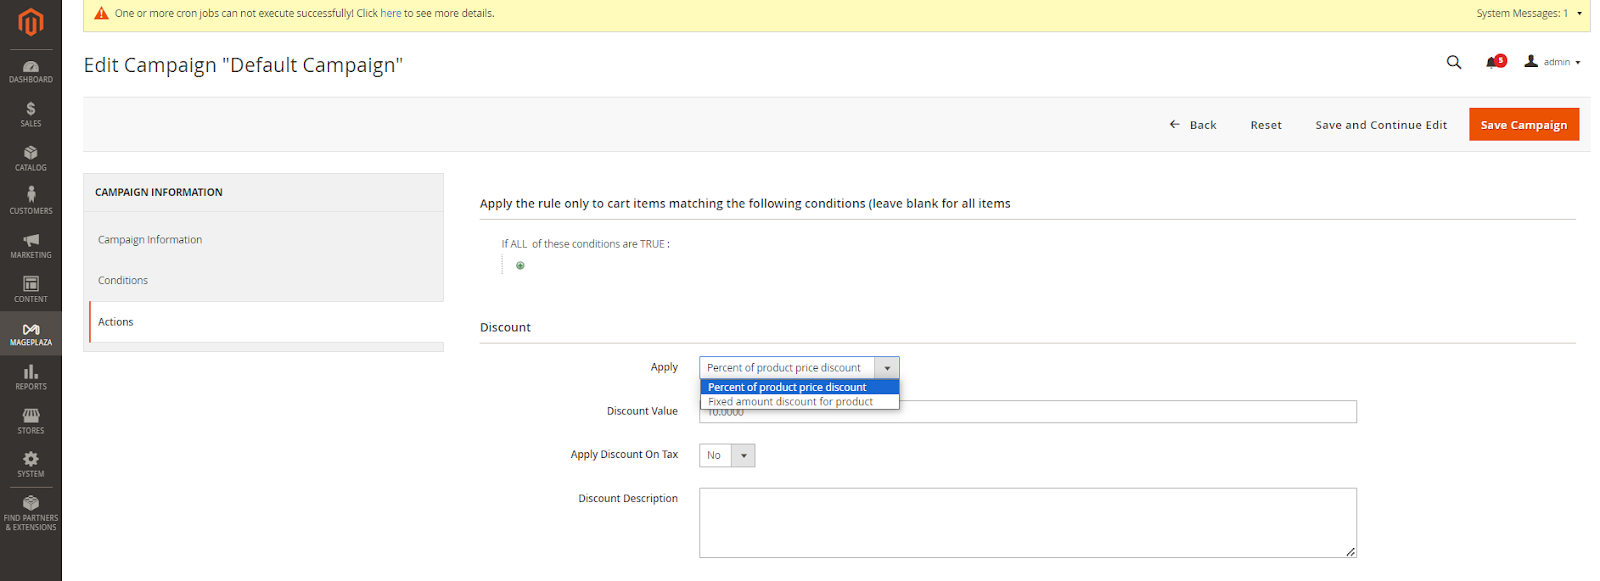
- Choose the rule for each item matching the following conditions
- Leave it blank if the rule is for all items.
Set up Discount
Apply
- Apply = Percent of product price discount: Apply discount for the percentage of each product price
- Apply = Fixed amount discount for product: Apply a fixed discount for purchasing
Discount value: Insert the amount or the percentage of discount for purchasing
Apply to Shipping Amount: Choose
Yesto apply discount for shippingDiscount Description: Insert the description for your discount policy
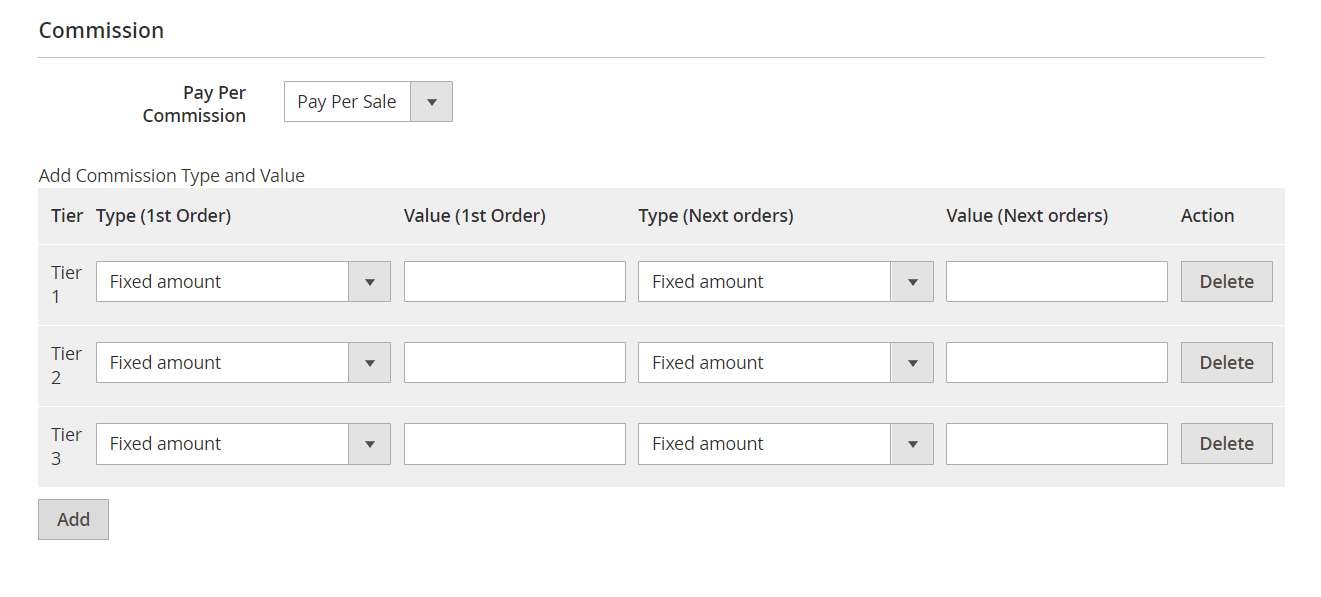
Set up the Commission
This section allows the configuration of the Tiers. You can choose one or add more tiers as follows:
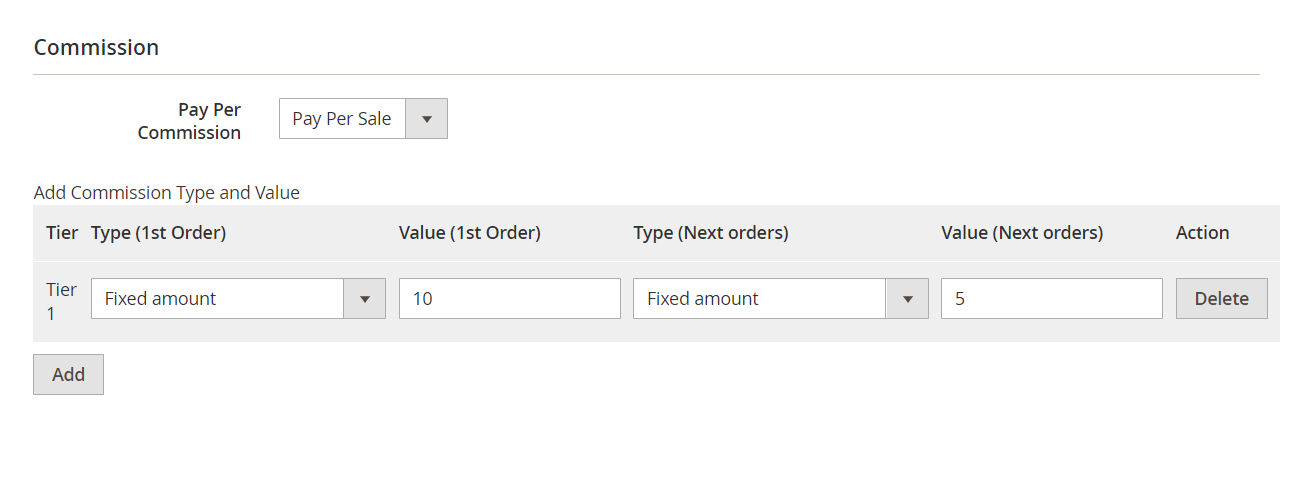
Pay per commission: Pay per sale is the default option for this field.
There are two commission types:
- Percentage of product price: Commission is calculated based on the percentage of each product price
- Fixed amount: Commission is a fixed amount
Choose the type and value of commission in the 1st order and the next orders. You can set them to the same or separate options depending on your strategy.
4.2. Add new Campaigns
- Step 1: Fill in the Campaign Information
- Step 2: Choose the conditions for applying the campaign
- Step 3: Set up Discount
Step 1: Fill in the Campaign Information
Campaign Information
Name
- Name your campaign
- This is a required field
Description: Fill in the description of your campaign
Status: Select yes to apply the campaign
Website IDs
- Choose the website to conduct the campaign
- This is also a required field
Affiliate Groups
- Choose the group you want to conduct the campaign
- This is another required field
Display
- Display = Allow Guest: Show the campaign for all visitors
- Display = Affiliate Member Only: Show the campaign for Affiliate only
Active From Date: Select the starting day for your campaign
Active To Date: Select the finishing day for your campaign
Priority: Enter the number of priorities for each campaign. If the conditions are met, the campaign with the lowest priority will be applied.
Campaign Referral Link
This includes the Referral Link field to create referral links for the campaign. If left blank, it will default to the only link placed in the Configuration section.
Step 2: Choose the conditions for applying the campaign
- You can choose the products for a specific campaign by setting the rules for those products
- Or you can also choose the categories for applying the campaign
Step 3: Set up the Action
- Choose the rule for each item matching the following conditions
- Leave it blank if the rule is for all items.
- From the Affiliate Pro, it applies multi-tier: for each item in a campaign, you can receive discounts and commissions according to different tiers
Set up Discount
Apply
- Apply = Percent of product price discount: Apply discount for the percentage of each product price
- Apply = Fixed amount discount for product: Apply a fixed discount for purchasing
Discount value: Insert the amount or the percentage of discount for purchasing
Apply to Shipping Amount: Choose Yes to apply discount for shipping
Discount Description: Insert the description for your discount policy
Set up the Commission
This section allows the configuration of the Tiers. You can choose one or add more tiers as follows:
Pay per commission: Pay per sale is the default option for this field.
There are two commission types:
- Percentage of product price: Commission is calculated based on the percentage of each product price
- Fixed amount: Commission is a fixed amount
Choose the type and value of commission in the 1st order and the next orders. You can set them to the same or separate options depending on your strategy.
5. Withdraws
This section allows admins to manage affiliate commission withdrawal history and edit, add, delete, or change withdrawal history.
5.1. Manage Grid
- Allow showing the withdraw history of each Affiliate account, including The amount, the status, payment method, etc. Click Edit to see the details of each withdraw.
- Admins can also change the status or delete the withdraw history.

5.2. Add New Withdraws
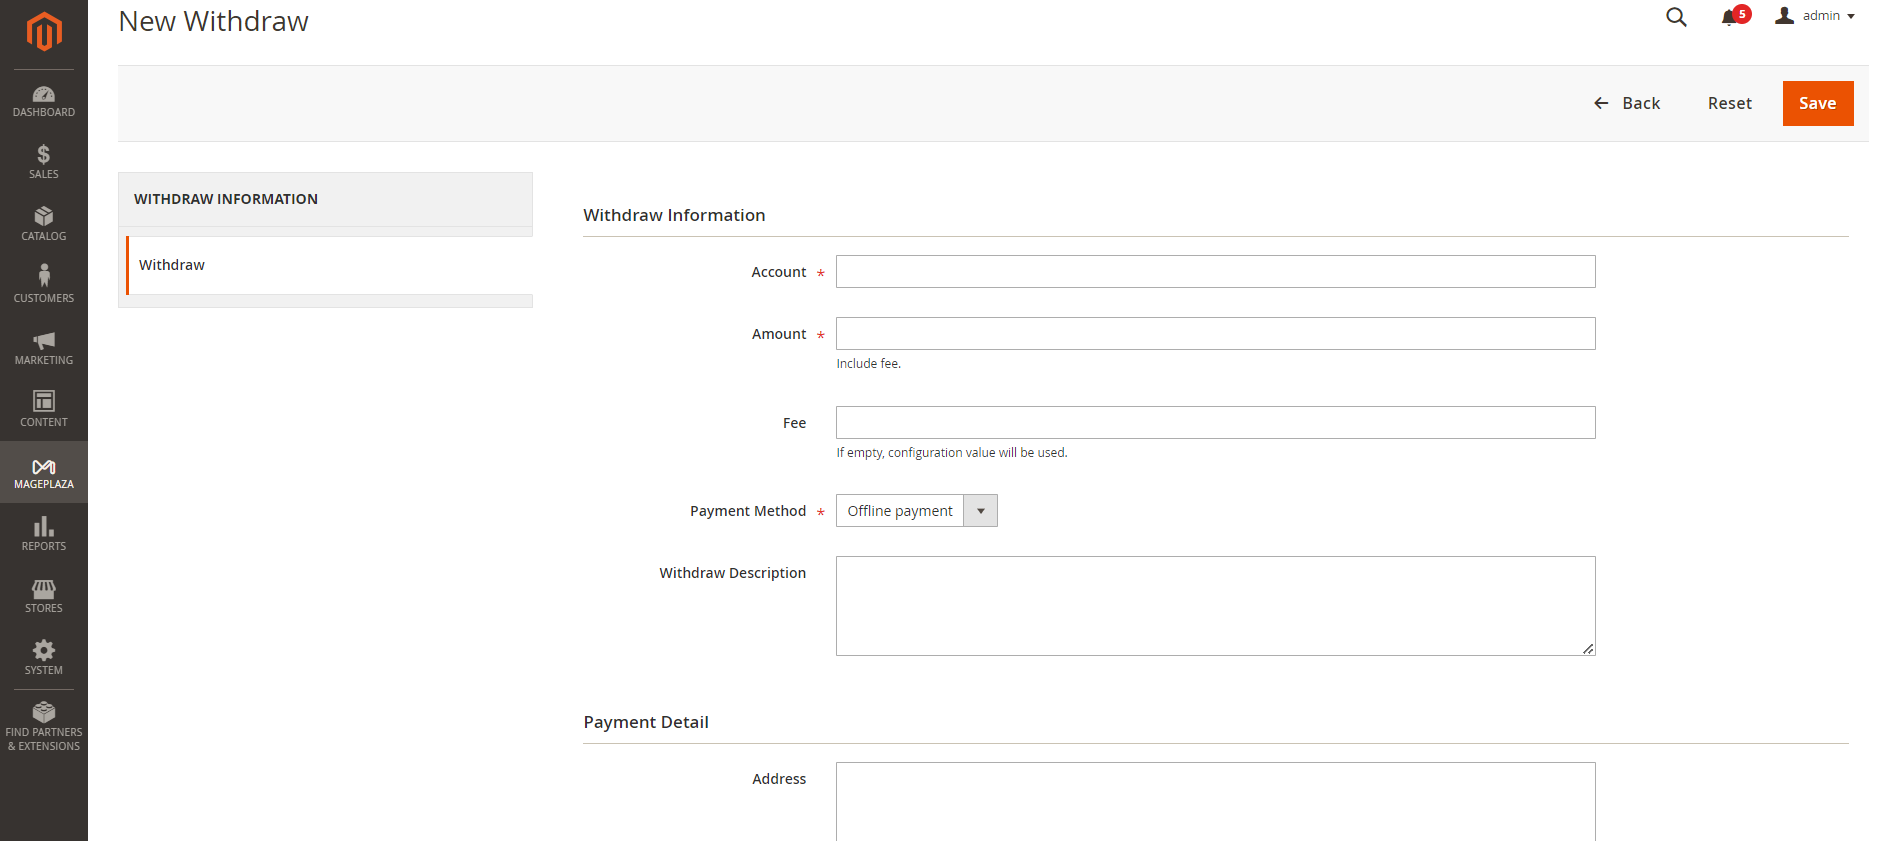
Account
- Click on this field to show the affiliate account that has a positive balance, which can be withdrawn
- This field is required

Amount
- Insert the withdraw amount which includes the fee for withdrawal
- This is a required field
Fee
- Insert the withdraw fee
- If you let this field empty, the configuration value will be applied
Payment Method
- Choose the payment method for withdrawal
- There are three payment methods: Offline payment, Bank Transfer, Paypal payment, Store Credit
Withdraw Description: Fill in the description for withdrawal
Payment Detail:
- For Offline payment, you need to insert the Addresses

- For Bank Transfer, insert the Bank account

- For Paypal payment, you need to fill in the Paypal email and Transaction ID

- Payment Email: Enter the Paypal email who receives the commission
- Paypal transaction ID: Enter Paypal transaction ID
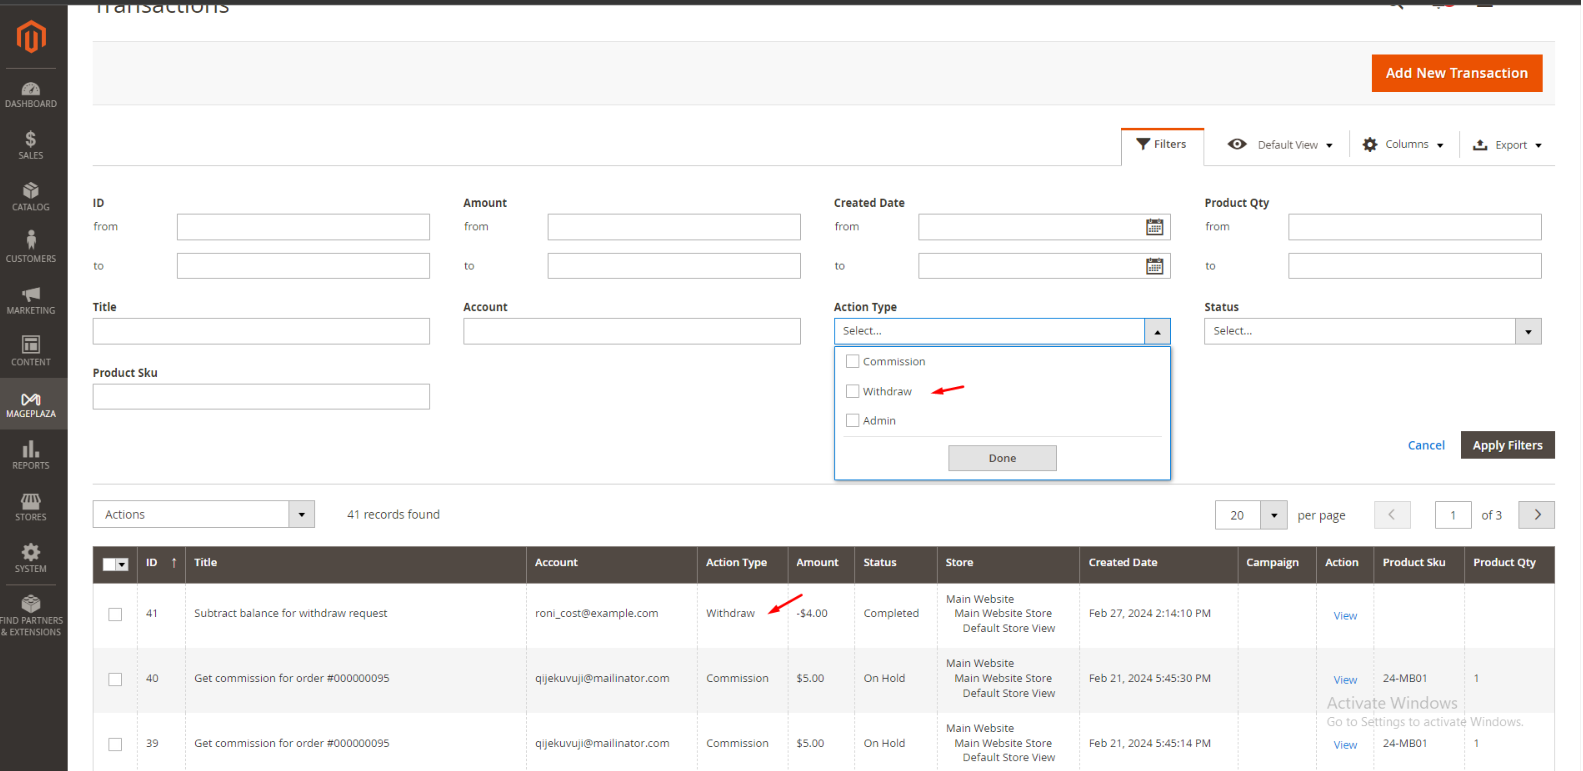
6. Transactions
Transactions in Mageplaza Affiliate records and manages all transactions arising from affiliate activities, including the commissions earned by affiliates from orders, as well as the commission status. This function helps manage and track finances in the affiliate marketing program.
6.1 Manage Grid
- Show the transaction of each affiliate account, including the amount, status, order, Product SKU, Product Qty, and Campaign that generates a commission. Click View to see more details of each transaction.
- The transaction is created according to each item: For each item in the order that meets the conditions in the campaign, the affiliate account receives a commission. Each item will create 1 transaction. In case 1 item has many qty, if the customer creates an invoice/shipment or refunds each item according to the qty quantity, a transaction will be created according to the number of invoices, shipment, refund, and qty.
- Admin can also change the status or delete the transaction records.
Assign to Affiliate Group
After adding the new Affiliate accounts, store admins can manage them in the Accounts Management grid.
- On the grid, find the Affiliate account needed to assign and open the Edit mode
- Choose the Affiliate group to assign. By default, General is chosen
6.2. Add New Transaction
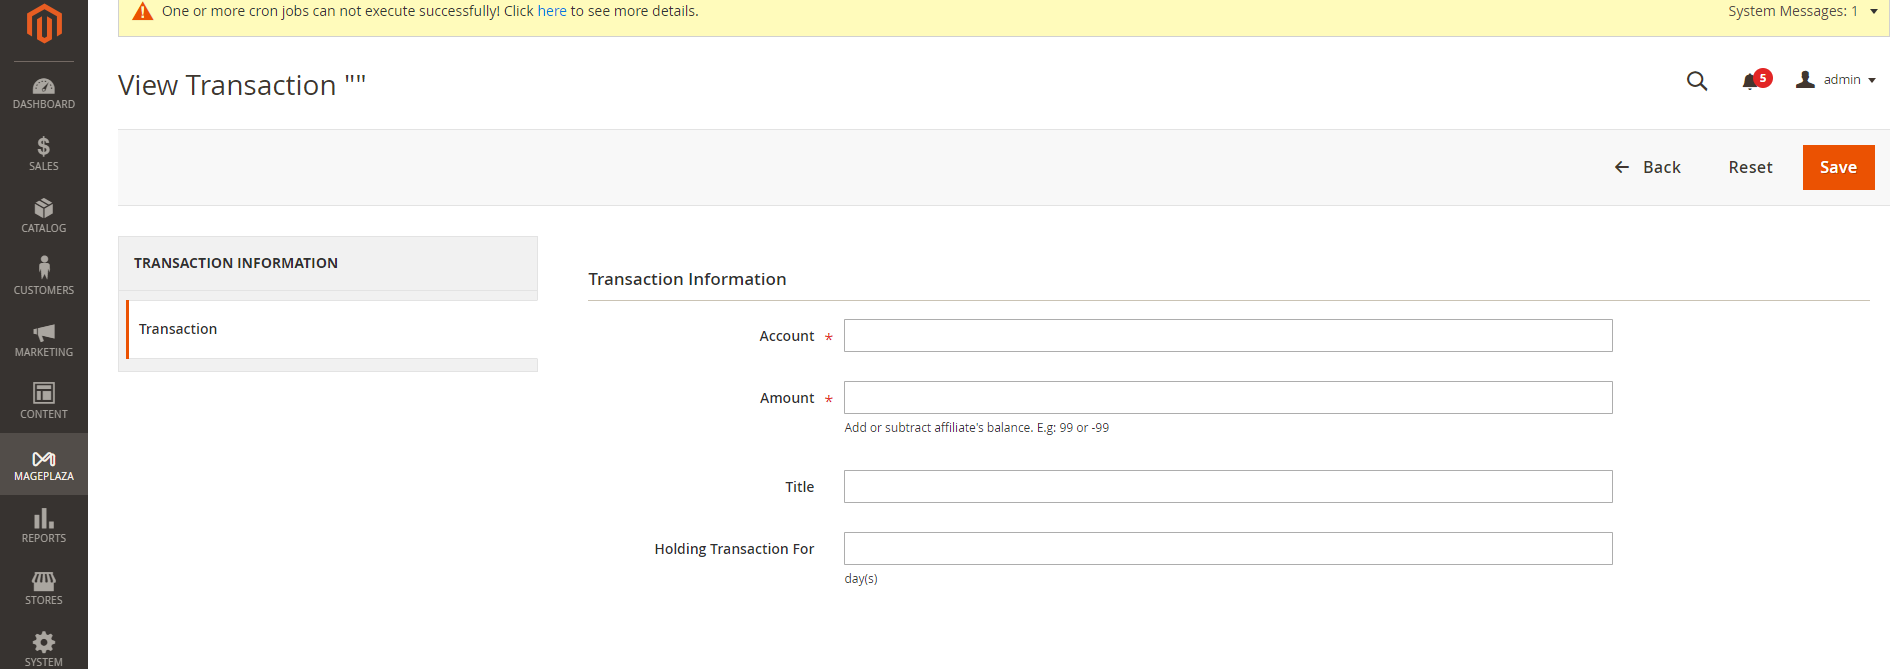
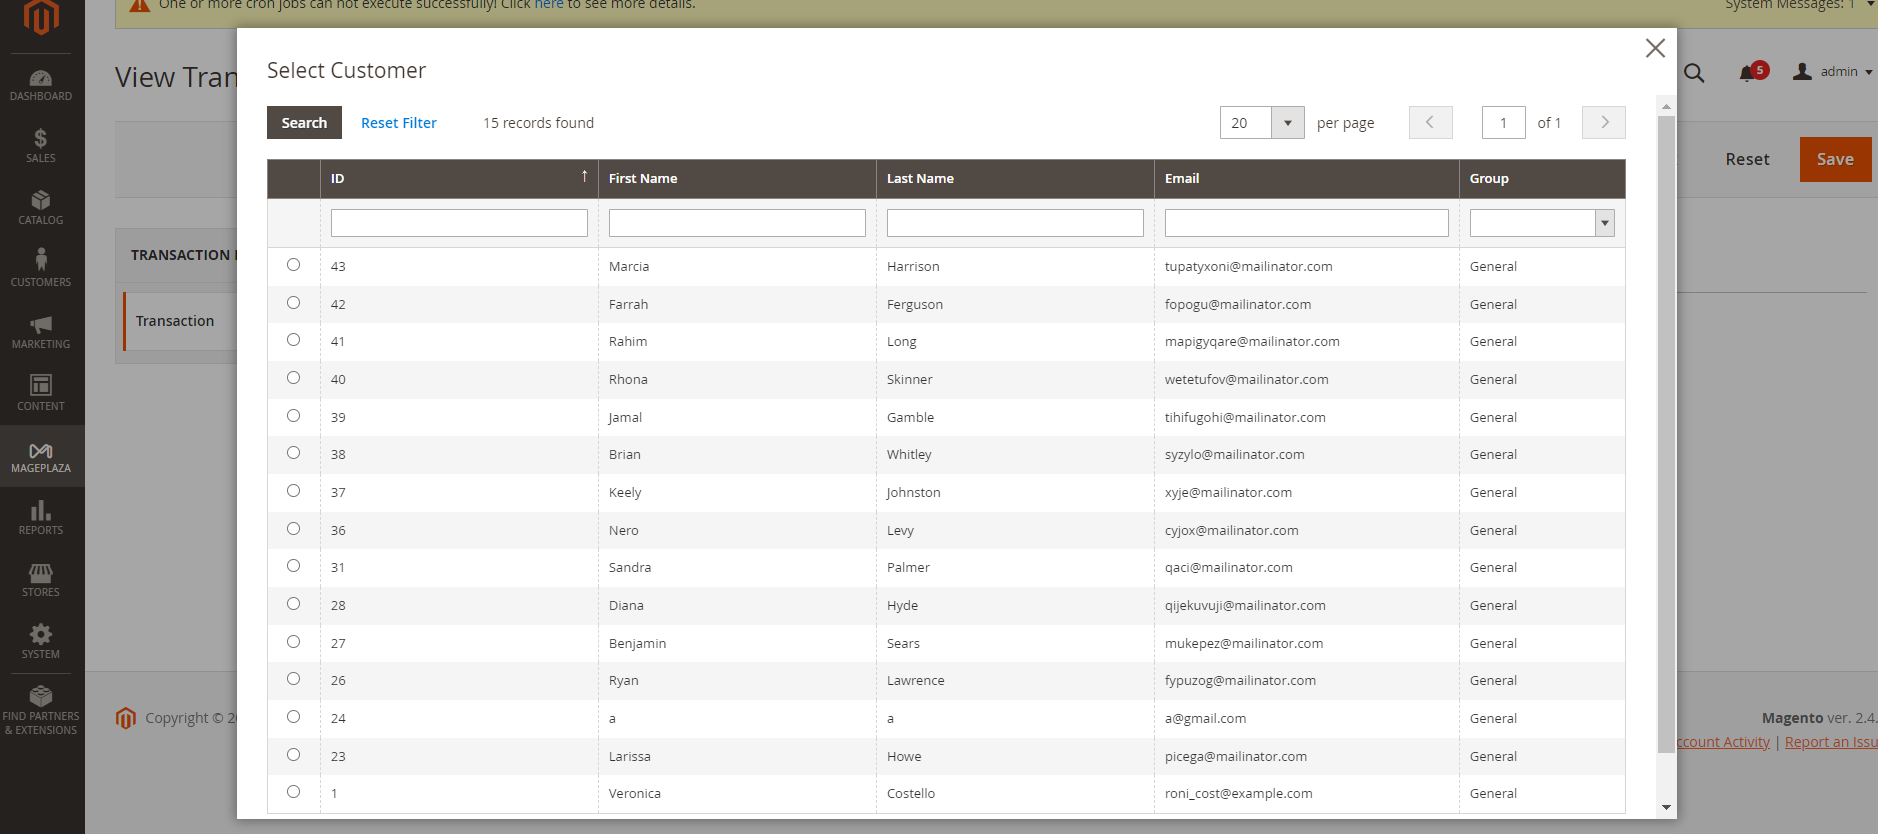
Account
- Click on this field to show the affiliate account, and then you can choose the account to add transactions in
- This is a required field
Amount
- Insert the added amount. It can be a negative one
- This is a required field
Title: Add the Title of the transaction
Holding Transaction For
- Add the number of days that you want to keep the transaction records
- If you leave it empty or insert 0, the transaction will be deleted
7. Email
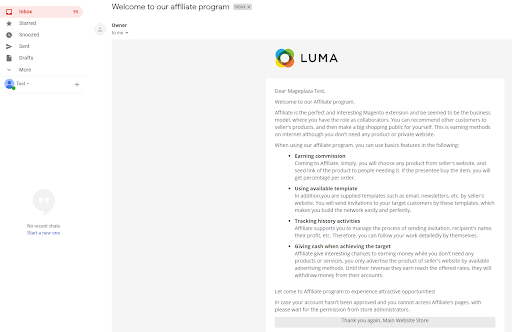
7.1 Notification emails for successful registration of the affiliate account
7.2 Notification emails for Affiliate account approval
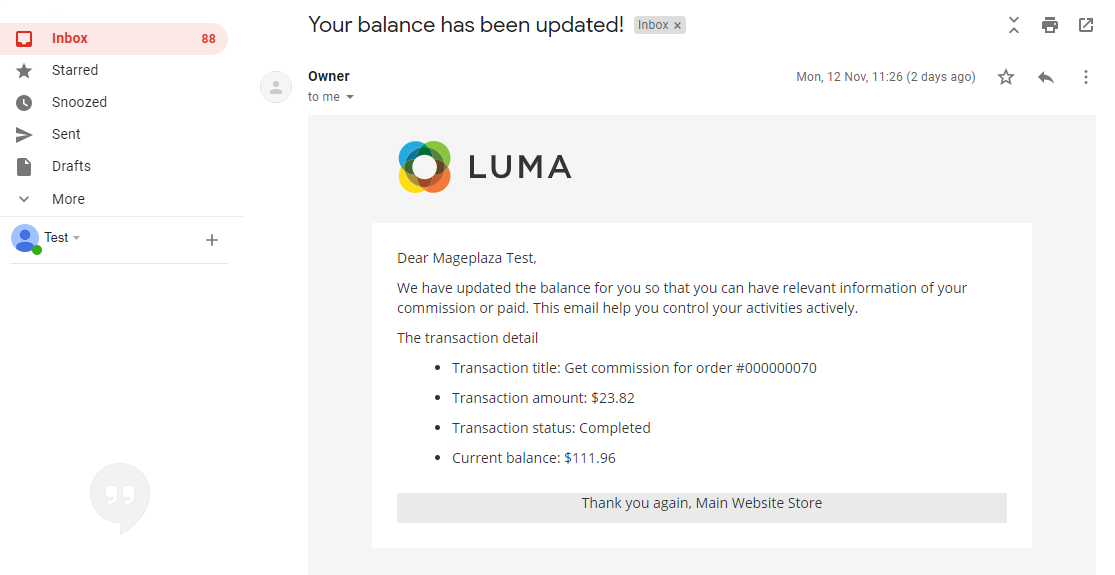
7.3 Notification emails for changing the Affiliate account balance
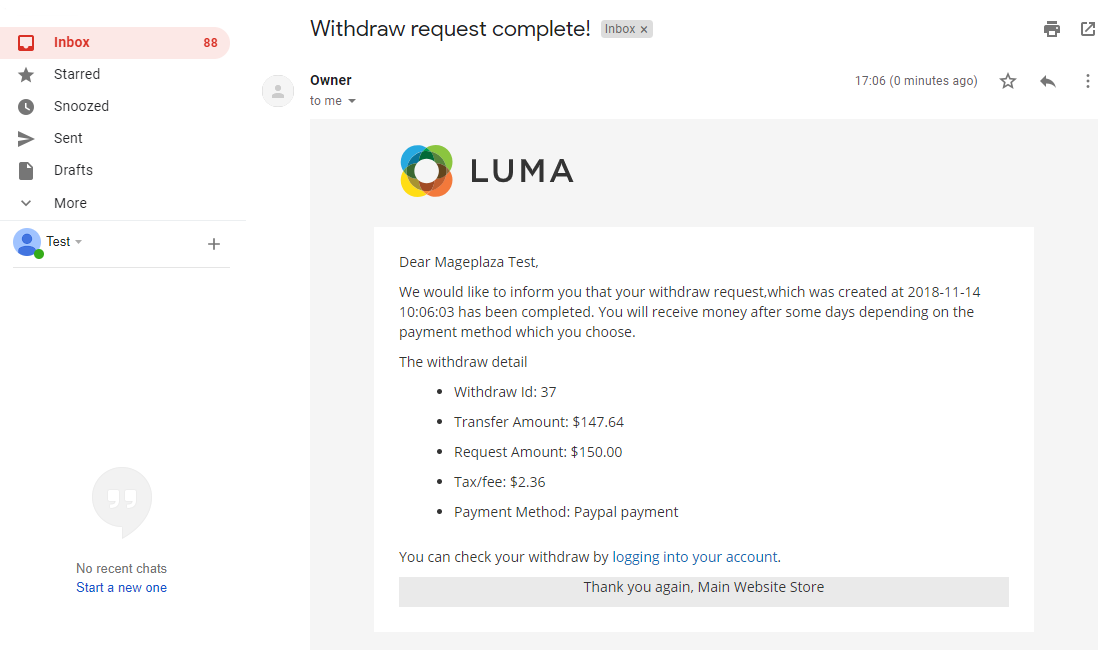
7.4 Notification emails for completion of withdraw request
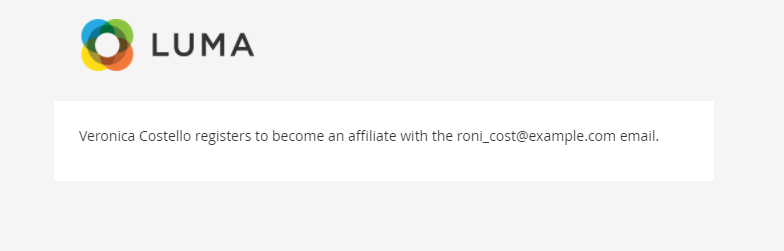
7.5 Notification emails for admin when there is a request to create Affiliate account
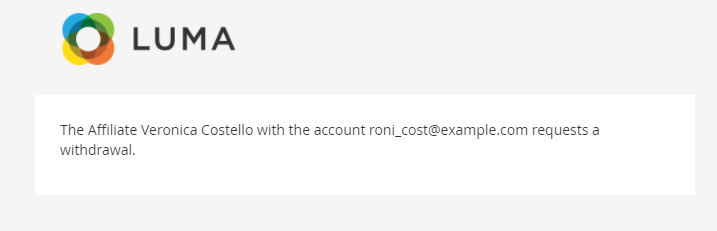
7.6 Notification emails for admin when there is a request to withdraw
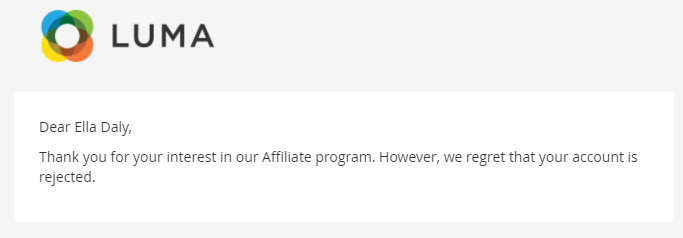
7.7 Notification emails for customers when an account creation request is rejected
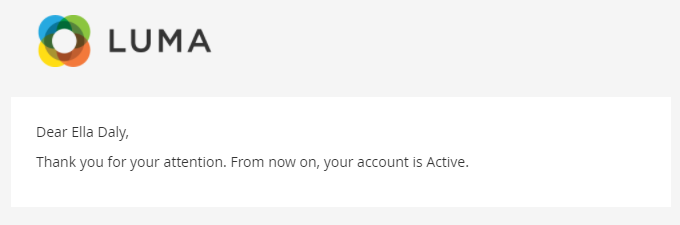
7.8 Notification emails for customers when status of Affiliate account changes
7.9 Notification emails for customers when withdrawal request is rejected

8. Compatible with Mageplaza Store Credit (Withdraw)
Affiliate is compatible with the Store Credit extension by Mageplaza to support withdrawal into store credit accounts conveniently and connect accounts with each other.
FAQs
Support and Assistance
1. Customer Support
For any assistance, please visit our support page or email us at cs@mageplaza.com/ sales@mageplaza.com
2. Create a Ticket
If you need to create a support ticket, please use the following link: Create Ticket Link
3. Operating Hours
Our support team is available during the following hours:
- Monday to Friday: 8:00 AM - 23:59 PM
- Saturday: 8:00 AM - 12:00 PM
- Sunday: Closed
4. Refund Policy
We understand that sometimes things don't go as planned. Please review our refund policy for detailed information: Refund Policy Link
5. Frequently Asked Questions (FAQs)
For quick answers to common questions, please visit our FAQ page: FAQ Page Link