Free Gifts
Overview
Mageplaza Free Gifts Extension helps store owners set up special promotions by offering free gifts when customers purchase the products in their stores. Admins not only easily set up conditions for free gifts, but they also can customize these rules with discount products, customer groups, quantity restrictions, etc. Therefore, customers are interested in shopping in your Magento store.
Outstanding Features
| Outstanding Features | Description |
|---|---|
| Change the desired gift beyond the default gift | Customers can choose the gift of their choice with a limited number pre-configured by the admin. This increases store diversity as well as providing more choices for customers. |
| Display gifts on multiple pages | With this feature, buyers can add a gift to the cart right on the Product fetail Page, view gift information on the Category Page,... helping to simplify and facilitate shopping and viewing gifts. |
| Automatic and manual gift allocation | Adding gifts in both manual and automatic ways helps increase flexibility for customers with different needs. By adding manually, customers will be able to add the gift they want from the gift list, without having to waste time giving up gifts they don't like. With automation, gifts will be automatically added to the cart to help customers save time and effort. |
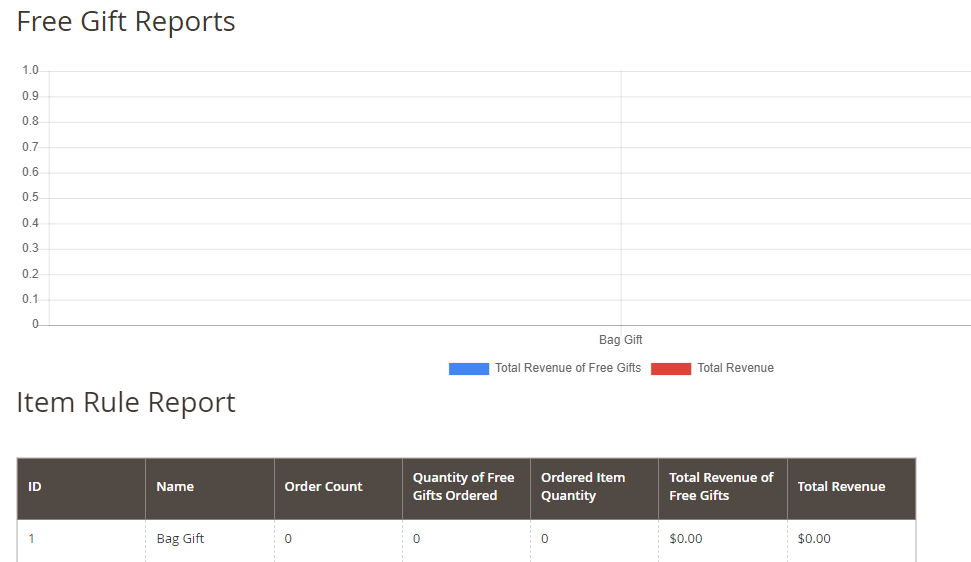
| Get statistical data about cart price rule performance | Statistical reports will be provided so that admins can monitor campaign effectiveness, thereby devising strategies appropriate to the business situation. These reports will include Number of orders, Number of free gifts ordered, Number of items ordered, Total free gift revenue, and Total revenue. |
How to Use
Free Gift is auto-added if the product the customer adds to the cart is qualified for conditions.

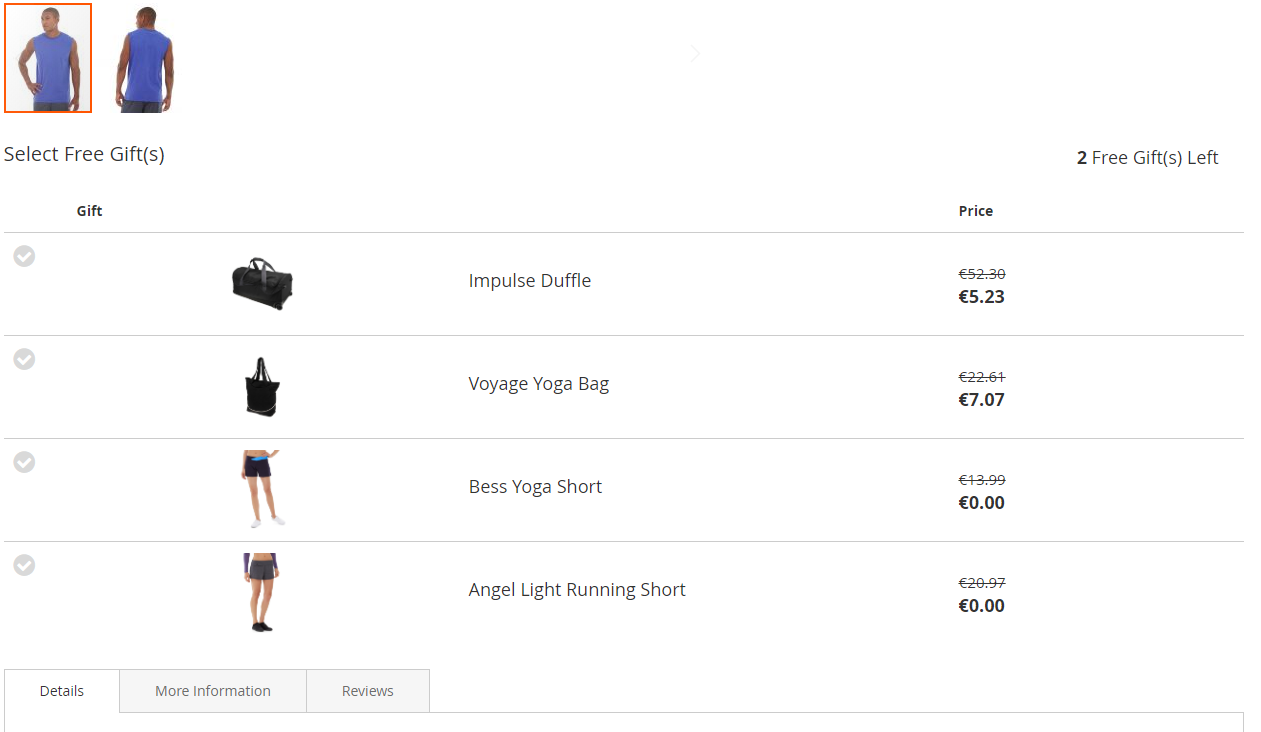
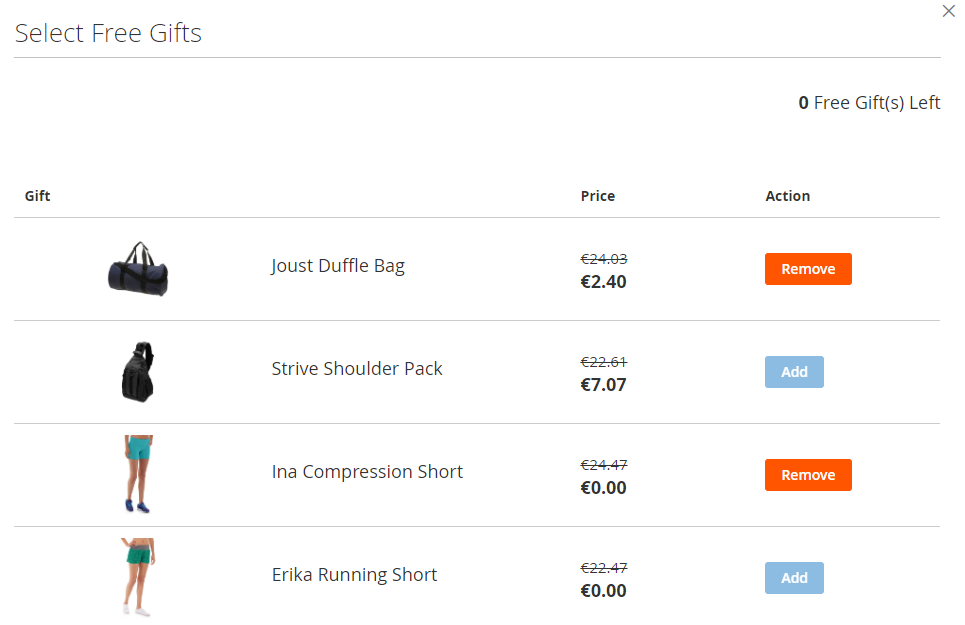
Customer can change the desired gift in the Gift list that the admin offer
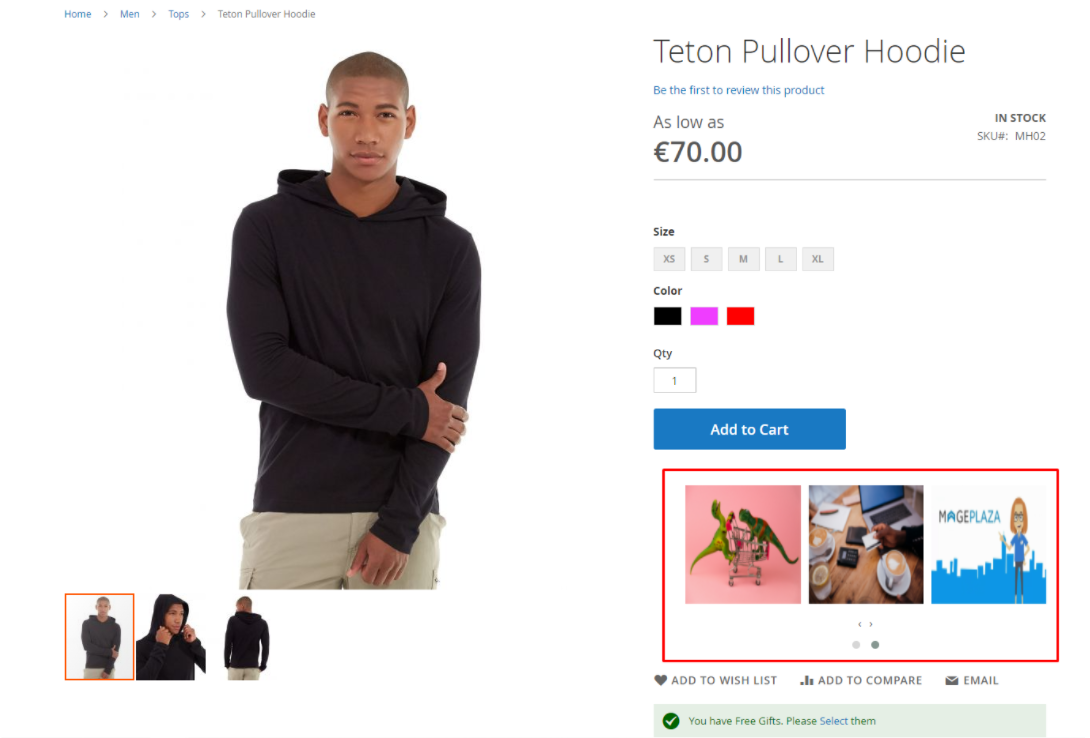
Customer can add the gift to cart right at Product Detail Page
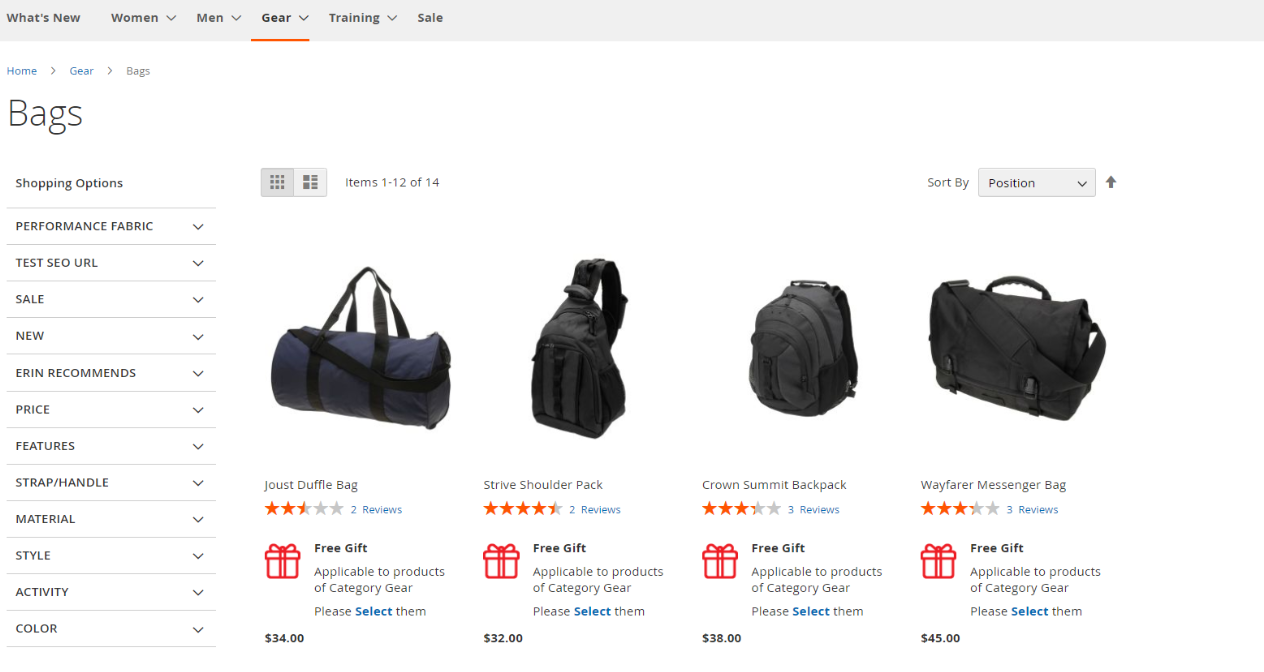
Customers can view the gift information of each product and add gifts to their carts right on Category page
When a product with a free gift promotion is removed from the cart, their free gifts are removed as well
Installation
We offer two methods for installing our plugins: the Copy & Paste method and the Composer method. Please follow the detailed instructions provided below.
Method 1: Installation via Copy & Paste
To install our plugins using the Copy & Paste method, kindly follow the instructions at the link below:
How to Install Magento 2 Extension via Copy & Paste
Method 2: Installation via Composer
Composer name: mageplaza/module-free-gifts
To install our extensions using Composer, please refer to the comprehensive guide at the link below:
How to Install Magento Extension via Composer
By following these guides, you can ensure that the installation process is handled correctly, allowing you to fully utilize the features and benefits of our plugins.
Module Update Guide
Keeping your module updated ensures optimal performance. Follow one of these steps to update your module:
- By Account Dashboard: Log in to your Mageplaza account > go to the My Licenses section > click on the Download button > choose the latest version from the popup.
- By composer: Kindly use the following commands to update the module via composer
composer require mageplaza/(composer name)
php bin/magento setup:upgrade
php bin/magento setup:di:compile
Updating a module by Composer ensures efficient dependency management, version control, and integration with development tools, making the process faster and more reliable.
How to Configure
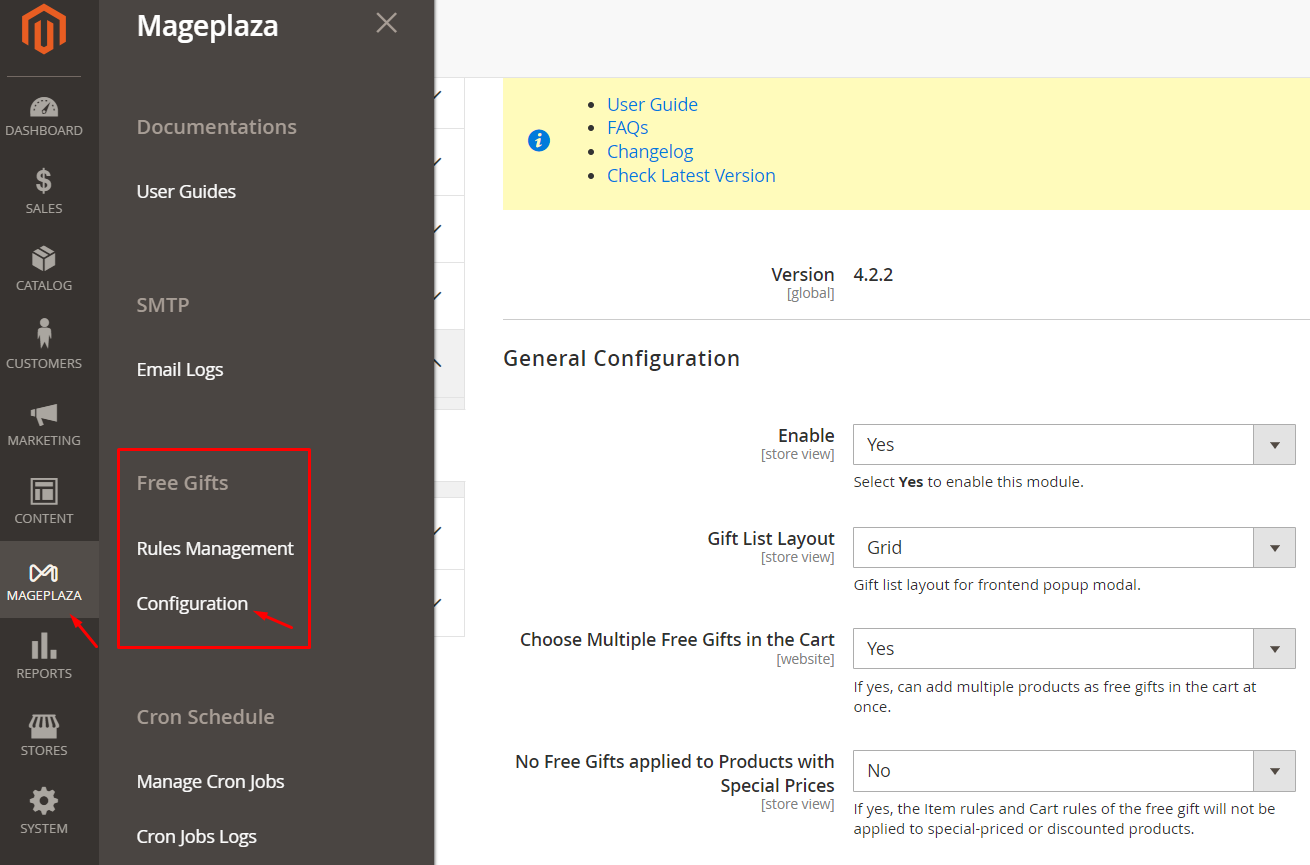
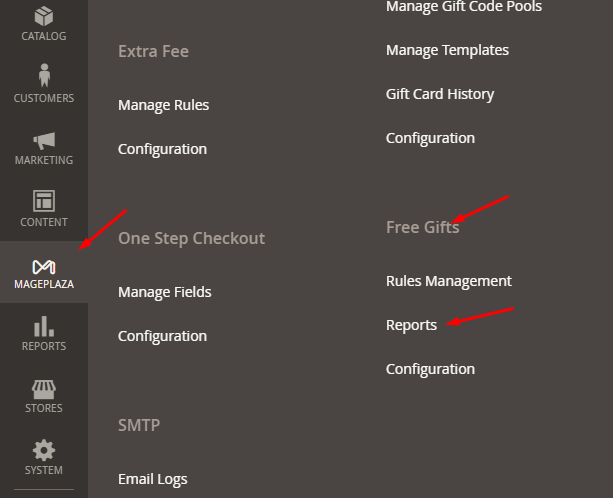
From the Admin panel, go to Mageplaza > Free Gifts > Configuration
1. Configuration
From the Admin panel, go to Mageplaza > Free Gifts > Configuration > Mageplaza > Free Gifts
1.1 General Configuration
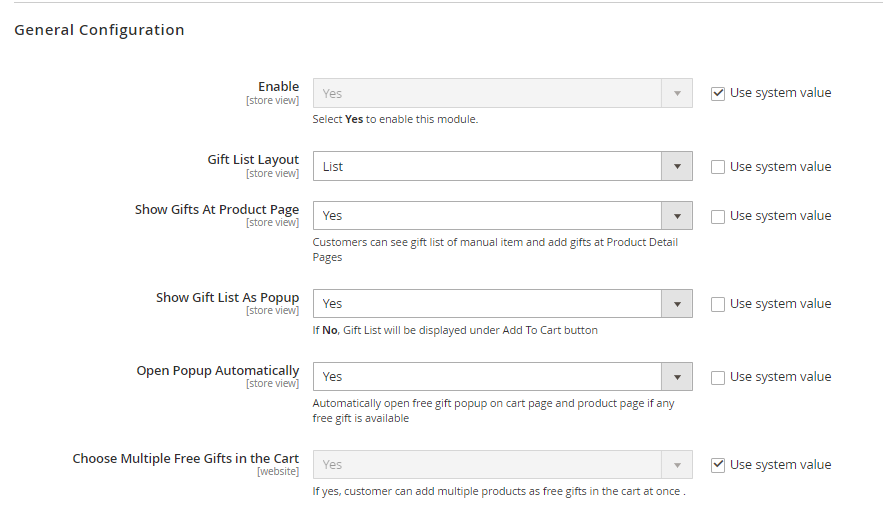
Enable: Select Yes to make the extension active
Gift List Layout: Set how to show gift list in Frontend. There are 3 ways:
List
Grid

Slider

Show Gifts At Product Page: select Yes so that the gift list shown on the Product Detail pages meets the condition of the rules. Show Gift List As Popup and Open Popup Automatically depends on this field.
Show Gift List As Popup:
Select Yes to have the gift list displayed on the Product Detail page as a popup
If you select No, the gift list is displayed as a block
Open Popup Automatically: Choose Yes to auto display the free gifts popup when the item/cart meets the conditions (without clicking on the add free gift button). This field depends on the Show Gift List As Popup field.
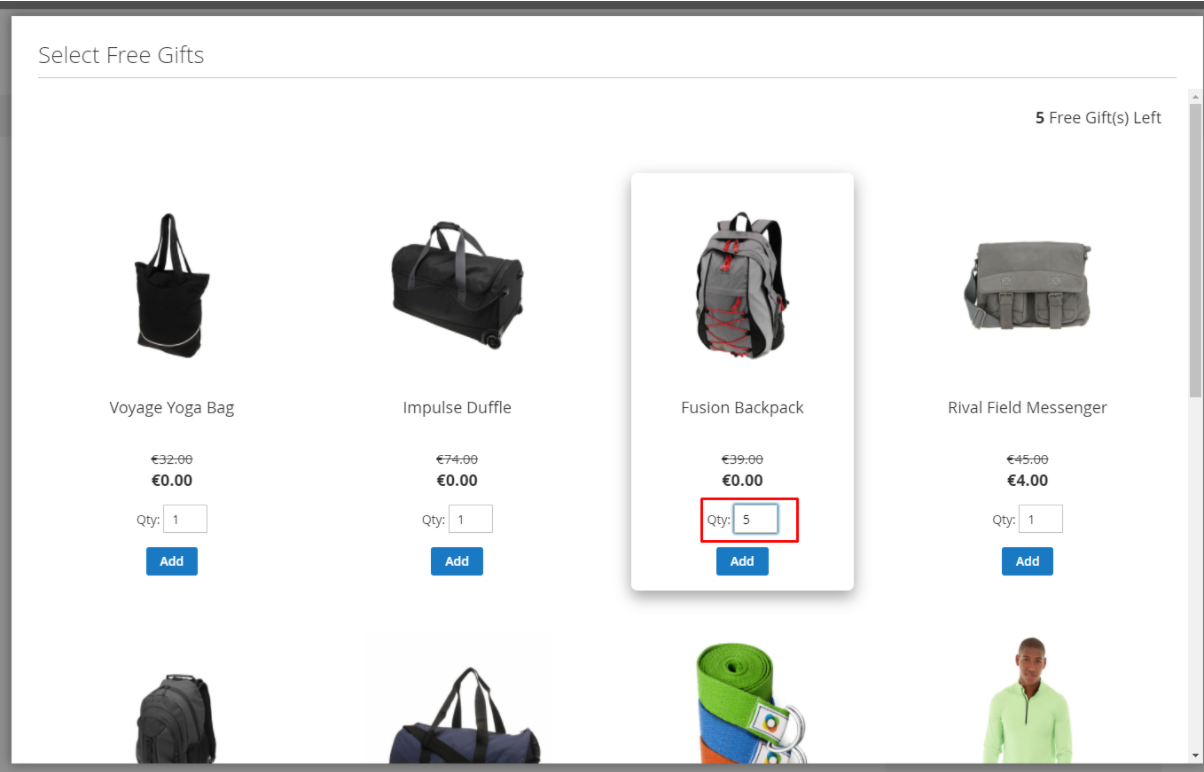
Choose Multiple Free Gifts in the Cart: Select Yes to allow customers to add multiple free gifts to their carts.
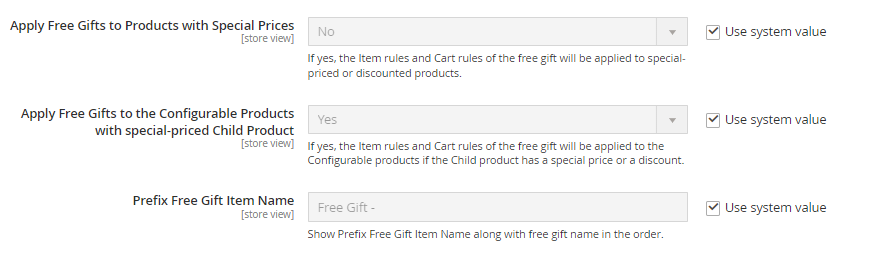
Apply Free Gifts to Products with Special Prices: Select No to disallow free gifts for special-priced products or on-sale discounted products. This can stop customers from having double discounts. Extra fields can be shown:
- Apply Free Gifts to the Configurable Products with special-priced Child Products: Select No to disallow free gifts for child products of Configurable products that have special prices or discounts.
Prefix Free Gift Item Name: Fill out the prefix for the gift name to let customers easily recognize the free gifts in the list
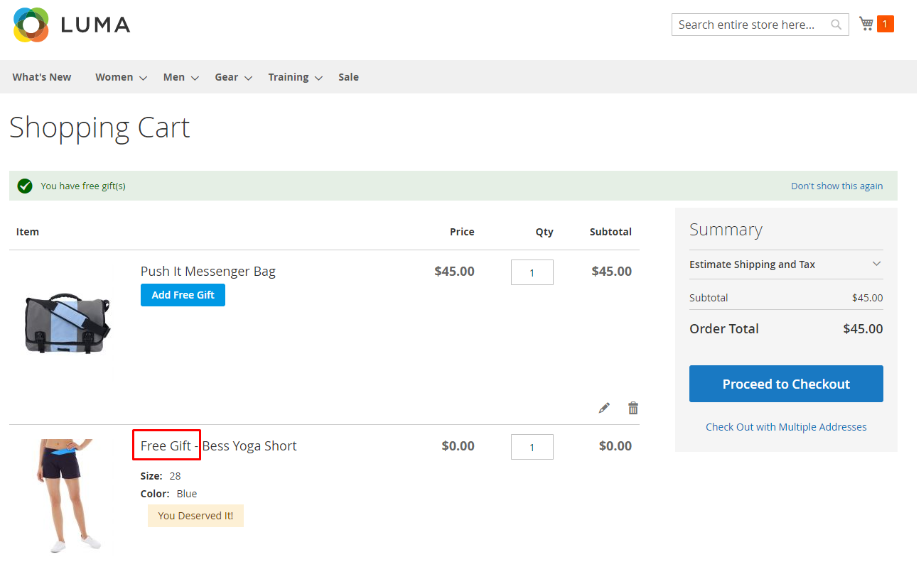
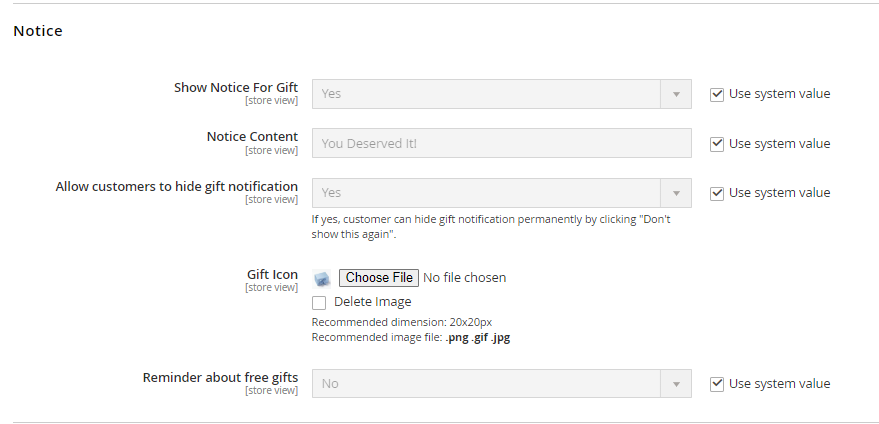
- Show Notice For Gift:
- Select Yes so that notice is displayed with the gift. Thereby, customers can easily distinguish gifts from other products
- Notice is displayed in minicart and View Cart Page
- Notice Content: Enter the notice content
- Allow customers to hide gift notifications: On the View Cart Page, there is a general notice for all gifts. Select Yes to allow customers to turn off this notice
- Gift Icon:
- The uploaded image will be used as Gift Icon and displayed in Frontend
- Accept image files in jpg, png, gif, svg, etc.
- If the admin does not upload the icon, there will be no Gift Icon displayed
- We recommend using a 20x20 px icon
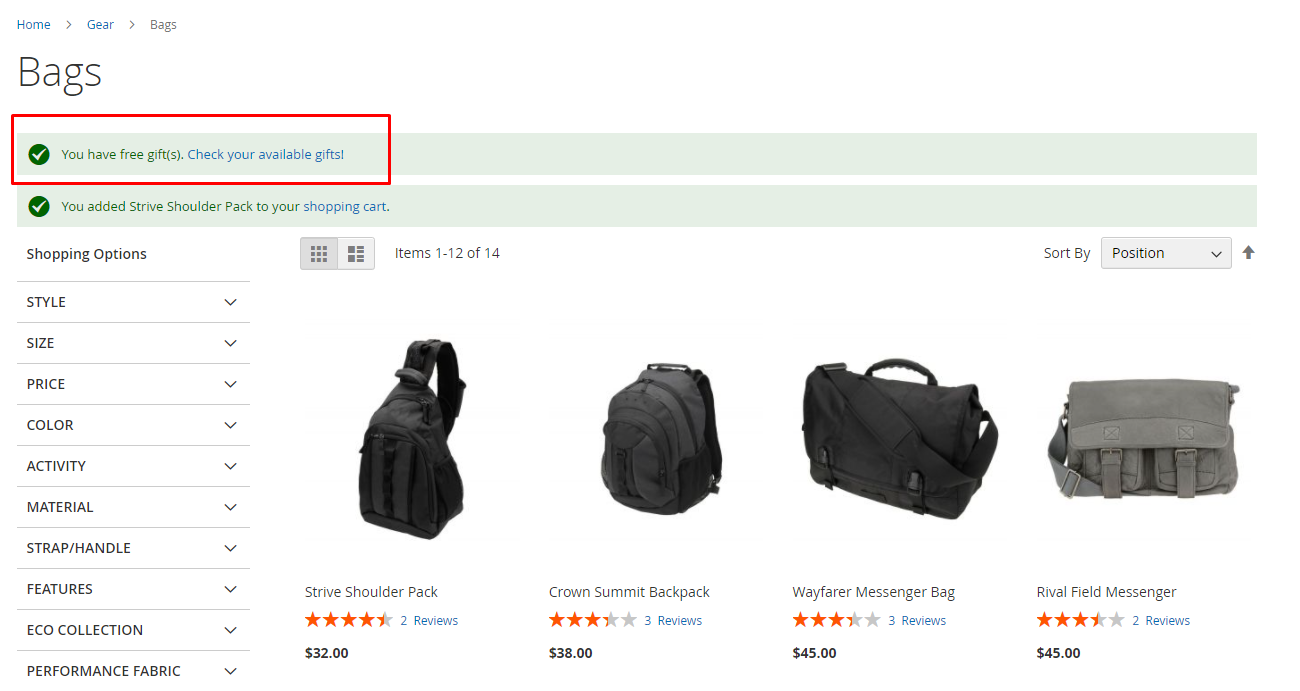
- Reminder about the free gift:
- Choose Yes to show the notification of free gift selection right on the category page if the product meets the item rule/cart rule. When clicking on
check your available gift, customers will be redirected to cart page - If Yes is chosen, show the Notification Message field
- Choose Yes to show the notification of free gift selection right on the category page if the product meets the item rule/cart rule. When clicking on
- Notification Message:
- You can change the notification message to select free gifts in this part
- Replace the {url checkout/cart} with the actual cart to redirect to the cart page
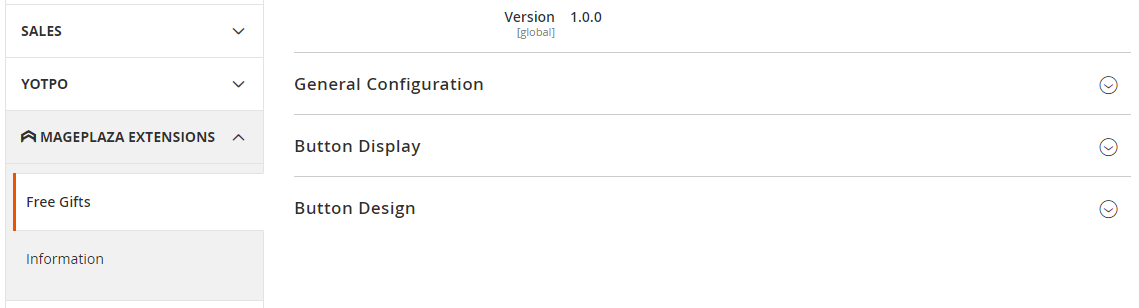
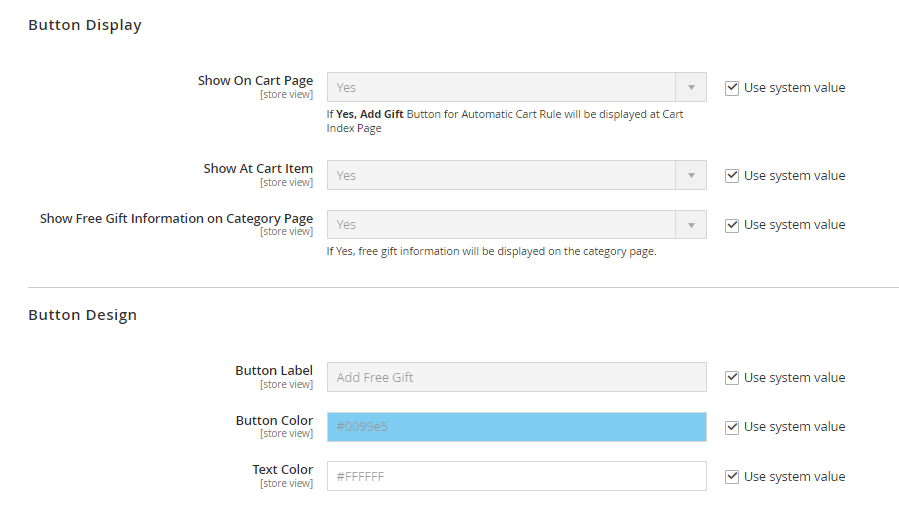
1.2 Button Display
Admin can choose to show the “Add gift button” on the Cart Index Page, besides, can also display the gift’s information.
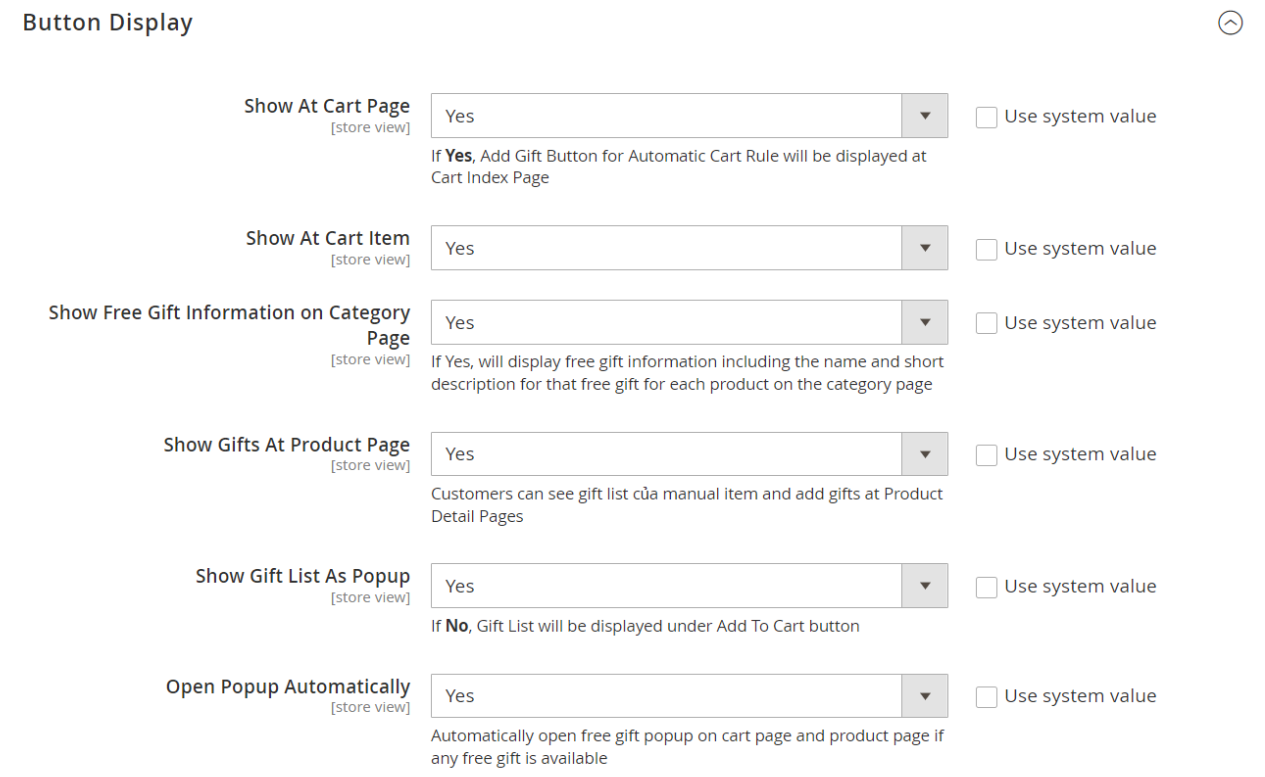
- Show At Cart Page: applies to auto cart rules
- Click Yes to display the add gift button on the View Cart Page
- If No is selected, the gift is automatically added following the rule, and the customer cannot change to another Gift
- Show At Cart Item: applies to manual item rules
- Select Yes to display the add gift button on the View Cart Page, customers need to click the button to select the desired Gift
- If No, the add gift button is not displayed in View Cart Page. Customers can only add gifts from the product detail page
- If the gift is not displayed on the Product Detail Page or in the View Cart Page, the rule is not being applied.
- Show Free Gift Information on Category Page: Select Yes to show information about the Free Gift, including the name and short description of the Free Gift of each product on the Category page.
1.3 Button Design
Is to customize the button’s design, such as the label, button color, and text color.
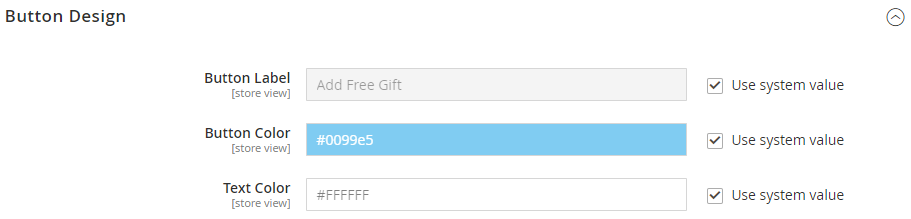
- Button label:
- The button label will be displayed in Frontend with the Add Manual mode
- The content needs to show customers that the product they are buying is given additional gifts
- Button Color: Set the background color of the add gift button
- Text Color: Set the font color of the text entered by the admin in the Button label field
2. Manage Rule
To manage rules, from the Admin panel, go to Mageplaza > choose Rules Management in the Free Gift section.
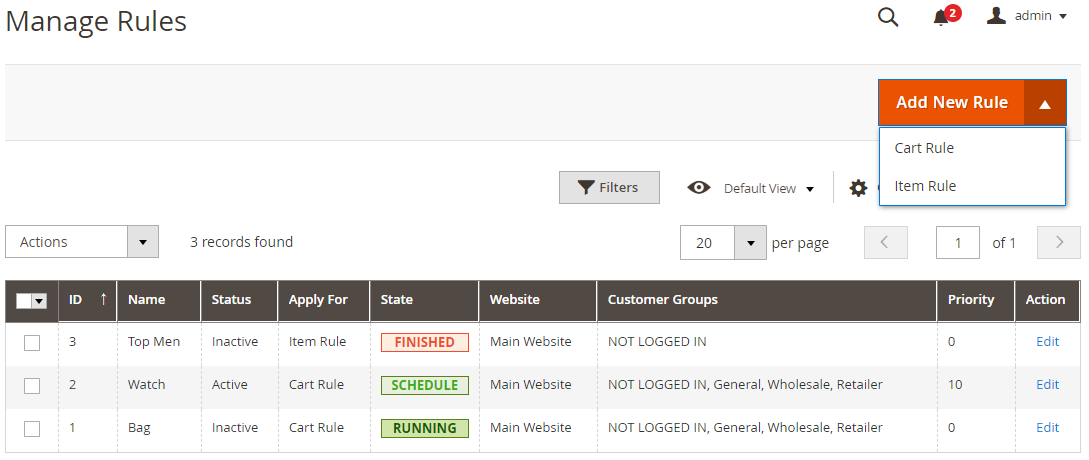
2.1 Grid
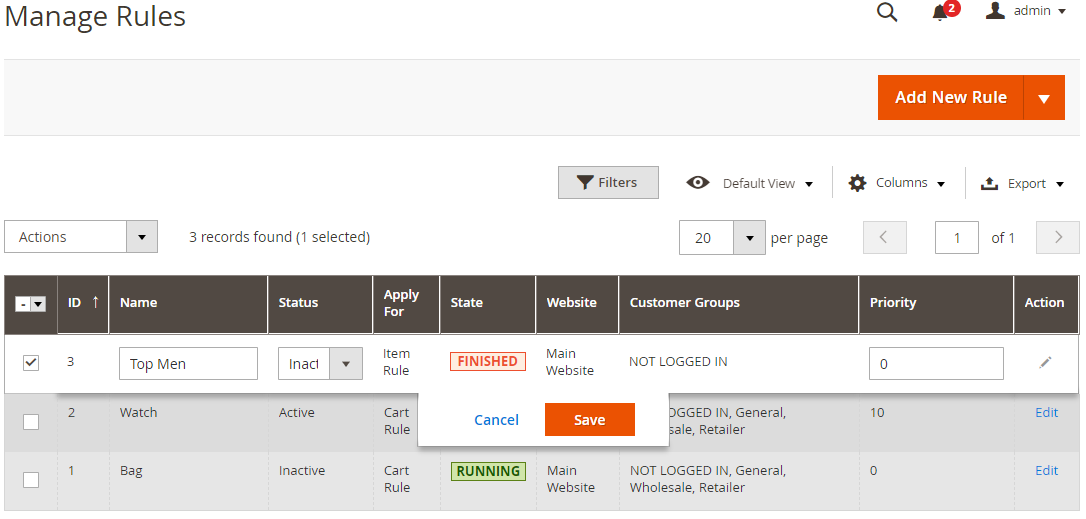
All the created rules are shown on this grid. From the grid, the admin can capture the basic information of the rule, such as ID, Name, Status, Apply For, State, Website, Customer Group, Priority, and Action that can be performed with the Rule.
- All the created rules are shown on this grid
- From the grid, admin can capture the basic information of the rule such as ID, Name, Status, Apply For, State, Website, Customer Group, Priority and Action can be performed with the Rule.
- In the Actions tab, the admin can perform the following actions:
- Delete: Admin needs to tick the Rule you want to delete, then select Delete in the Actions box (upper left of the Grid) to delete. A confirmation box will appear, click OK to continue
- Change Status: The admin needs to tick the rule you want to change the status, then select
Change Status > Active/ Inactivein the Actions tab (upper left side of the Grid) to change it. A confirmation box will appear, select OK to confirm the change
- In the Action column, admin click on Edit to Rule to edit the information
- In addition, the admin can Filter, Change Store View, Hide/Show the Columns, Export Grid or Edit inline
2.2 Add New/ Edit Form
There are two main types of rules: Rules that apply to the Whole Cart and rules that apply Per Item. Both rules have the same form, except for the Condition tab. The rule that applies to the whole cart will use the condition of the cart, the rule applied to each item will use the condition of the product.
- There are two main types of rules: Rules that apply to Whole Cart and rules that apply Per Item. Both rules have the same form, except for the Condition tab. The rule that applies to the whole cart will use the condition of the cart, the rule applied to each item will use the condition of the product
2.2.1 General tab
- Name: Enter the name of the rule. This name is only displayed in the backend to distinguish it from other rules
- Status: Select Enable to active the rule
- Description: Enter a simple description of the rule
- Website: Rule is applied only to the selected website
- Customer Group: Choose a customer group to apply the rule
- Active From: Choose the date to start applying the rule
- Active To: Select the date to finish the rule
- Priority:
- For different rules applying to one product, the rule that has the highest priority is applied first
- 0 is the highest priority
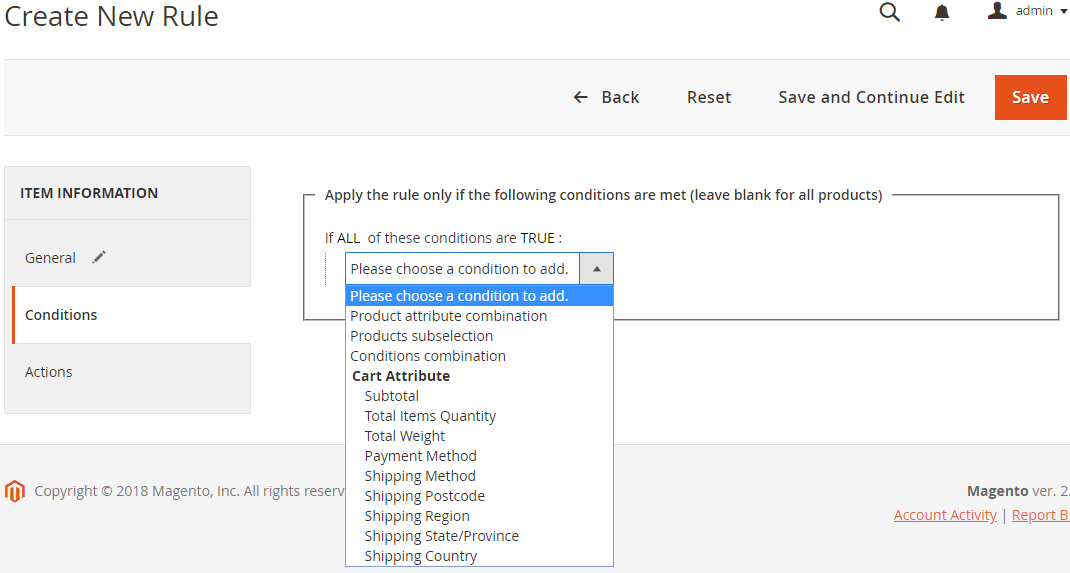
2.2.2 Condition
- Condition for Cart
- Condition for Item (Product)
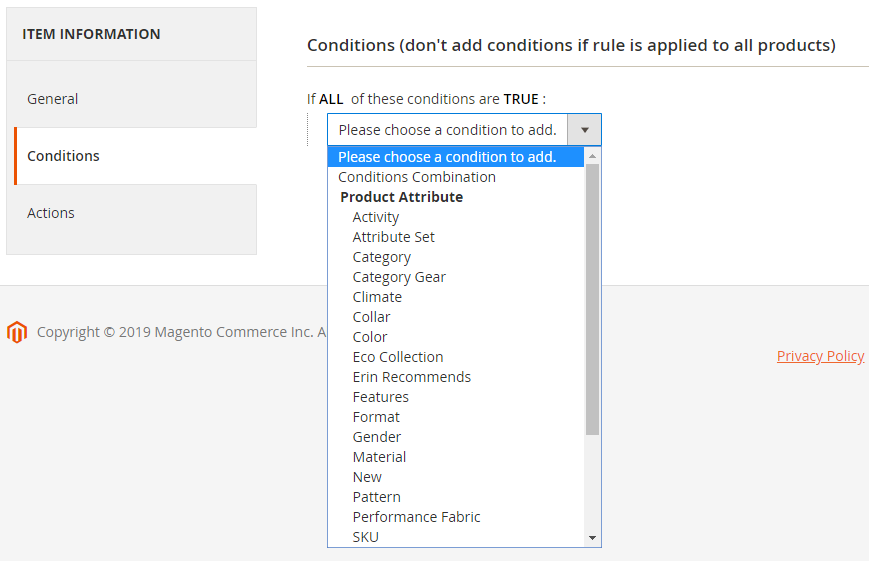
- Here, you select the conditions for the rule. Only apply rules for products that satisfy the selected condition
- You can add or remove conditions by clicking on the + or x sign
- You can change the true/ false condition by clicking on the bold text
2.2.3 Action
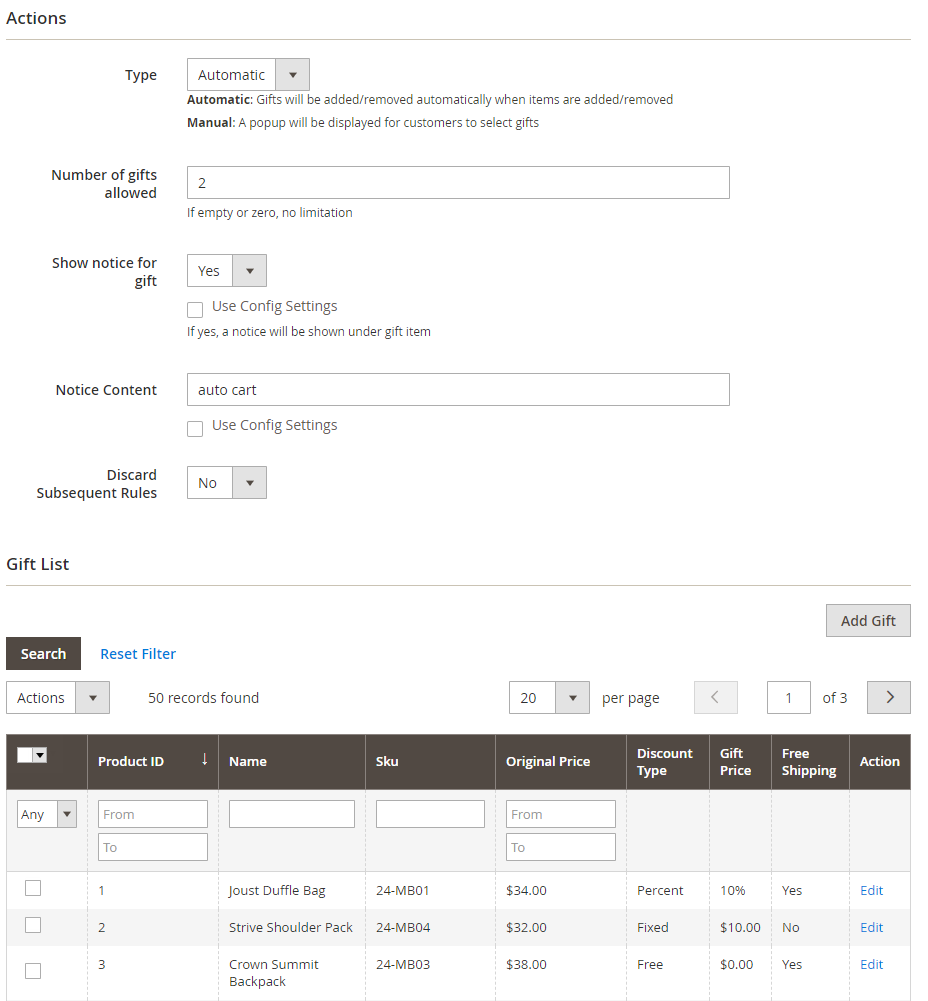
- Action:
- Type: Choose how to add a Gift to Cart:
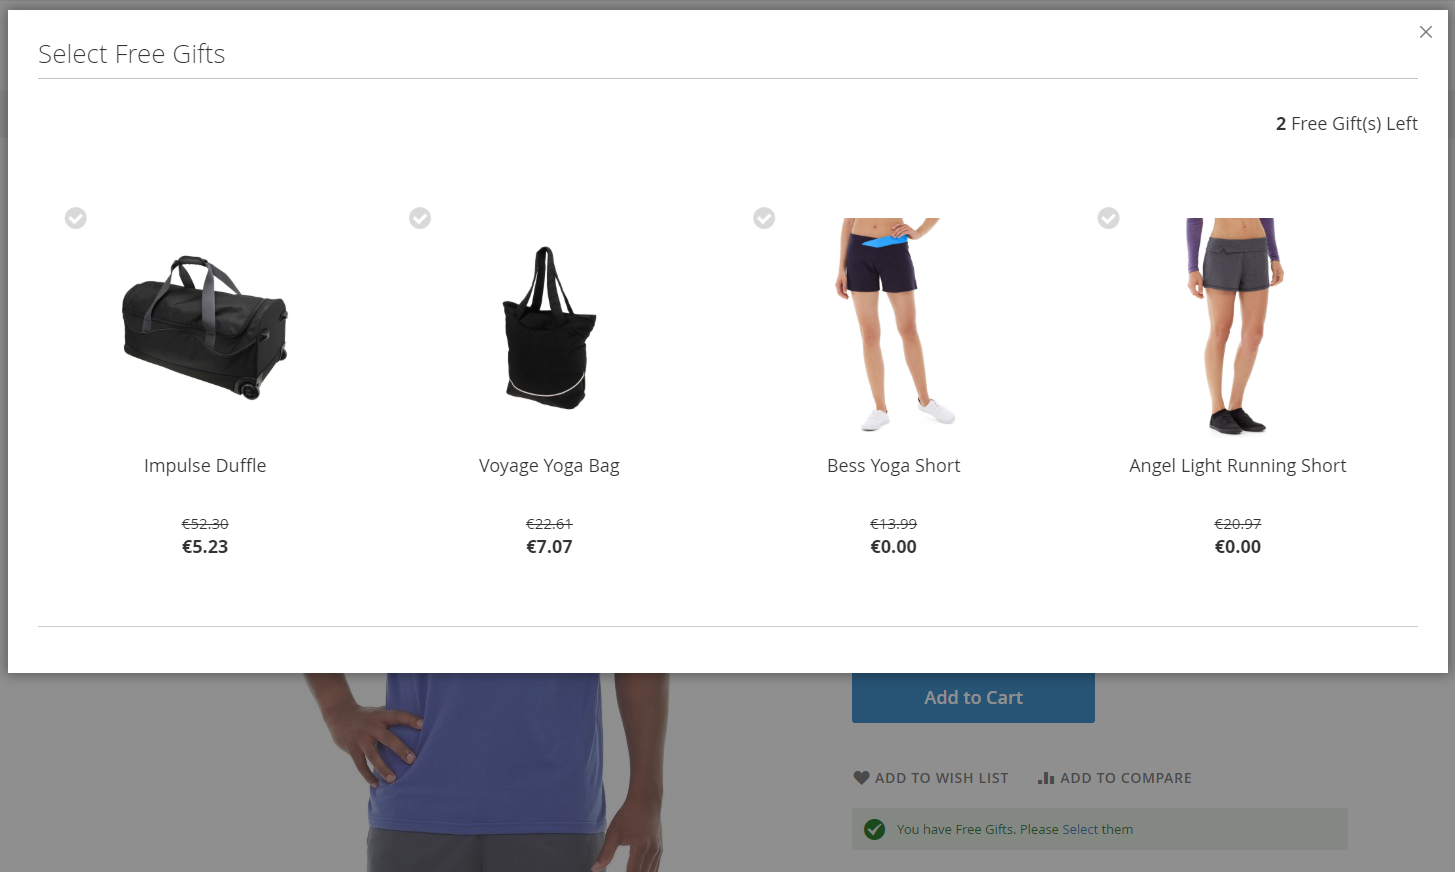
- Automatic: Gift is automatically added from Gift List in order from top to bottom
- Manually: Customers can add the Free Gifts that they want. The Gift List will be displayed as a popup on the frontend
- Number of gifts allowed: Limit the number of free gifts that a Customer receives when applying this rule
- Show notice for Gift: Select Yes to notify customer when they add gift to the cart
- Notice: The message notice that
Customer has successfully added free gift - Discard Subsequent Rules:
- Select Yes to limit the number of gift rules applied to the product or cart.
- Rules with lower priority than this rule or rules with Priority but created later will not be applied
- Discard Subsequent Rules are divided into 2 cases applicable to Cart or Item
- Type: Choose how to add a Gift to Cart:
- For example: There are 6 rules in which: rule 4 has a priority of 10; rule 1.5 is 1; rule 2 is 10; rule 3 is 15; rule 6 is 10. If you choose to stop at 4, then:
- Rule 1.5, with a higher priority, should be applied
- Rule 3 is not applied because the priority is lower
- Rule 2 is applied because of the same priority but created earlier
- 6 is not applied because it has the same priority but creates it later
- Gift List:
- Contains basic information about Gift including: Product ID, Name, SKU, Qty, Original Price, Discount Type, Gift Price, Free shipping, and Action
- Admin click Add Gift to add Free Gift or use Mass Action Delete to delete Free Gift
- To edit gift price, the admin needs to click Action Edit. There are 3 types of Discount that the admin can choose for Free Gift:
- Free: Gift is completely free
- Percent: Gift is sold at X % of the original price (0 <= X <= 100)
- Fixed: Gift sold for $ X (0 <= X <= Original Price)
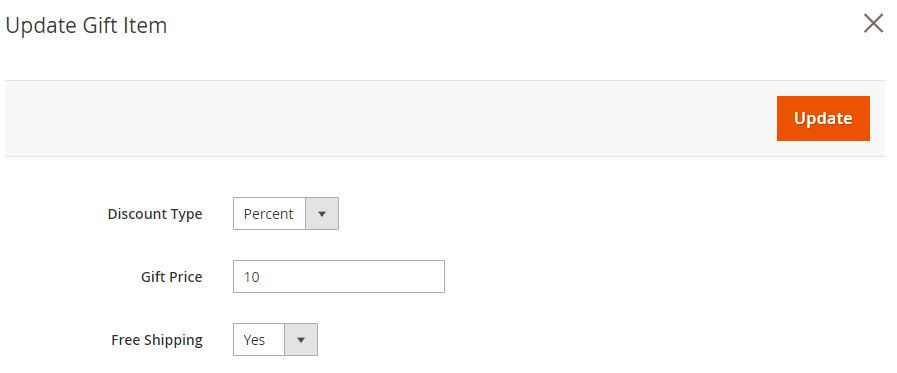
- For each Discount type, admin can set the amount of Discount Amount they want
- For each Free Gift, the Admin can allow the Free Ship or not
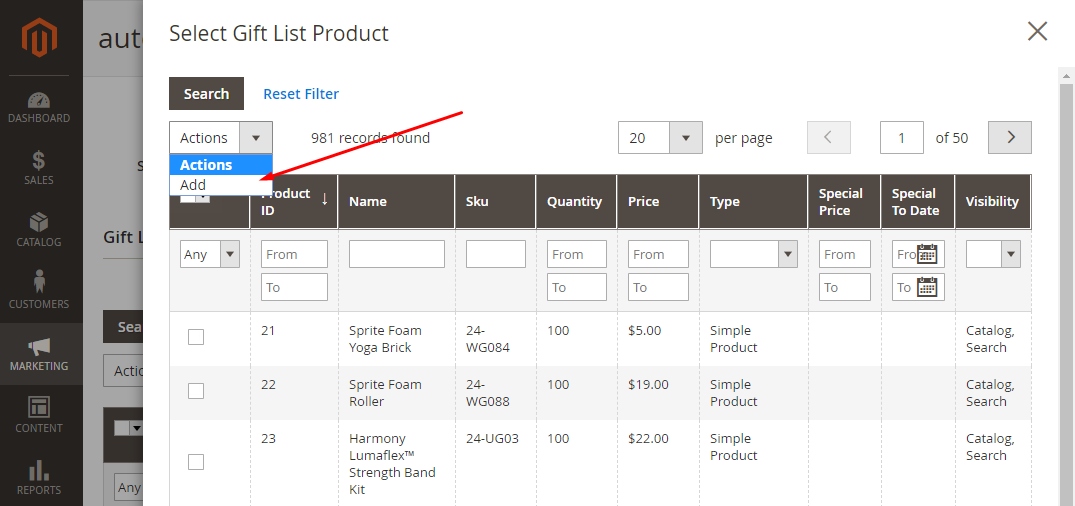
Popup to add gifts to the gift list
2.2.4 Free Gift Banner
Only apply the Free Gift Banner for item rules and display it on the Product page.
Upload Banner Image
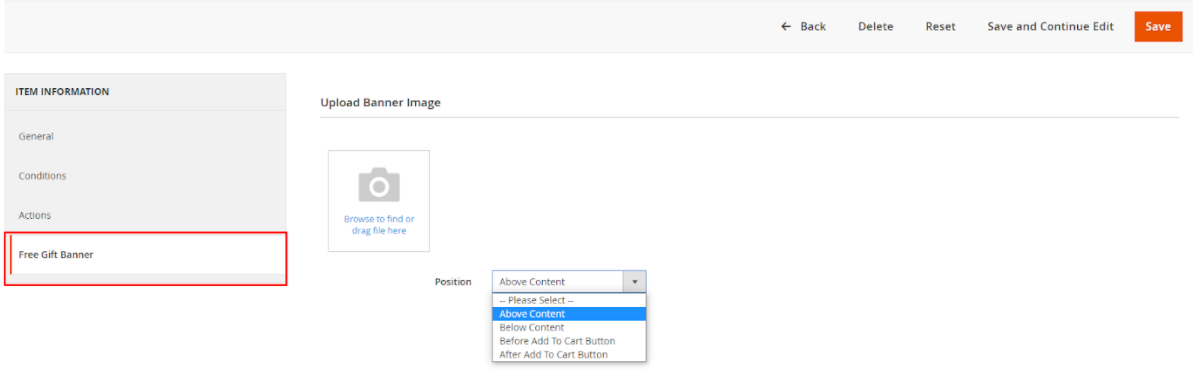
- Admins can upload one or multiple banners to attract customers
- Position: show banners on different positions on the Product page: Above Content, Below Content, Before Add To Cart Button, After Add To Cart Button
Design Banner
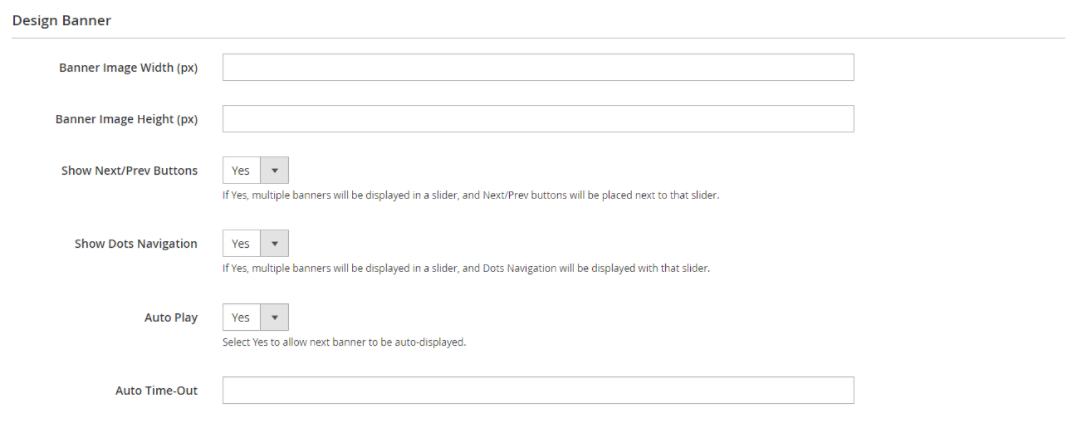
- Banner Image Width (px): Enter the (px) width for banners. Notice that you should choose a suitable px so that the banner quality will not be changed.
- Banner Image Height (px): Enter the (px) height for banners. Notice that you should choose the suitable px so that the banner quality will not be changed
- Show Next/Prev Buttons: Select Yes to show Next/Prev buttons together with the banner to navigate and view the next banners of the slider.
- Show Dots Navigation: Select Yes to show Dots Navigation.
- Auto Play: If select Yes, next banners will automatically displayed.
- Auto Time-Out: Enter the time to automatically display the next banners (in seconds).
3. Report
This part shows all the data on the free gift program under the form of reports.
You can retrieve data on the free gift program from the item and cart rules report; go to Mageplaza > Free Gift > Reports
4. API
Free Gifts extension from Mageplaza support using Rest API to view and check all carts and items in carts of customers and even guests. Also, admin and customers can view the Free Gift Items list and add/delete Free Gift Items to/from the Cart.
For more details, please see here
5. Frontend
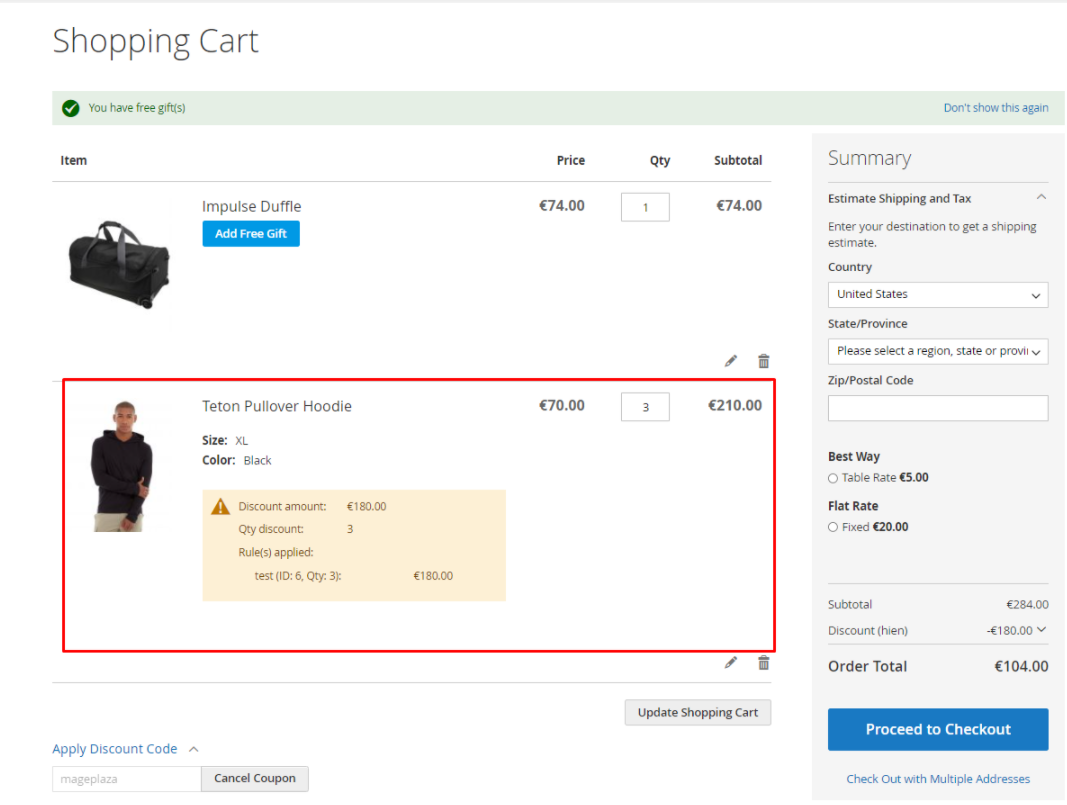
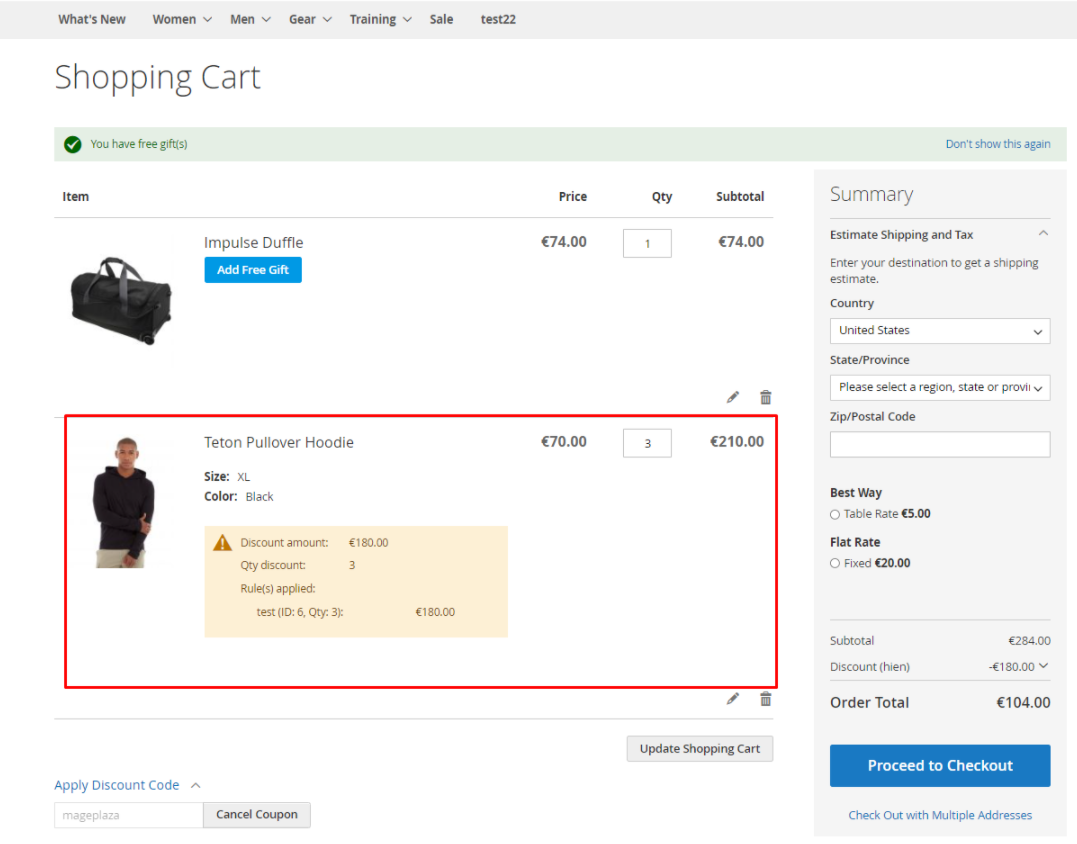
5.1 View Cart Page

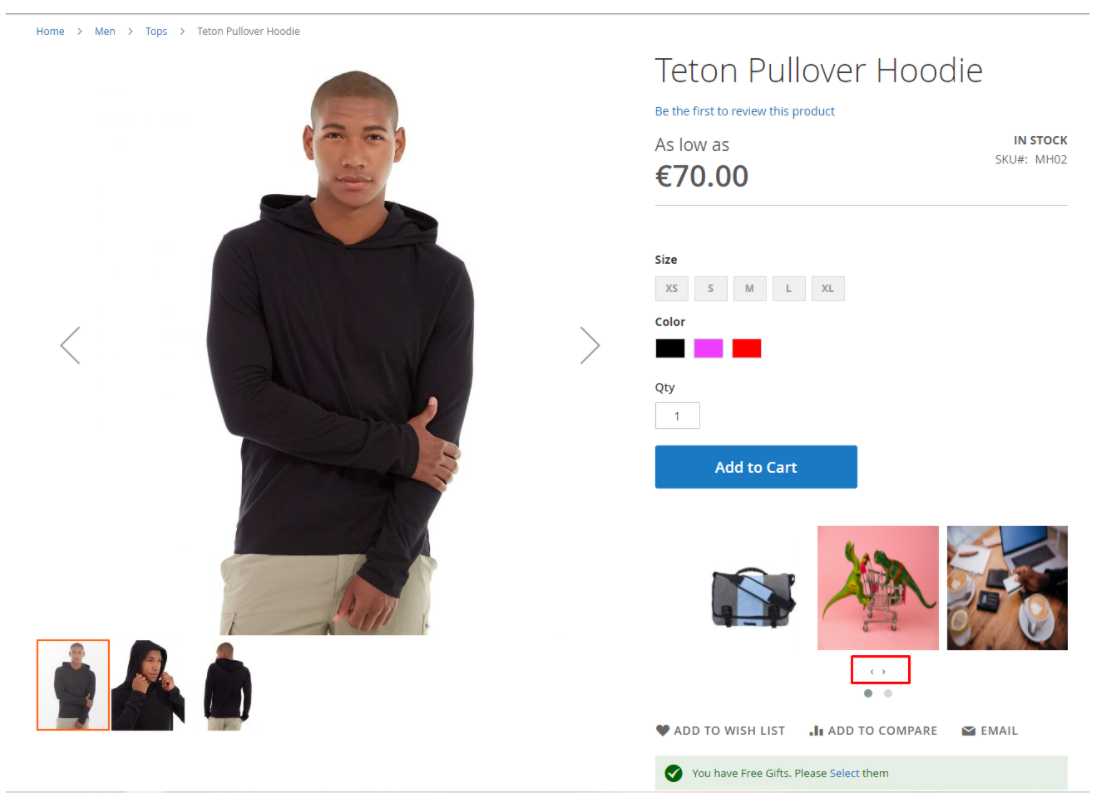
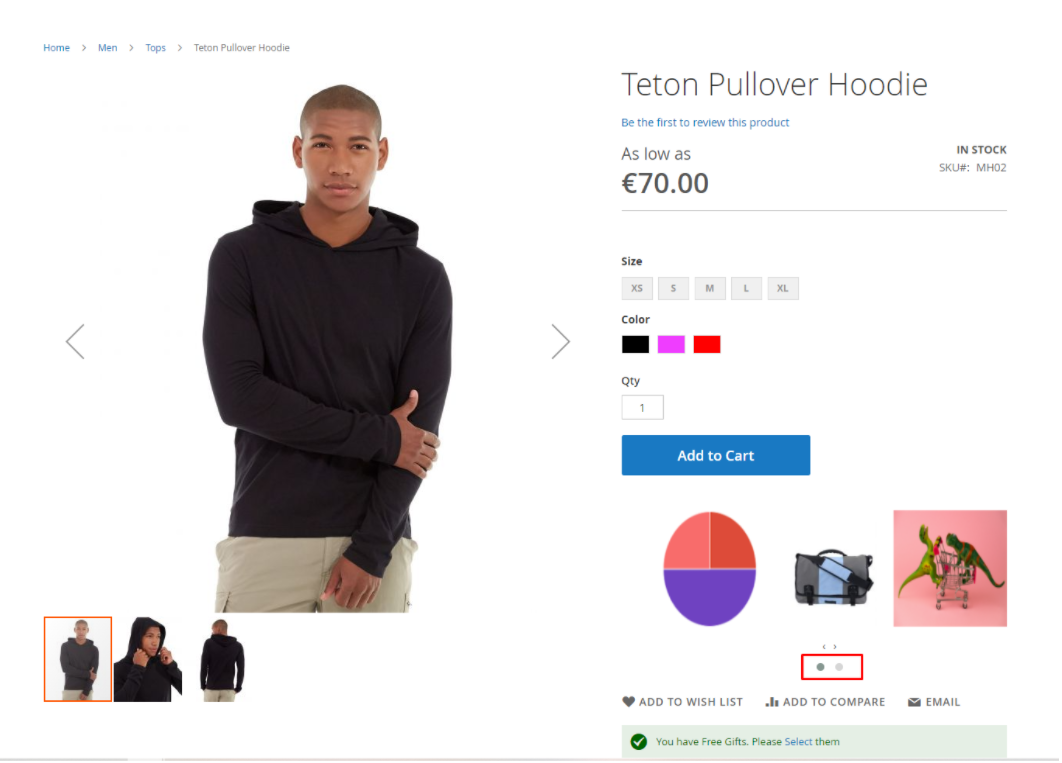
5.2 Product Detail Page
Popup
Block

5.3 Gift Layout
Gift List = List

Gift List = Grid
Gift List = Slider
6. GraphQL
Run the following command in Magento 2 root folder:
composer require mageplaza/module-free-gifts-graphql
php bin/magento setup:upgrade
php bin/magento setup:static-content:deploy
- Use Magento 2.3.x. Return your site to developer mode
- Set GraphQL endpoint as
http://<magento2-3-server>/graphqlin url box, click Set endpoint. (e.g. http://develop.mageplaza.com/graphql/ce232/graphql) - Perform a query in the left cell, then click the Run button or Ctrl + Enter to see the result in the right cell
- Currently, Mageplaza Free Gifts extension supports the following queries and mutations: Gift By Product SKU, get Gifts By Quote Item, Add Gift By ID, Delete Gift By Quote Item ID, etc. View more details here
7. Compatibility with the Special Promotions module of Mageplaza
Free Gift extension is well compatible with Special Promotions by Mageplaza. You can configure items in cart that can be discounted, and customers can receive free gifts or not when purchasing those items.
FAQs
Support and Assistance
1. Customer Support
For any assistance, please visit our support page or email us at cs@mageplaza.com/ sales@mageplaza.com
2. Create a Ticket
If you need to create a support ticket, please use the following link: Create Ticket Link
Operating Hours
Our support team is available during the following hours:
- Monday to Friday: 8:00 AM - 23:59 PM
- Saturday: 8:00 AM - 12:00 PM
- Sunday: Closed
Refund Policy
We understand that sometimes things don't go as planned. Please review our refund policy for detailed information: Refund Policy Link
Frequently Asked Questions (FAQ)
For quick answers to common questions, please visit our FAQ page: FAQ Page Link