Quickbooks Online
Overview
Quickbooks Online is a software that helps small and medium businesses perform accounting tasks most effectively. Mageplaza Quickbooks Online extension will help you fully integrate with Quickbooks Online to connect and synchronize mass or each data information from Magento such as Customer, Product, Order, Invoice, Credit Memo, Payment Method, Tax to Quickbooks Online(corresponding with Customer, Sales Receipt, Invoice, Products and Services, Credit Memo, Tax Service, Payment Method).
That will help create a smooth flow for your business, better manage your accounting data and better organize your financial work. Also, in the process of sending data to the Quickbooks Online, admin can be sent manually or automatically synchronize whenever there is any update. These settings are configured by admin in the backend.
How to download and install
How to use
Quickbooks Online:
- To register a Quickbooks Online account, visit the this link.
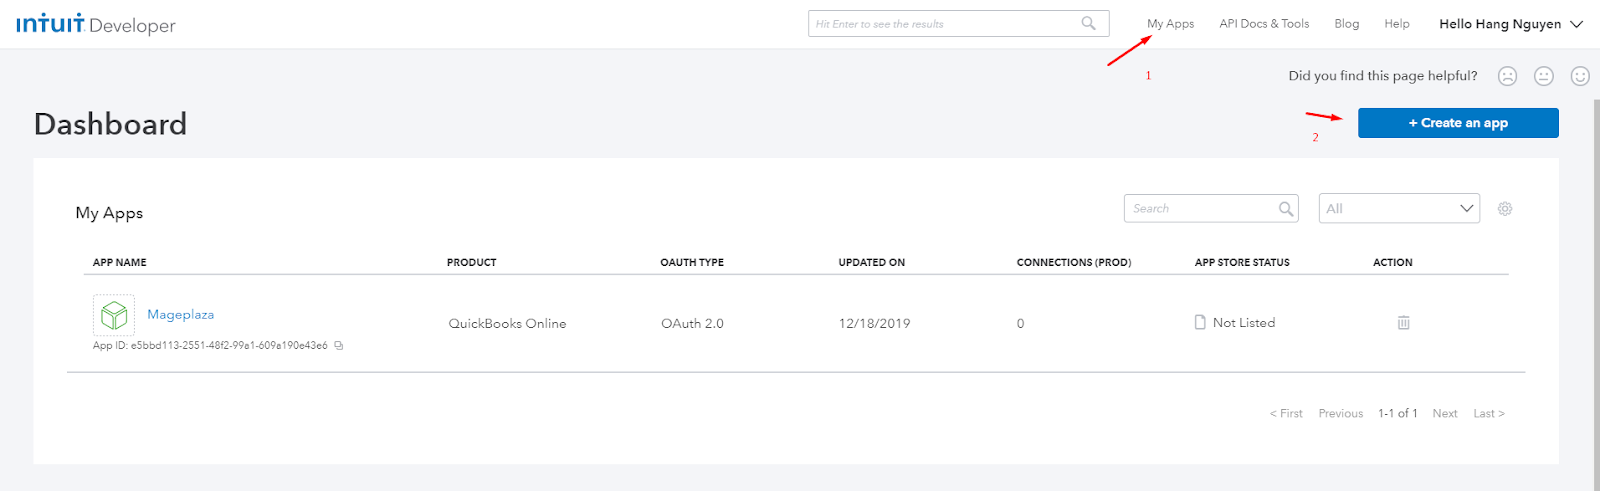
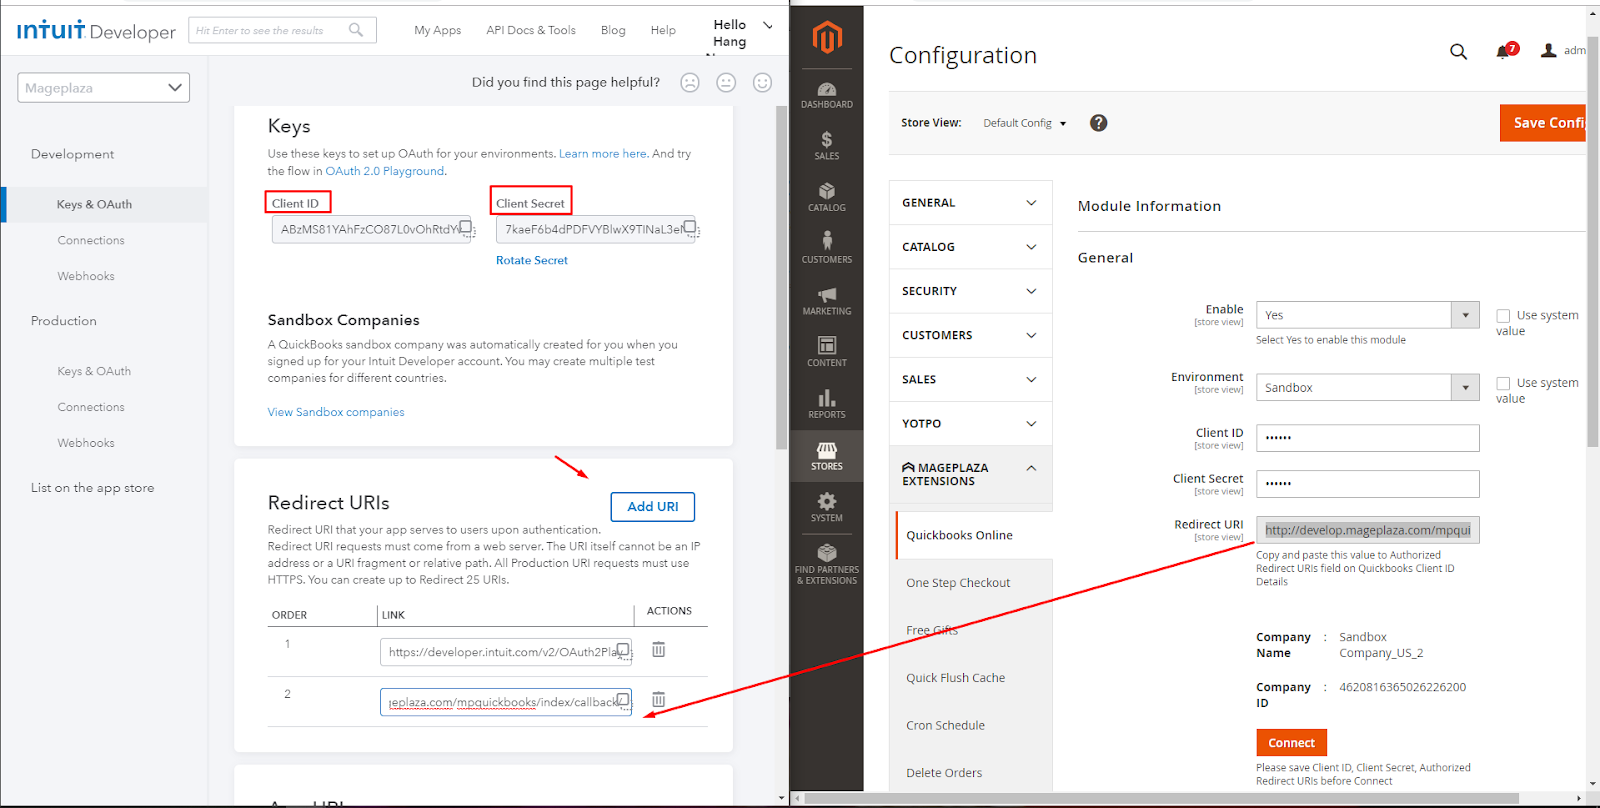
- After registering an account, visit this link to get your API login information. The select My Apps and click to Create an app. There provided with Client Id and Client Secret you need save it to be able to connect with Quickbooks Online later.
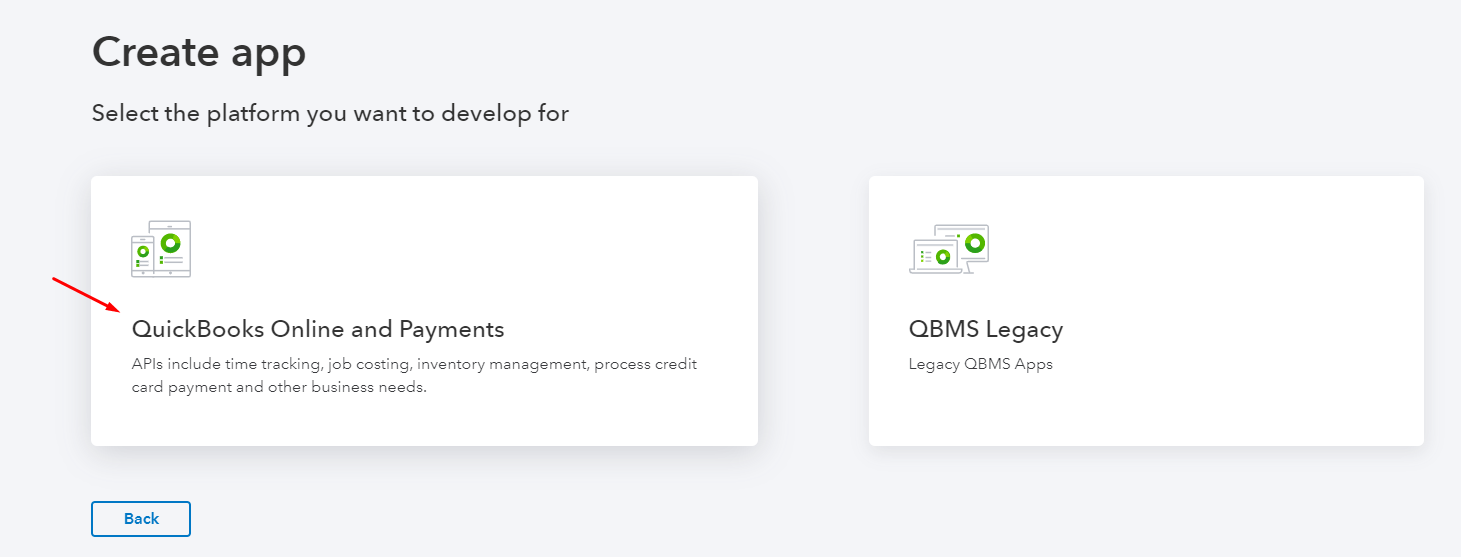
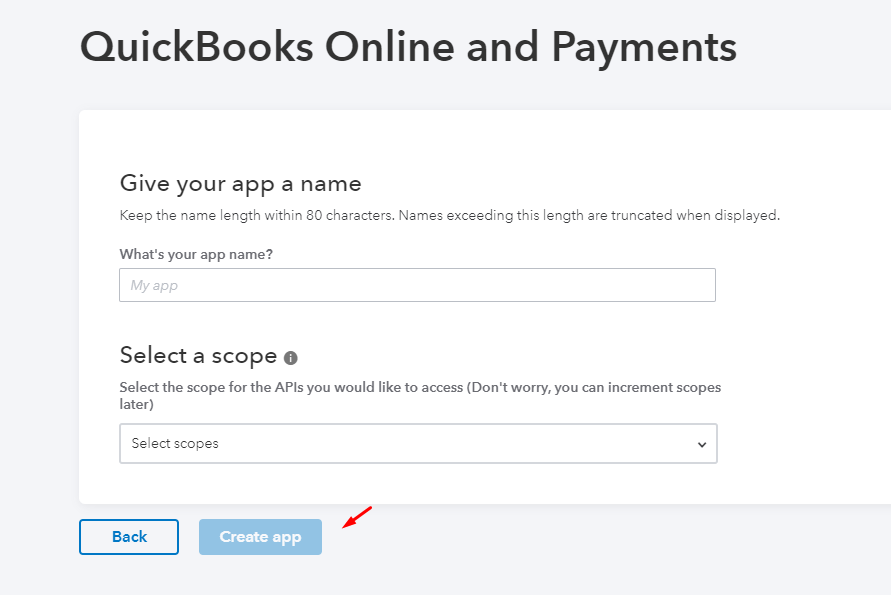
- Select QuickBooks Online and Payment. Then enter the required information and click Create app to start creating the app.
- Accessing the Key & OAuth tab, you can get Client ID and Client Secret information. Click the Add URI button and copy the Redirect URIs value available in Mageplaza's Quickbooks Online to fill out.
How to Configure
1. Configuration
Login to the Magento Admin, choose Stores > Settings > Configuration > Quickbooks Online.
1.1. General Configuration
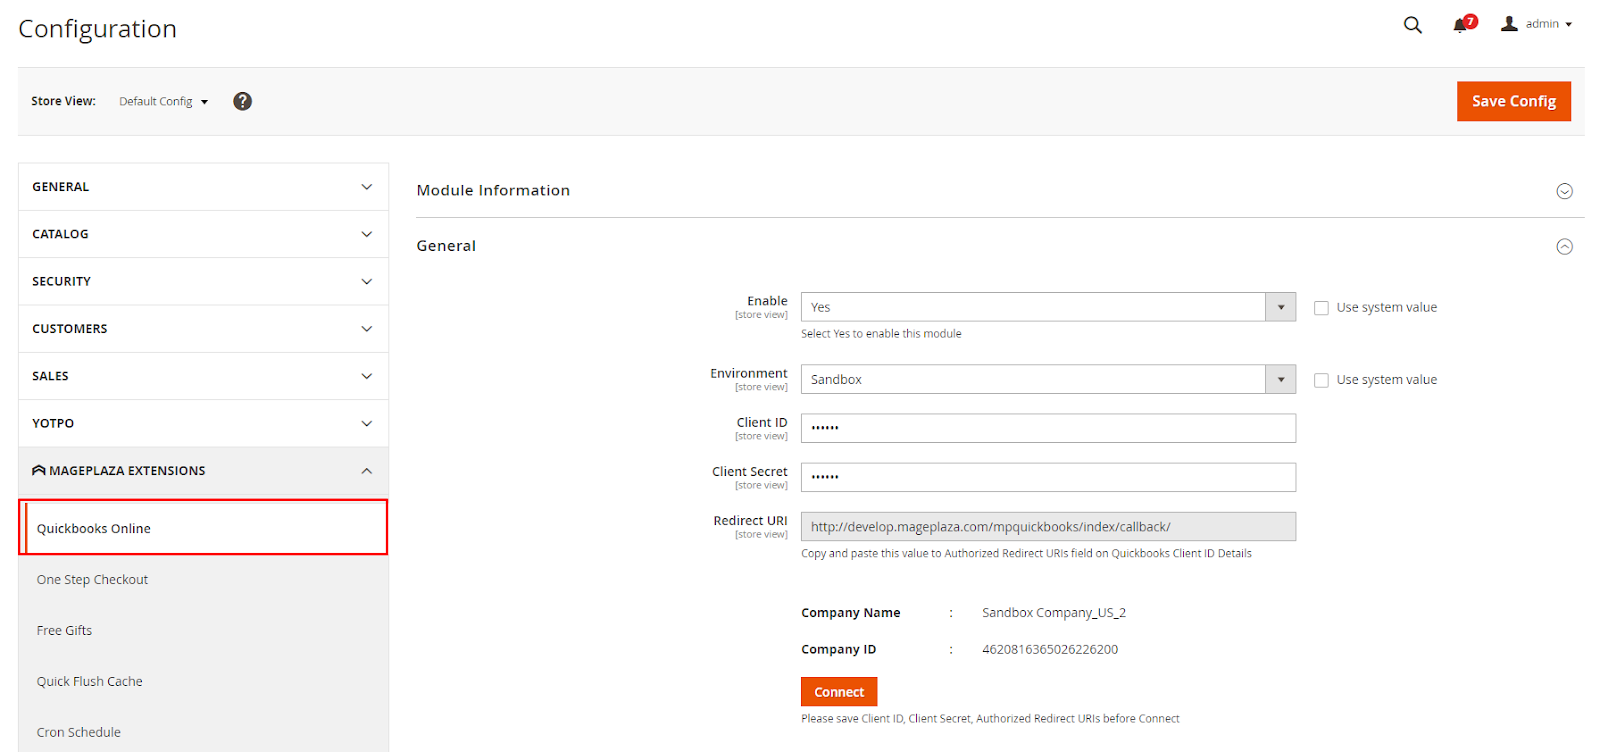
Enable: Select Yes to activate the module and use the function data synchronization from the Magento Objects to Quickbooks Online.
Environment:
- Admin can select Sandbox environment to test module function
- When you want to apply data synchronization inlive site, choose Production.
Client ID:
- Enter the obtained ID in Quickbooks Online into the Client Id field to connect to Magento.
- If left blank or incorrectly entered ID, it will not synchronize data with Quickbooks Online.
Client Secret:
- Enter the Client Secret obtained in Quickbooks Online.
- If left blank or filled incorrectly in the Client Secret, it will not synchronize data with Quickbooks Online.
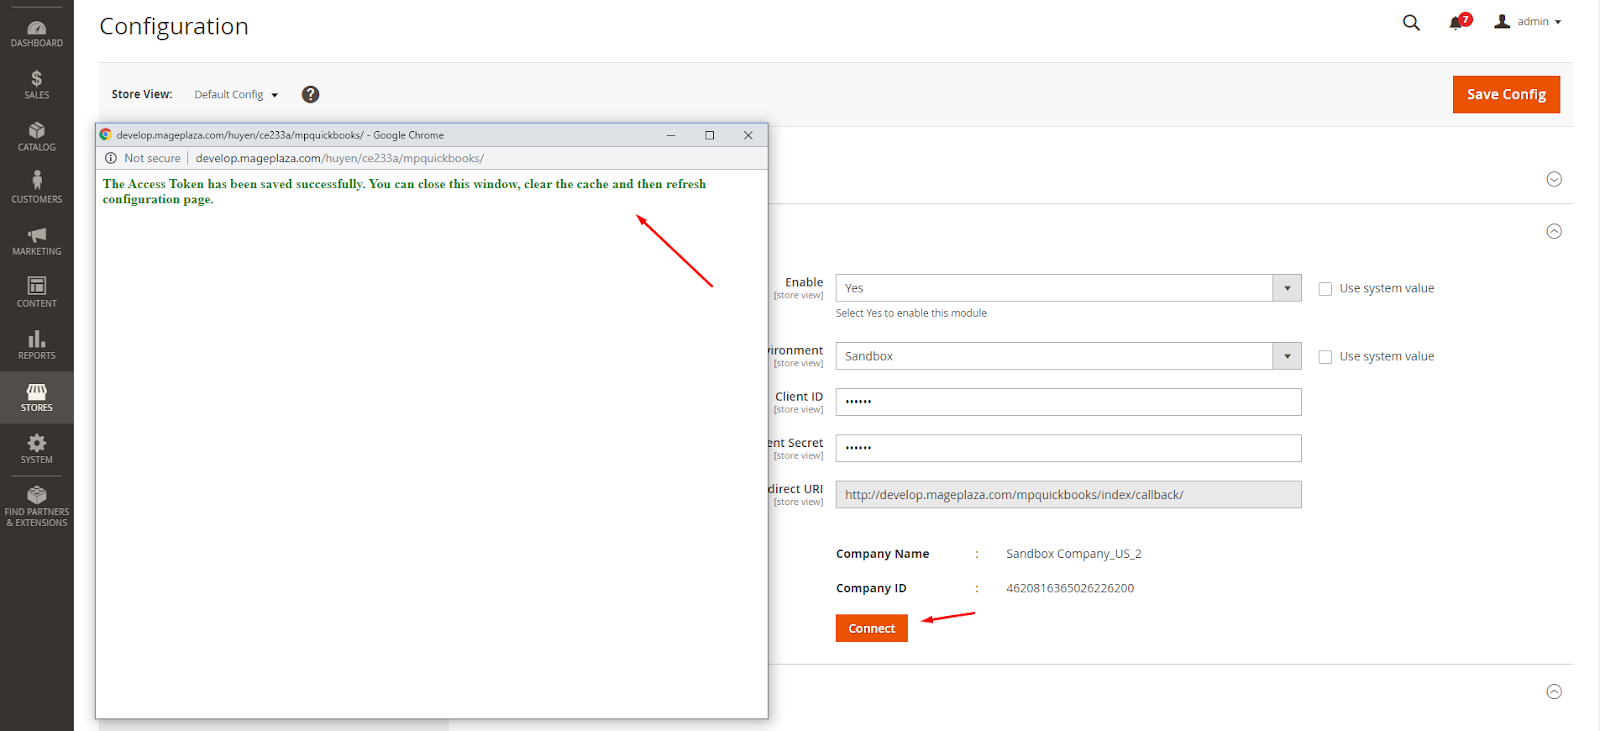
Redirect URIs:
- Copy value in this field and paste to the similar field in Quickbooks Online
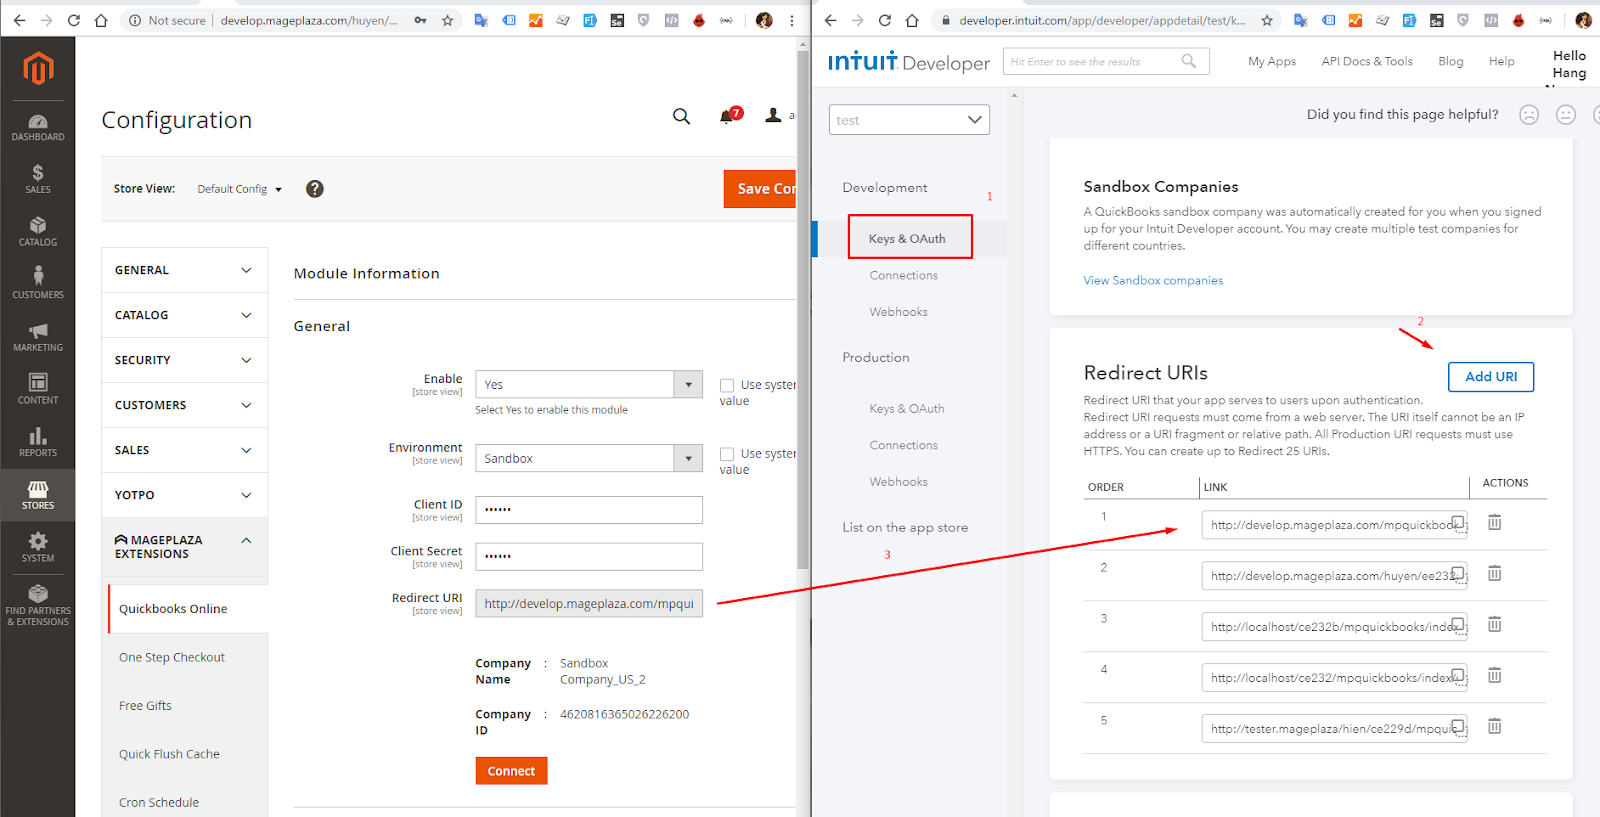
- Admin can get Company Name and Company ID to check the connection with Quickbooks Online by clicking Connect button and choose the Company Name you want to sync. After that, you will see a successful notification. You should close the current tab then return to Quickbooks Online to configure the module
1.2. Queue Log/Sync Schedule
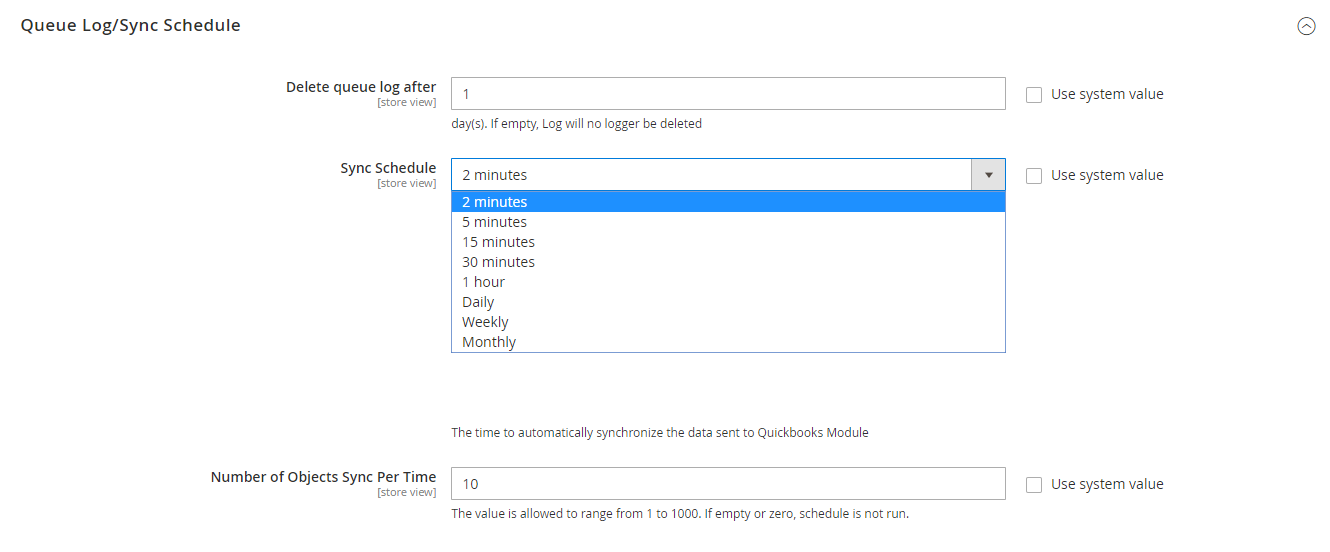
Delete Queue Log After:
- Enter the number of days into Delete Queue Log After. In which, for the queues synchronized having success will be auto-deleted after the time configured here. For example: You enter 6 days in this field, meaning that those queues with success status will be deleted after 6 days.
- If empty, Log will no longer be deleted.
Sync schedule: Select the time to send data to Quickbooks Online automatically. Any Magento objects changes will be sent to Quickbooks Online; otherwise, the unchanged data will not be sent to Quickbooks Online anymore.
Number Of Objects Send Per Time:
- Enter the number of objects limit each time sending data to Quickbooks Online. Any pre-added queues will be prioritized to be sent to the Quickbooks Online first. The value is allowed to range from 1 to 1000.
- If you leave it blank or zero, the schedule is not run.
2. Manage Sync Rules
Login to the Magento Admin, choose Stores > Quickbooks Online > Synchronization Rules.
2.1. Grid
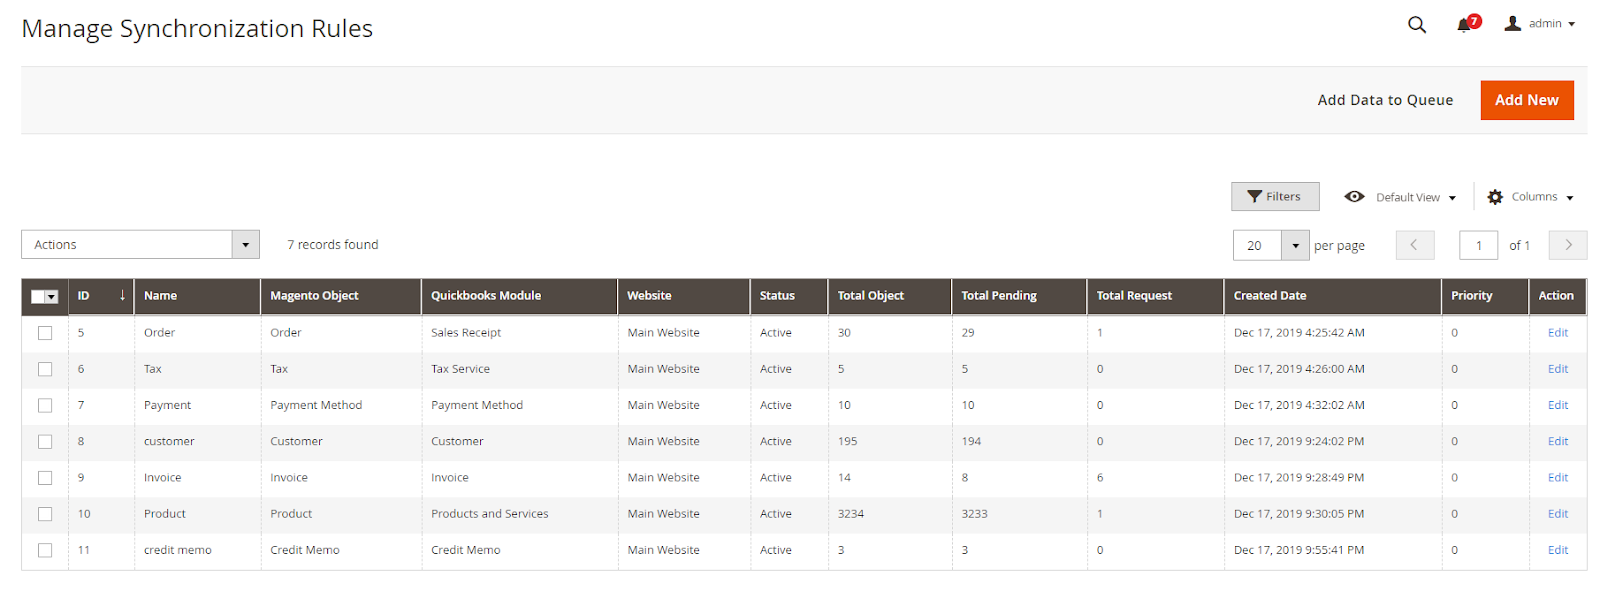
Here, the Sync Rules information includes the Name, Magento Object, Quickbooks Module, Website, Total Objects, Total Request (include error and success statuses), Total Pending, etc.
- Click Add new button to create a new rule. After creating rules, you can choose Edit to edit rules. Also admin can delete rules, change status (Enable/Disable), filter, and so on.
- Select Add Data to Queue if you want to add more data to Queue. Or with Mass Actions, admin can synchronize one or more rules at the same time when clicking Add To Queue.
Note: When installing Mageplaza Quickbooks Online and creating the Synchronization Rules, you should click Add Data to Queue to put the previous data into Queue and synchronize data to Quickbooks Online.
Mageplaza's Quickbooks Online extension is fully compatible with the Report extension, which provide reports on queue synchronized quickly and conveniently at three columns: Total Object, Total Pending, Total Request.
2.2. Create Sync Rule
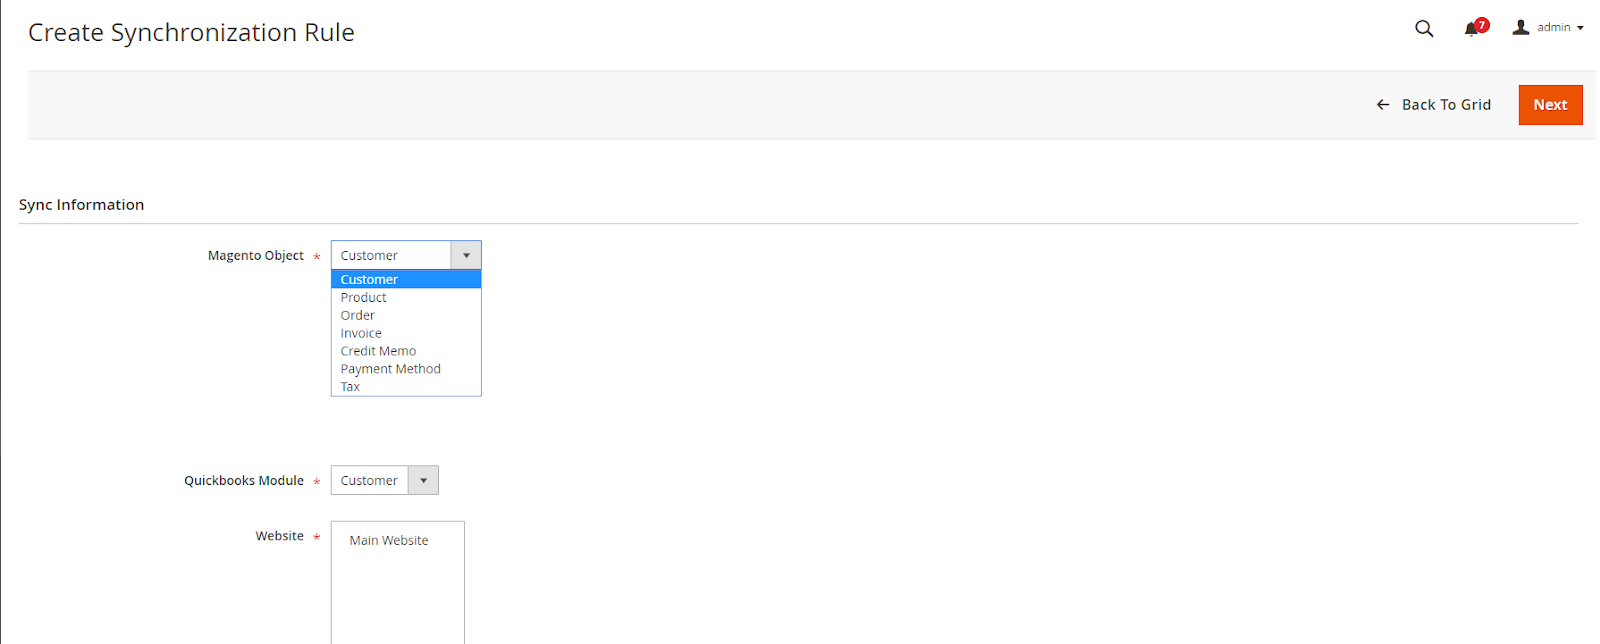
- Magento Object: Select Magento Object to allow sending that Magento object data to Quickbooks Online.
- Quickbooks Module: Here will display the Quickbooks Module corresponding to the selected Magento Object. For example: Magento Object is Customer, so the information corresponds from Zoho Module selectable are Customer.
- Website: Select Website from which to get Magento Object data sending to Quickbooks Online.
After selecting the object, click Next to start filling at Form create/ edit Sync Rule
2.2.1. General
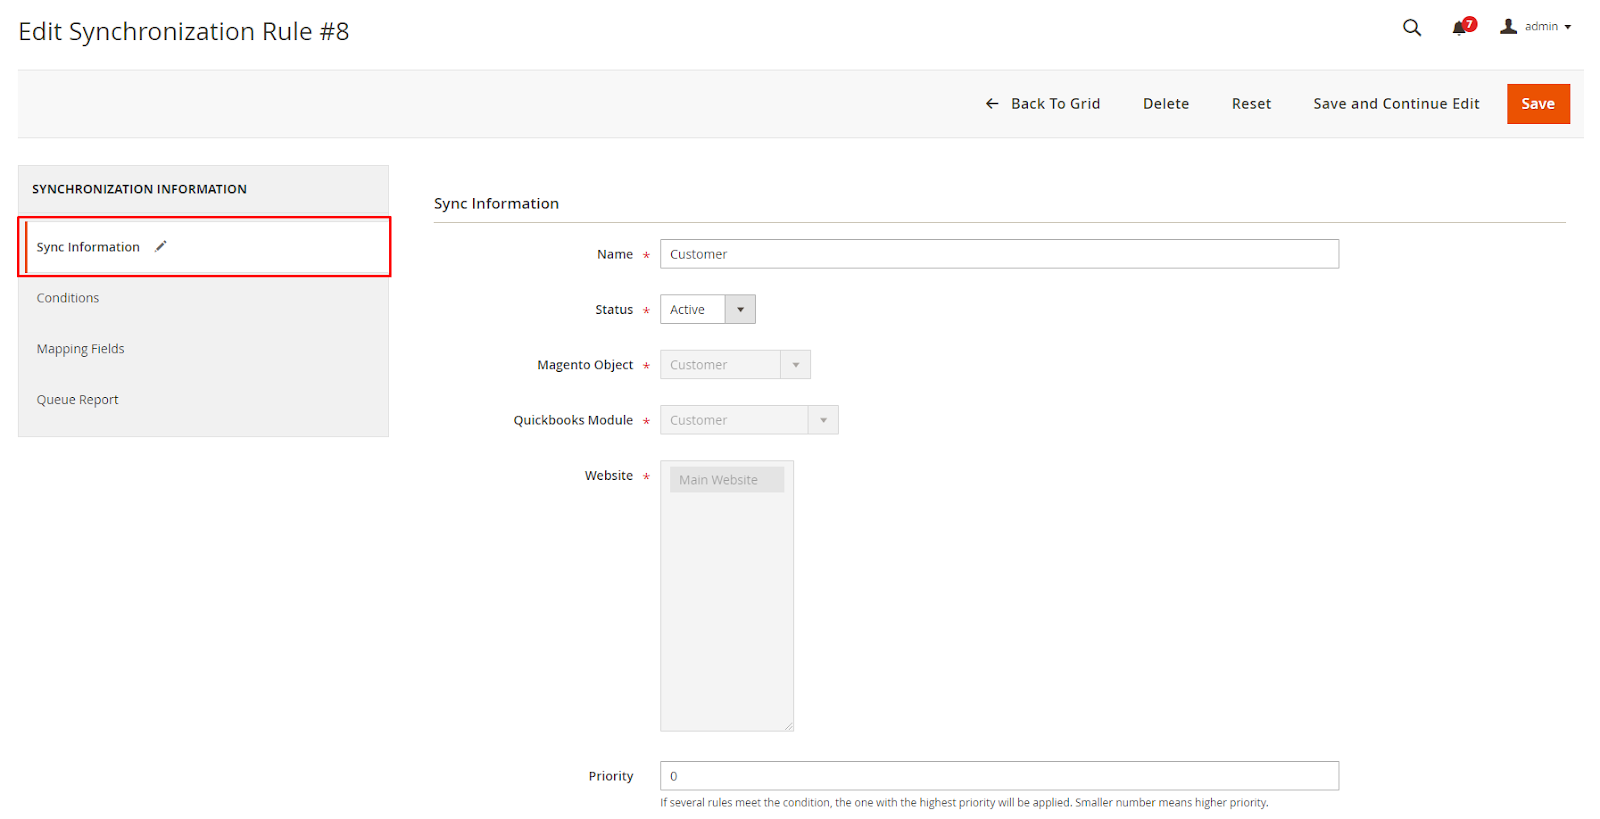
- Name:
- Enter the name of Sync rules
- This is a required field
- Status: Select Active to anable the rules work and synchronize data to Quickbooks Online.
- Data of Magento Object, Quickbooks Module, Website are taken according to the object data above before creating sync rules and can only be changed when admin changes object information before creating.
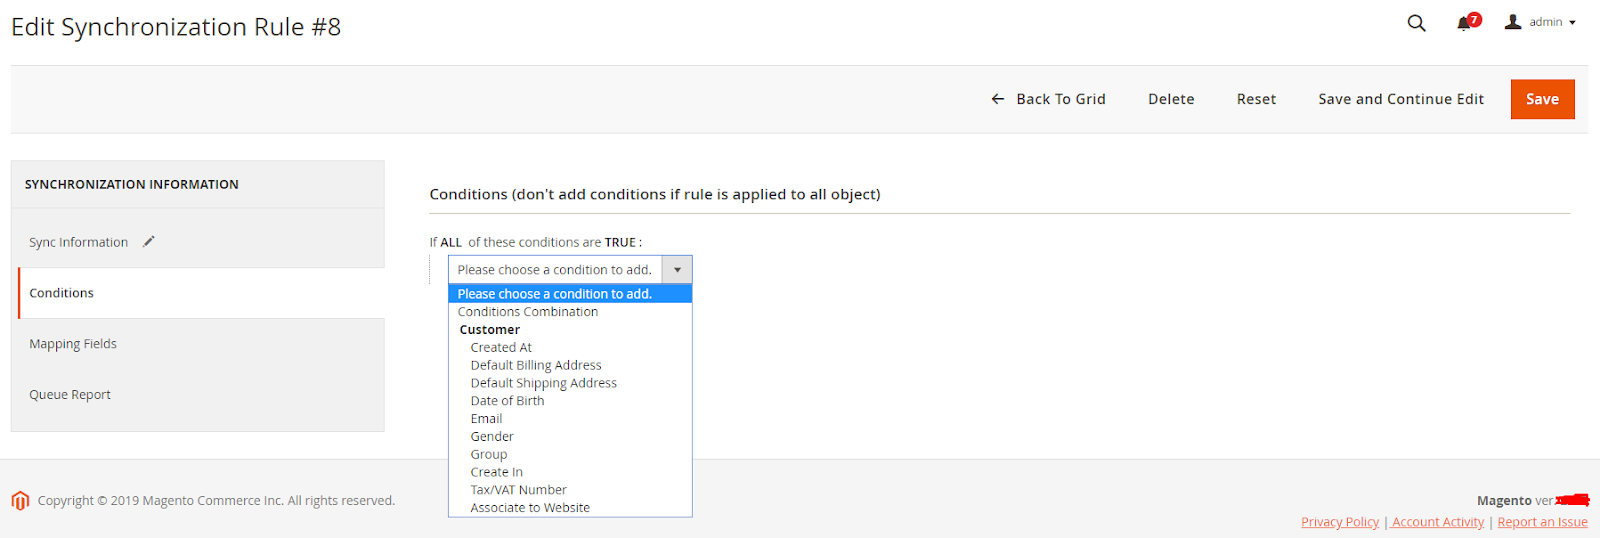
2.2.2. Conditions
Select the conditions to filter the data that the admin wants to sync to Quickbooks Online. Those data that meet the conditions of each rule will be put into Manage Queue to synchronize data and vice versa.
Note: Each rule will have different options and conditions. There is no Conditions tab when creating rules with Payment Method.
2.2.3. Mapping Fields
Here select the corresponding Magento Fields to send data to Quickbooks Online. There is no Mappign fields tab when creating rules with Payment Method.
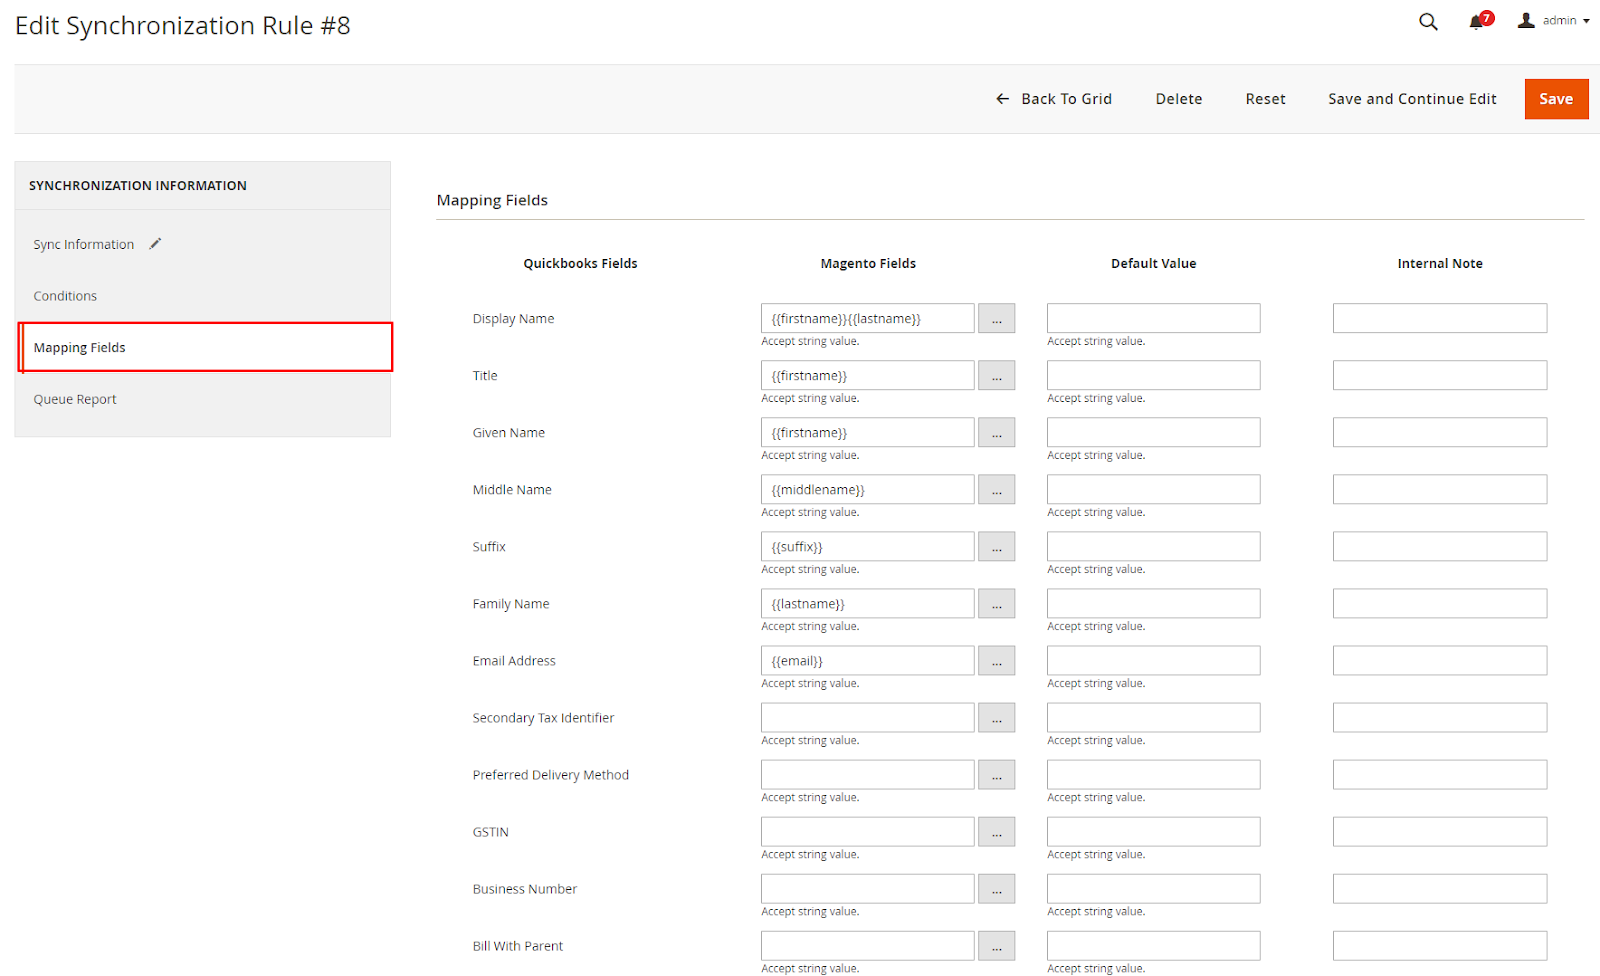
Quickbooks Fields: Displays the fields managed by Quickbooks corresponding to the selected Magento Objects. Quickbooks Fields change depending on the change on selected Magento Object such as Customer, Product, etc.
Magento Fields:
- Enter the fields of the corresponding Magento object to upload data with the fields of Quickbooks Module.
- Leaving this column blank will get the Default Value column to apply to Quickbooks Module.
Internal Note: Enter an internal note for any note of this rule. This is for admin use only, not for data synchronization.
Insert Variables: Select the fields of the Magento object corresponding to the fields of Quickbooks Online.
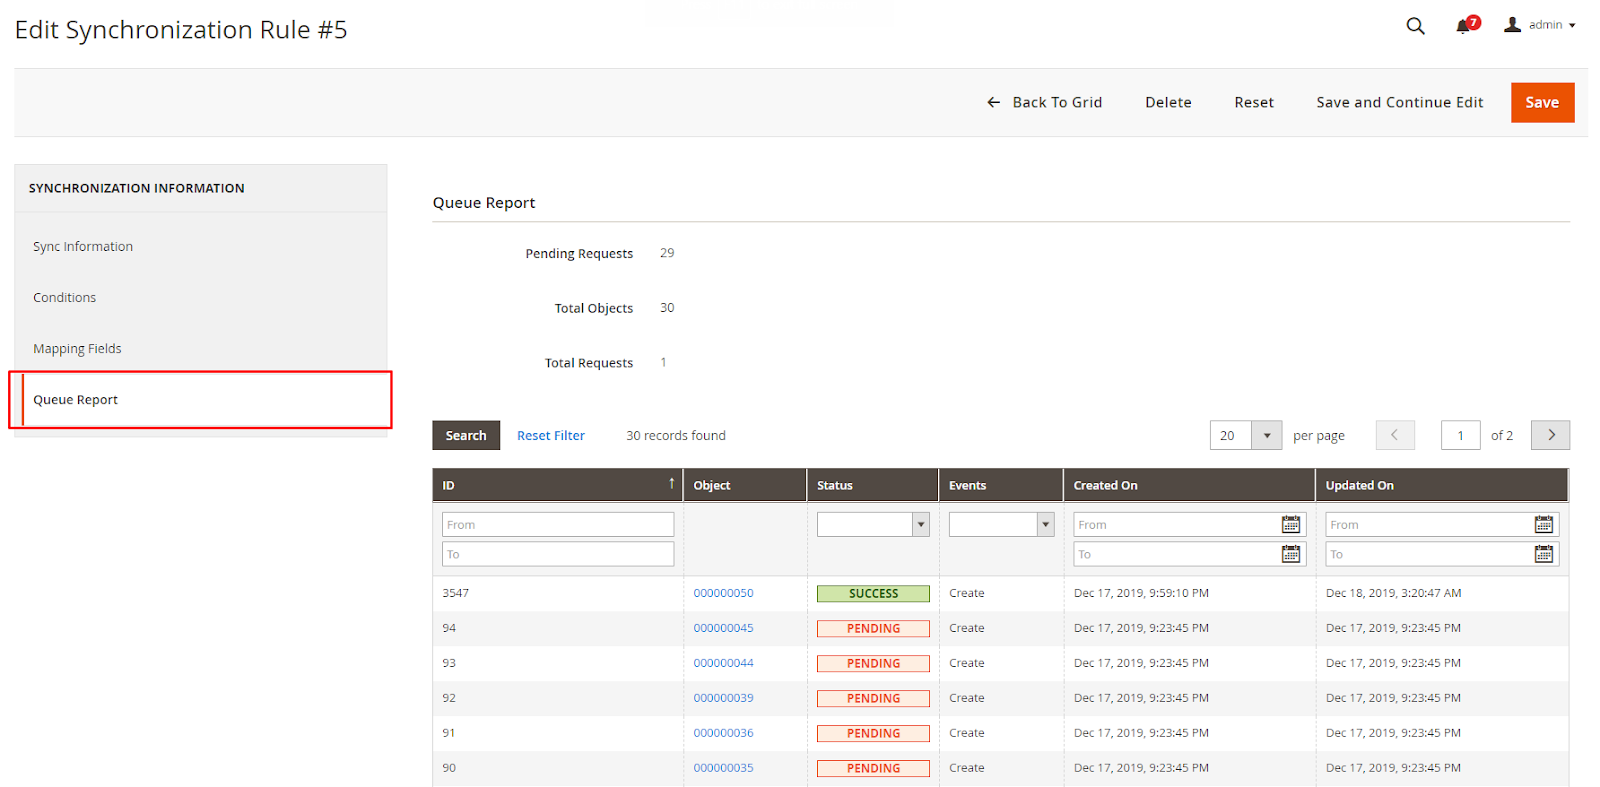
2.2.4. Queue Report
Here records Queue data by rules which include information of Object, Created On, Status, Updated On. etc. Also, there are reports of Pending Request, Total Object, Total Request (Queue number created).
Note: With Created On is the time that data are imported to Queue. Updated On is the time when the queue is synchronized to Quickbooks Online.
2.2.5 Payment Method List
The Payment Method List tab only appears when creating rules with the Payment Method and shows the tab after clicking Save/Save and Continue Edit.
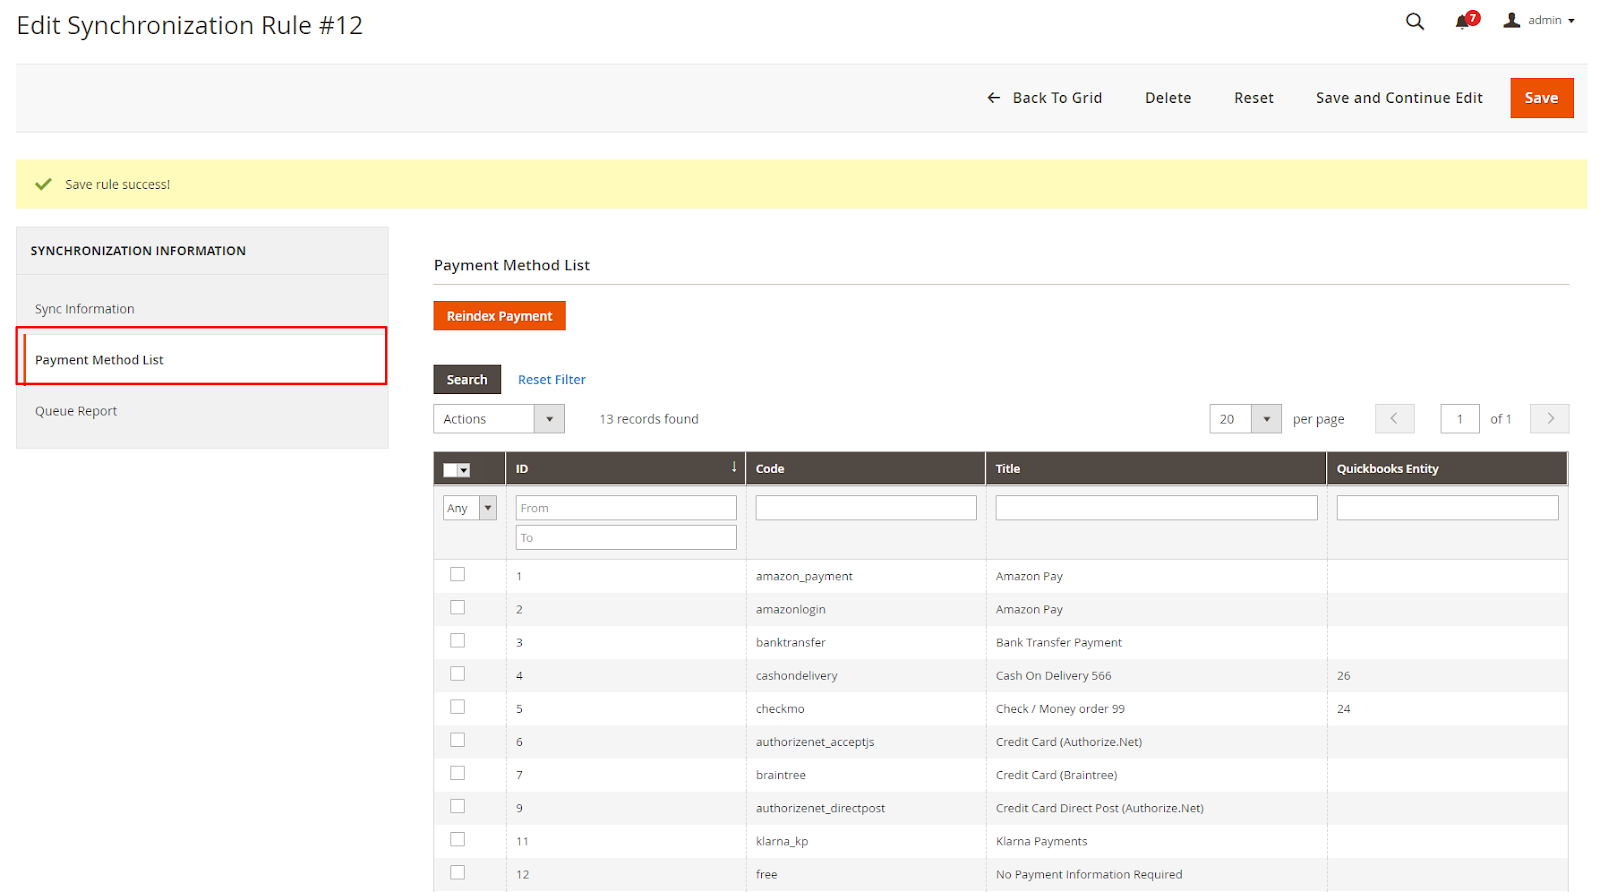
- Reindex Payment button: Click Reindex Payment button to update payment method when there is a change in title or when that payment method is not used on your website.
- Here record the Payment Method information including the fields: Code, Title, Quickbooks Entity,... It is possible to synchronize each or multiple payment methods when you select the payment and click Add to queue in the Action section.
3. Manage Queue
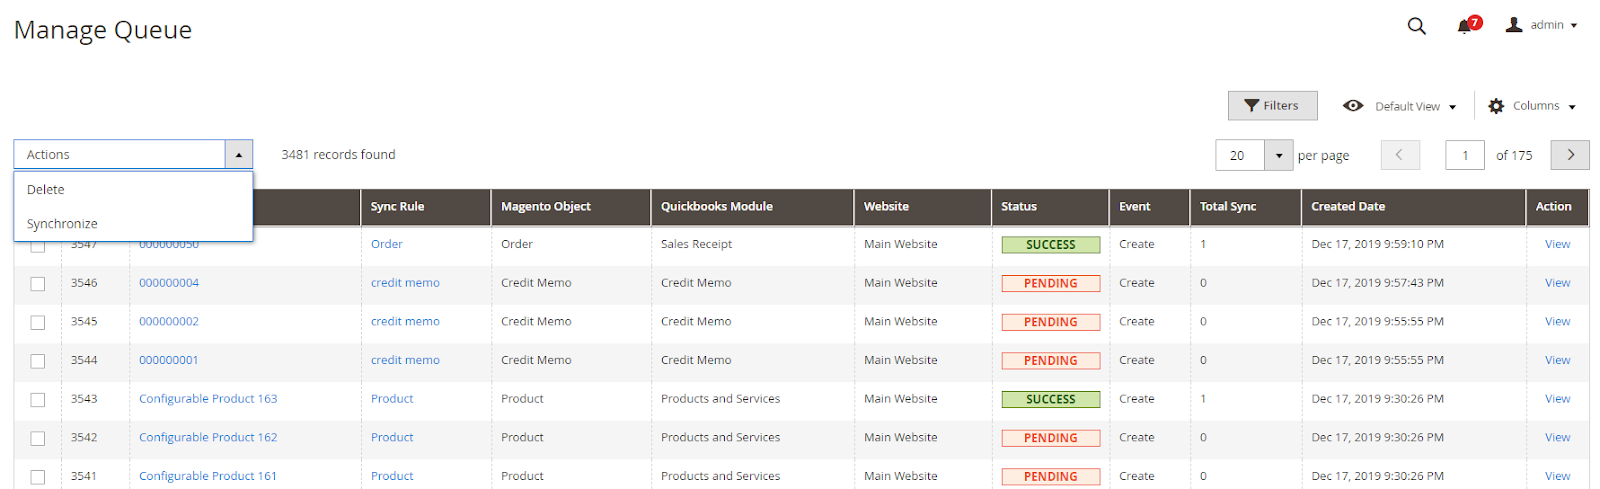
- This section records the information of Queue including Object, Sync Rule, Magento Object, Quickbooks Module, and so on.
- Here admin can synchronize all data or select specific data to add to queue and synchronize to Quickbooks Online. All data changes such as create, update, delete are included in Queue.
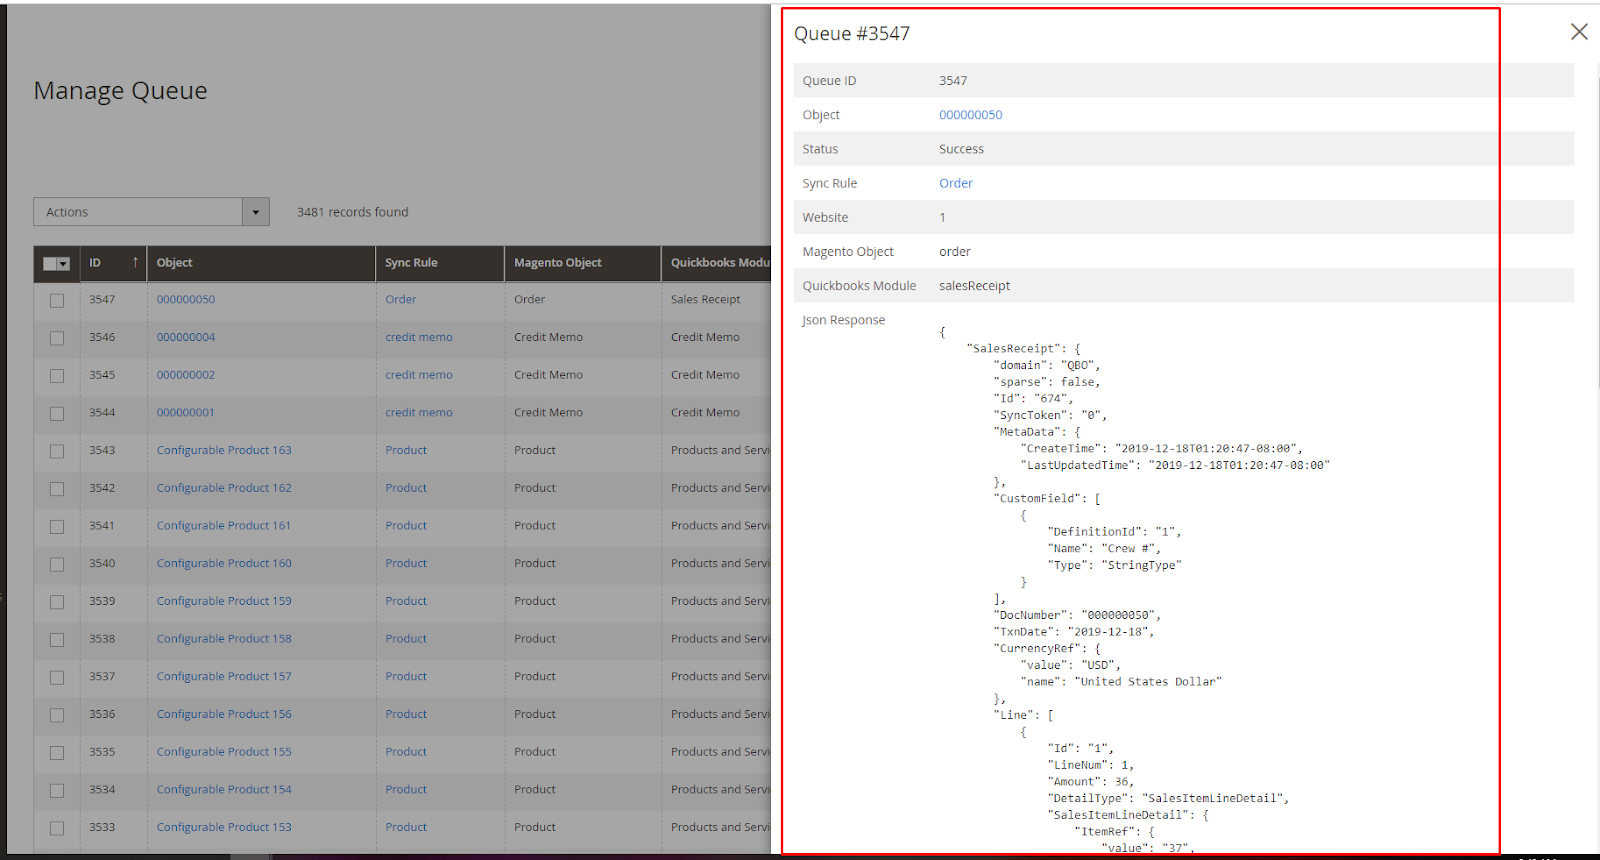
- When you click on View, it will display Popup View Queue to see all information of each Queue. Select Delete to delete Queue and Resend to resend Queue.
4. Customer, Product, Order, Invoice, Catalog Rules
4.1. Grid
Here admin can synchronize multiple data or individual data by event: product, order, invoice, credit memo, customer (not include Tax and Payment method). These data will be sent to Manage Queue to be synchronized. This feature will help admin synchronize selected data by each product, customer, etc., more quickly and conveniently.
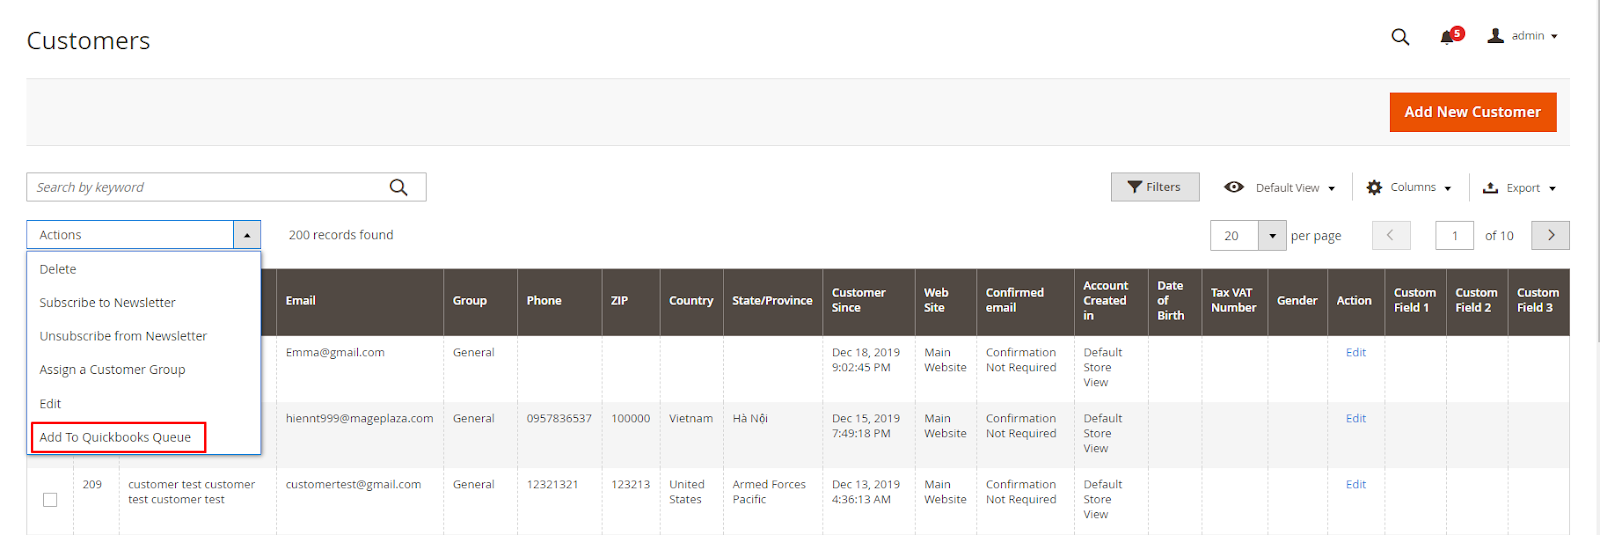
4.2. Edit
With the available data before, admin can Add To Quickbooks Queue with Customer, Product, Order, Invoice, Credit Memo to send data into Manage Queue and synchronize them.
- System will show a Quickbooks Online tab when editing into customer account data, product, order, so on; which helps report and display a list of queues with each of that data information, including Status, Quickbooks Module, Event, Created On, Updated On, etc.
- Admin can filter, search those data from the available columns.

5. Sync quickBooks data with Magento data
If you already have Magento data (products, customers, orders, etc.) in QuickBooks, please sync the data from QuickBooks to Magento 2 first before sending data from Magento 2 to QuickBooks (this action will not affect Magento data, but only save QuickBooks information into Magento).
Admin can go to Stores > Configuration > Mageplaza Extensions > QuickBooks Online > Sync data from Quickbook Online to Magento and sync some entities that you already have existing data for on QuickBooks.
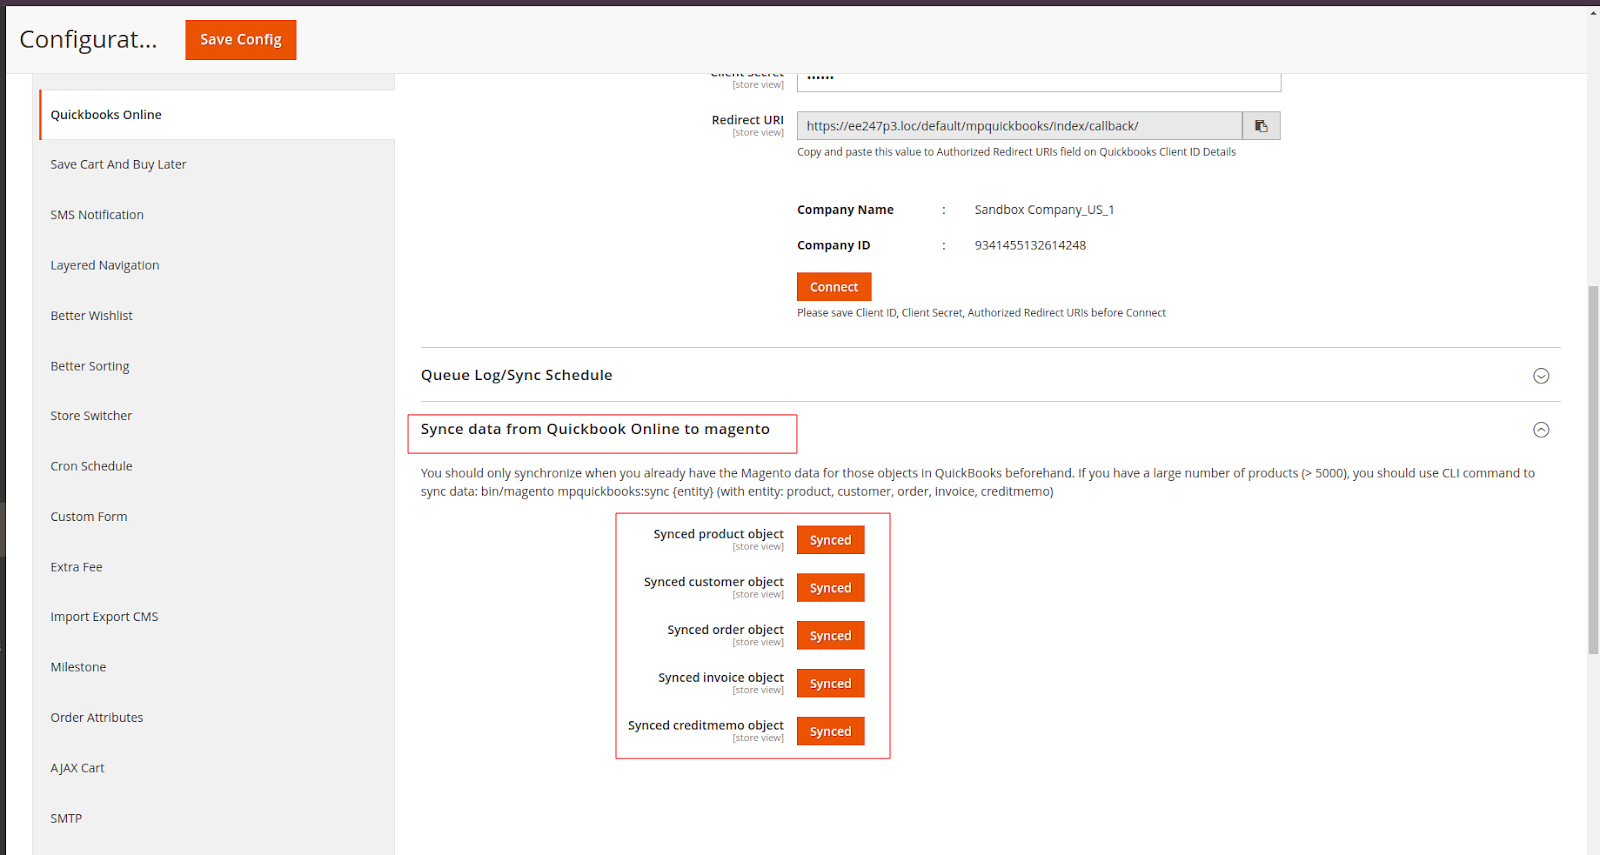
Admin can also use the CLI command to sync data:
bin/magento mpquickbooks:sync {entity}
With entity: product, customer, order, invoice, creditmemo

Note: If you have a large number of products, orders, or customers… (greater than 5000), you should use the CLI command to synchronize them to avoid timeouts when syncing using the button in Stores > Configuration.