Social Share
Overview
Today, social media is growing strongly and having tremendous influence on human life. Thanks to thousands of people accessing social networking sites every day, most online businesses take advantage of this opportunity to promote their brands and products closer to customers as well as increase the amount of interaction on their websites. With the new Social Share extension of Mageplaza, it will help you to do the above tasks and especially help you save time and advertising costs.
Download & Install
- Mageplaza Social Share
- How to Install
How to use
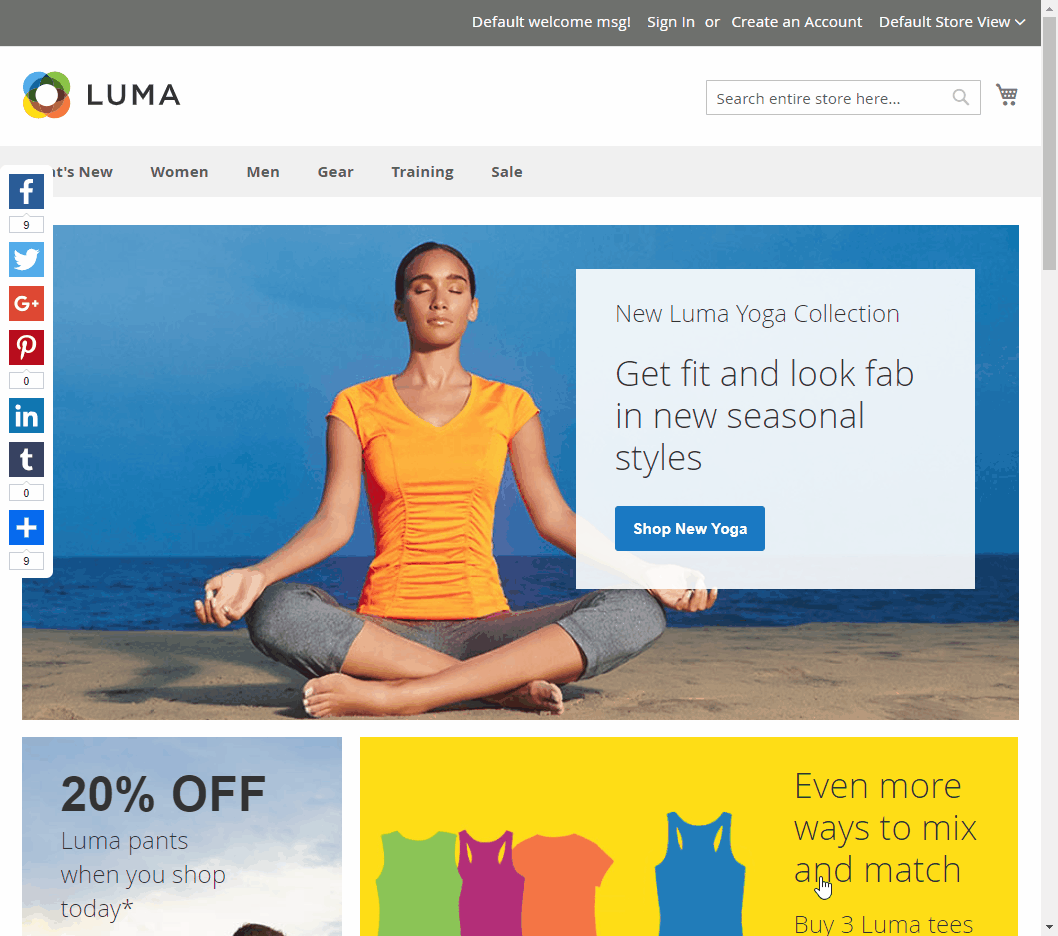
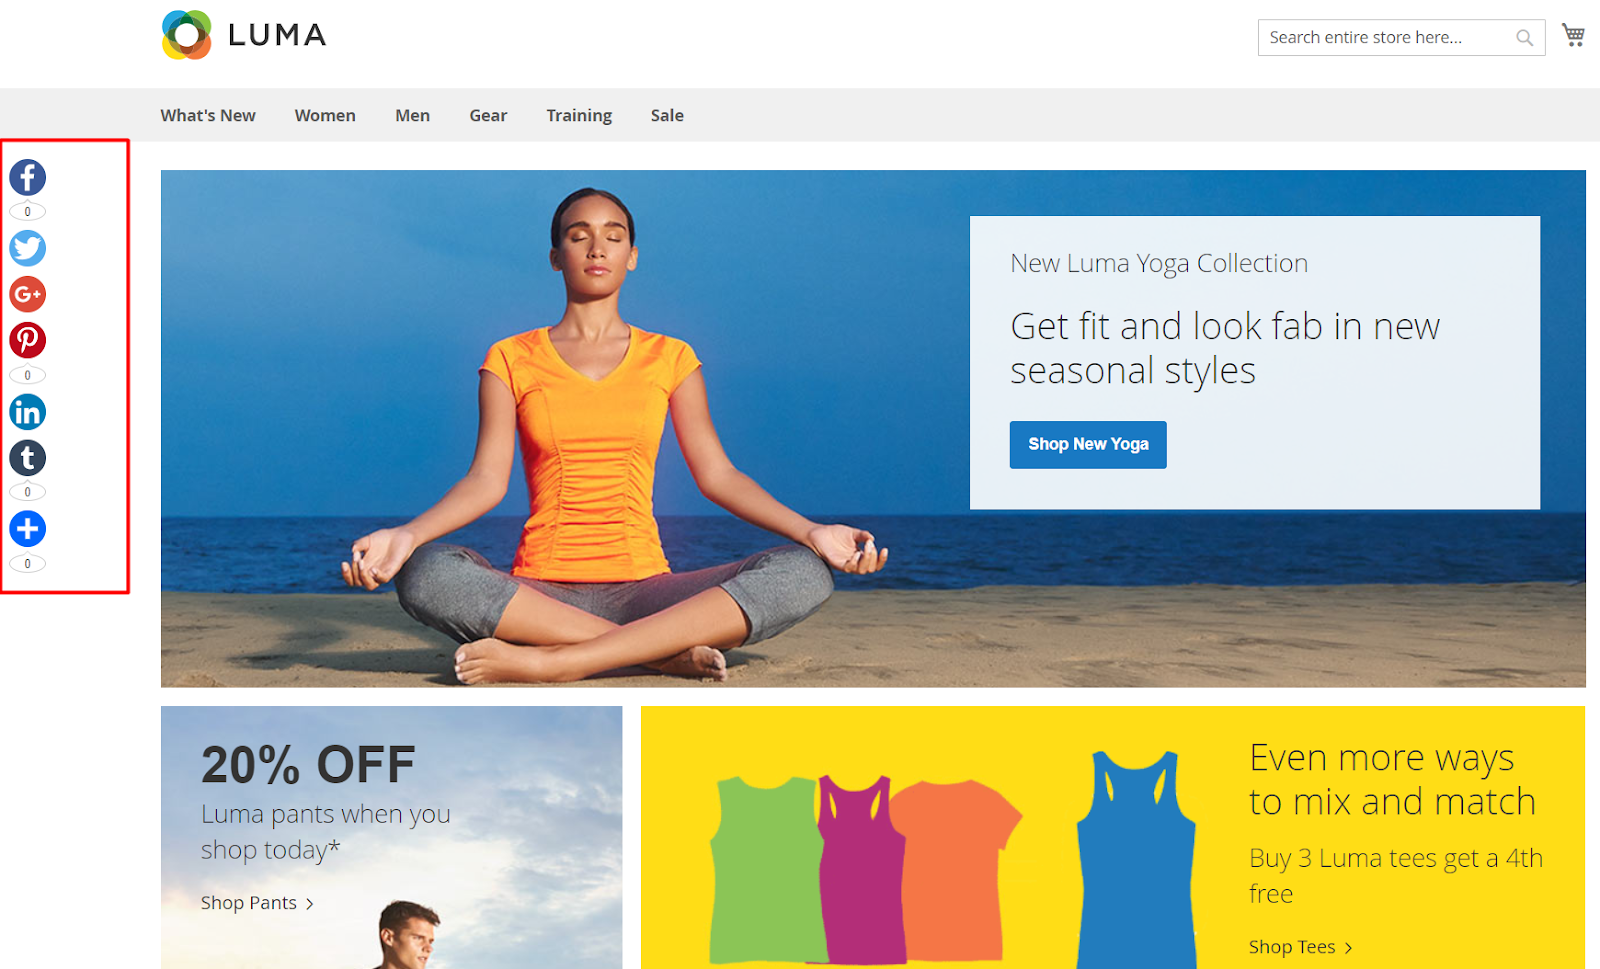
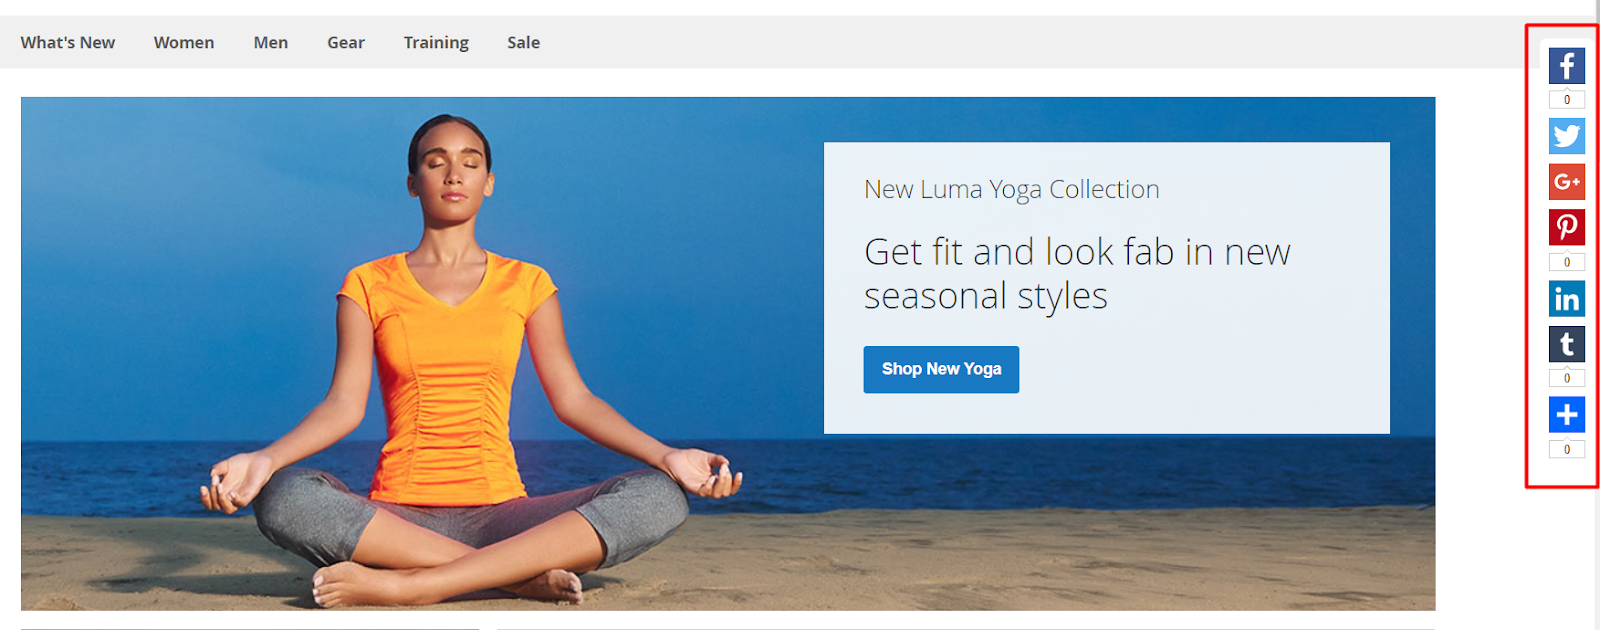
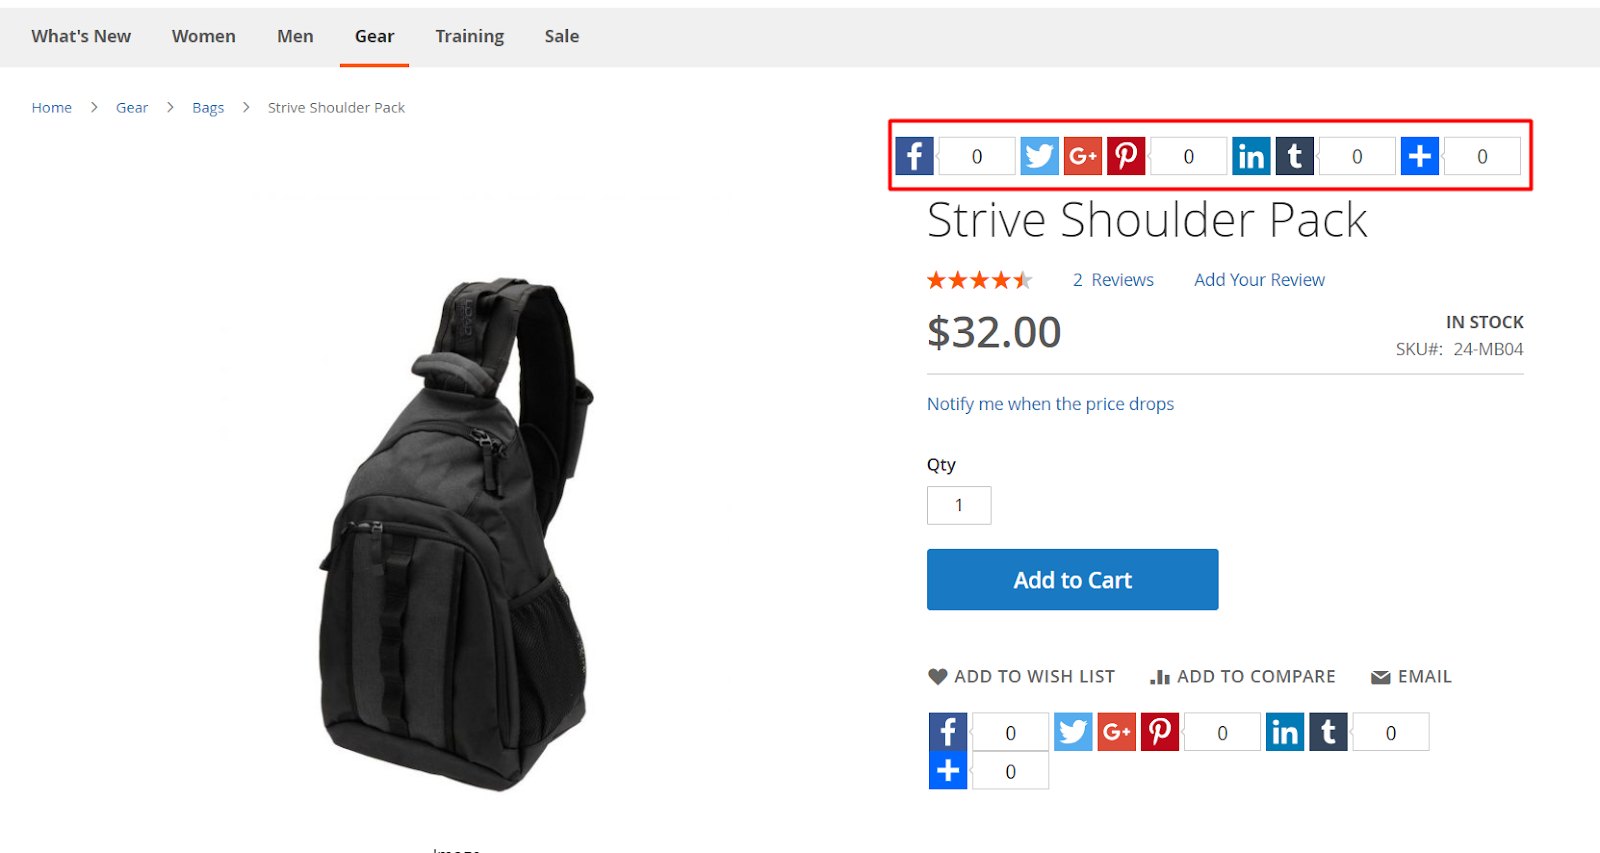
Frontend - Floating:
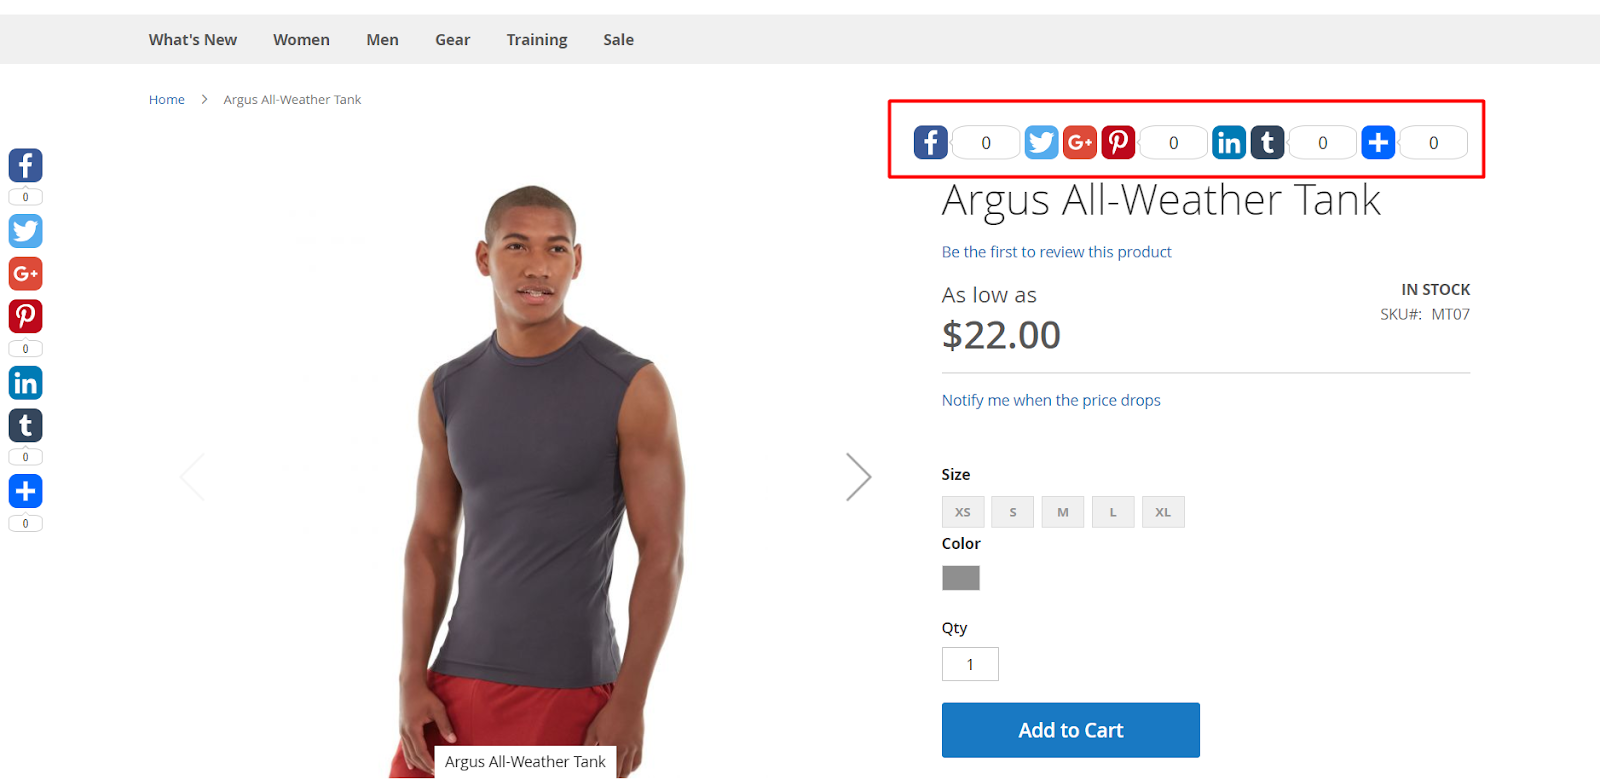
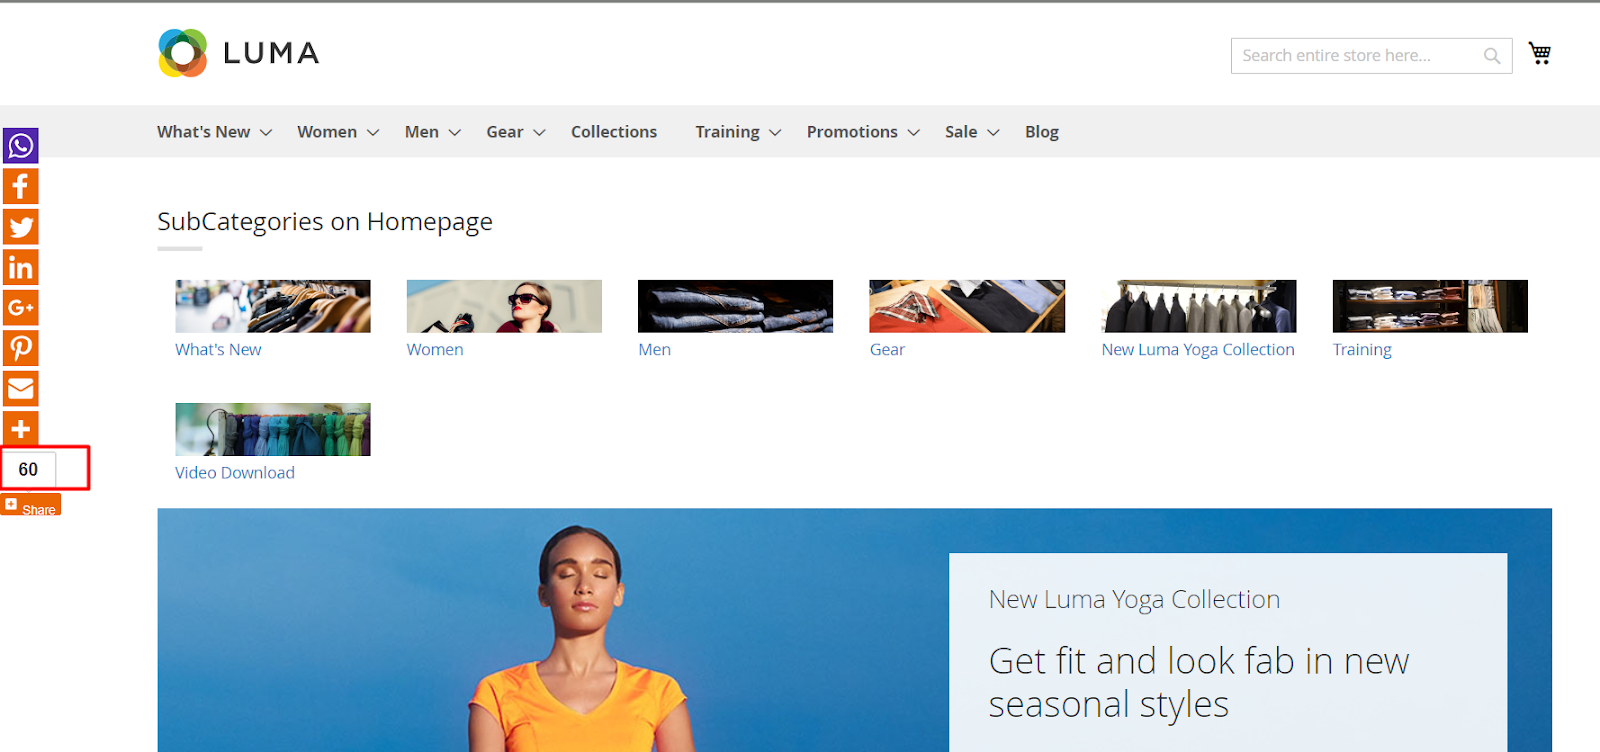
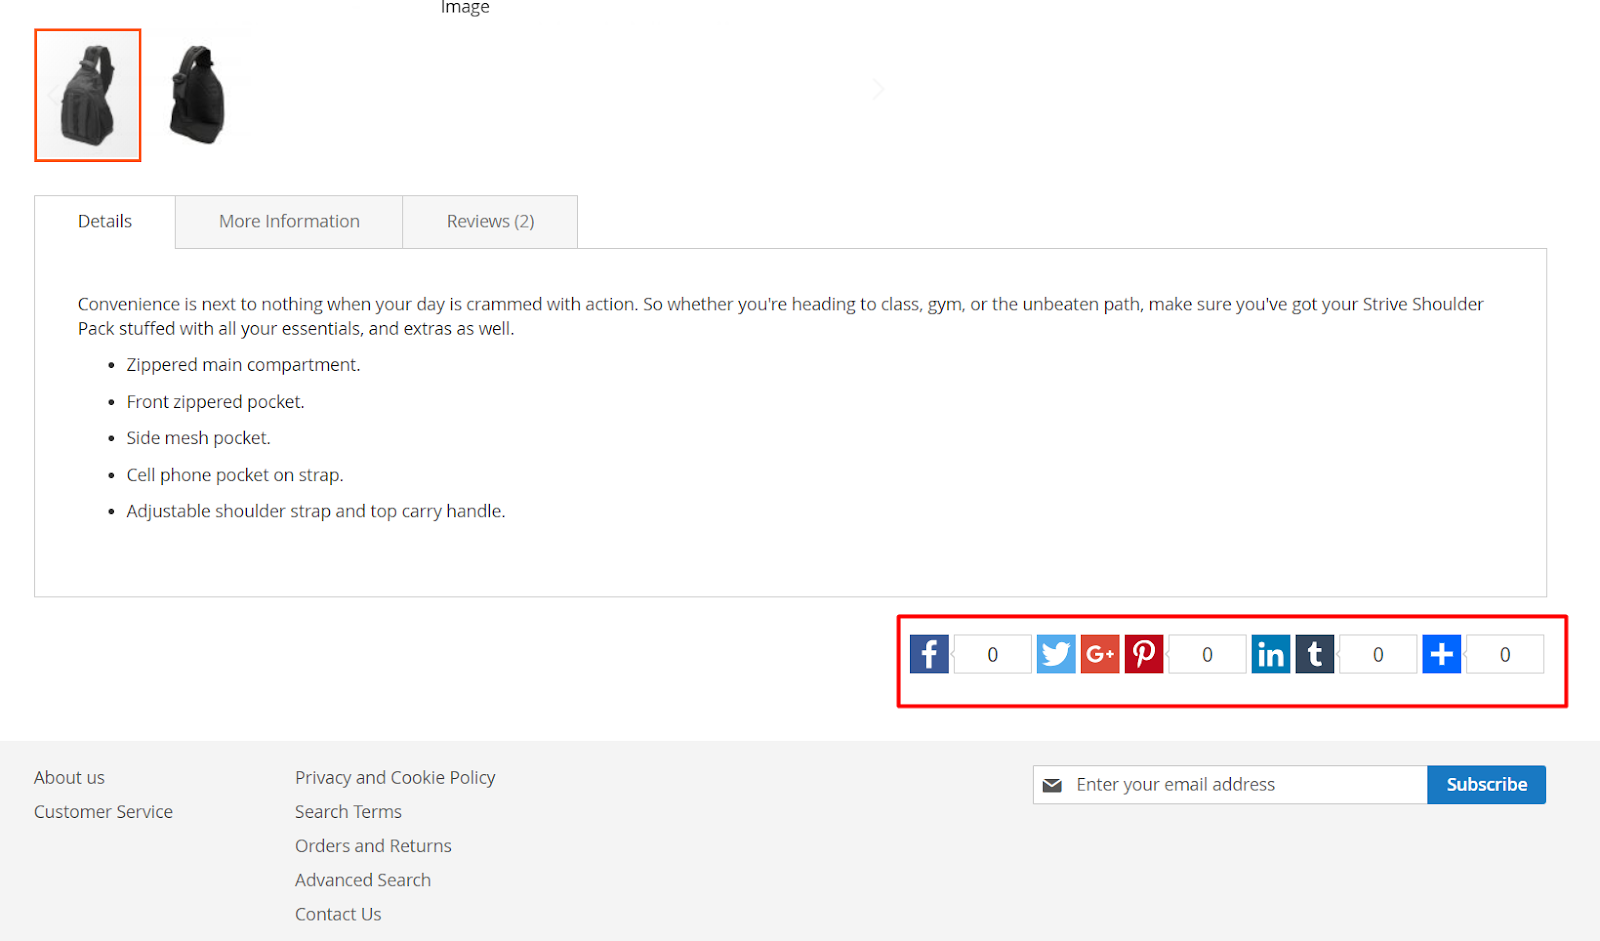
Frontend - Inline
How to configure
1. Configuration
Login to the Magento Admin, choose Store > Configuration > Mageplaza > Social Share.
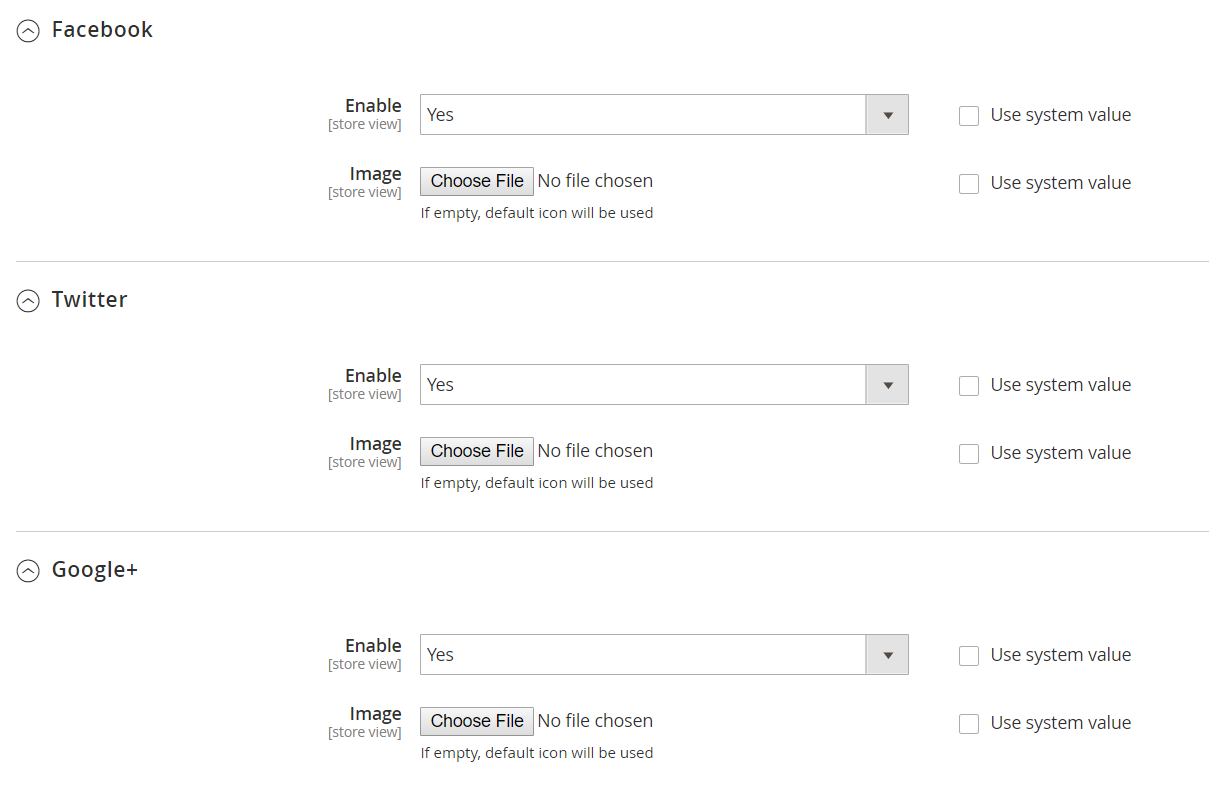
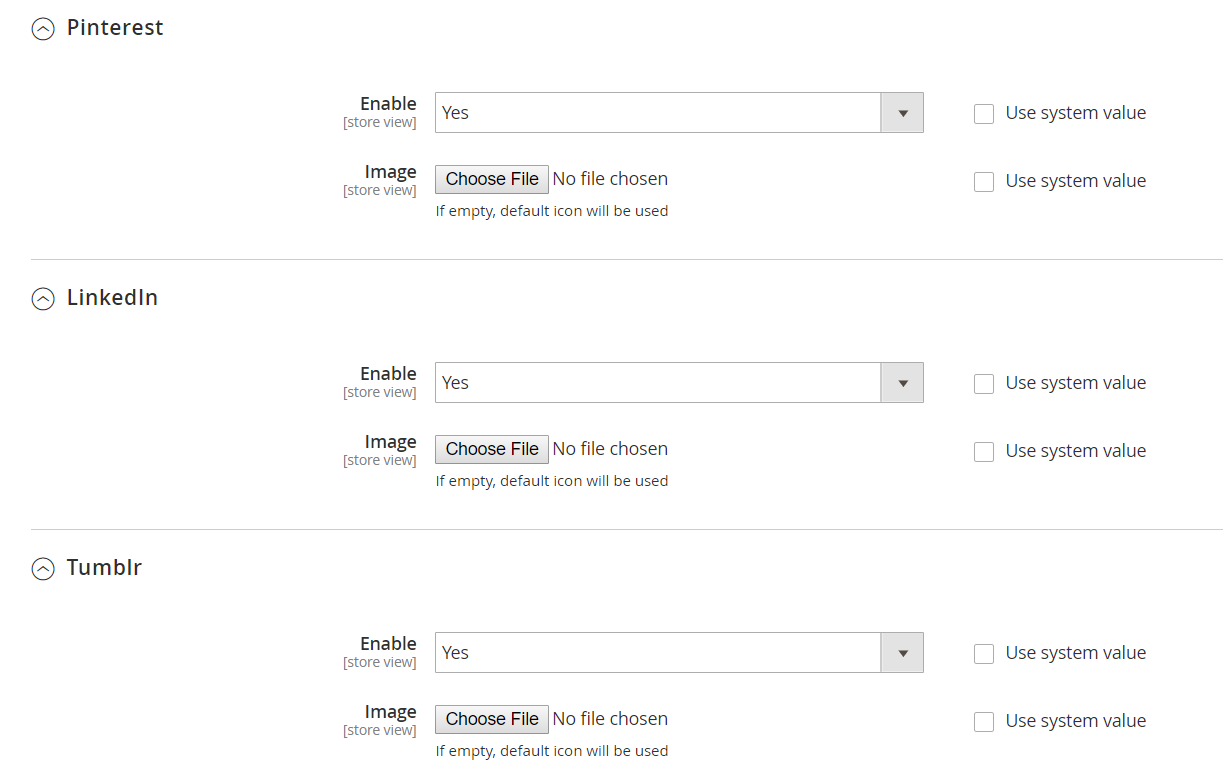
1.1. General
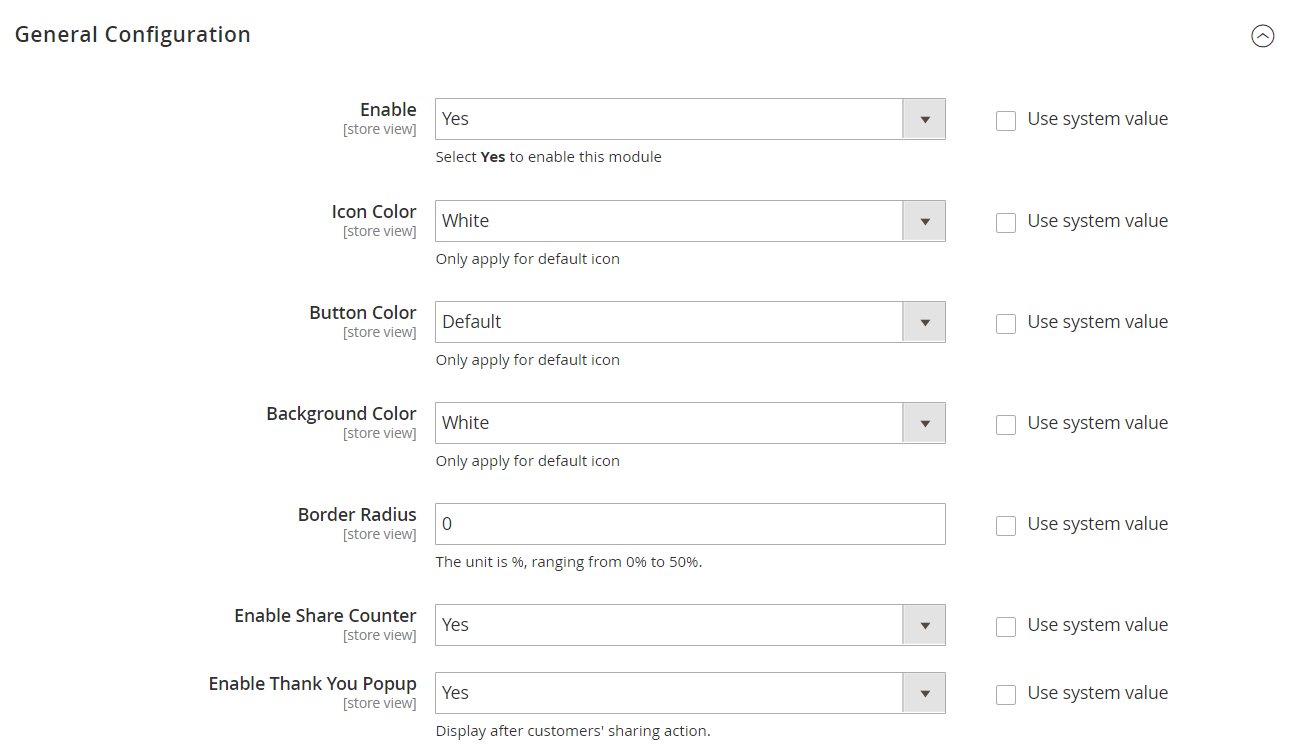
Enable: Choose
Yesto activate the moduleIcon Color:
- Select icon color. This field only applies for default icons.
- Choose
Customoption, an extra field appears for selecting among multi colors
Button Color:
- Select button color. This field only applies for default icons.
- Choose
Customoption, an extra field appears for selecting among multi colors
Background Color:
- Select background color. This field only applys for default icons.
- Choose
Customoption, an extra field appears for selecting among multi colors
Border Radius: Insert the % value for
Border Radiusfield, with the value range from 0 - 50% ( 0 is square, 50 is round by default). For example when you insert the value of 50%:
- Enable Share Counter: Select
yesto count the Share number in the URL links
- Enable Thank You Popup: Select
yesto show Thank you popup after sharing

- Enable: Select
Yesto enable social share on specific social networks - Image: click
Choose Filebutton to upload the file image of those social networks
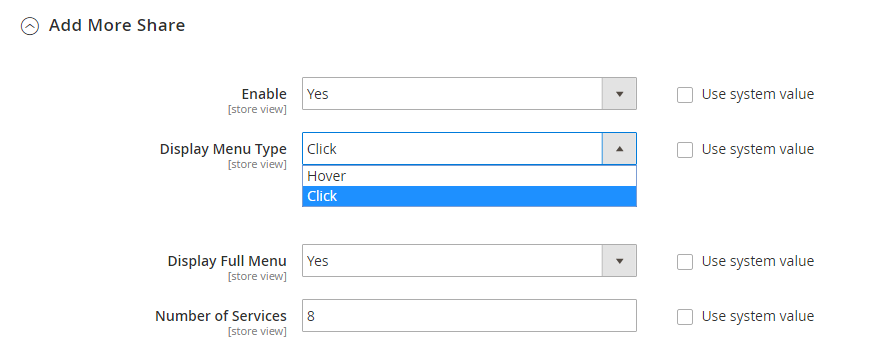
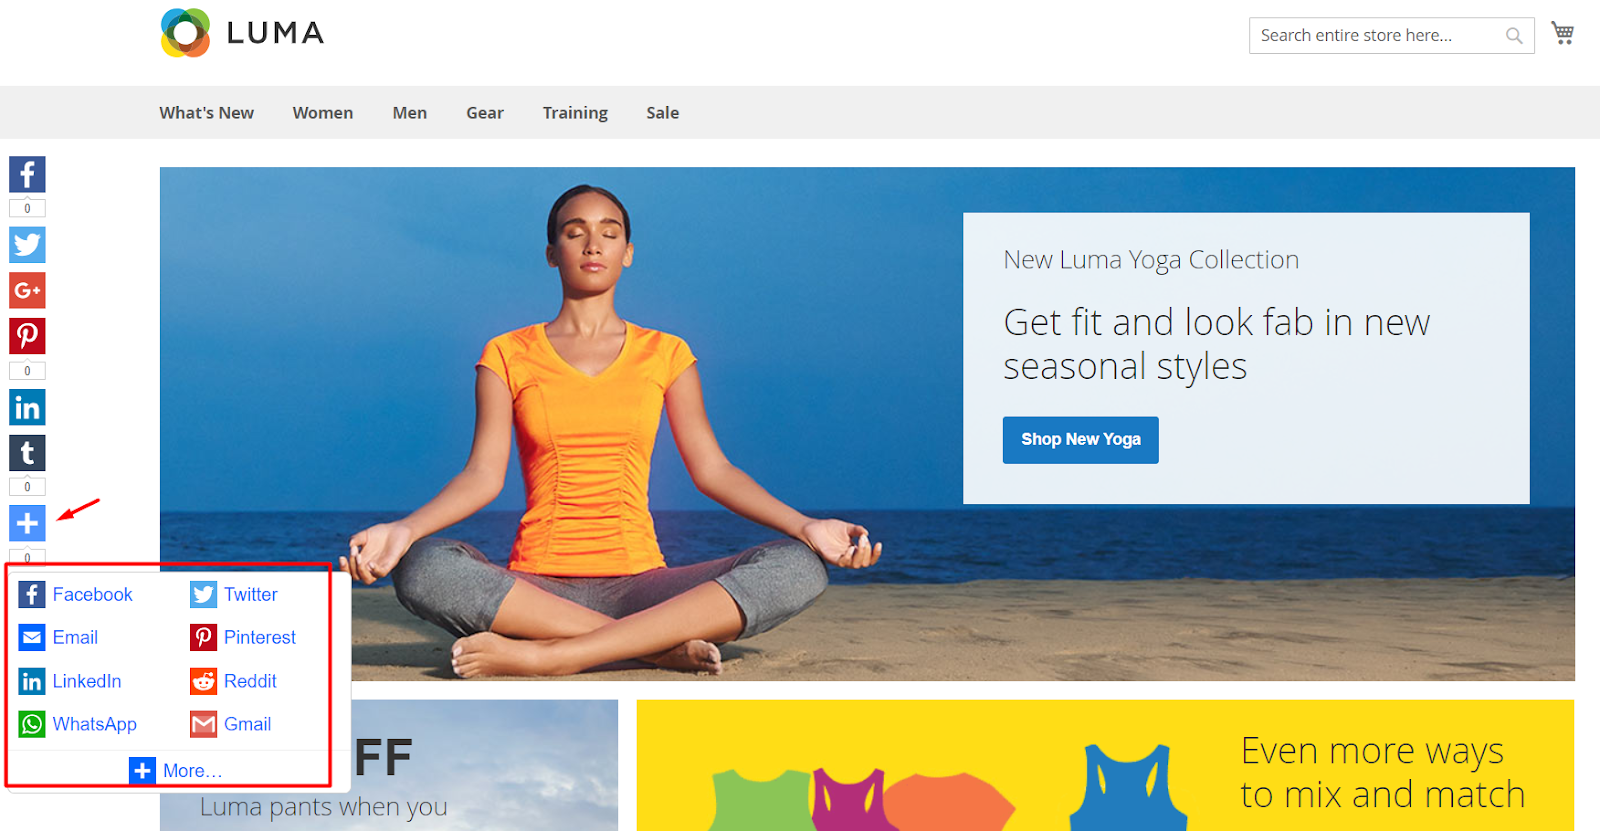
Enable: Choose “Yes” to show more services for sharing. It will allow icon
+to display more Services on Frontend.Display Menu Type: Choose the Menu displaying method
- Hover: Allow showing Menu when mouse over
- Click: Allow showing Menu when clicking to Service symbol and show the field:
- Display Full Menu: Choose
Yesto show full Menu. ChooseNo, the field Number of Services appears allowing you to choose the service number that you want to display.
- Number Of Services:
- Enter the number in
Number Of Servicesfield, when clicking to “+”, it will allow showing Services by your chosen number - If it is left blank, the system will notify that
This is a required fieldand the number will start from 1 by default.
- Enter the number in
1.2. Floating Configuration
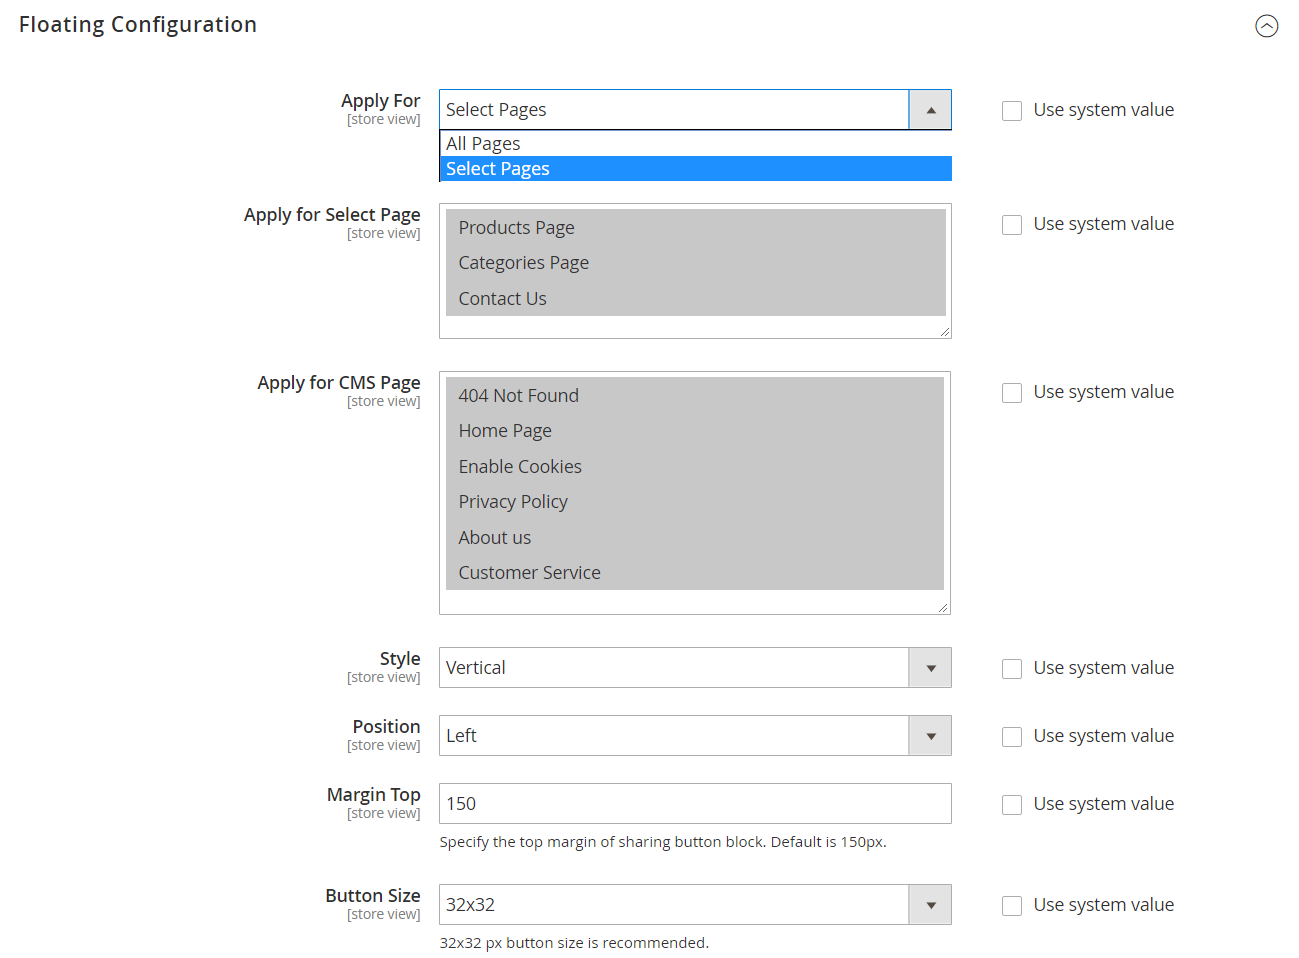
- Apply For:
- Choose the position to display Services at Floating Configuration
- All Pages: Displays services on all pages
- Select Pages: Show 2 more fields: Apply for Select Page and Apply for CMS Page to choose the location to display services:
- Apply for Select Page: Select the page to display services. You can choose to apply multiple pages at once. Pages not selected will not display services.
- Apply for CMS Page: Select CMS page to display services. You can choose to apply multiple CMS pages at the same time. CMS pages that are not selected will not display services.
- Choose the position to display Services at Floating Configuration
- Style: Select the style for displaying Menu
- Horizontal: Icons are arranged horizontally.
- Vertical: Icons are arranged vertically.
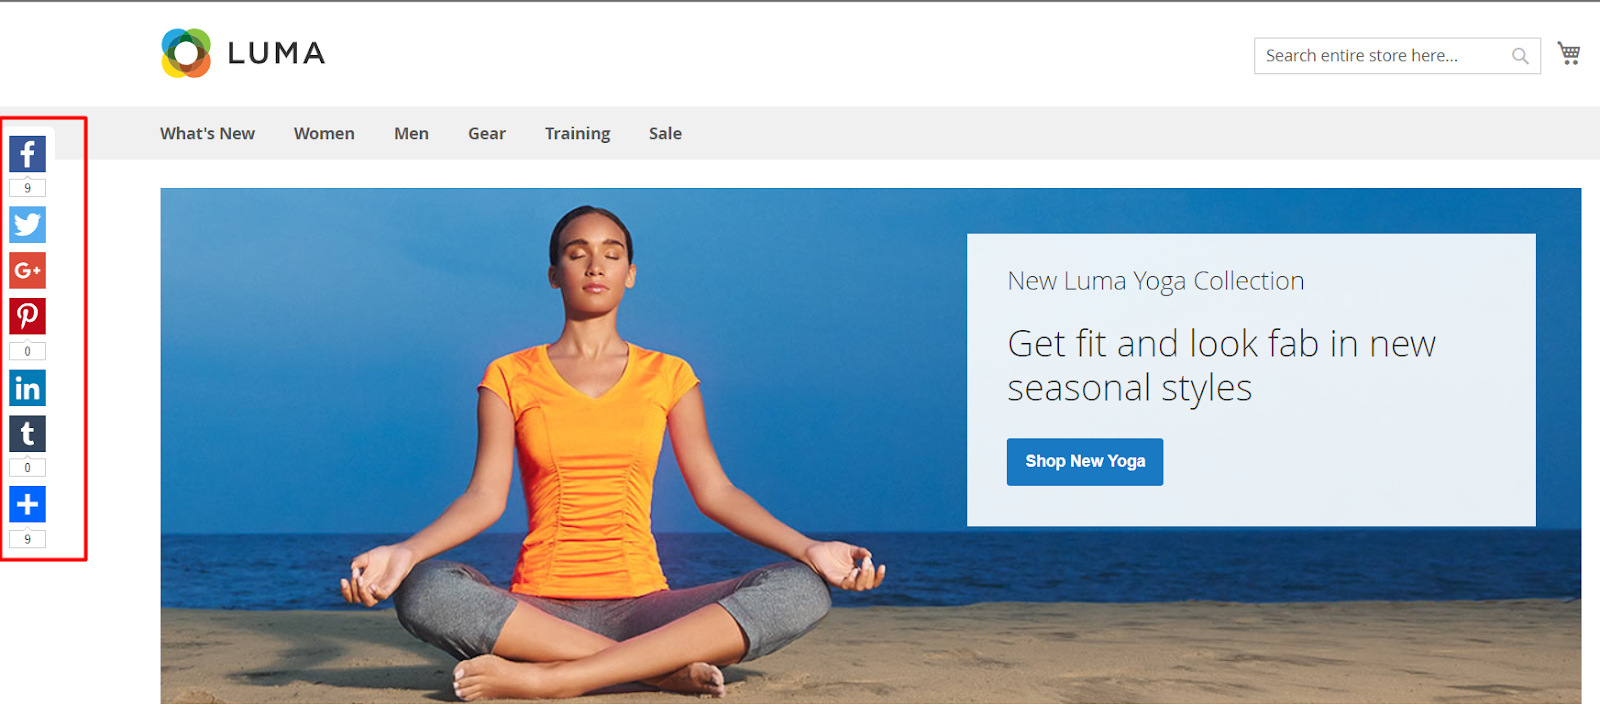
Position: Choose the position to show Menu at 2 sides:
- Left: Icons are on the left side of pages
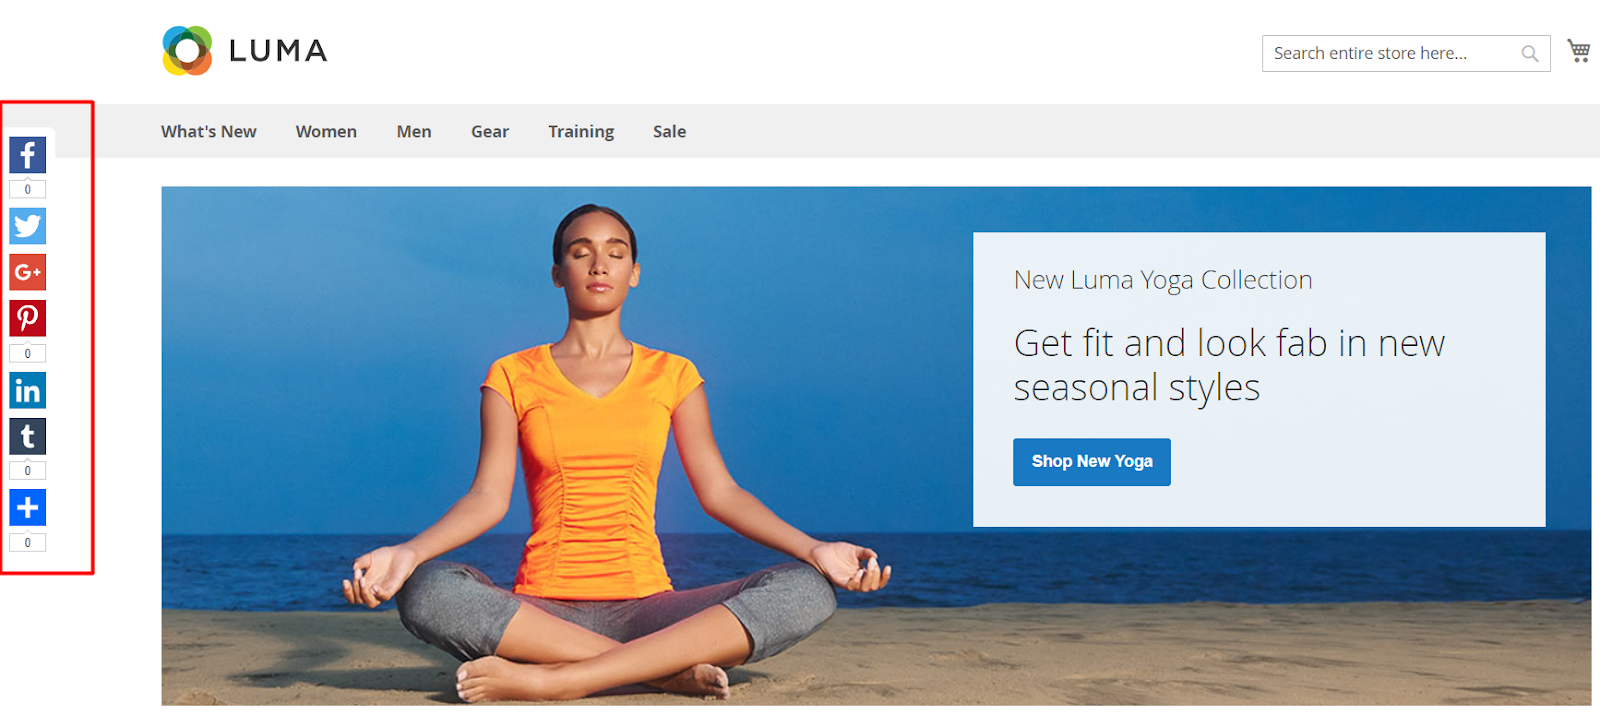
- Right: Icons are on the right side of pages
Margin Top:
- Choose the size of services to decide the margin top of sharing button block. Only show this field when choosing Vertical style
- The default number is 150 px
Margin Bottom:
- Choose the size of services to decide the margin bottom of sharing button block. Only show this field when choosing Horizontal style
- The default number is 0 px
Button Size: Choose the button size for Icons. The default size of icons is 32x32

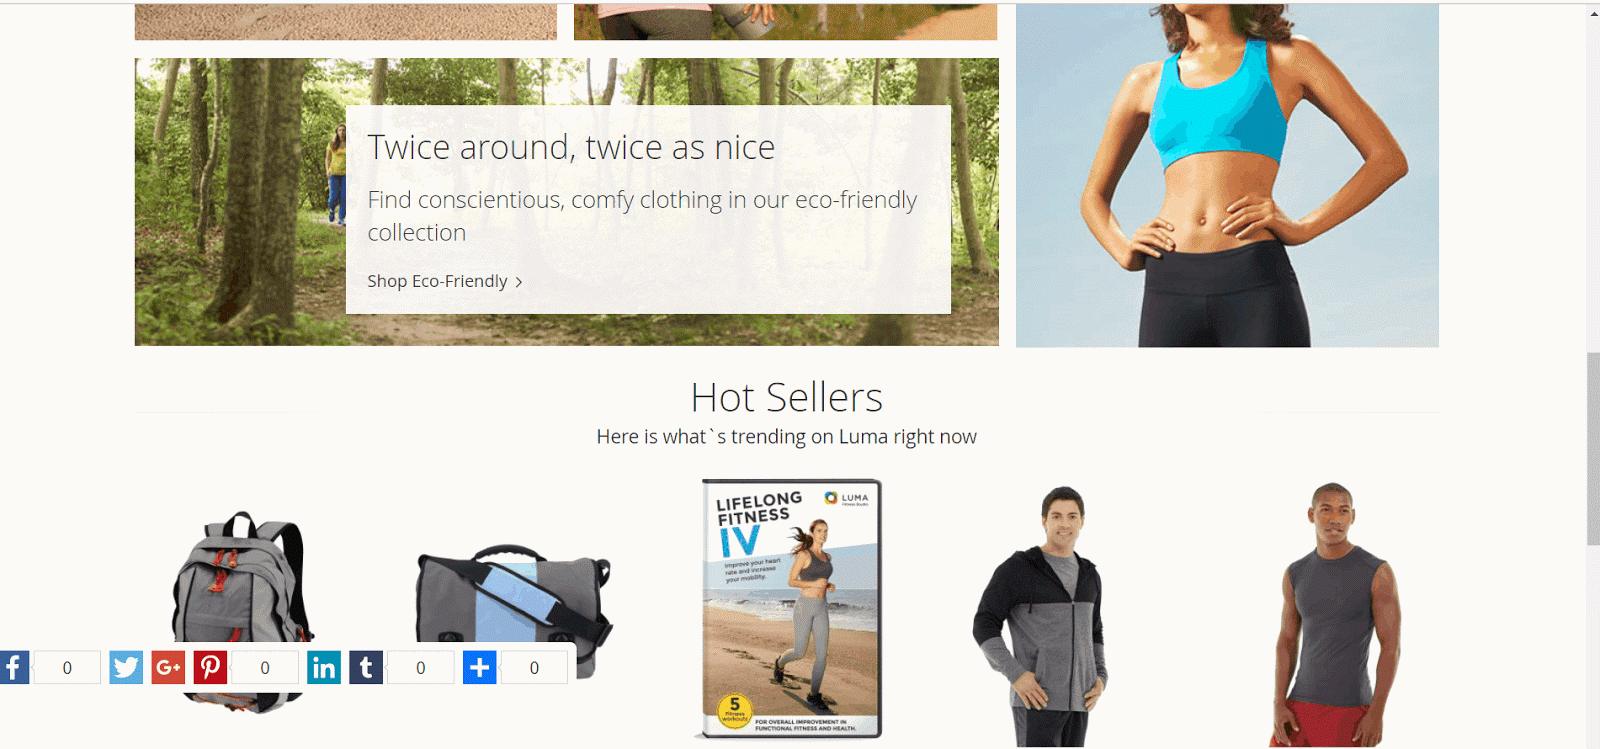
1.3. Inline Configuration
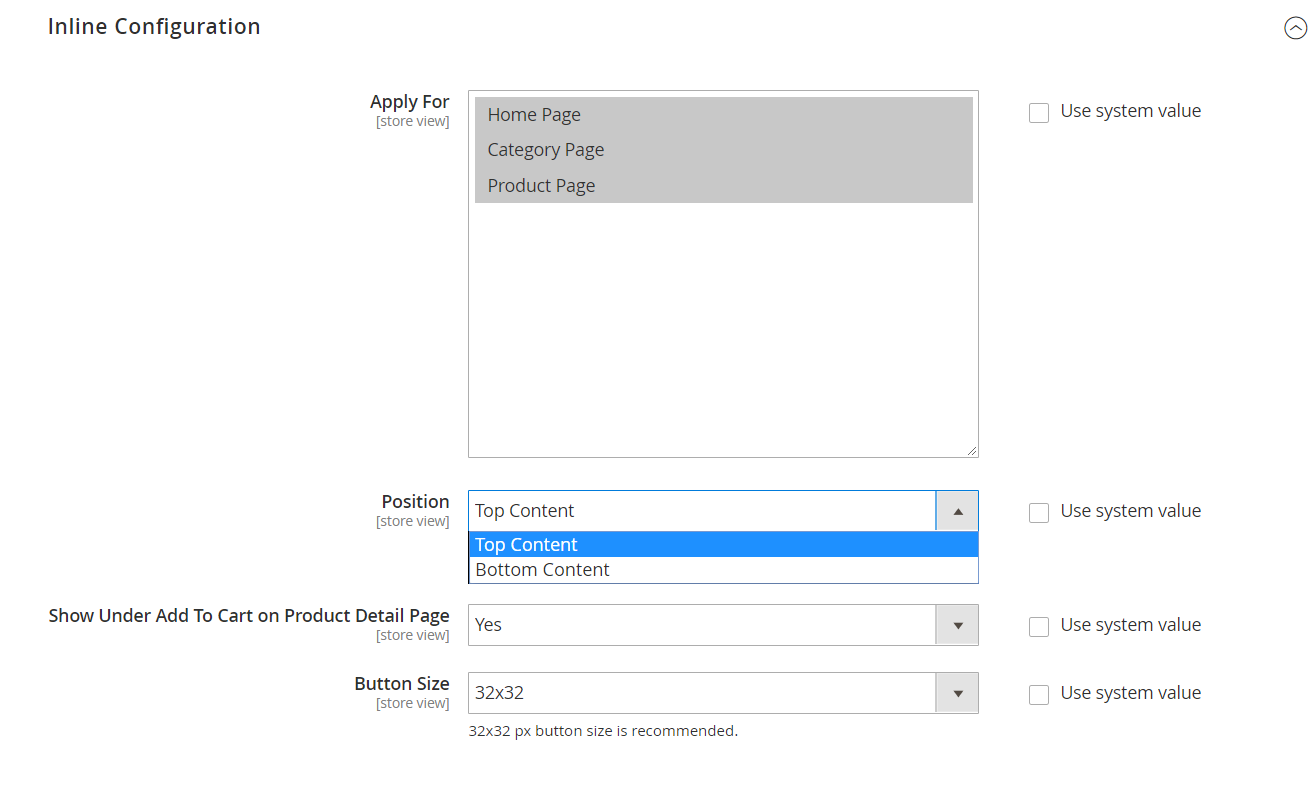
- Apply For:
- Choose the position to display Services at Inline Configuration
- Enable showing in multi positions
Position: Choose the position to show Menu at:
- Top content: Icons shown at the top of page
- Bottom content: Icons shown at the bottom of page
Show under Add To Cart on Product detail Page: Select
Yesto display under Add To Cart on Product Detail Page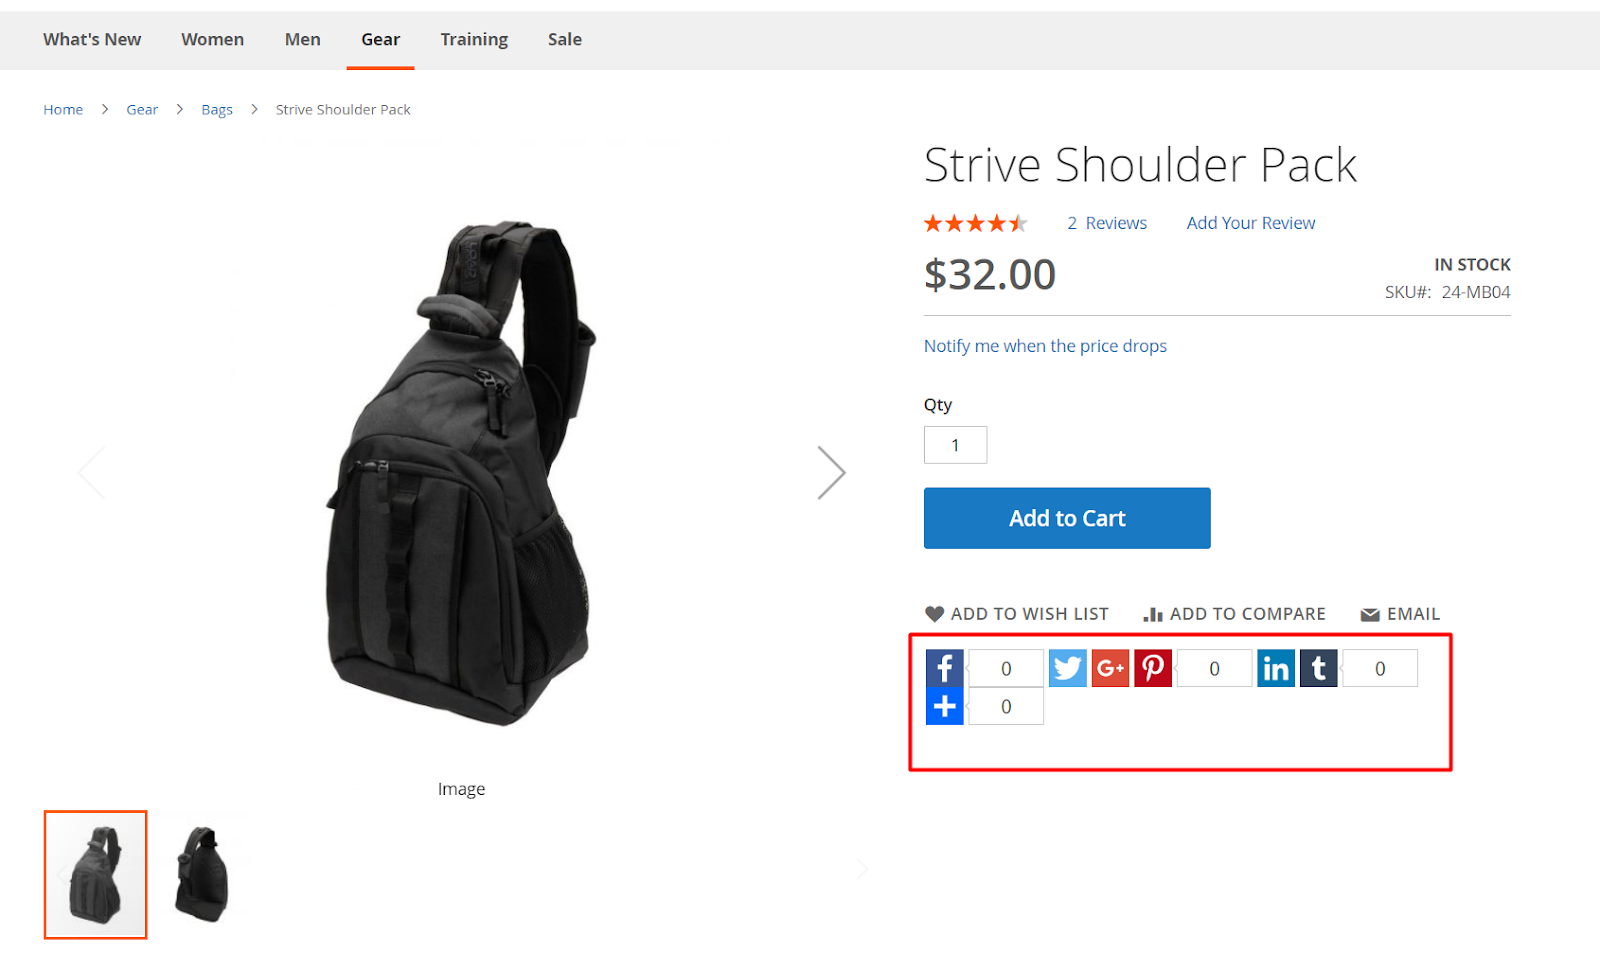
Button Size: Choose the button size for Icons. The default size of icons is 32x32
