Lookbook
Introduce
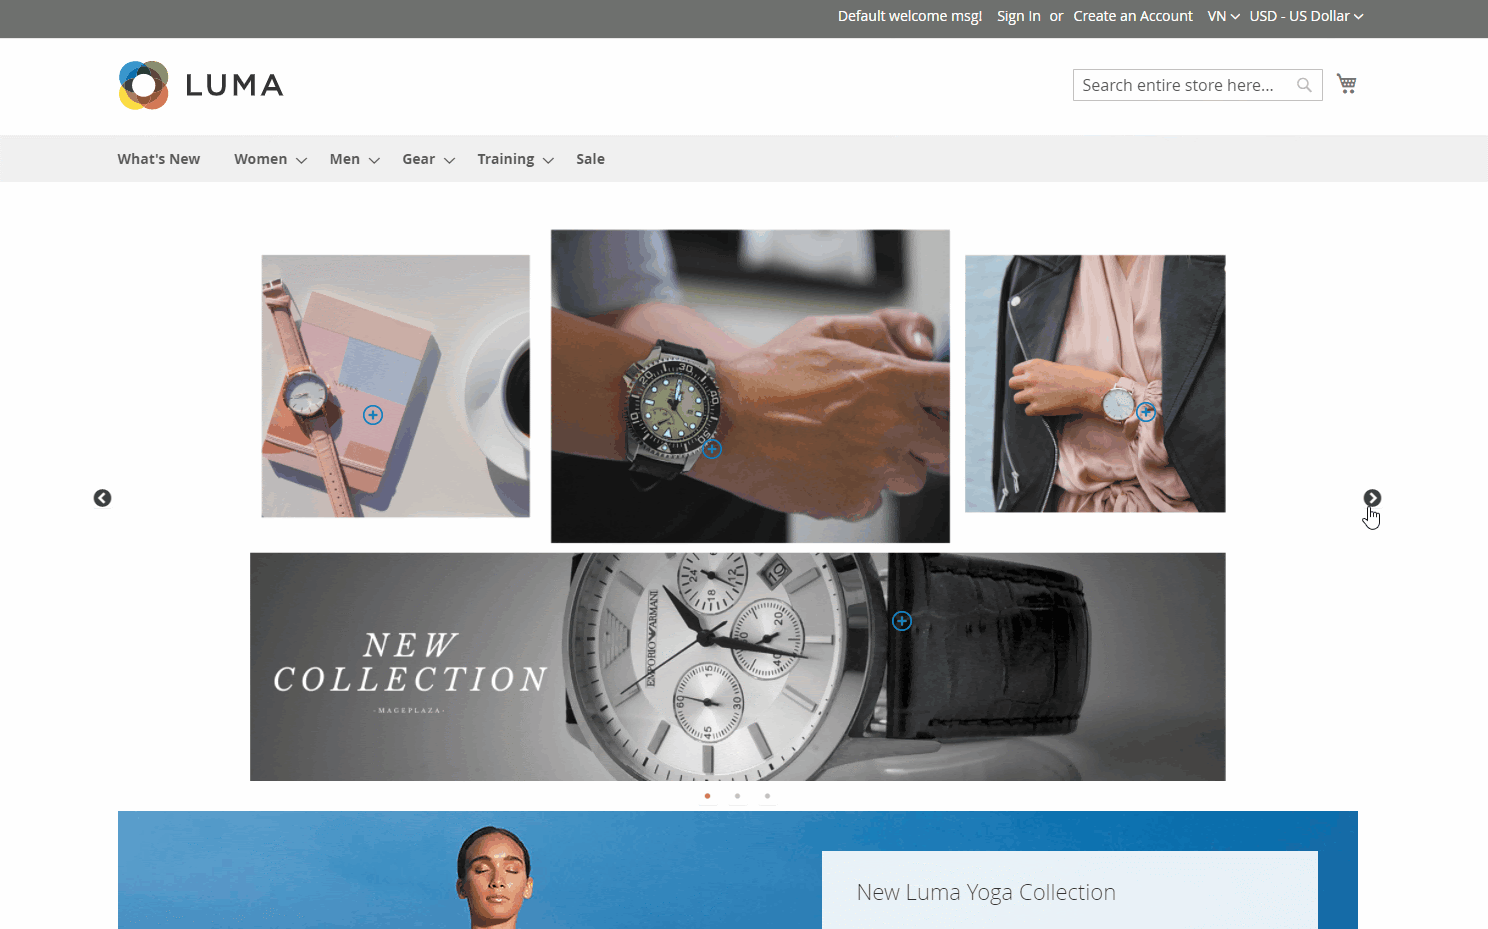
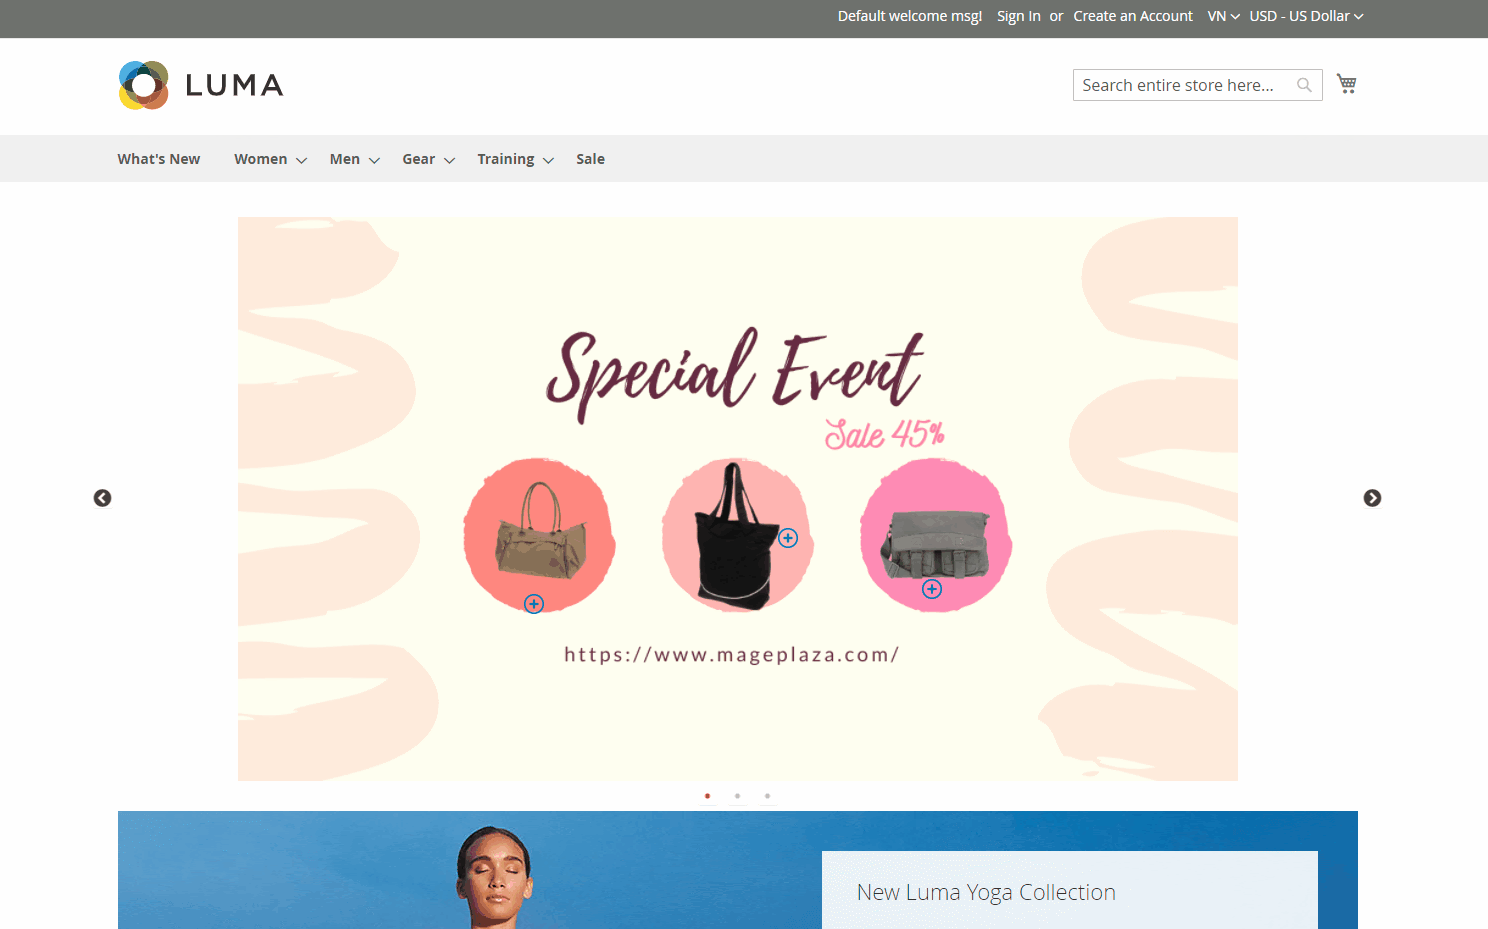
Lookbooks are an effective tool in assisting online stores to attract and engage with customers as well as boost sales revenue. For Magento stores, the Lookbook extension will enable you to create multiple gallery collections that educate and recommend customers about the ways to mix and match products together. You can attach the product links to their positions on the images and the links will lead customers to the individual product pages. Also, you are able to place the lookbooks anywhere on the website as your wish.
How to configure
Log into your backend, go to Content > Lookbook Sliders
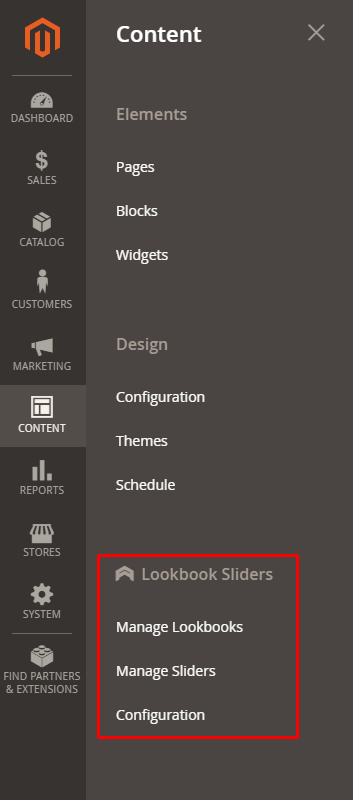
1. Configuration
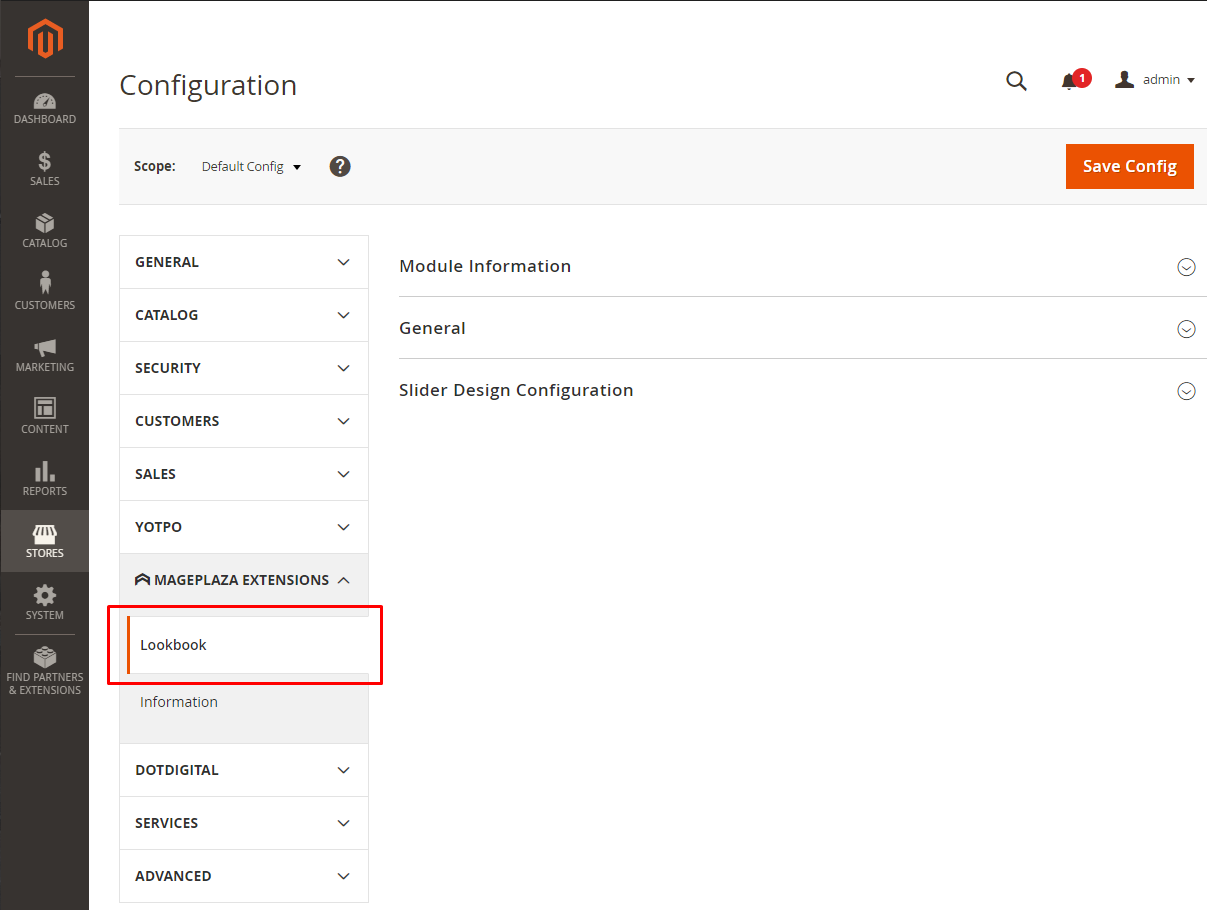
Log in your backend, choose Content > Lookbook Sliders > Configuration or Stores > Settings > Configuration > Mageplaza Extensions > Lookbook
1.1 General Configuration

- Enable: Select Yes to enable the module
- Marker Icon: Select icon for the marker. Allow file types: jpg, gif, png. If left blank, the icon will be displayed according to the default setting
- Marker Width: Set the width for the icon
- Marker Height: Set the height for the icon
1.2 Slider Design Configuration
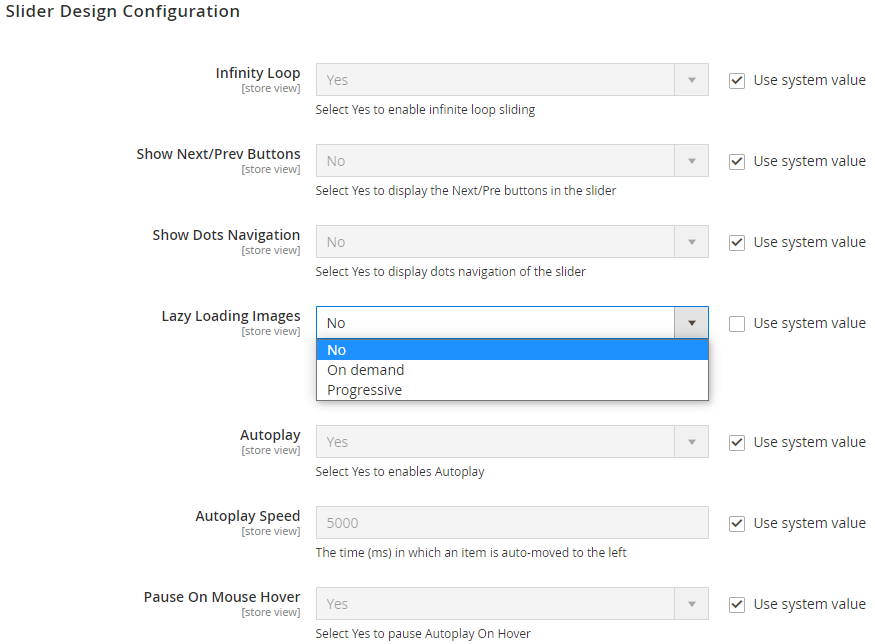
- Infinity Loop: Select Yes to display the first lookbook after the last lookbook is displayed

- Show Next/Prev Buttons: Select Yes to display Next / Prev in the slider. Click Next / Prev to move to the next lookbook or return to the previous lookbook.
- Show Dots Navigation: Select Yes to display dots representing the number of sliders.
Lazy Loading Images:
- No: The images are loaded simultaneously when the page is loaded
- On demand: The first image is displayed as soon as the page loads, the other images will be loaded at the transition event
- Progressive: The first image is displayed as soon as the page loads, other images will be loaded in the background one after another
Autoplay: Select Yes to automatically move the lookbooks to the left with the time set at Autoplay Speed. When Yes selected, the Autoplay Speed and Pause On Mouse Hover fields are displayed.
Autoplay Speed: Set the playing speed of the slider
Pause On Mouse Hover: Select Yes so that when you hover on the displayed lookbook, the slider will not move automatically
2. Manage Lookbooks
Log in to your Magento backend, go to Content > Lookbook Sliders > Manage Lookbooks
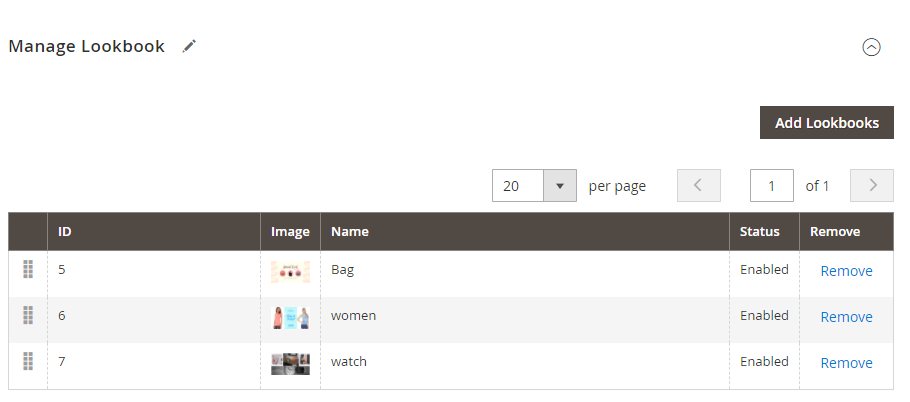
2.1 Grid
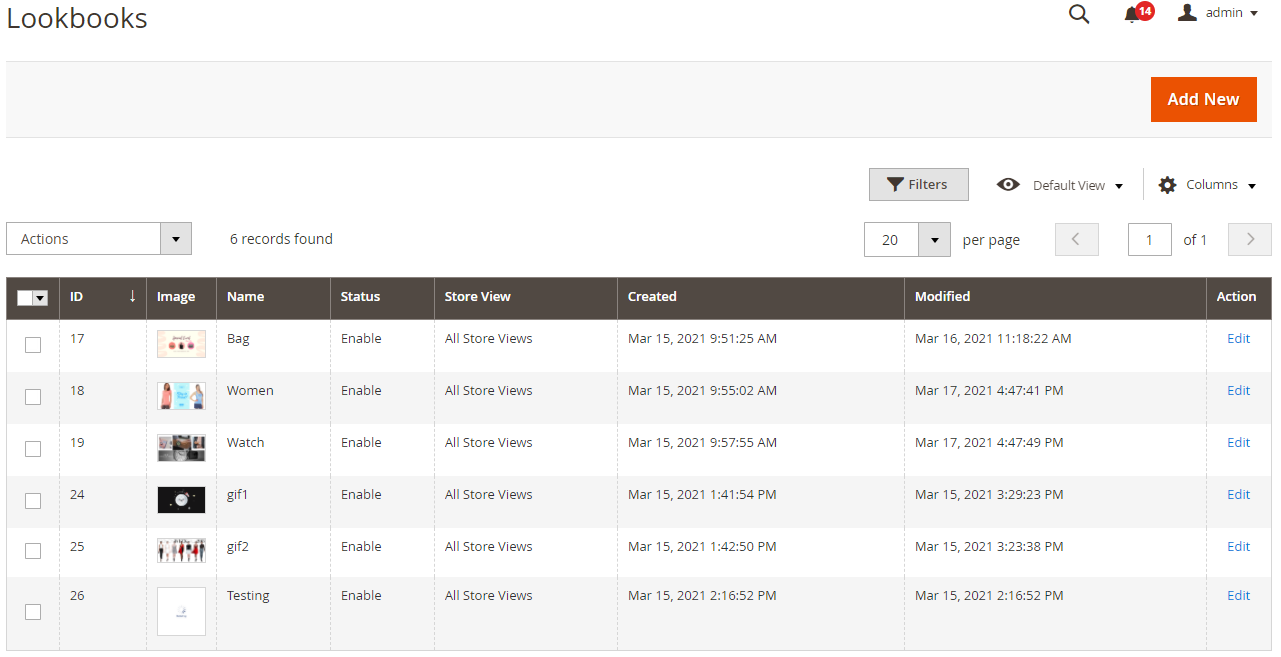
- You can find all created lookbooks here.
- At the grid, admins can view all general information of lookbooks such as ID, Image, Name, Status, Store View, Created, Modified.
- Admins can perform these actions:
- Edit: Select Edit at the Action column to display the lookbook page and edit the lookbook information
- Delete: Select one or multiple lookbooks needed to delete. Select Action > Delete > OK
- Change Status: Change the status of the lookbook. Select one or multiple lookbooks needed to change the status. Select Action > Change Status > Enable/Disable
- Add New: Create a new lookbook
2.2 Add New
2.2.1 Lookbook Information
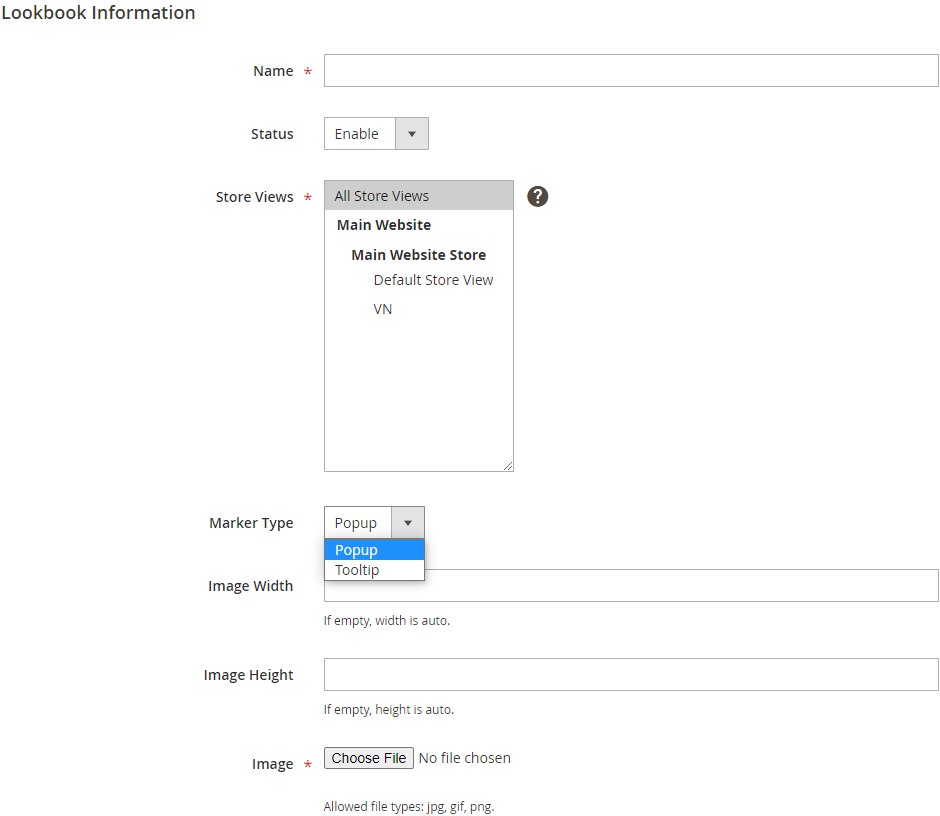
- Name: Enter a name for the lookbook. This field is required.
- Status: Select Enable to display lookbook on the frontend
- Store Views: Select the storeviews to display
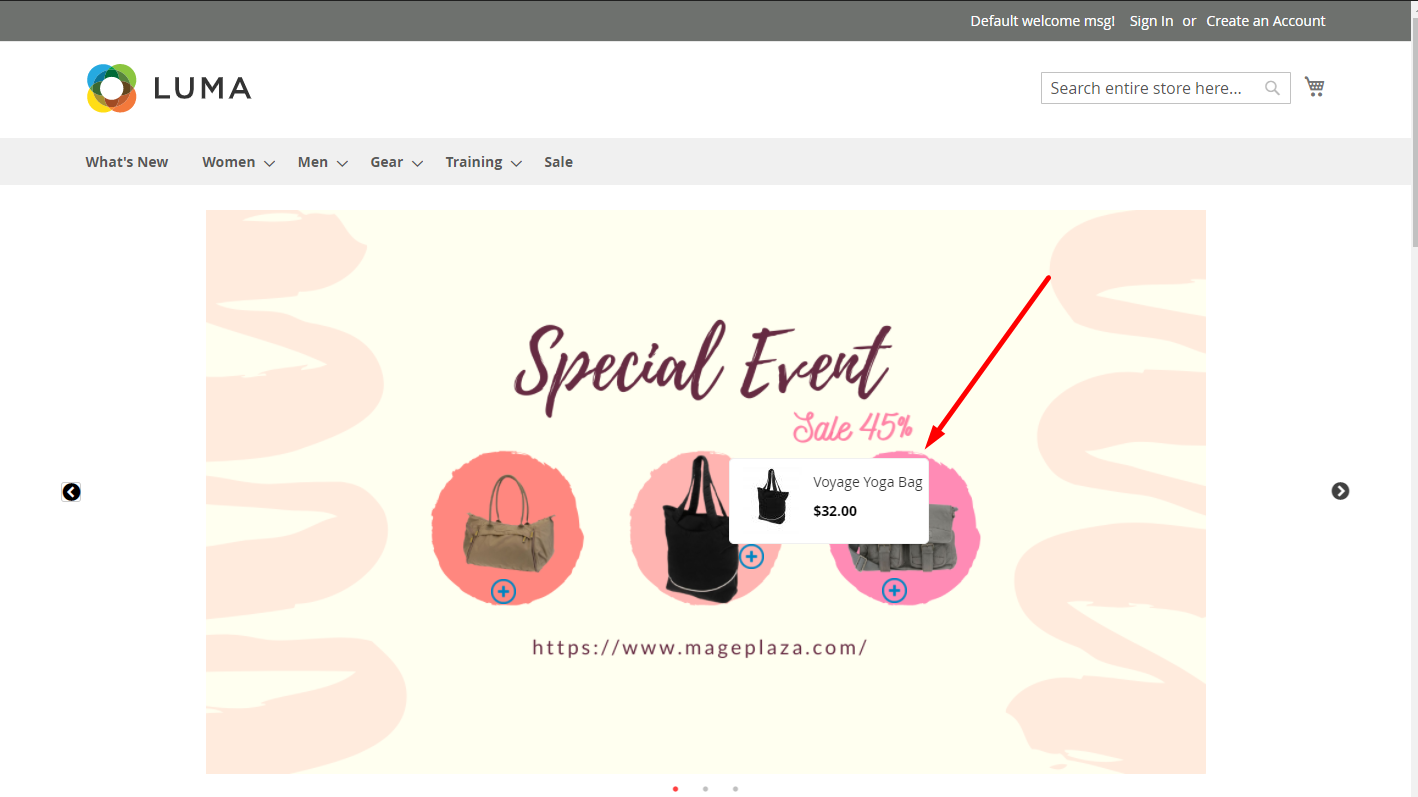
- Marker Type: Select the format to display products with markers on the frontend
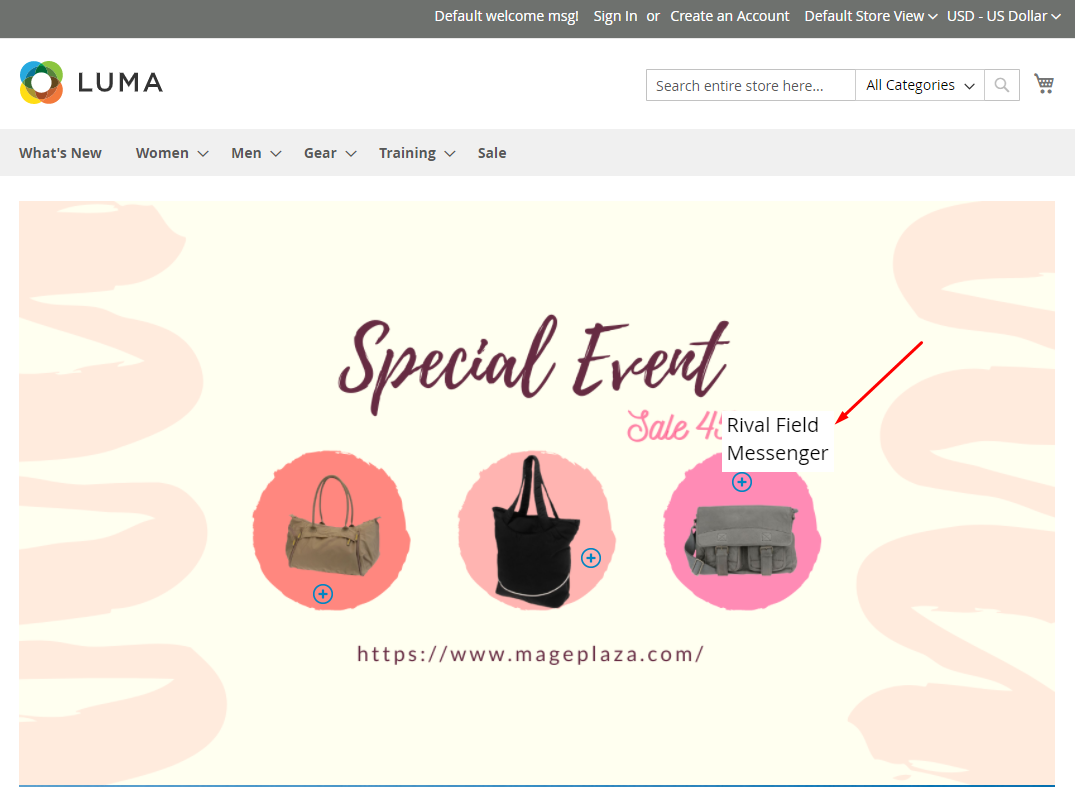
- Popup: click on the marker to show the product

- Tooltip: Hover on the marker to show the product
- Image Width: Enter the width of the image
- Image Height: Enter the height of the image
- Note: If Image Width and Image Height left blank, the images are shown with the default size
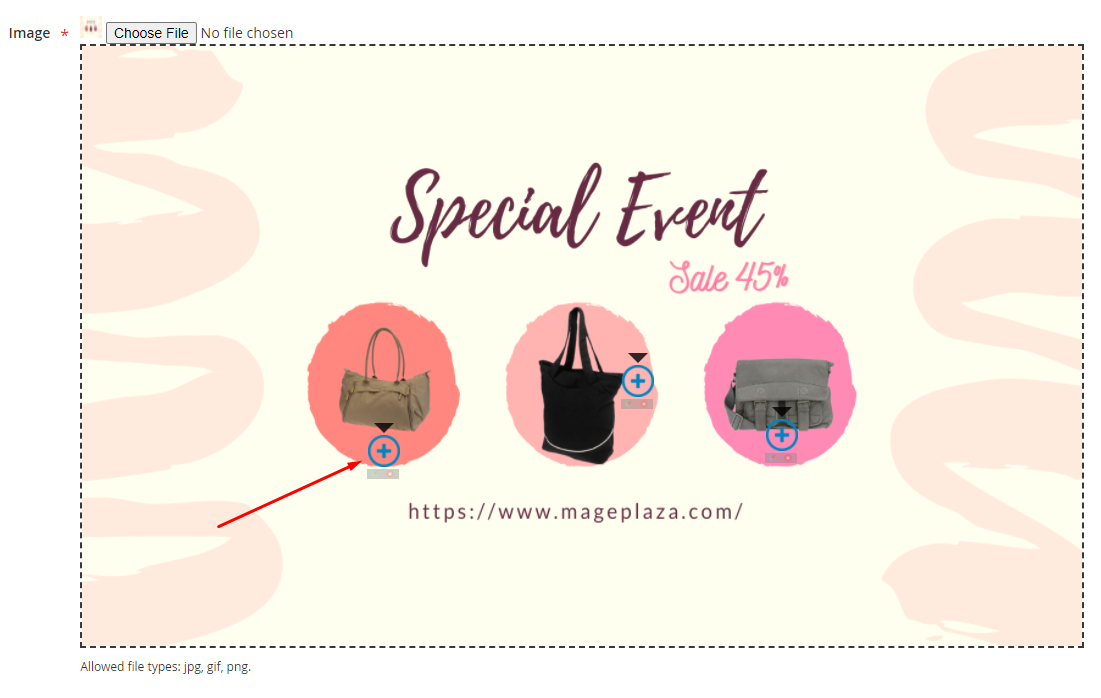
- Image: Select images with file type: jpg, png, gif. This a required field so you need to select images to save the lookbook
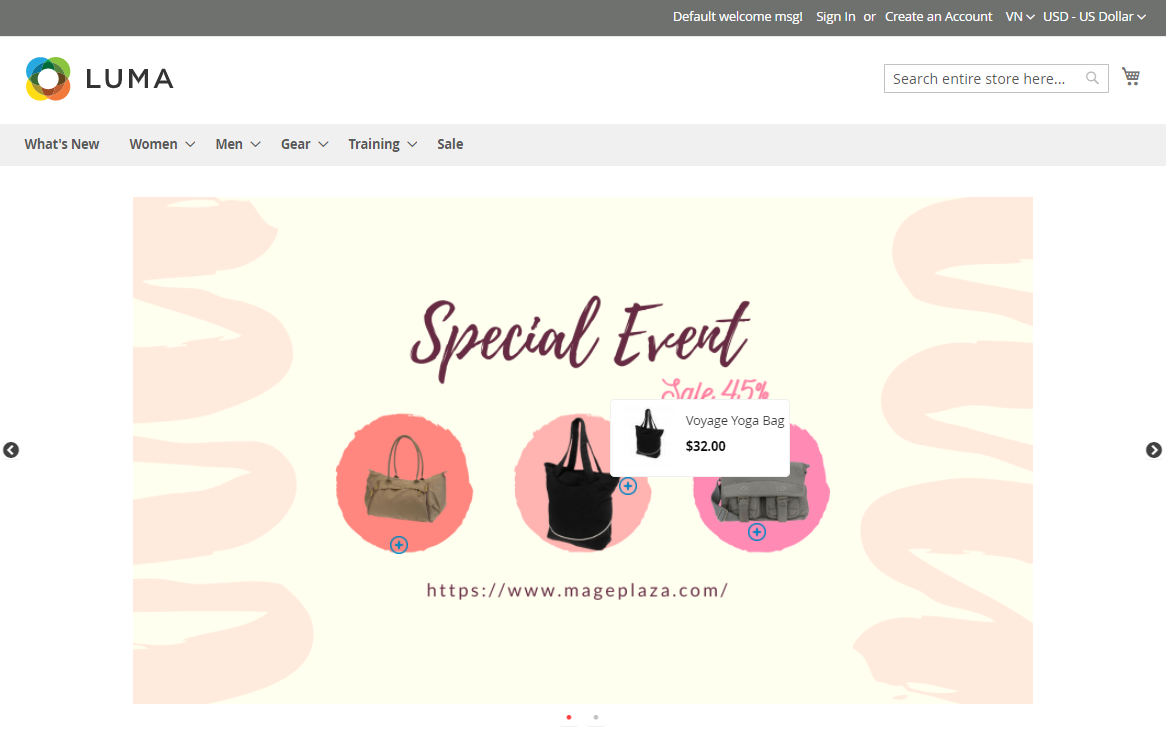
2.2.2. Add Marker
After creating lookbooks successfully, go to the Edit Lookbook page to add markers.
Click to choose the positions to add markers. Click on the pencil icon to edit marker, click on the delete icon to remove the marker
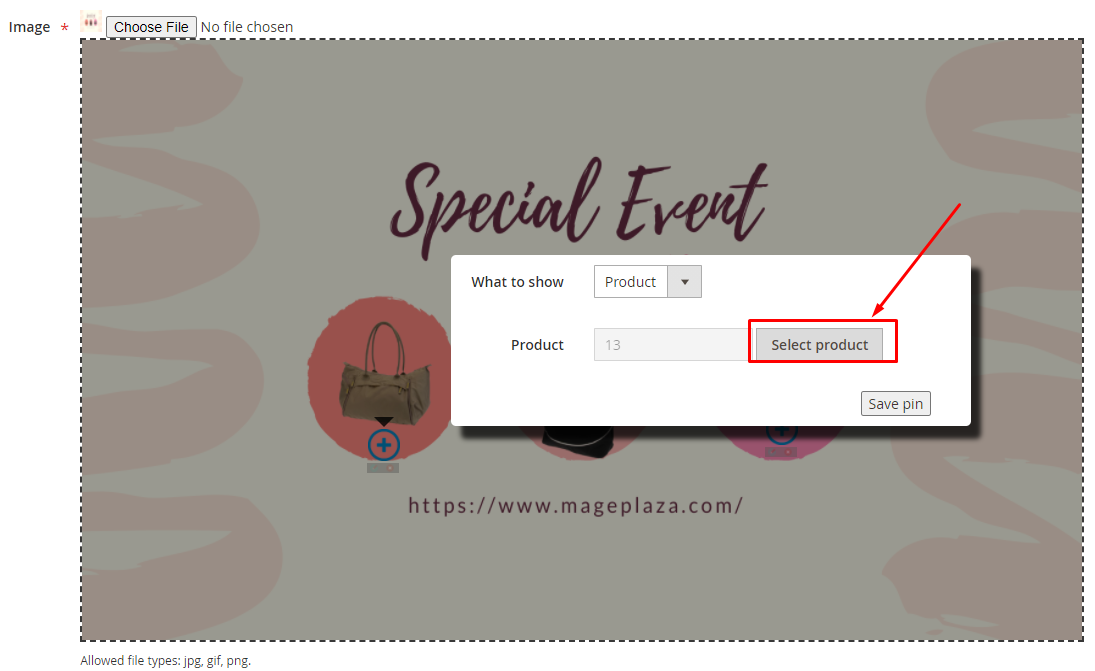
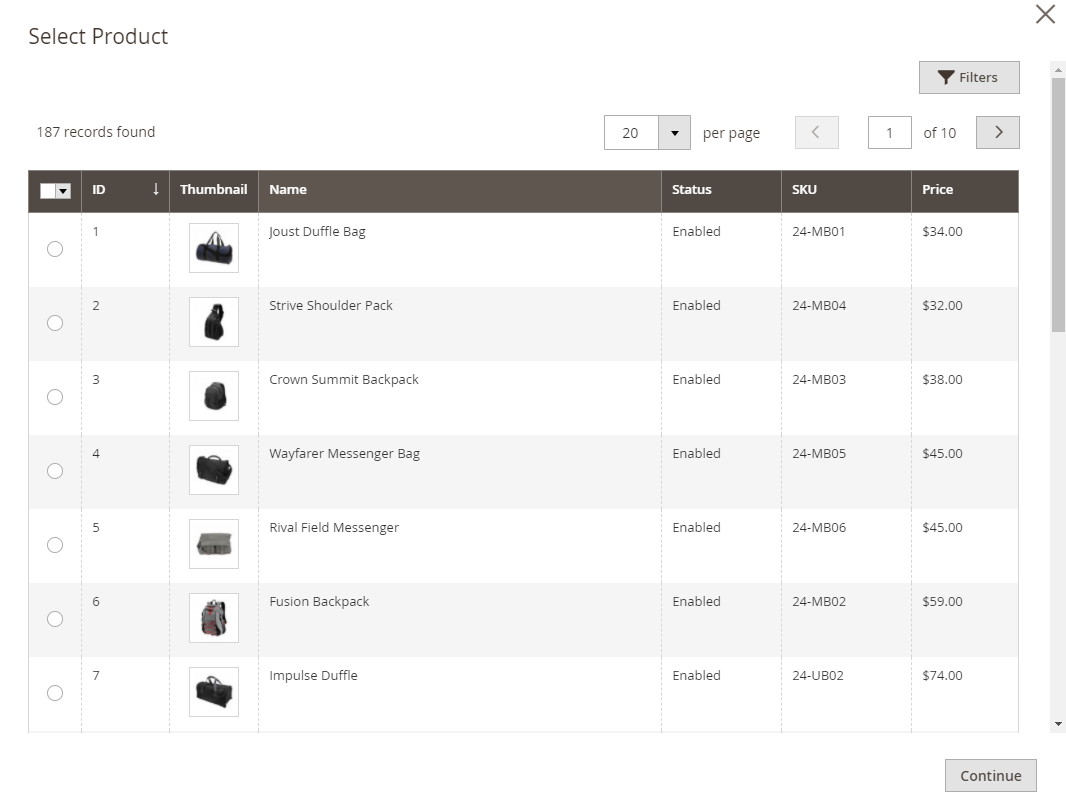
- What to show = Product
- Select product: Select the products that are shown on the lookbook. Click Save pin to save the information
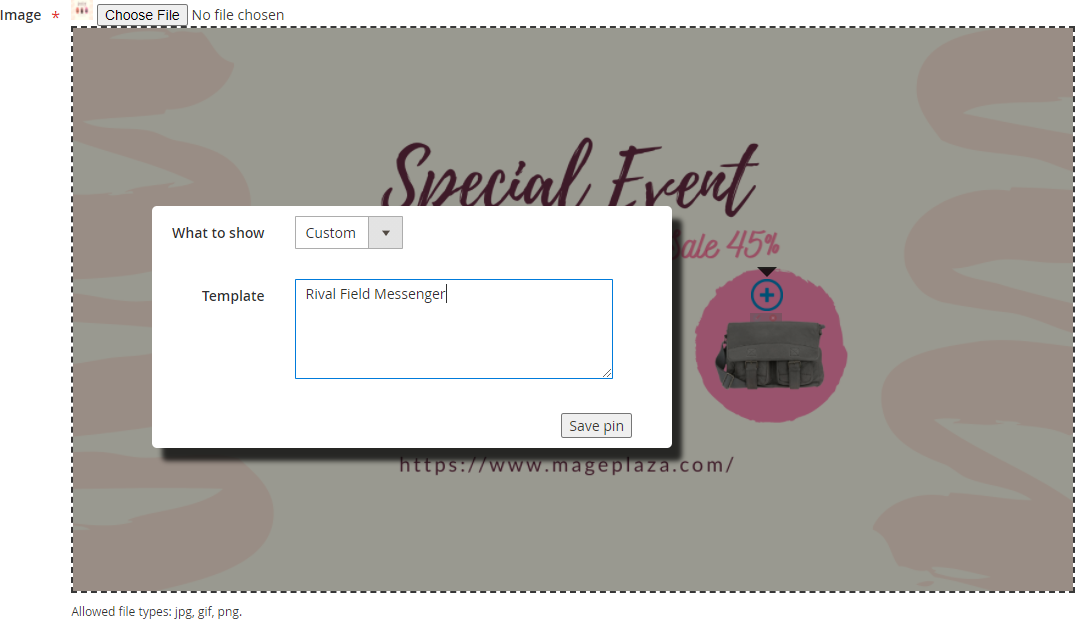
What to show = Custom
- Template: Enter the information that you want to show with the marker. Click Save pin to save the setting.
3.Manage Sliders
Log in your Magento backend, go to Content > Lookbook Sliders > Manage Sliders
3.1 Grid
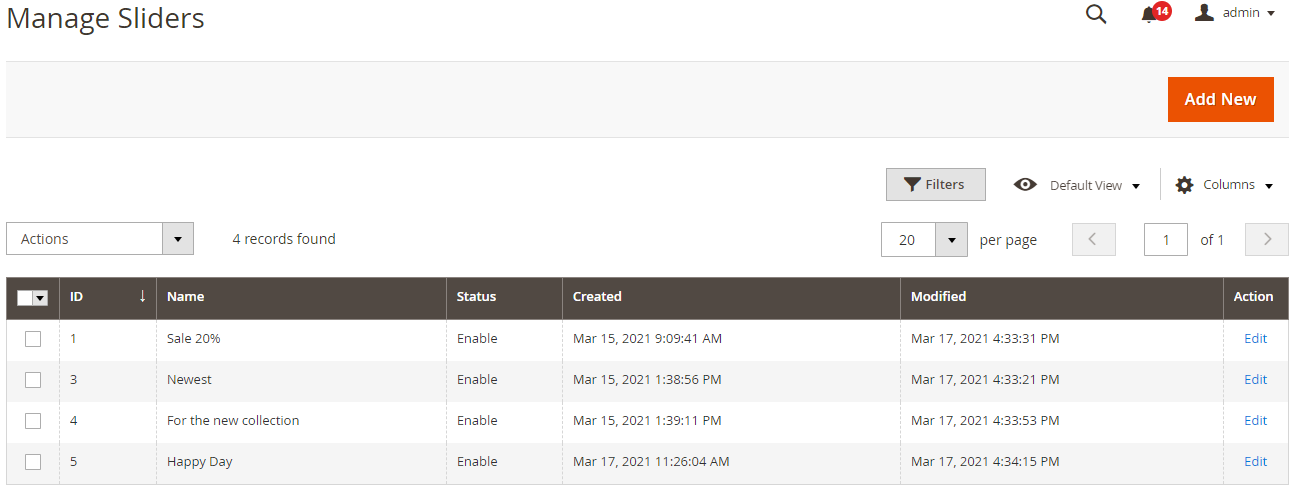
- You can find all created sliders here.
- At the grid, admins can view all general information such as ID, Name, Status, Created, Modified.
- Admins can perform these actions:
- Edit: Select Edit at the Action column to display the slider page and edit the slider information
- Delete: Select one or multiple sliders to delete. Select Action > Delete > OK.
- Change Status: Change the status of the slider. Select one or multiple sliders to change the status. Select Action > Change - Status > Enable/Disable.
- Add New: Create a new slider
3.2 Add new
3.2.1 General Information
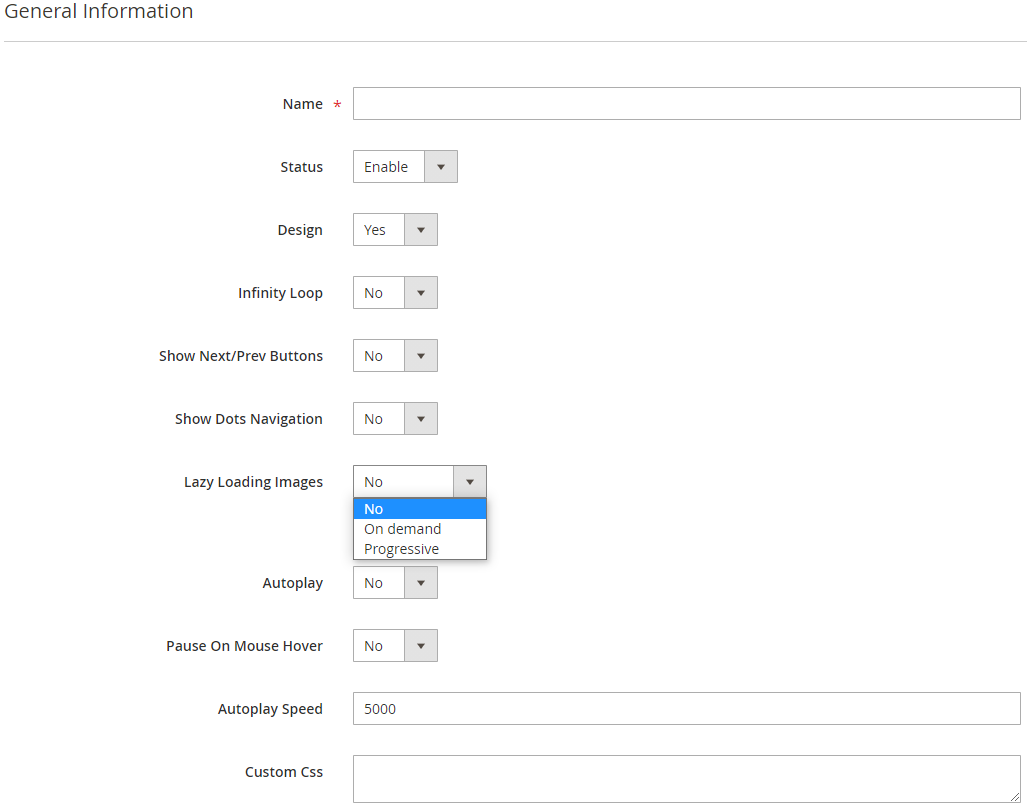
- Name: Enter the name of the slider. This is a required field
- Status: Select Enable to enable the slider
- Design = No: The slider will be shown with the settings in the configuration part
- Design = Yes: Configure the slider with more fields: Infinity Loop, Show Next/Prev Buttons, Show Dots Button, Lazy Loading - Images, Autoplay, Pause On Mouse Hover, Autoplay Speed. Custom Css: Custom the slider with Css (for example: .slick-dots li.slick-active button:before {color: red;})
3.2.2 Manage Lookbook
- Add Lookbooks: Show a popup with a list of products
- Click on the lookbook and click on Add Selected Lookbooks to add lookbooks to the slider
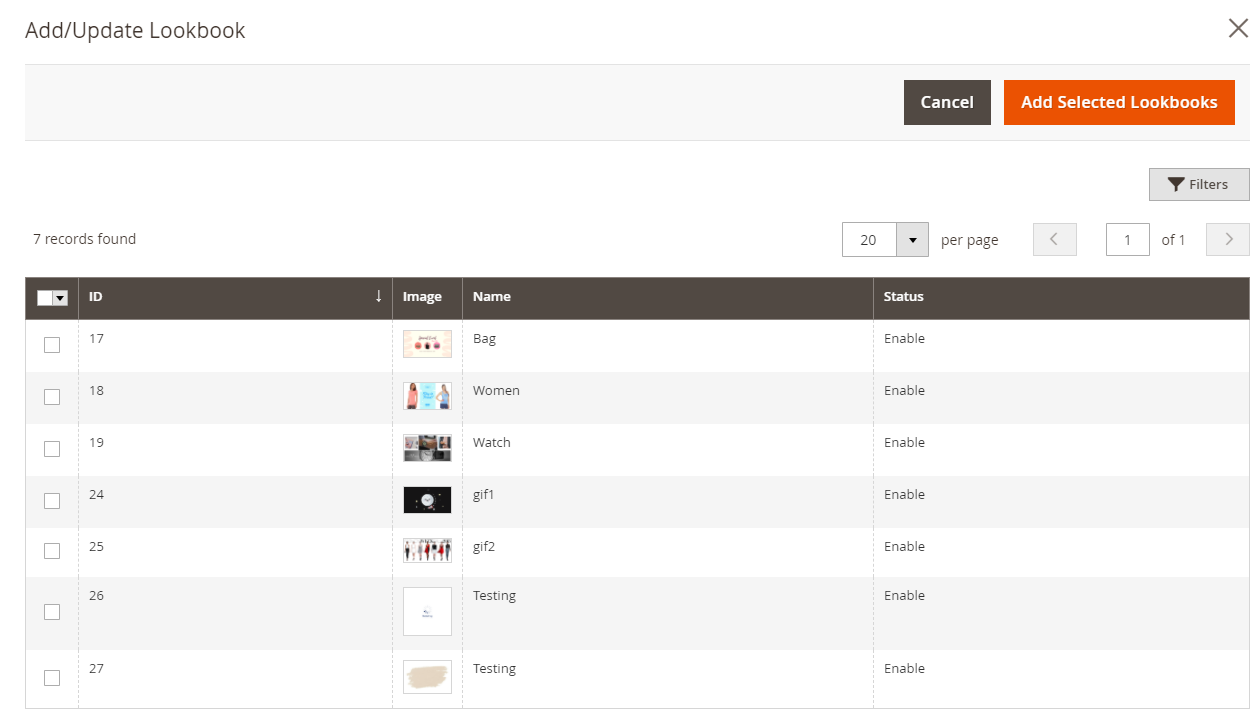
- Select Remove to delete lookbooks from the slider
- You can change the order of lookbooks displayed on the slider
4.1. Widget
You can add lookbooks or sliders anywhere by adding widgets on Blocks, Pages or creating new widgets.
- Add Widget
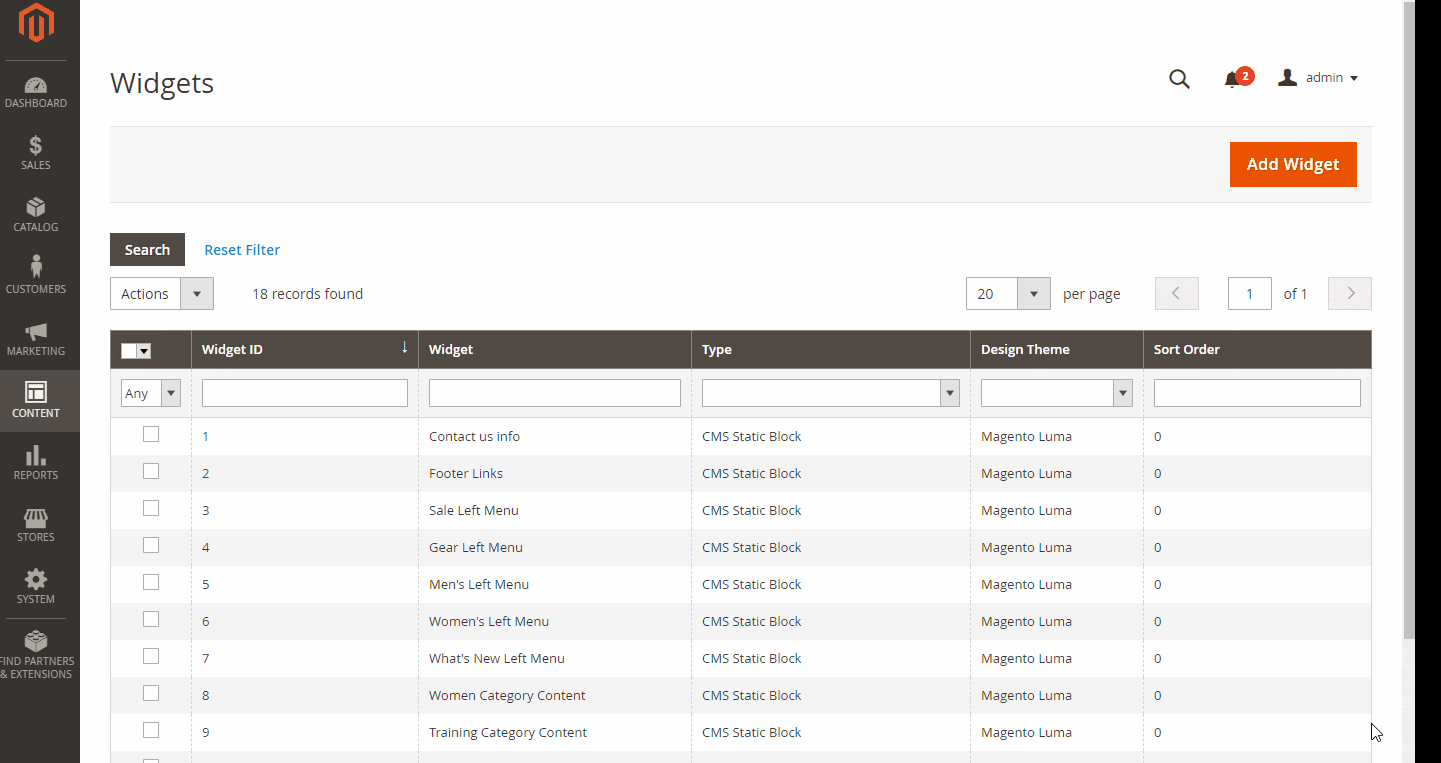
- Insert Widget
5. Rest API
Mageplaza’s Lookbook extension supports using Rest API to list information and list of Lookbook.
Please view details here.
View guide to create Integration tokens here.