Freshsales
Overview
Freshsales is a famous product of Freshdesk, designed to meet all communication management needs of businesses. Free to use program of Freshsales is very useful for small and medium businesses, the useer-friendly design, eye-catching interface is the advantage of the software.
Mageplaza Freshsales extension will help you fully integrate with Freshsales CRM to connect and synchronize many or each data information from Magento (Customer data, Order data) to Freshsales CRM (Accounts, Contacts, Leads, Deals). That will help create a smooth flow to maintain customer relationships and well organize your business. In the process of sending data to the Freshsales, admin can choose to sync manually or automatically the data.
How to use
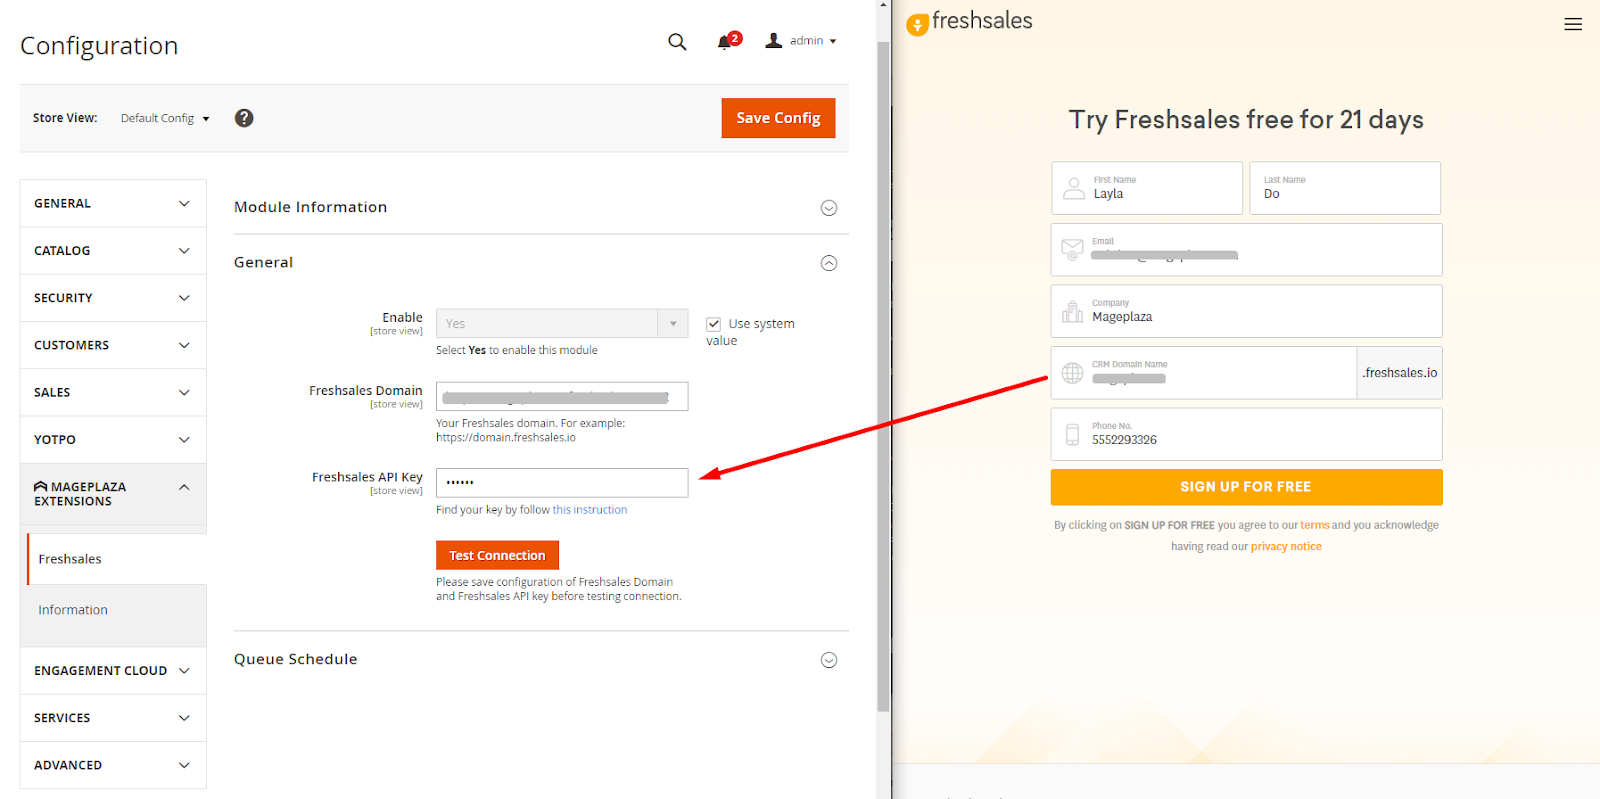
- To register for a Freshsales account, visit the this link
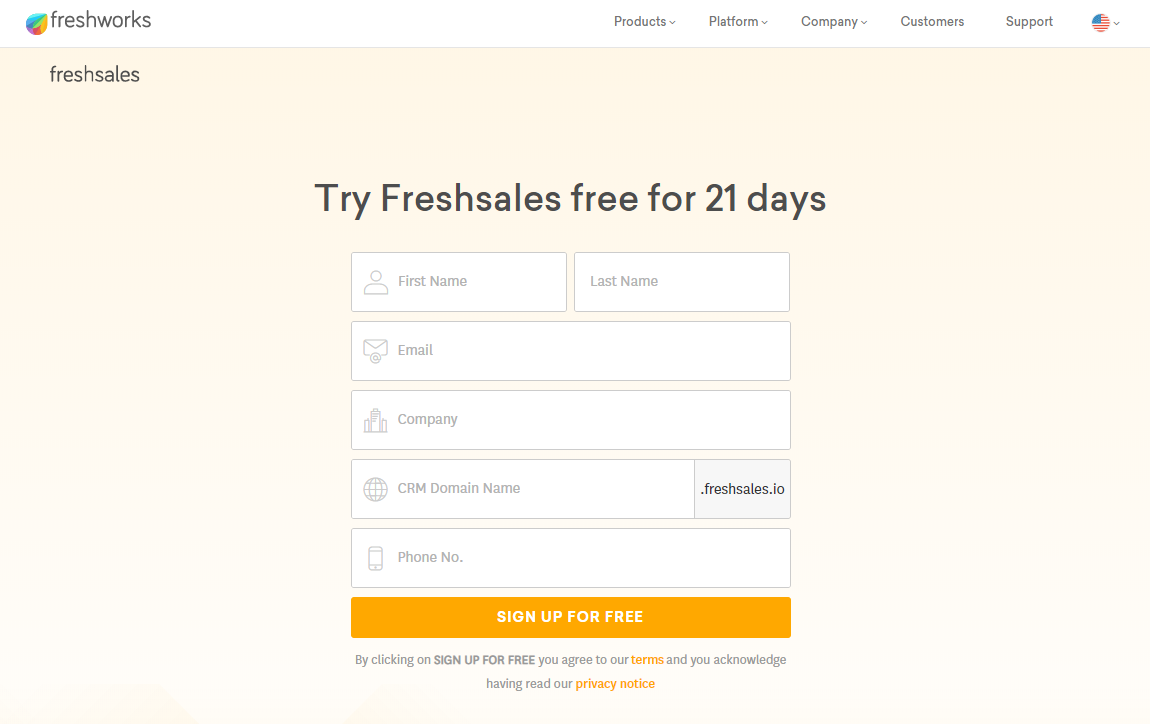
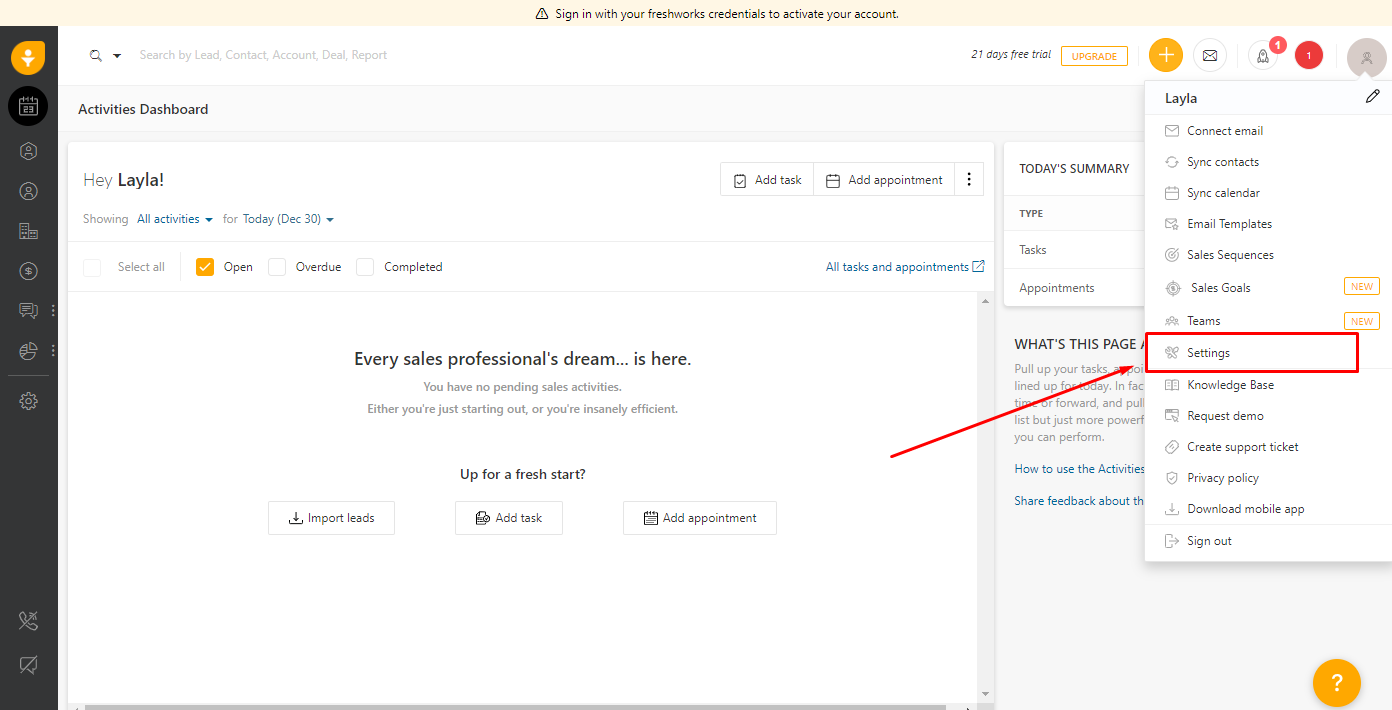
- After completing the information click Sign up for free. To get an account API, select
Settings > API Settings
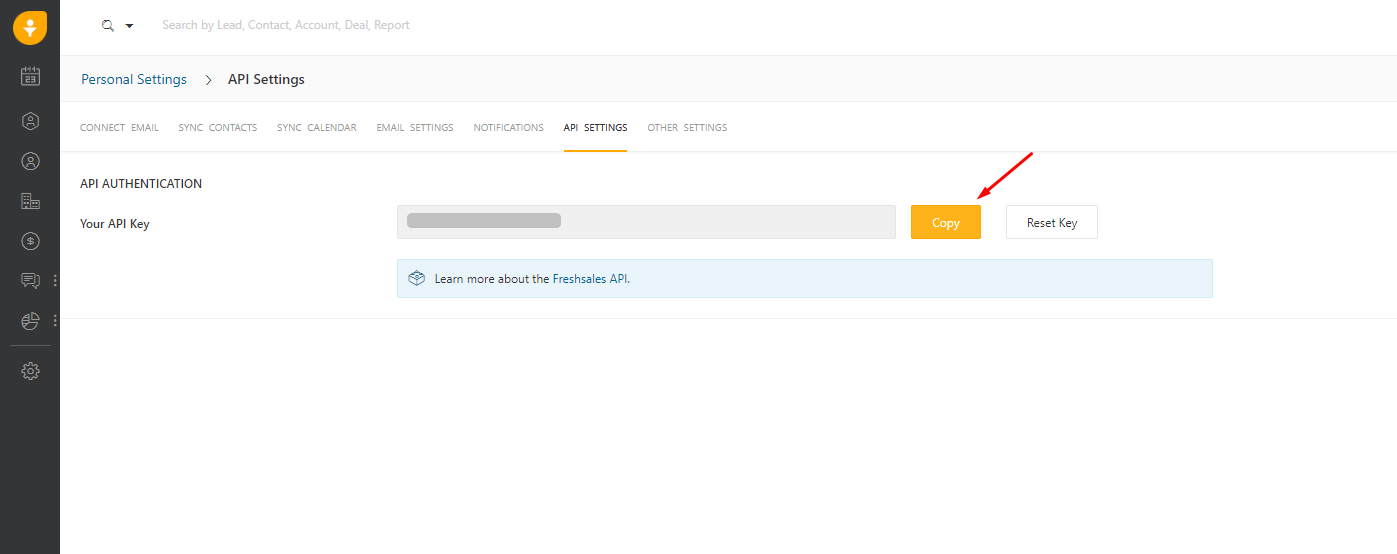
- Copy API Key to fill out the information in Magento (will be instructed below):
How to Configure
1. Configuration
Login to the Magento Admin, choose Stores > Settings > Configuration > Freshsales
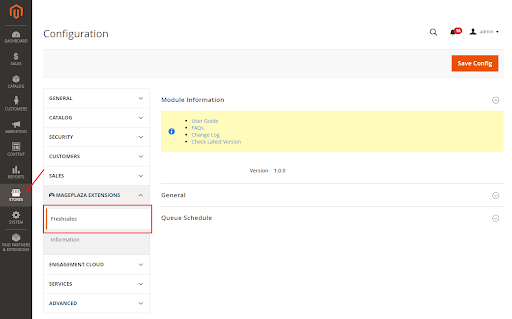
1.1. General Configuration
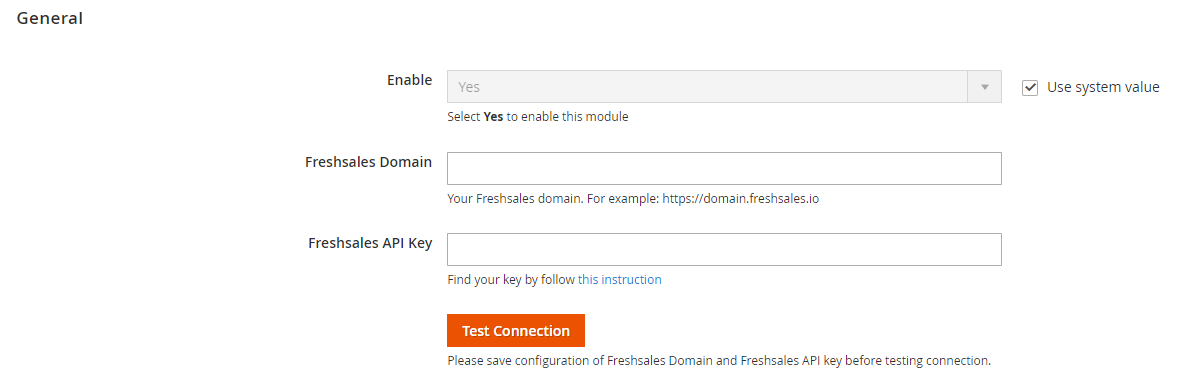
Enable: Select "Yes" to enable the module
Freshsales Domain:
- Freshsales API Key:
- With the value of this field, copy and paste it into the information of Freshsales.
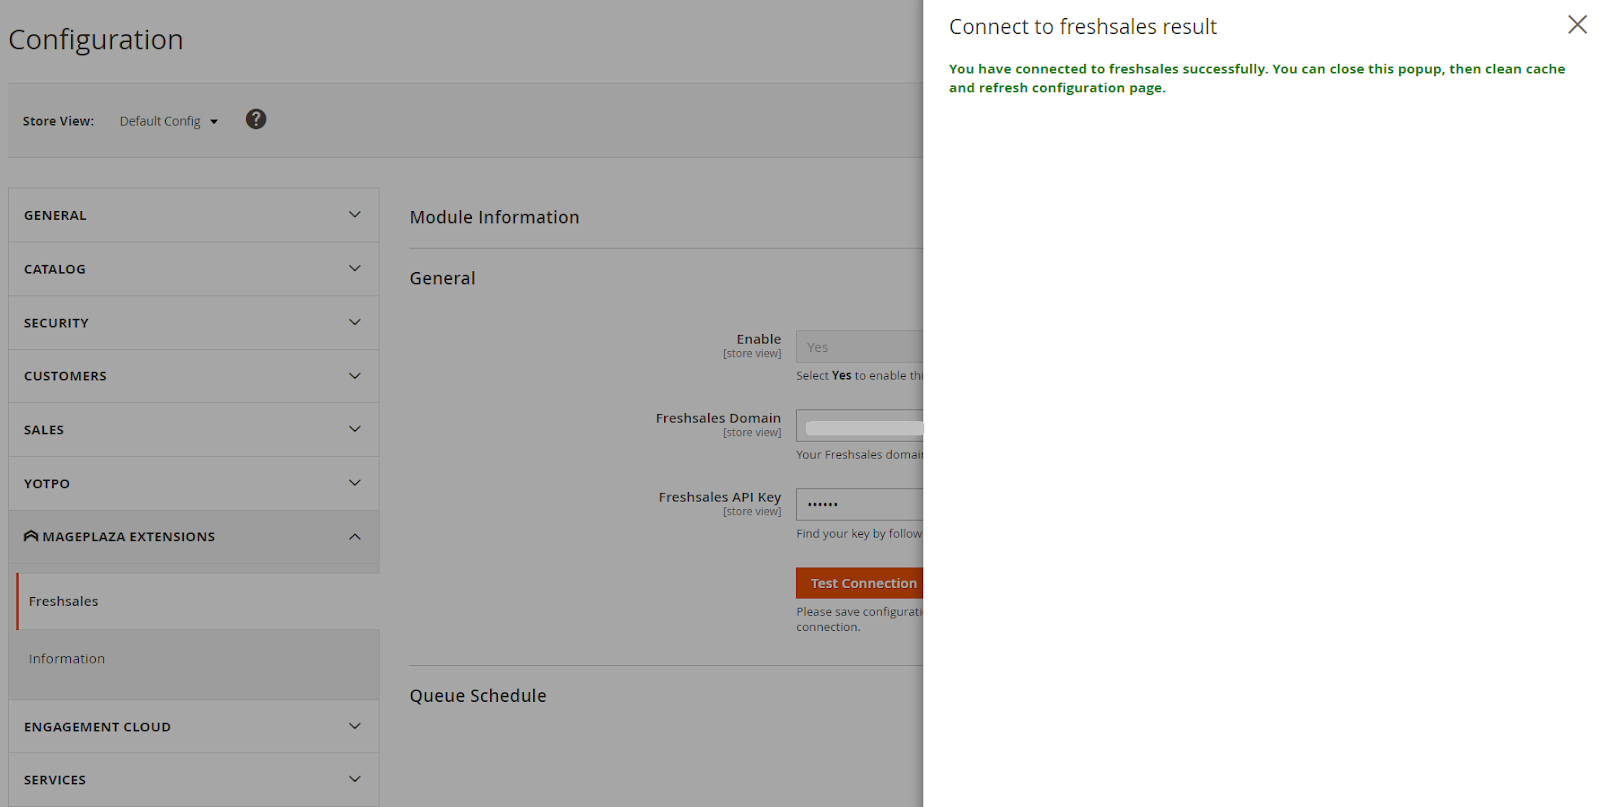
- Admin can get API Key to check the connection with Freshsales by saving the configuration once filled in, then click Test Connection button. After that, you will see the success message, you should close the tab to return to the configuration page to continue the configuration for the Freshsales extension.
1.2. Queue Schedule
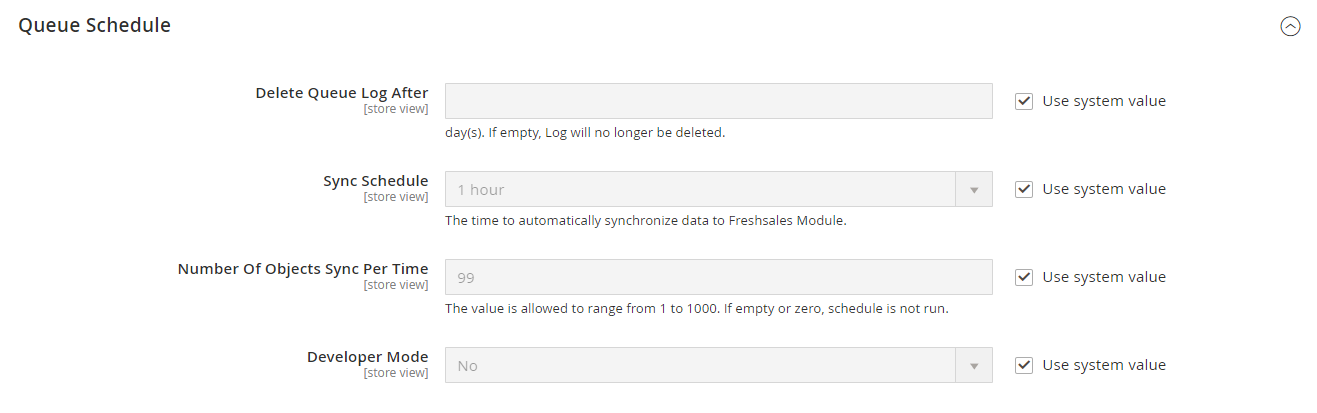
- Delete Queue Log After:
- Enter day(s) in the Delete Queue Log After field. The synchronized queue has the status of Success, then after the entered time period will automatically be deleted. For example: If you enter 6 days, the queues have the status of Success, then after 6 days will be automatically deleted.
- If empty, queue log will no longer be deleted.
- Sync Schedule: Select the time to automatically synchronize data sent to the Freshsales object. The modified Magento object will be sent to the Freshsales object, whereas the unchanged data will not be sent to the Freshsales object anymore.
- Number Of Objects Send Per Time:
- Enter the number of objects to limit the number of objects each time sending data to the Freshsales object into the Number Of Objects Send Per Time field. Queue which is added first will be given priority to send to the Freshsales object first. The value is allowed to range from 1 to 1000.
- If empty or zero, schedule is not run.
- Developer Mode: Select the environment to synchronize data. With 2 options:
- Sandbox: only allow admin to sync data manually.
- Production: allows admin to synchronize data manually and synchronize automatically.
2. Manage Synchronization Rules
Login to the Magento Admin, choose Stores > Settings > Configuration > Synchronization Rules
2.1. Grid
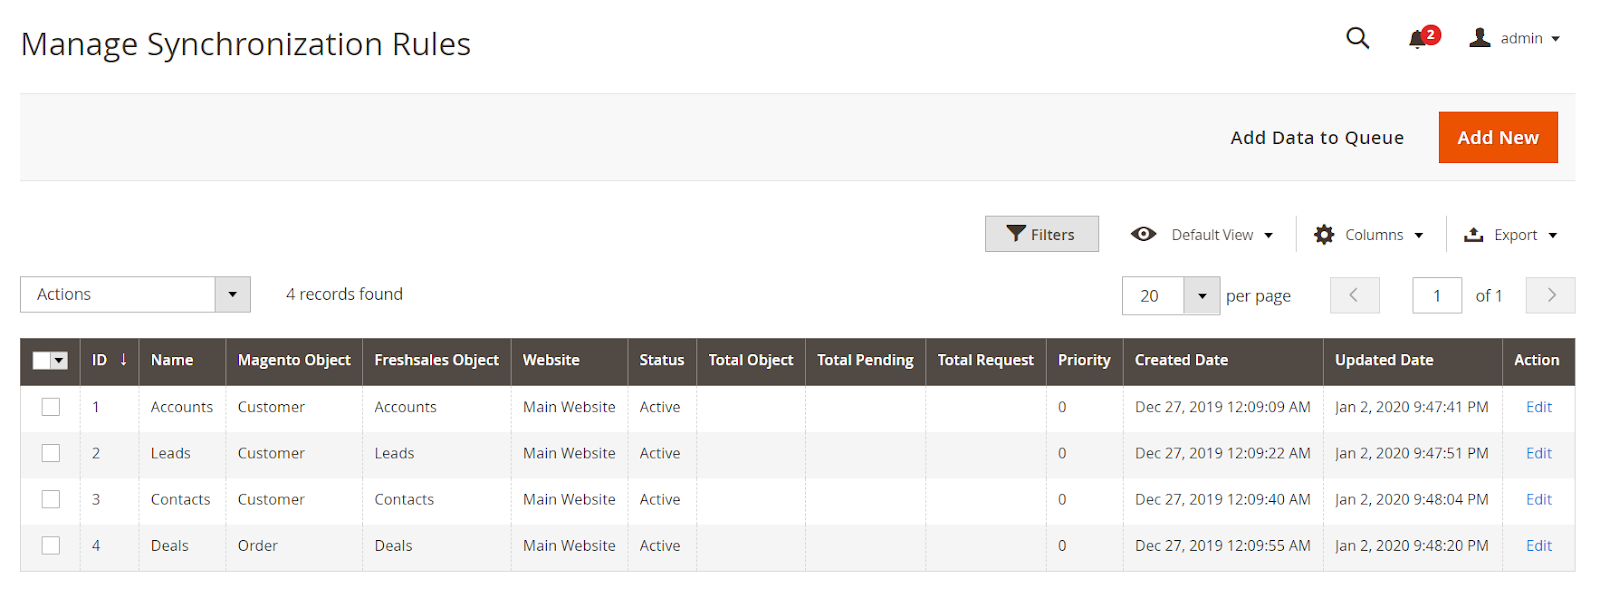
- Here record Sync Rules information including Name, Magento Object, Freshsales Object, Website, Status, Total Object, Total Pending, Total Request, etc.
- Click Add new button to create new rules. After creating the rules, you can choose edit to edit the rules. Also admin can delete rules, change status (enable/disable), filter, so on.
- Select Add Data to Queue to add data to Queue. Or with the MassAction, the admin can sync one or multiple rules at the same time when clicking Add To Queue.
- Note: When installing Mageplaza Freshsales and creating Synchronization Rules, click Add Data to Queue to bring the previous data into the queue and synchronize the data on the Freshsales CRM.
2.2. Create Sync Rule
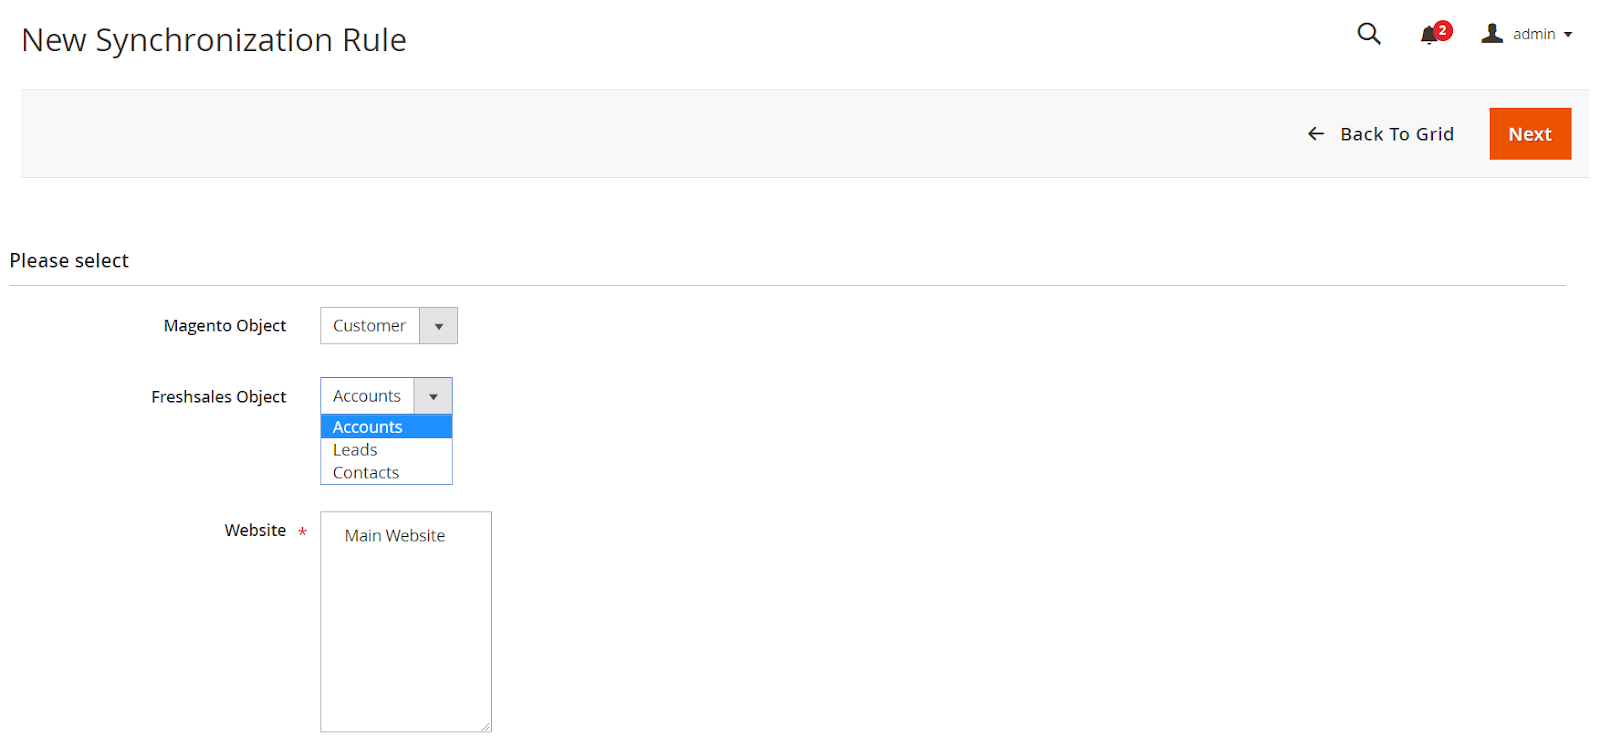
- Magento Object: Select the Magento Object to retrieve nd submit it to Freshsales CRM.
- Freshsales Object: Here will display Freshsales Object corresponding to the Magento Object selected. For example: Magento Object is Customer, so the data information submitted corresponding to Freshsales Object can be selected as Accounts, Leads, Contacts. With Magento Object as Order, the data information submitted corresponding to the Freshsales Object can be selected as Deals
- Website: Select Website to get Magento Object for submission to the Freshsales Module. Magento objects from non-selected websites will not be synchronized.
- After selecting the object, click Next to start the Form create/edit Sync Rule
2.2.1. General
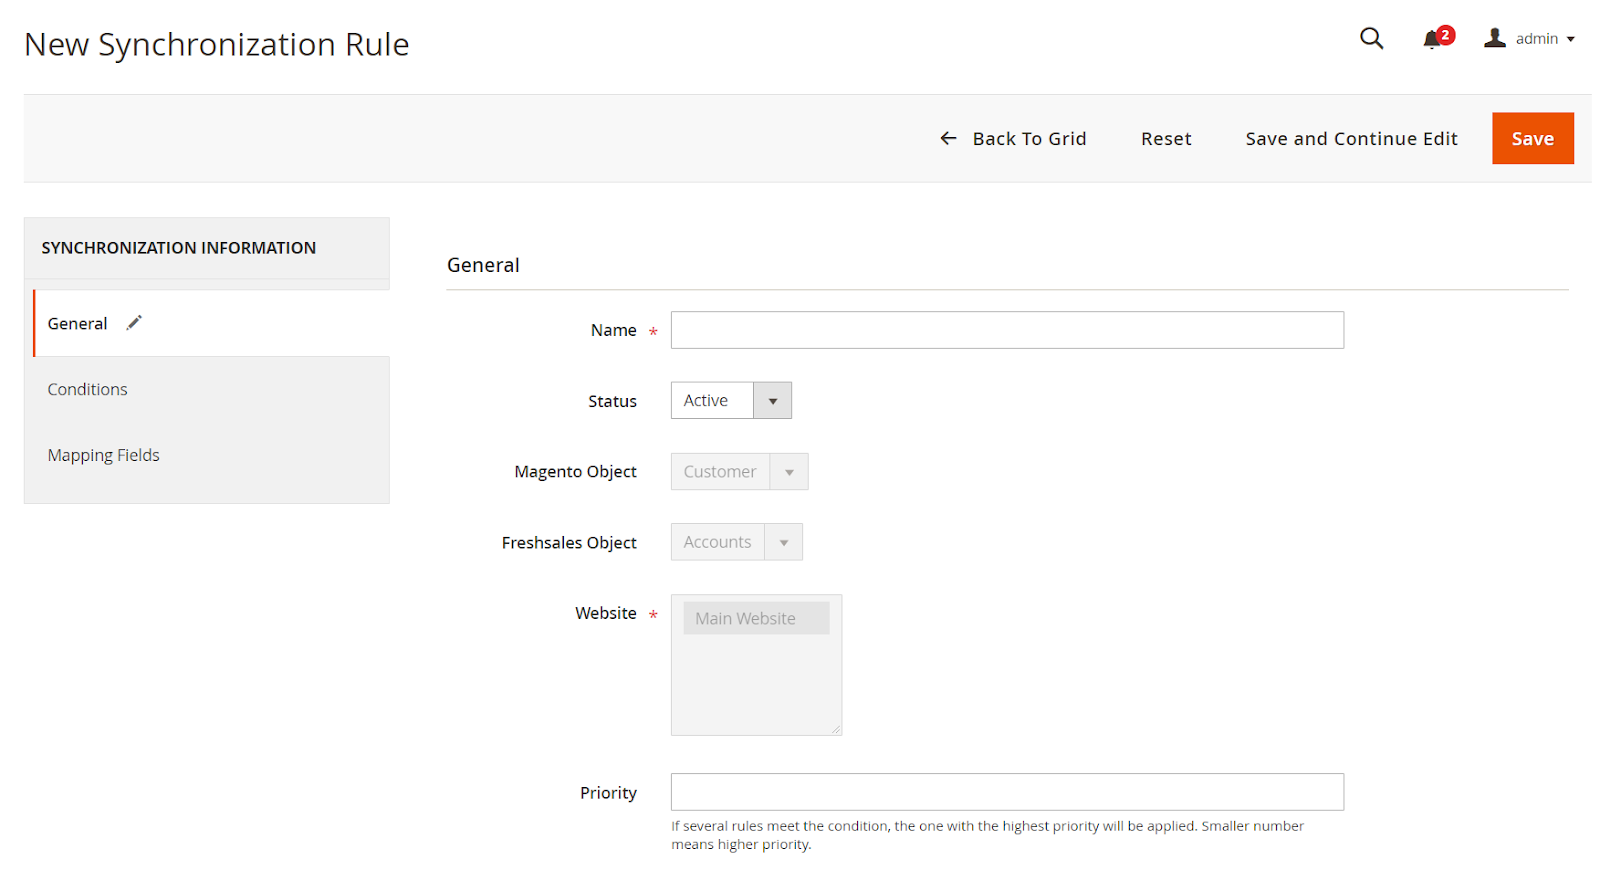
- Name:
- Enter the name that is applied to the Sync rules
- This is a Required field.
- Status: Select Active to make the rules active and synchronize the data on the Freshsales Object.
- Magento Object, Freshsales Object, Website data are retrieved according to the above object information before creating sync rules and the information is only changed when the admin changes the object information before creating.
- Priority: If several rules meet the condition, the one with the highest priority will be applied. Smaller number means higher priority
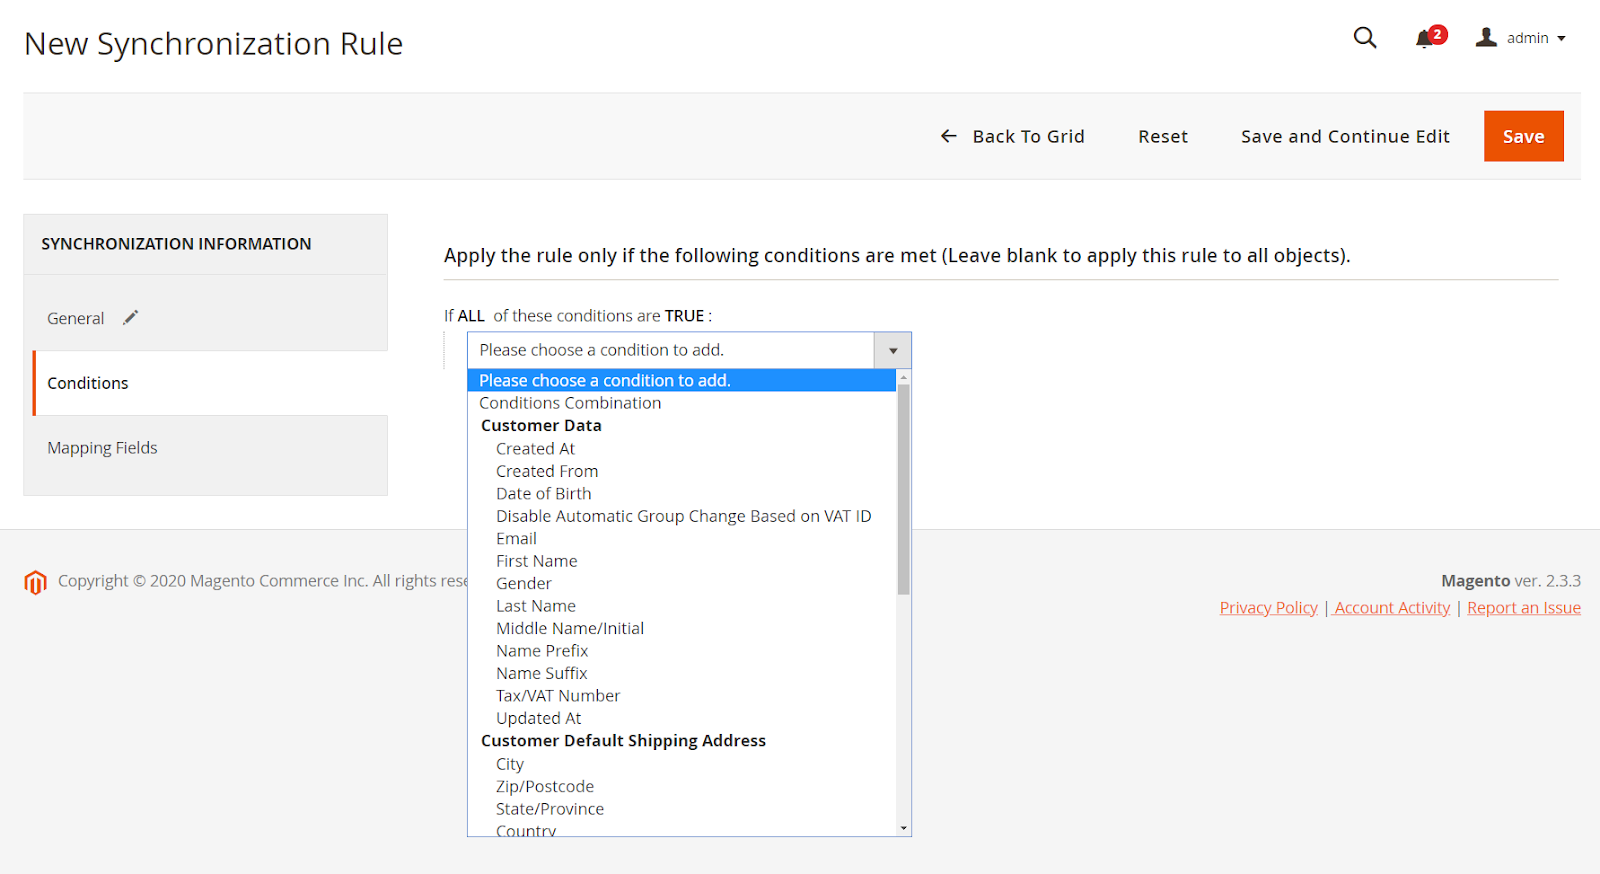
2.2.2. Conditions
- Select the condition to filter the data that the admin wants to sync to Freshsales CRM. Those data that meet the conditions will be put into Manage Queue to synchronize data and vice versa.
- Note: Each rule will have different options and conditions.
2.2.3. Mapping Fields
- Here, select the information of the corresponding Magento fields to submit data to the Freshsales CRM.
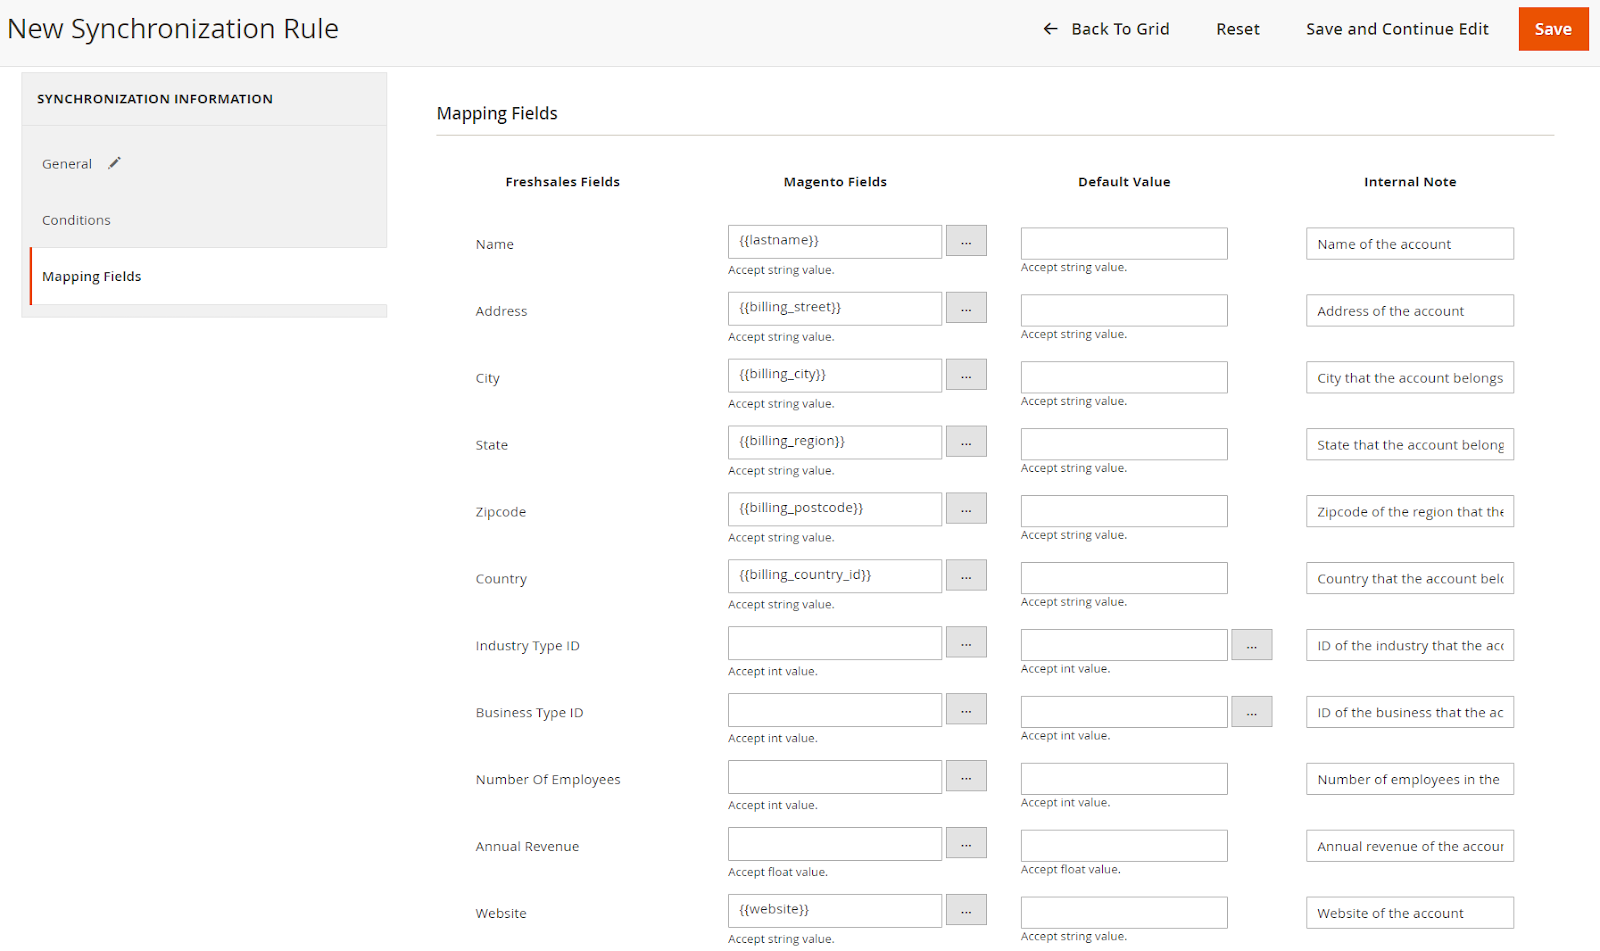
- Freshsales Fields: Displays fields managed by Freshsales for this object according to the selected Magento Object. Fields of Freshsales Field vary depending on the selected Magento Object such as Customer, Order.
- Magento Fields
- Enter the fields of the corresponding magento object to push the data corresponding to the fields of the Freshsales object.
- Leaving this column blank will take the Default Value field value to be applied to the Freshsales object.
- Internal Note: Enter a description in the Internal Note field. This section is only for admin note information with this rule.
- Insert Variables: Select the fields of the Magento object that correspond to the fields of the Freshsales object.
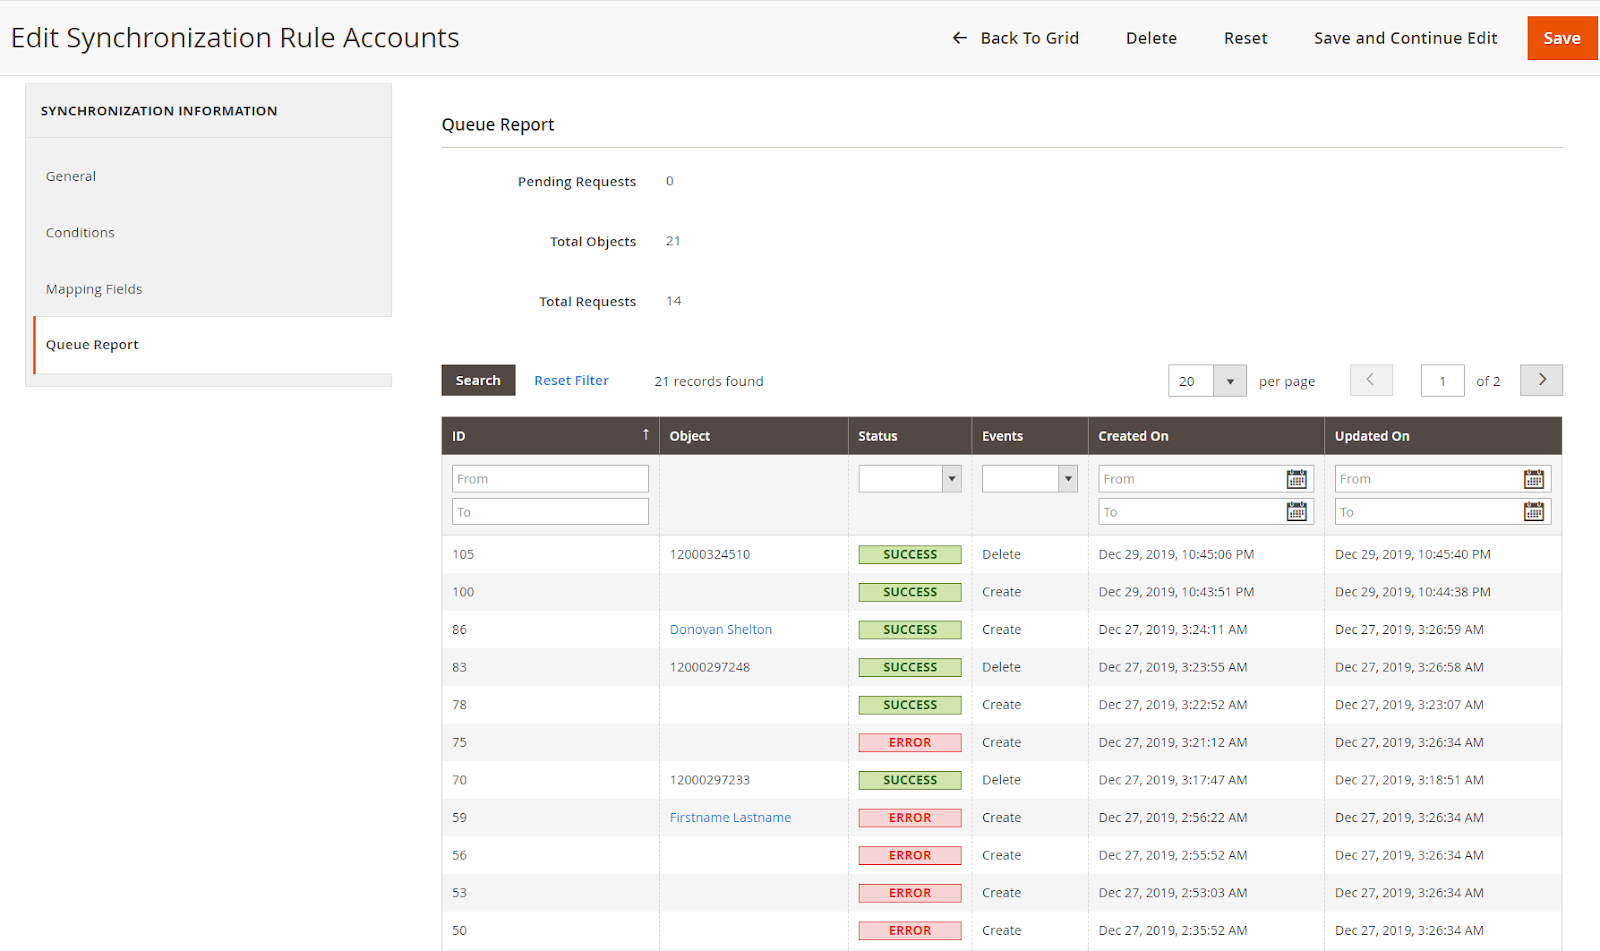
2.2.4. Queue Report
- Here record the Queue information with each rule including the following information: Object, Status, Events, Created On, Updated On. Statistical information with Pending Request, Total Object, Total Request (total number of Queue created).
- Note: With Created On is the time data is entered into the Queue. Updated On is the time when the queue is synchronized to Freshsales CRM.
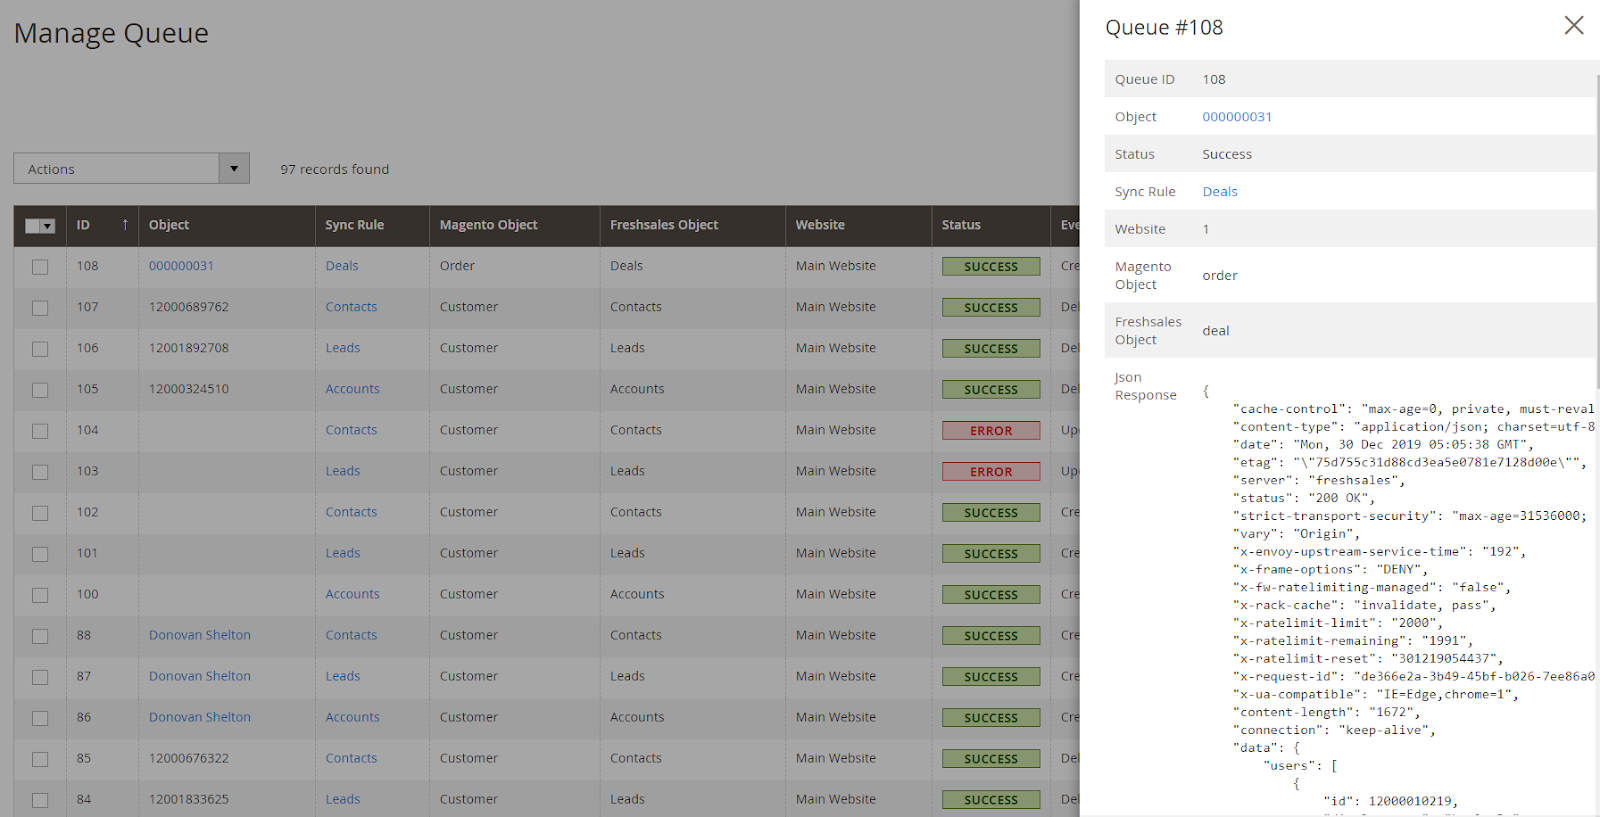
3. Manage Queue
Login to the Magento Admin, choose Stores > Settings > Configuration > Queue
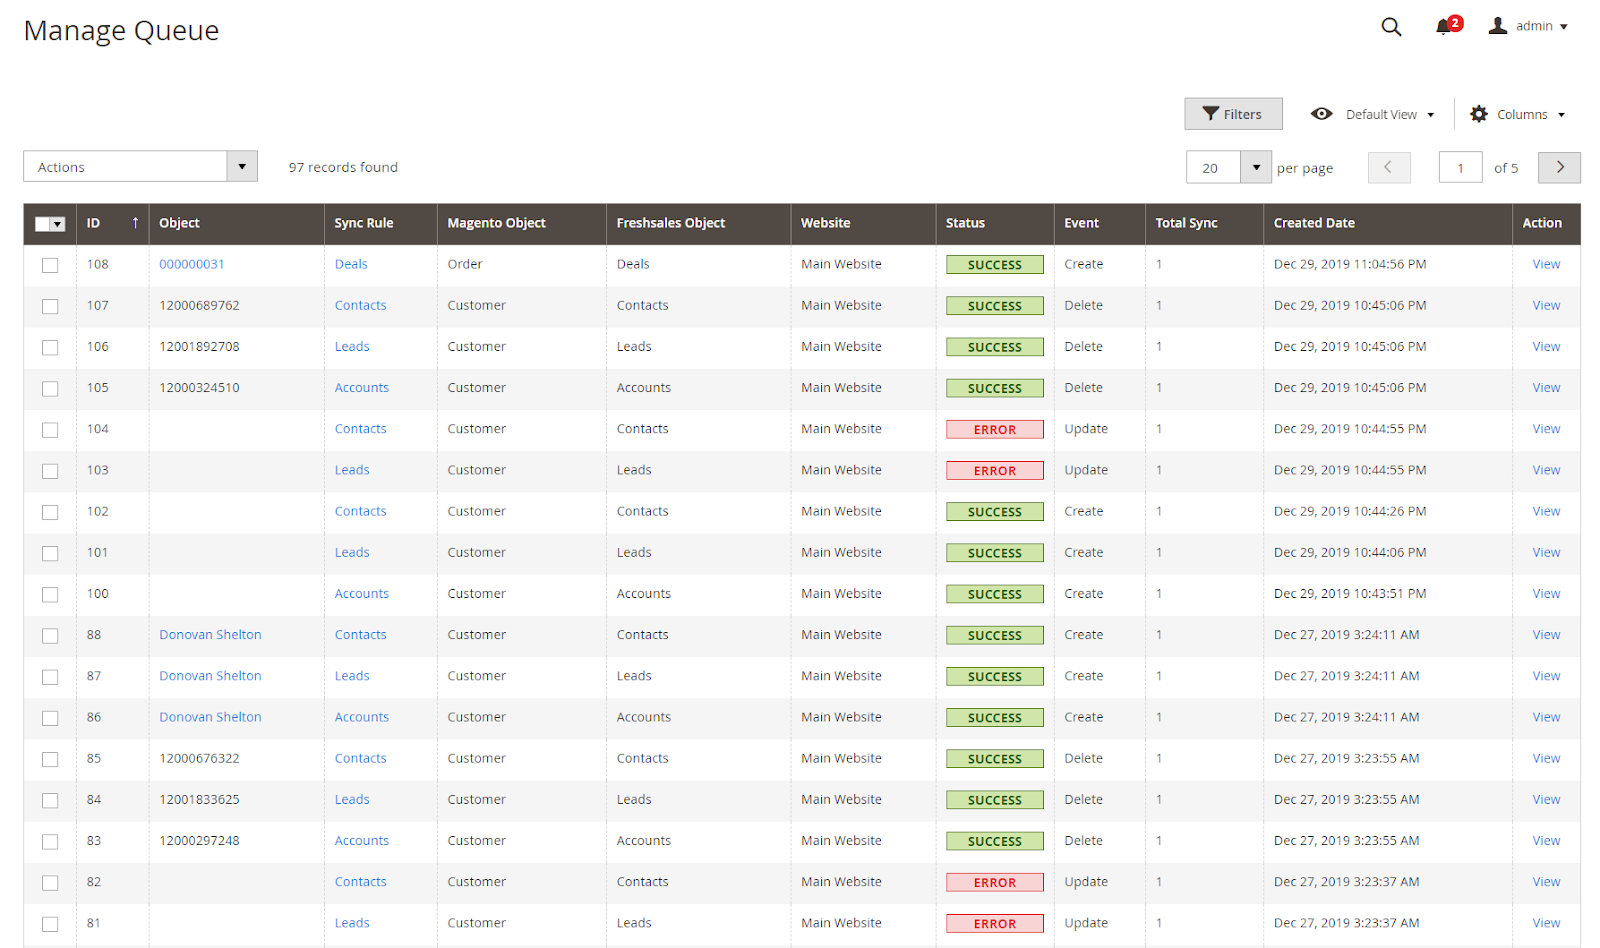
- This section records information of Queue including Object information, Sync Rule, Magento Object, Freshsales Object, etc.
- Here admin can synchronize all data or select each data included in queue to sync to CRM Freshsales. All data changes such as create, update, delete are included in Queue.
- When clicking on View, will display Popup View Queue to view the full information of each Queue. Select Delete to delete Queue and Resend to Re-synchronize Queue.
4. Customer, Order
4.1. Grid
- Here admin can synchronize data or each data information by event: customer, order such as Account, Lead, Contact, these data will be put into Manage Queue to synchronize data. This feature will help admin perform synchronized data selection according to each customer data, each product, etc. more quickly and conveniently.
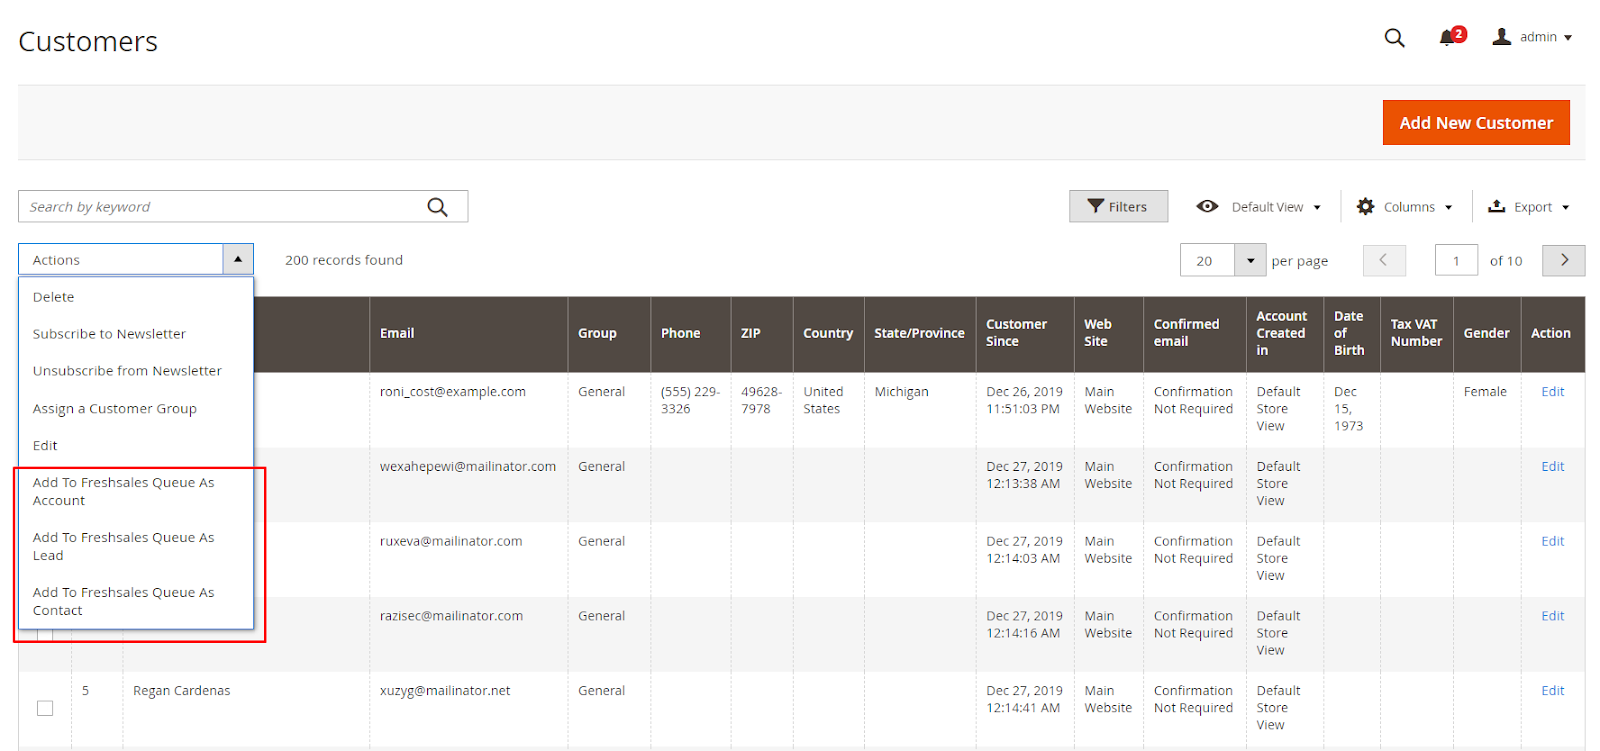
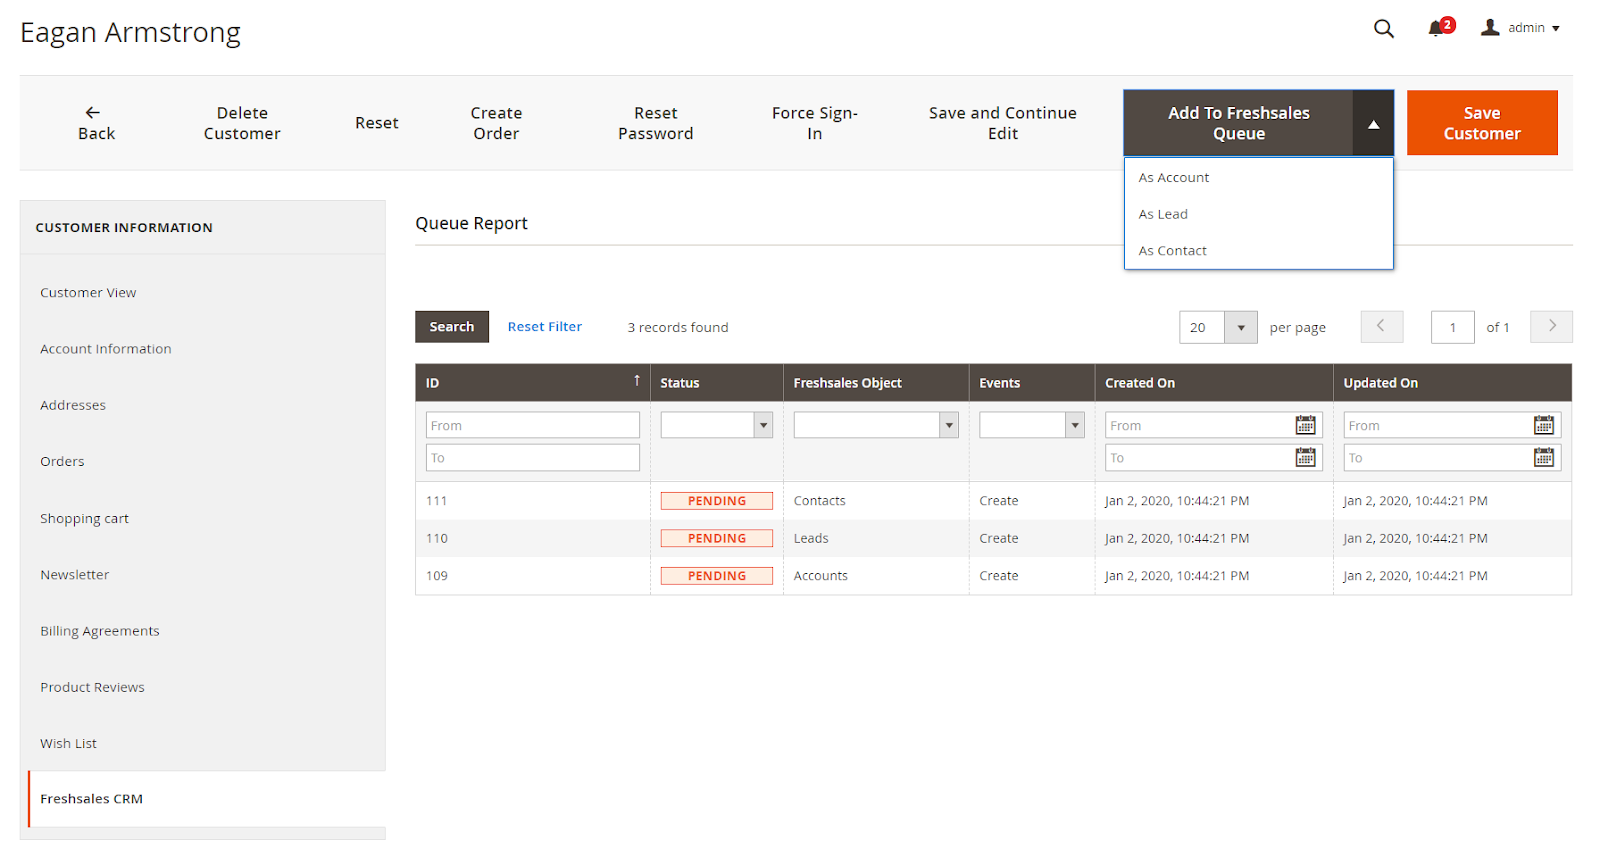
4.2. Edit
- With the data available before, admin can Add To Freshsales Queue with As Account, As Lead, As Contact, Order to put data into Manage Queue and synchronize data.
- Will display more Freshsales CRM tab when editing into customer account data, order. This grid shows statistics and displays a list of queues with each data information, including information: Status, Freshsales Object , Event, Created On, Updated On, etc. Also, the admin can filter, search at those columns.