Call for Price
Overview
Nowadays, some stores or distributors don't want to display the price of the product on the website, they want to display the information only so that customers must contact the shop owners to ask the price or may bargain the price of the product; however, Magento doesn't support this feature currently. To resolve this problem, therefore, Mageplaza provides Magento 2 Call for Price that can meet the needs of store owners.
How to use
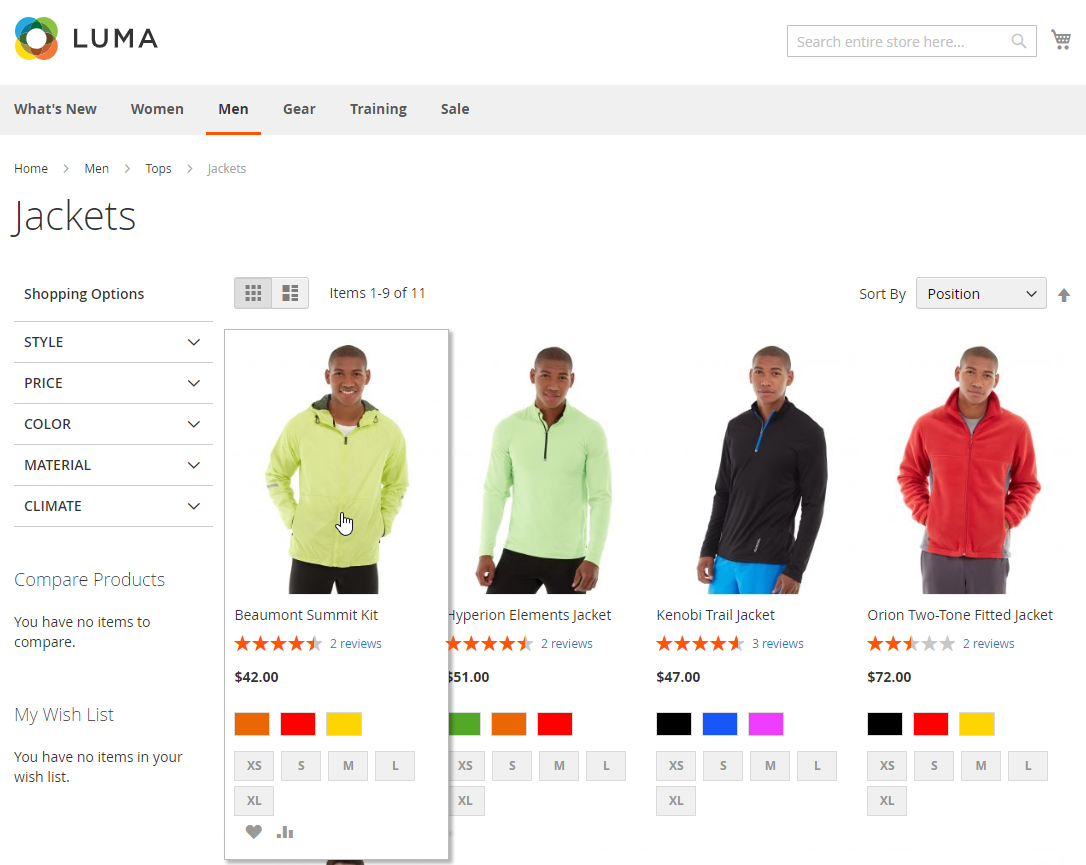
Display on the Product Listing
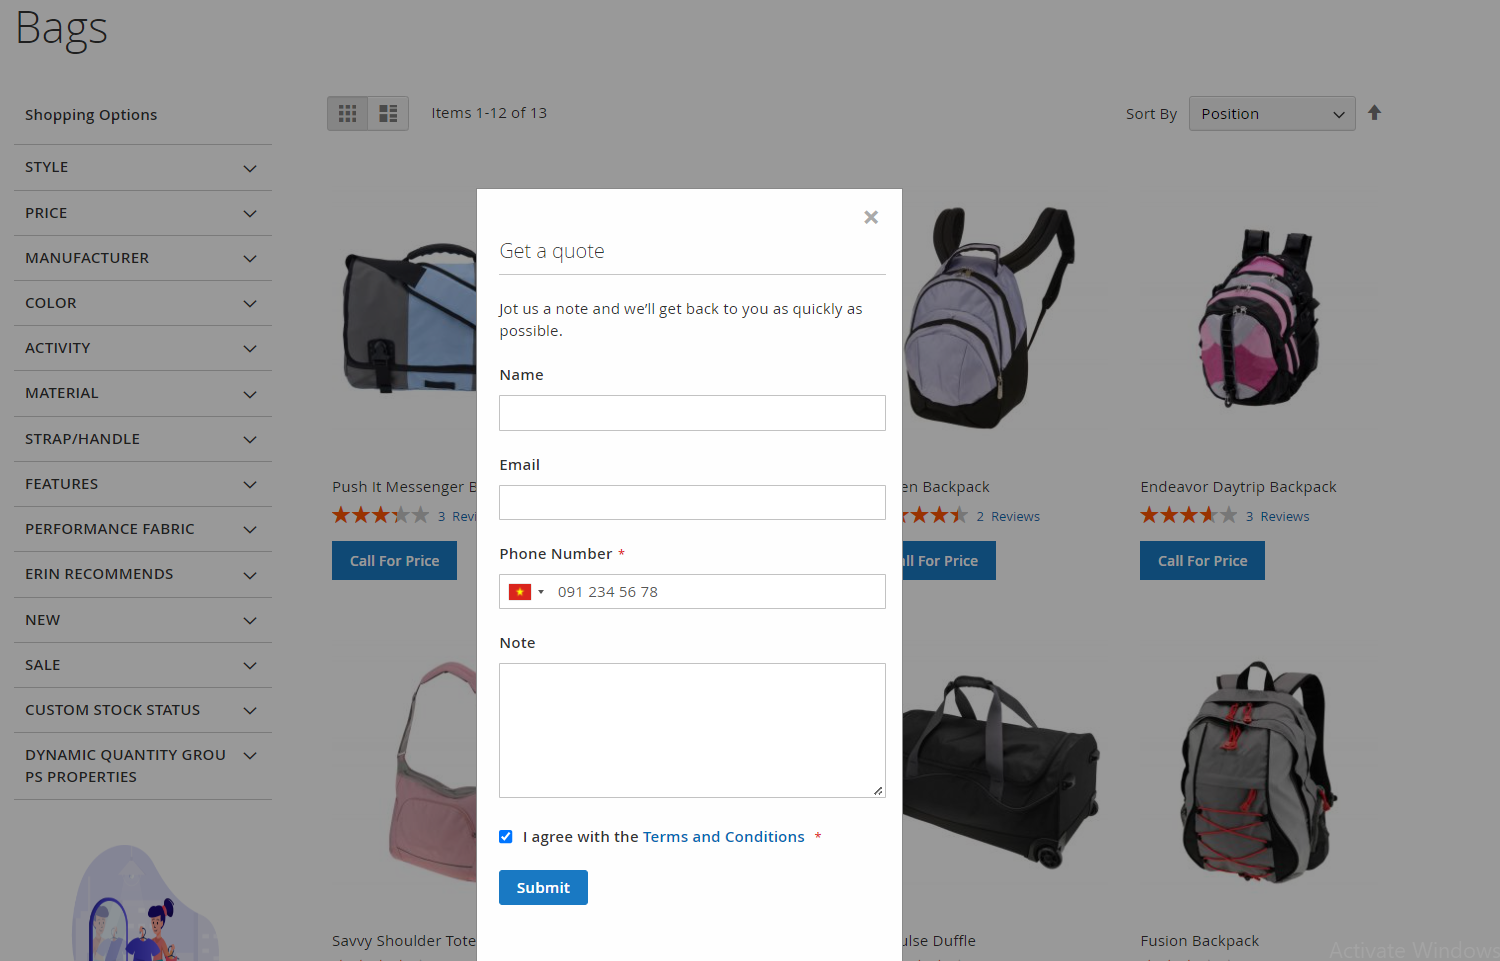
- Display on the popup
- Hide Add to Cart button
Display on the Product Page
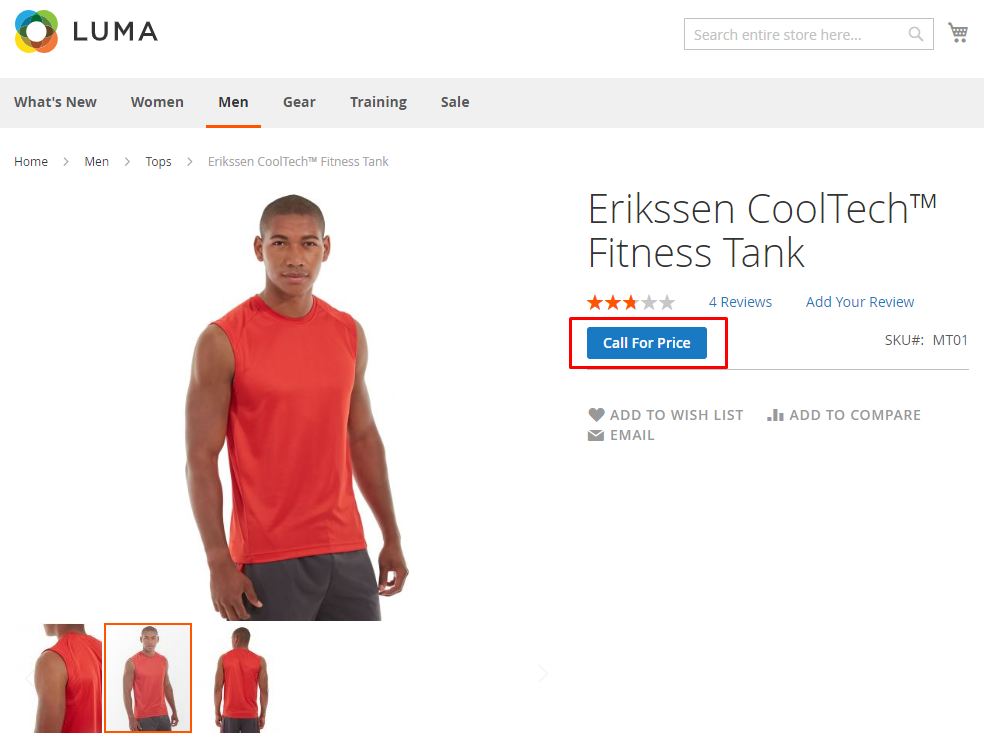
- Hide Add to Cart button
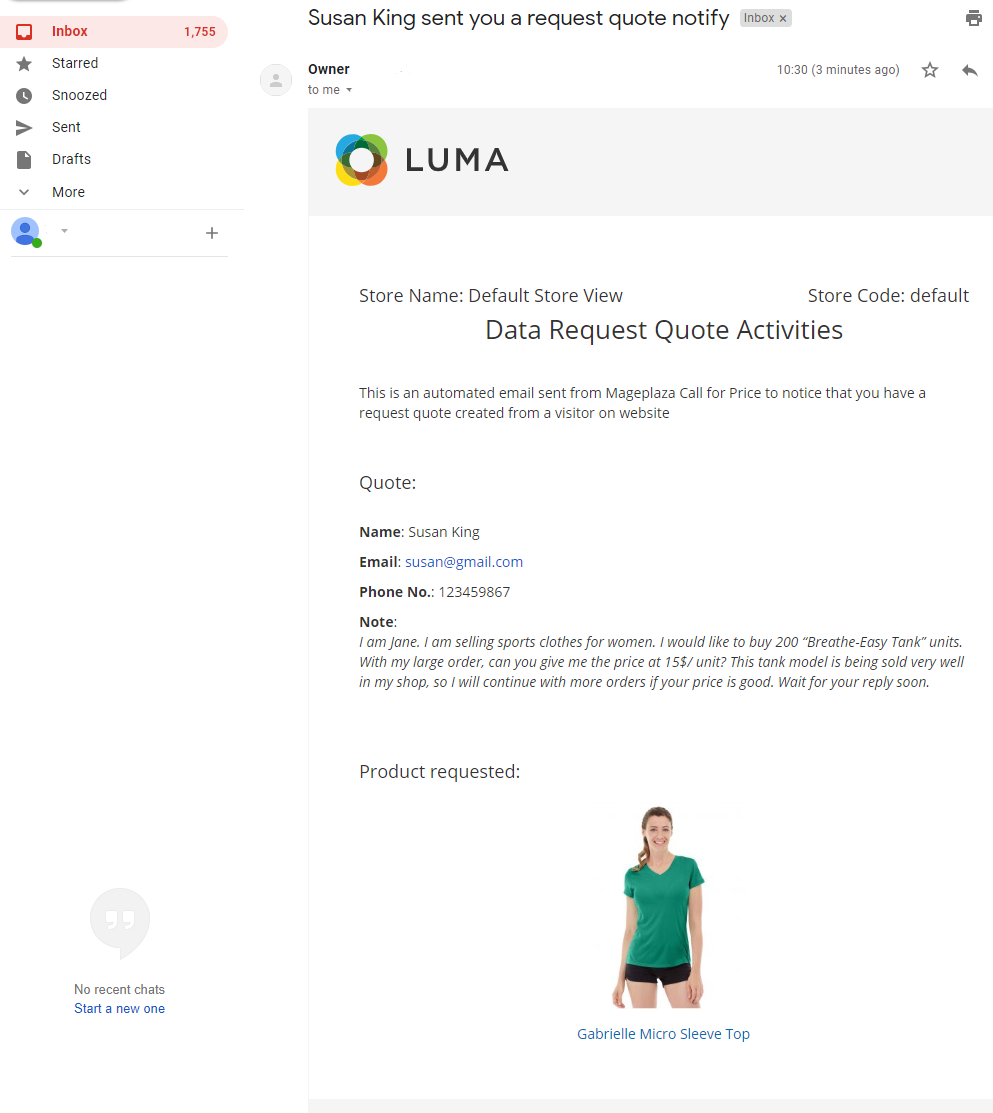
Email when customers send a request quote
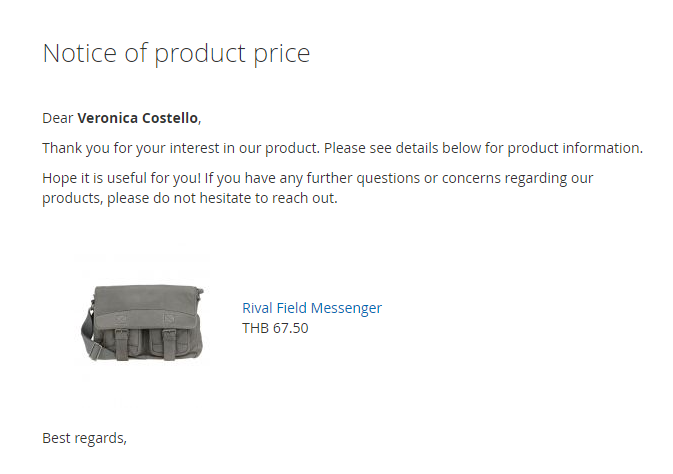
Email of admins to notice product price
How to configure
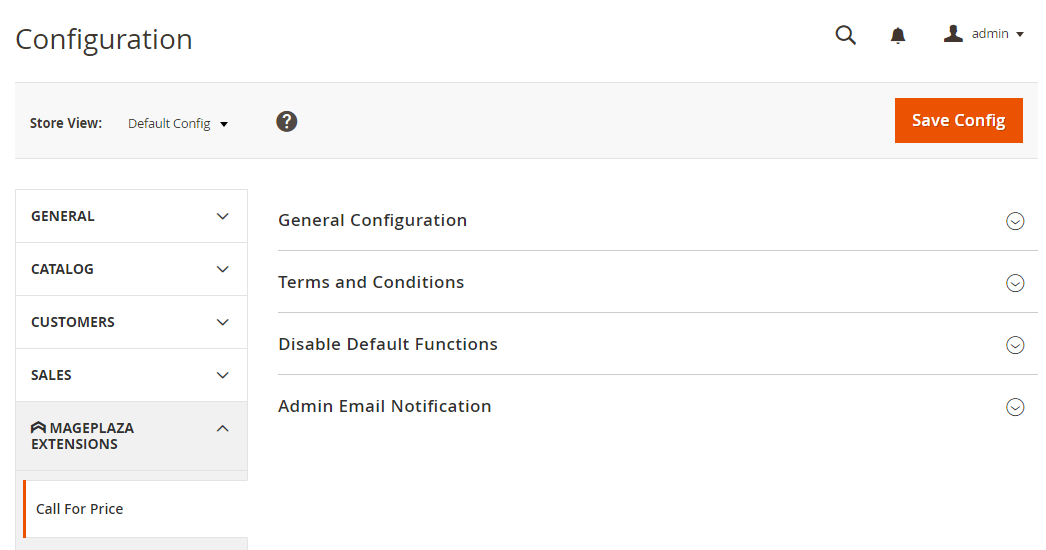
From the Admin Panel, go to Sales > Call For Price > Configuration

Configuration
From the Admin Panel, go to Sales Call ForPrice > Configuration, choose General sections
General Configuration

Enable: Choose
Yesto use the functions of this moduleAvailable Country Codes: Select countries whose phone codes are available
Default Phone Code: Select the country whose phone codes you want to display as default for the Phone Number section in the call for price popup
Request status:
- There're 4 available statuses of this extension: To Do, Doing, To review, Done
- When there's a request sent to, the default status of the request is To Do
- Admins can add, edit, or delete the request status to mange requests that they receive easily
- Admins can set the default status for the requests they receive
Terms and Conditions
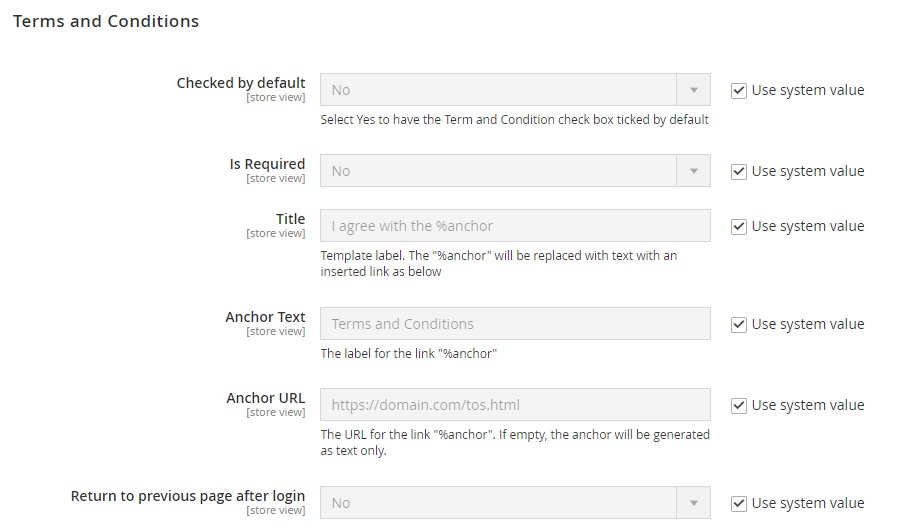
Check by default: Choose
Yesto auto-tick on the checkbox (always agree with the terms and conditions of the store)Is Required: Choose
Yesto display this required fieldTitle:
- Enter the title for the Terms and Conditions
- If you use "%anchor" variable in this field, the text entering into
Anchor Textwill match with the ext ofTitlefield
Anchor Text:
- Enter the content displaying for this field
- The content of this field will merge with the Title field
Anchor URL:
- Enter the URL that store owners want to redirect the customers when clicking in the content filled in the
Anchorfield - If you leave this field blank, the
Anchor Textfield doesn't have the link to click and it will be a text description as usual. - For instance: In the
Titlefield, you fill is that I agree with the %anchor of Services, in theAnchorfield, you fill is that Terms and Conditions and theURLfield is that https://domain.com/tos.html, then the result displaying on the frontend is that I agree with the Terms and Conditions of Services
- Enter the URL that store owners want to redirect the customers when clicking in the content filled in the
Return to previous page after login:
- If
Yes: The page will be redirected to the page before when customers sign in (Example: Customers go to the Bag product page, then sign in, they will be redirected to that Bag product page). - If
No: The page will be redirected to the default Magento page when customers sign in (My Account page).
- If
Disable Default Functions
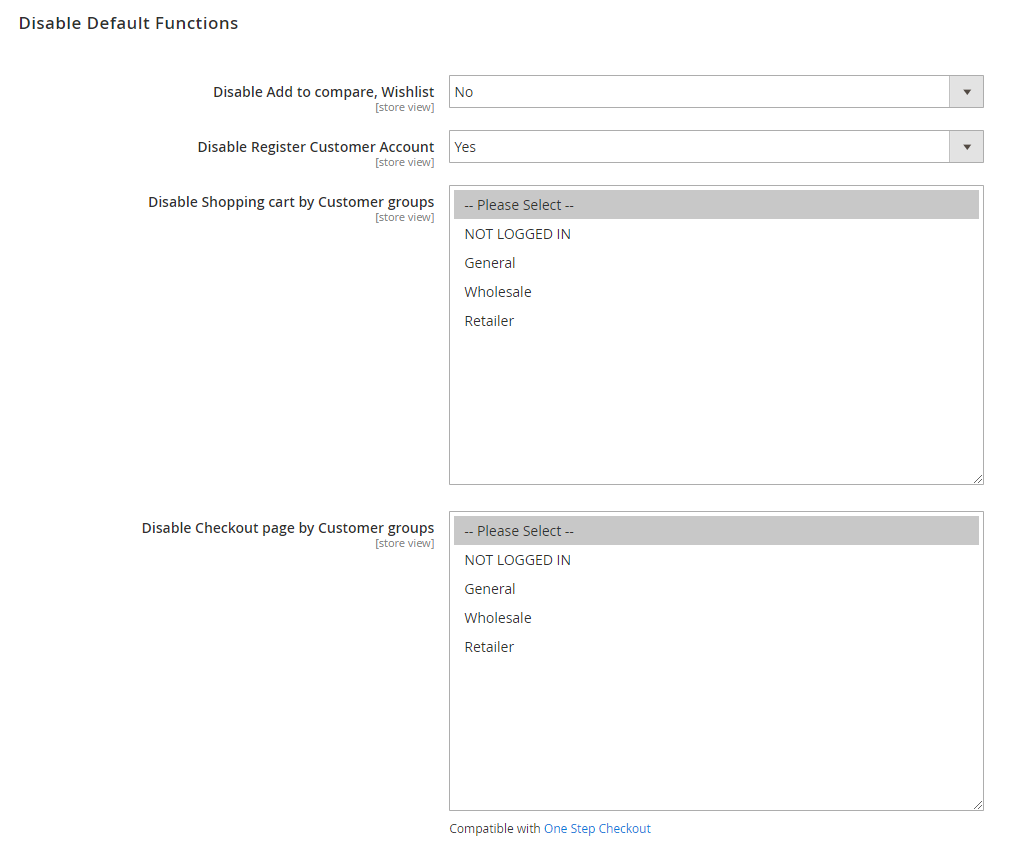
- Disable Add to compare, Wishlist: Choose
Yesto hide theAdd to compareandAdd to Wishlistbuttons on the product on the frontend - Disable Register Customer Account: Choose
Yesto hide theCreate an Accountbutton after customers checkout by their guest account - Disable Shopping cart by Customer groups:
- The selected customer groups cannot access on Shopping cart page
- Allow choosing many customer groups simultaneously
- The default is that no group is selected
- Disable Checkout page by Customer groups:
- The selected customer groups cannot access on the Checkout page
- Allow choosing many customer groups simultaneously
- The default is that no group is selected
Admin Email Notification
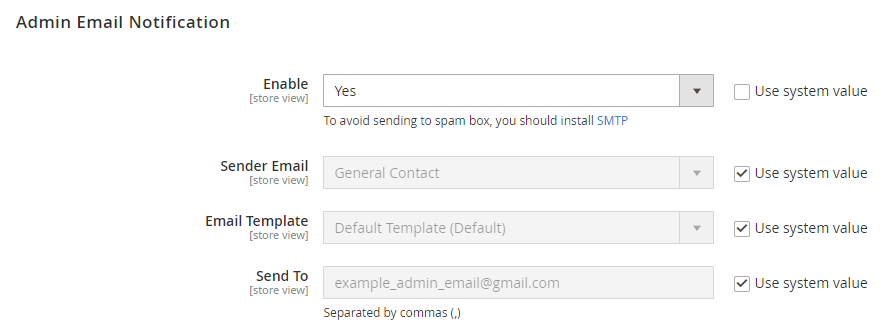
- Enable: Choose
Yesto send the email notification to the store owner when there're requests from customers - Sender Email: Choose the sender to send the email notification
- Email Template:
- An email will be sent to admins when there is a call-for-price request.
- To change Gift Card Email Template, admins can create a new Email Template in the
Marketing > Email Templatesection. - Please view how to create a new Email Template here
- Send to:
- Fill the email to get the notification when there're requests from customers
- Allow filling in many emails to get the notification simultaneously, the emails are separated by commas
Reply Email To Customer Request
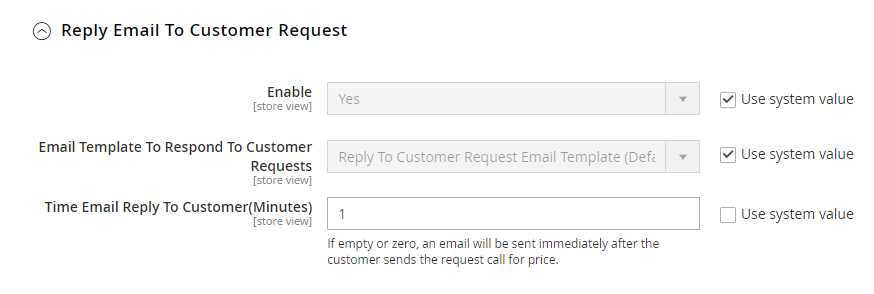
- Enable: Select
Yesto send email to customers to reply to their requests. - Email Template To Respond To Customer Requests:
- Select the available templates to send emails.
- To change the Email Template, admins can create a new Email Template in the
Marketing > Email Templatesection. - Please view how to create a new Email Template here
- Time Email Reply To Customer(Minutes):
- Time to send the reply to customers is in minutes.
- If empty or zero, an email will be sent immediately after the customer sends the request.
Rules Management
Add new rule
- Step 1: Enter the full information in the
Generalsection - Step 2: Design the display of the rule on the frontend in the
What to Showsection - Step 3: Set the condition applying the rule for products in the
Where to Showsection
Admin SMS Notification
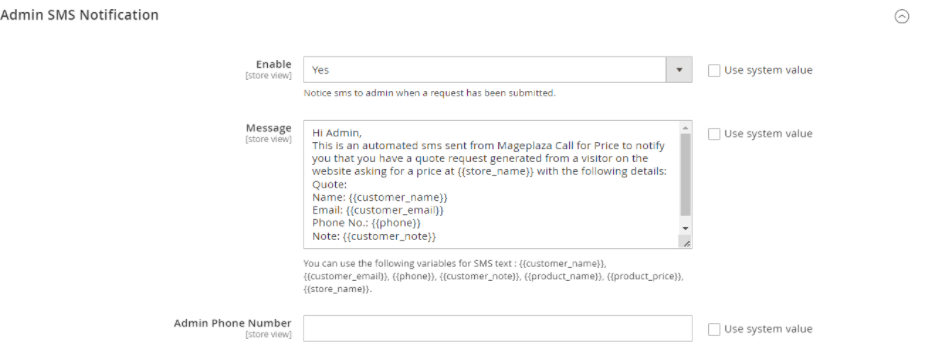
- Enable: Select Yes to inform admins via SMS when there is a call for price request from customers.
- Message:
- Enter messages
- You can use the following variables for SMS text : {{customer_name}}, {{customer_email}}, {{phone}}, {{customer_note}}, {{product_name}}, {{product_price}}, {{store_name}}.
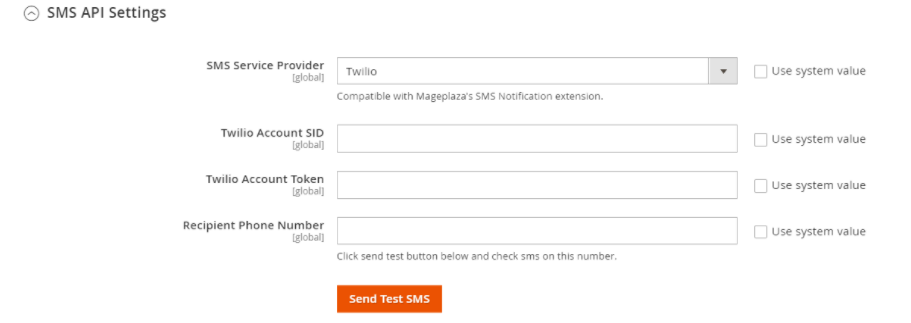
- Mageplaza supports sending SMS to admins via the registered phone number at Twilio. Stores need to register and enter required information to activate the messages.
- Create a Twilio account at: https://www.twilio.com/try-twilio
Reply SMS To Customer Request

- Enable: Select Yes to inform admins via SMS when there is a call for price request from customers.
- Message:
- Enter messages
- You can use the following variables for SMS text : {{customer_name}}, {{customer_email}}, {{phone}}, {{customer_note}}, {{product_name}}, {{product_price}}, {{store_name}}.
- SMS Time To Reply To Customers (Minutes)
- Enter the time SMS will be sent after customers send requests.
- If empty or zero, an SMS message will be sent immediately after the customer sends the call for price request.
Step 1: Enter the full information in the General section
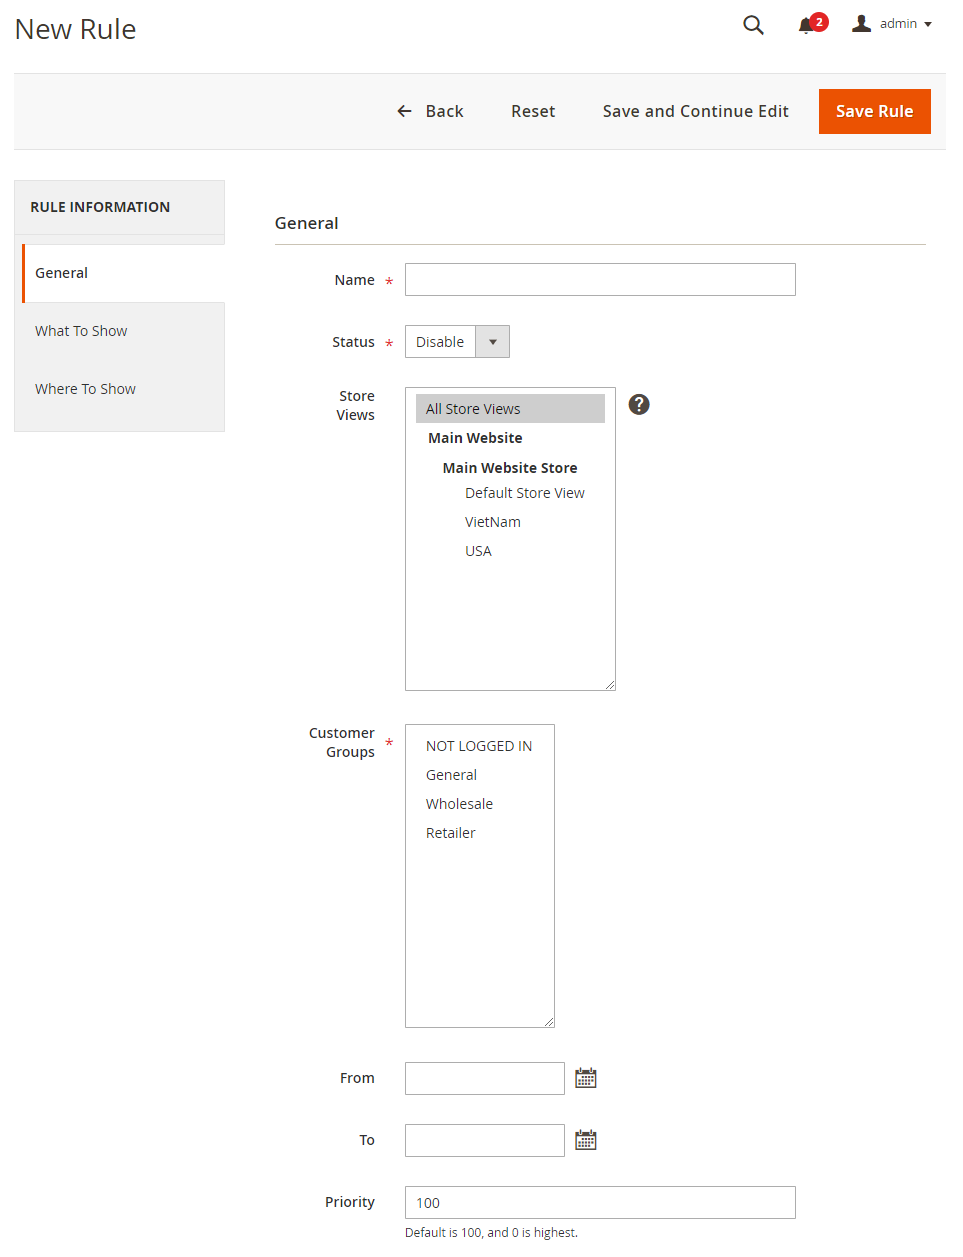
- Name: Fill in the name of the rule
- Status: Choose
Enableto apply for the rule - Store View:
- Only selected products on the store can be applied for the rule
- Allow choosing many store views simultaneously
- Customer Groups:
- Only the selected customer groups can see the products applied the rule
- Allow choosing many groups simultaneously
- Do not Apply Rule with Customer ID: Do not apply Call For Price with particular CustomerID entered here and show prices to them.
- From Date: Choose the start day applying the rule on the product
- To Date: Choose the finish applying the rule on the product
- Priority:
- Enter priority for synchronizing objects
- The smaller the input number, the higher the priority.
- Items have the equal priority, the priority will be based on what item is created first.
Step 2: Design the display of the rule on the frontend in the What to Show section
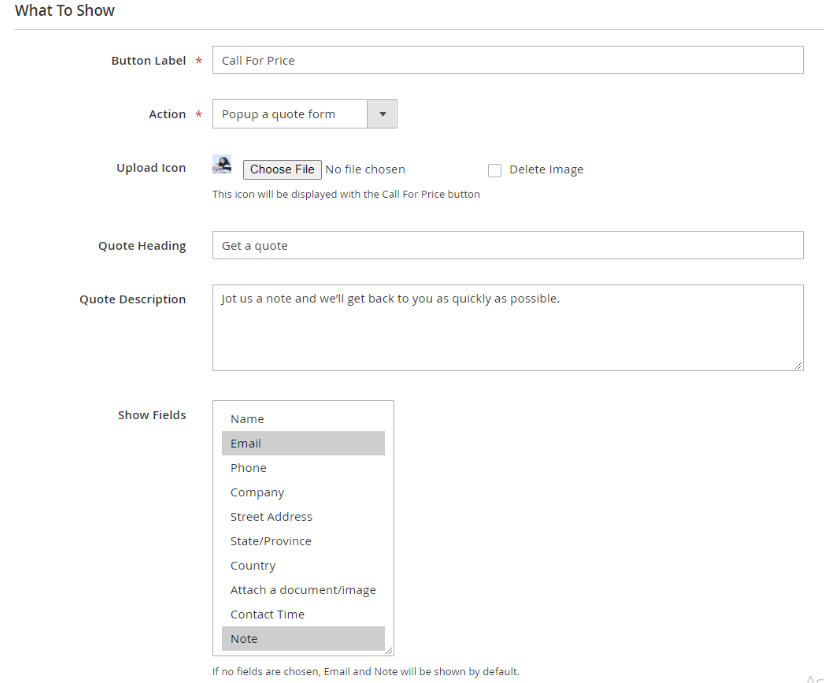
- Button label: Enter the label for the button to replace the Add to Cart button
- Action:
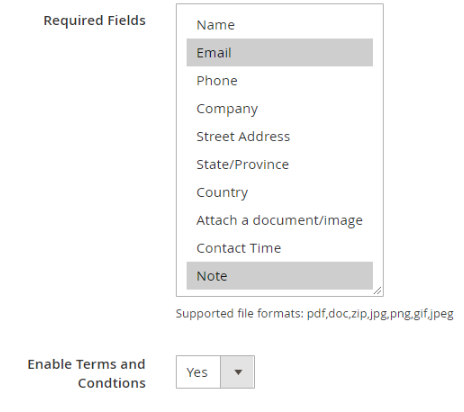
Action = Popup a quote form: Display the popup to login or as a note of customers so that they can send the requests to the store ownerQuote Heading: Enter the title for the popupShow Fields: Choose the fields displaying the popup, including Name, Email, Phone, Company, Street Address, State/Province, Country, Attach a document/image, Contact Time, Note.Required Fields: Choose the field displaying the default on the popup, including Name, Email, Phone, Company, Street Address, State/Province, Country, Attach a document/image, Contact Time, Note.Enable Terms and Conditions: Choose Yes to show Terms and Condition
Action = Redirect to an URL: Redirect the customers to the desired admin page when clicking on the button to replace the Add to cart buttonRedirect URL: Enter the URL that you want to redirect the customers for accessing to
Action = Login to See Price: Customers need to login to the website to view the price of the productAction = Hidden Add to Cart button:- Hide the Add to cart button on the product
- This section is usually for reference products or non-selling products
Action = Custom CSS:- Add custom CSS.
- Product SKU = {{sku}}, Product ID = {{id}}. The {{sku}} and {{id}} will be replaced automatically with the specific SKU and ID you've set in the rule's condition.
- Some commonly-used elements:
- Button Add to Cart: form[data-product-sku="{{sku}}"] .action.tocart{ Your custom CSS !important}
- Product Prices: .price-box[data-product-id="{{id}}"] .price{ Your custom CSS !important}
- Product SKU: .product-info-stock-sku{ Your custom CSS !important} Example: form[data-product-sku="{{sku}}"] .action.tocart{ color:red;background-color:yellow }
Step 3: Set the condition applying the rule for products in the Where to Show section
- Choose the condition to apply the rule
- You can customize label products by setting the conditions for the product or selecting which products of the category will be displayed labels. You can find products that meet the conditions in the
PREVIEW PRODUCTSsection
Requests Management
Display all customer requests sending to the store.
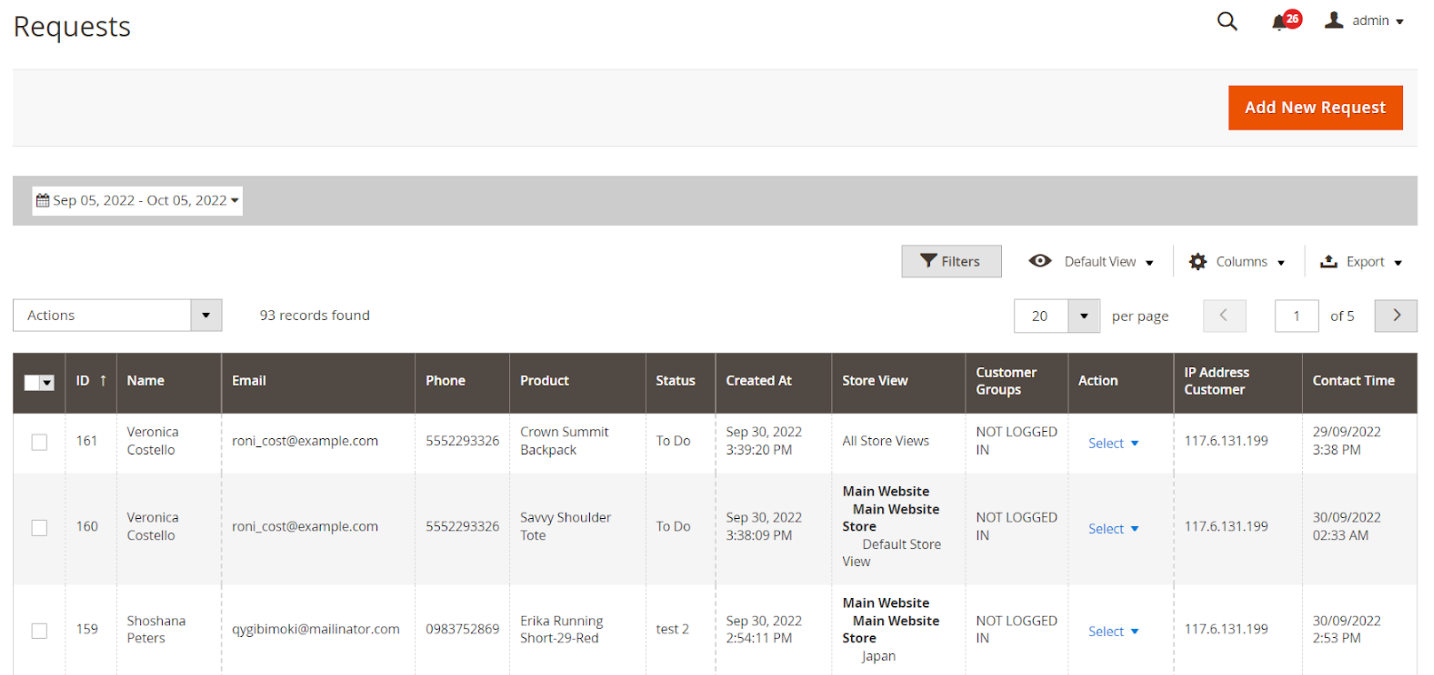
- Click Add New Request: Admin can create Call For Price Request. Affter creating request successfully, admin can send replies to customer's requests via the Conversation in each request.
Mageplaza Call For Price supports saving IP Address Customer and Contact Time - the time when admin can contact with their customers.
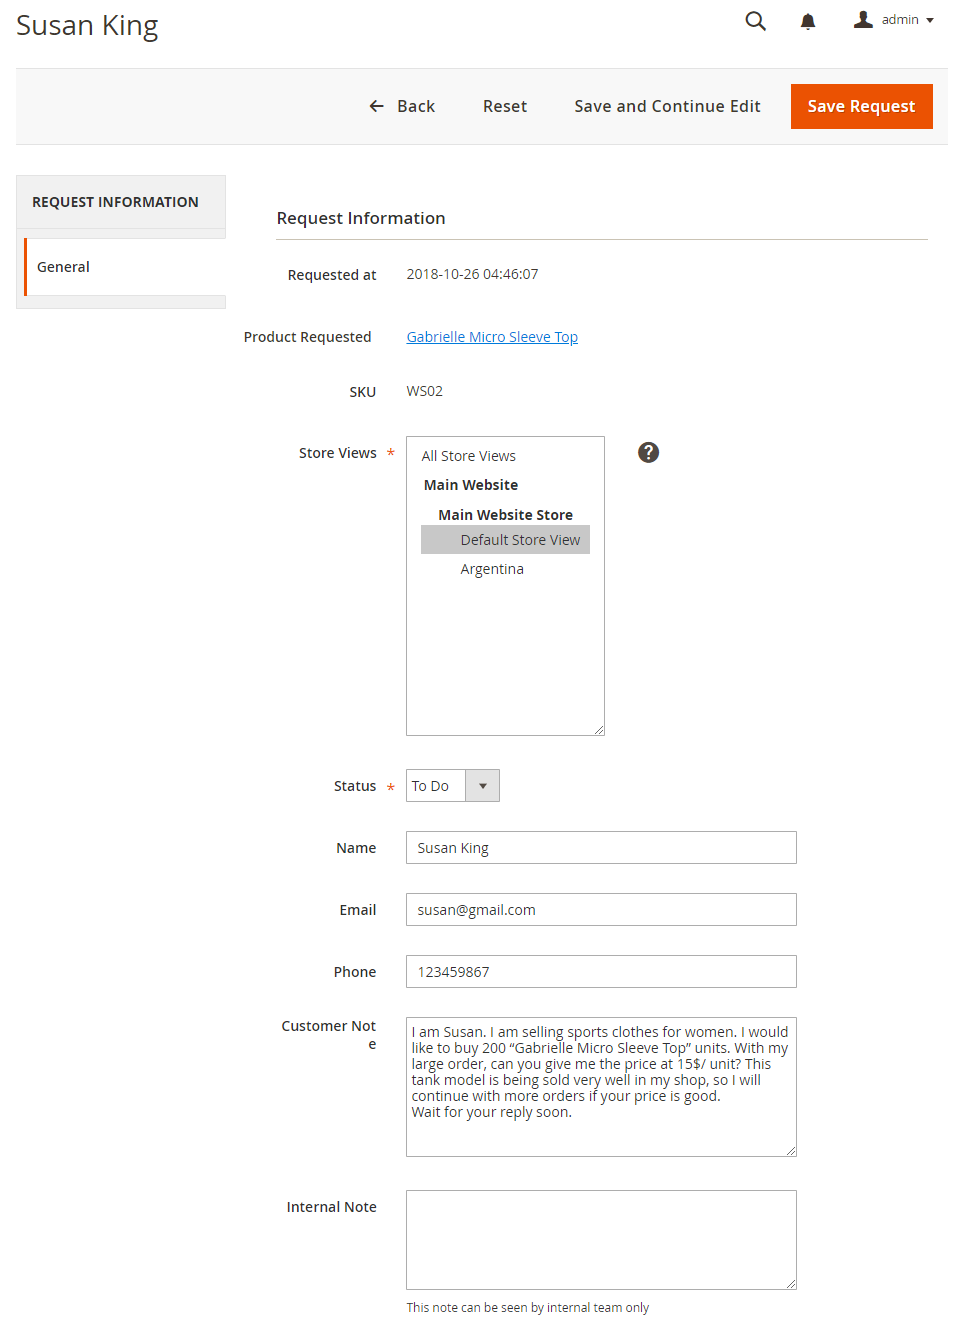
When you click on View, store owners can view the details of the request, such as the date of the request, the name and email of the customers, the product the customers are interested in and store owners can change the status of the request to manage requirements with ease. At the same time, they can also annotate on customer requirements.
Product
From the Admin Panel, go to Catalog > Products > Add Product or Edit Product

- Call for Price: The product will be applied based on the selected rule in this field
Call for Price = Inherit from Rule: The product that complies with the created rule inRulessection will continue to apply that ruleInherit from Rule = Disable: Not apply any rule for the product- For example: Your store has 3 rules applied as Rule 1, Rule 2, and Rule 3. The product A includes category Bags applied Rule 1, but you want the product A assign to apply with rule 2, you need to choose
Inherit from Rule = Rule 2
Compatible with Reports standard extension
If you have installed Mageplaza Reports Standard extension on your site, in the Dashboard of the admin panel will be displayed 2 different boards: Call for price: Requests and Top Requested Product.
Call for price dashboard: Requests will show the top 5 customers and products requested recently. Simultaneously, it also displays the comparison with the previous period time and the number of requests got. When clicking on View Details, admins can view the details all requests.
Top Requested Products dashboard will display the top 5 products that are requested the most and the number of requests respectively with that products.
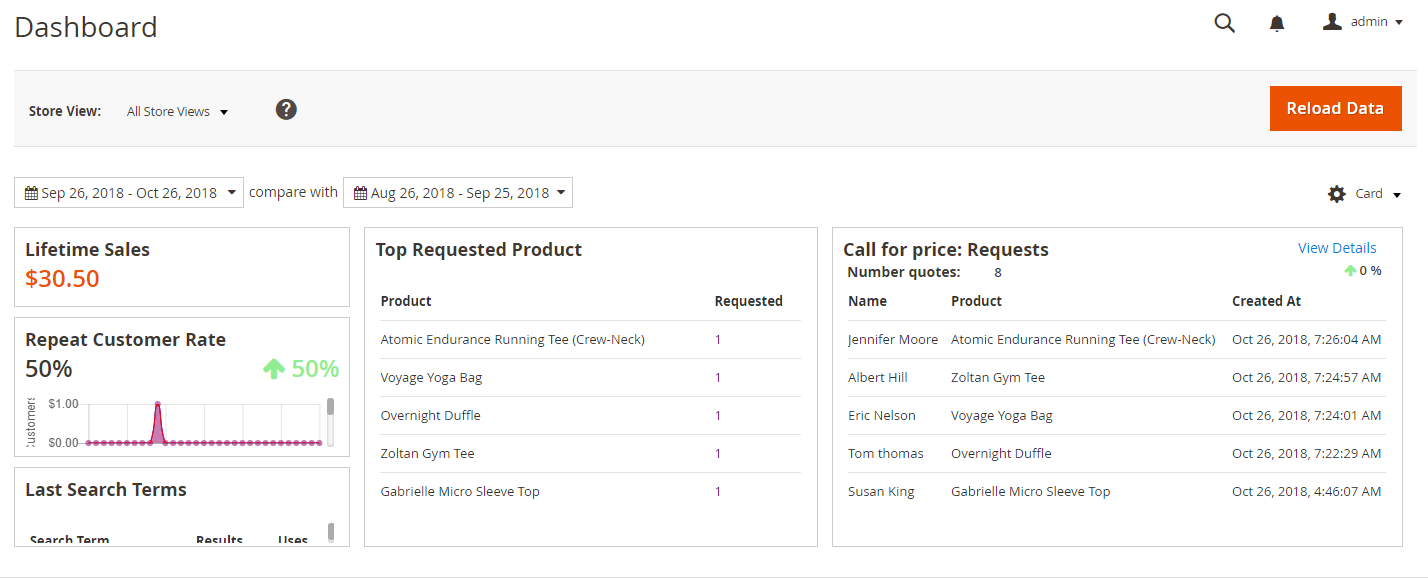
When You click on the View Details link in the Call for Requests card, Requests page will show all information of the request sent to the website.
API
Mageplaza's Call For Price extension allows using the Rest API to view the rule information, create and delete rules, view the list of price requesters and support to create customer requests.
Details can be viewed here.
Instructions for creating Integration tokens here.
GraphQL
Run the following command in Magento 2 root folder:
composer require mageplaza / module-call-for-price-graphql
php bin / magento setup: upgrade
php bin / magento setup: static-content: deploy
To start working with Call For Price GraphQL in Magento, you need to:
Use Magento 2.3.x. Return your site to developer mode
Install chrome extension (currently does not support other browsers)
Set GraphQL endpoint as
http://<magento2-3-server>/graphqlin url box, click Set endpoint. (e.g. http://develop.mageplaza.com/graphql/ce232/graphql)The mutation Mageplaza supports is creating customer requests,etc. Details can be viewed here.