Custom Order Number
Overview
With the ID of Order, Invoice, Shipment or Credit Memo, the default ID of Magento only includes the numbers and the ID of the first order is 000000001. Therefore, with newly established websites, the order quantity is low, which makes customers feel that this store has no the high reliability. This leads to the low number of purchasing quantity of customers at your store. Besides that, to manage the orders of customer that are created on whichever date, month, year of the store, store owners have to view the detail of the orders, this will cause the inconvenience for them.
To resolve this problem, Mageplaza has launched a handy extension, called Magento 2 Custom Order Number.
Note: Magento 2 Custom Order Number can be used with multiple stores. Multiple stores module:
- This extension is applied to multiple stores.
- Stores are set the default as the Default Configuration.
- To change the configuration for each store, need to remove tick at Use Website on the right of each option.
- Config of the extension in each store will be applied in the store itself.
- Config in this store doesn't affect the config in the other store.
Download & Install
- Mageplaza Custom Order Number
- How to install
How to configure
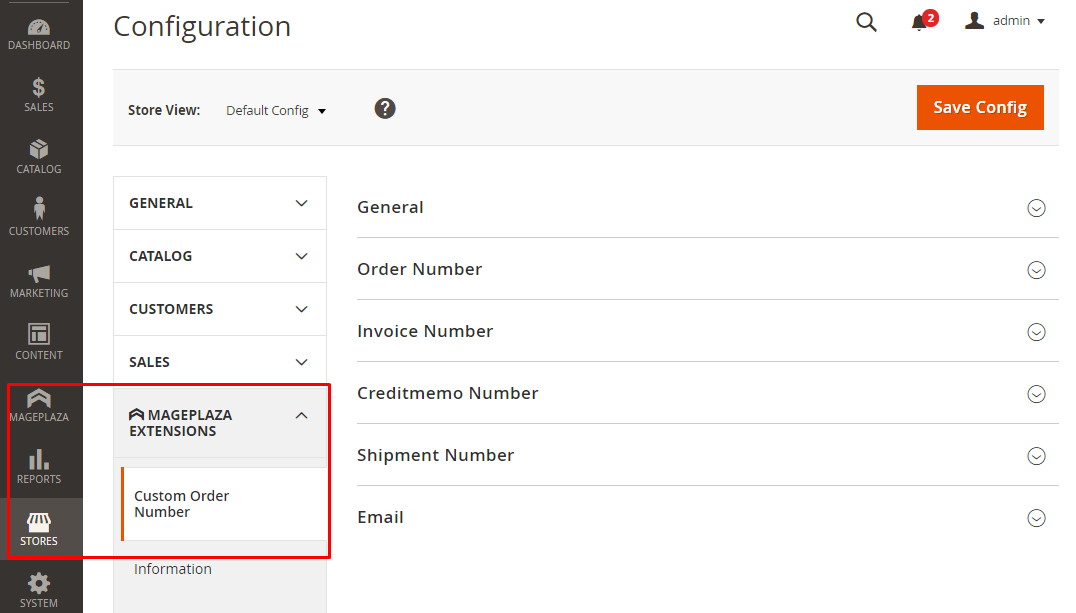
Login to the Magento Admin, choose Store > Settings > Configuration > Mageplaza Extensions > Customer Order Number
General Configuration
From the Admin Panel, go to Store > Settings > Configuration > Mageplaza Extensions > Customer Order Number, choose General Configuration section

- Enable: Choose Yes to enable this module
Order Number
From the Admin Panel, go to Store > Settings > Configuration > Mageplaza Extensions > Customer Order Number, choose Order Number section
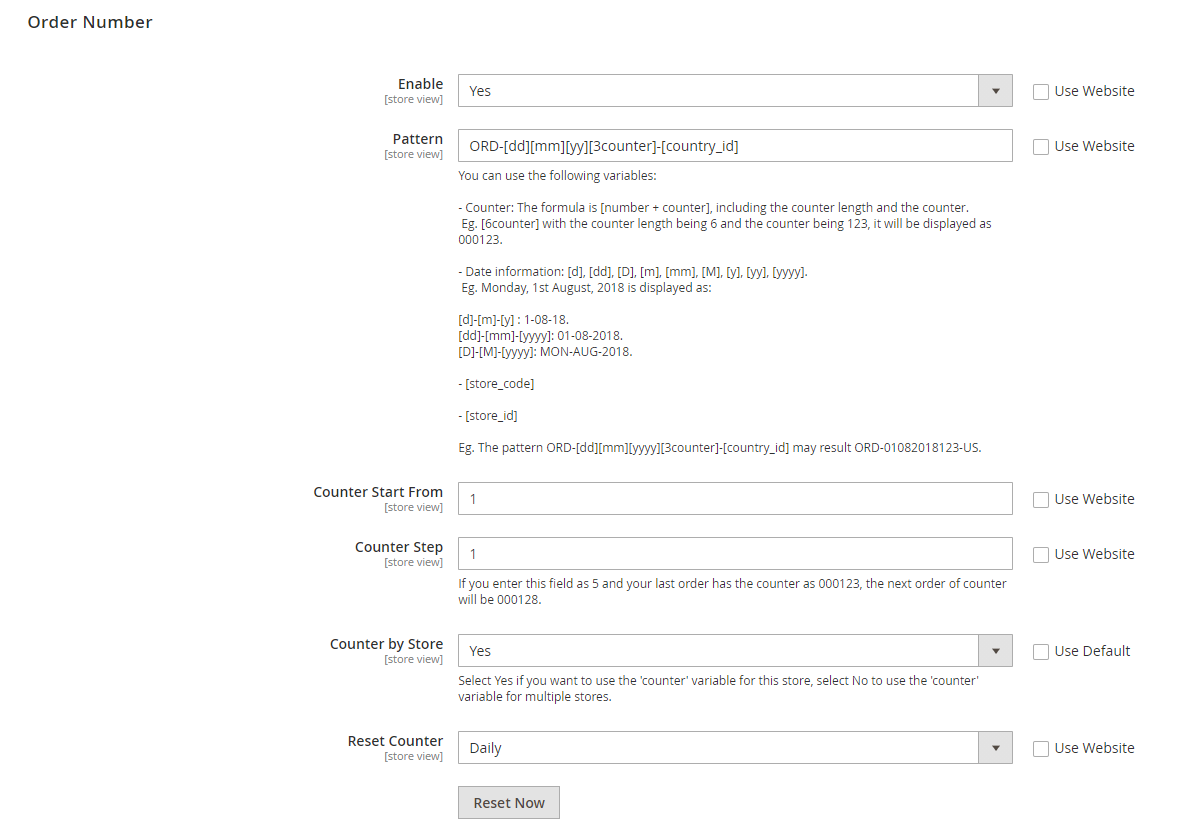
Enable: Choose Yes to use the feature that allows configuring the changing ID of the Order
Pattern:
- Enter the format for the Order ID. For instance, ORD-[store_id]-[yy]-[mm]-[dd]-[2N]-[2counter]
- Only support some variables as: [store_id], [yy], [mm], [dd], [2N], [2counter], [4AN], [4A], [4N], [store_code], [y], [yyy], [M], [D], [m], [d], [country_id]
- If the format of supported variables is entered wrong, the order ID will be displayed under the text
Counter Start From:
- Enter the counter when using the variable [counter]. When the number of digits in this field is less than the number of digits of the variable [counter], the ID is automatically added to the number 0 in front. Example: You enter as 15, counter variable that is used will be [4counter]. The ID displayed will have the format as 015
- The ID of the next order will begin with the number entered and it will incrementally increase based on the
Counter by Stepfield below. - For example, when you use the variable [2counter], if you enter 04, the order ID after configuring will start from 04
- If you want to change the
Counter Start Fromfield, after entering a new value and saving, admins need to click onReset Nowbutton so that the Order ID can get a newCounter Start Fromvalue.
Counter by Step:
- Enter the distance number order ID of the next orders
- For example, if you enter 2, the order ID of next orders will be separated by 2 units and gradually increased
- If leaving this field blank, the default ID of orders will be separated by 1 unit.
Counter by Store:
- If you choose Yes, the order ID of the different stores will be increased separately based on the configuration of each store. For example, store A has an order ID as 50, store B has no order. Customers place the order at the store B, this order ID is 01.
- If you choose No, the order ID of different stores will be merged and increased in succession based on the configuration of Main Website. For instance: Store A has 50 orders and the order ID is 50, store B don't have any order. When customers purchase the products in the store B, the order ID of store B is 51.
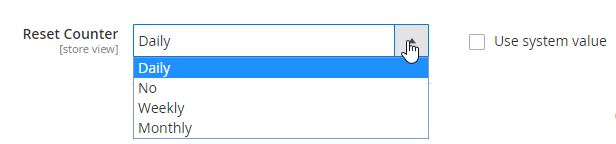
Reset Counter:

- Reset Counter = Daily: Counter will be reset to the
Counter Start Fromvalue that is using at 00h daily - Reset Counter = Weekly: Counter will be reset to the
Counter Start Fromvalue that is using at 00h the first day of the week - Reset Counter = Monthly: Counter will be reset to the
Counter Start Fromvalue that is using at 00h the first day of the month - Reset Counter = No: Counter will NOT be reset to the
Counter Start Fromvalue that is using. - Reset Now Button: Counter will be reset to the
Counter Start Fromvalue that is using instantly. For example,Counter Start Fromfield is 10000 now,Counter Stepis 5. After a long time to order and click onReset Now, the ID of the next order after resetting will start fromCounter Start From + Counter Stepvalues.
Invoice Number
From the Admin Panel, go to Store > Settings > Configuration > Mageplaza Extensions > Customer Order Number, choose Invoice Number section
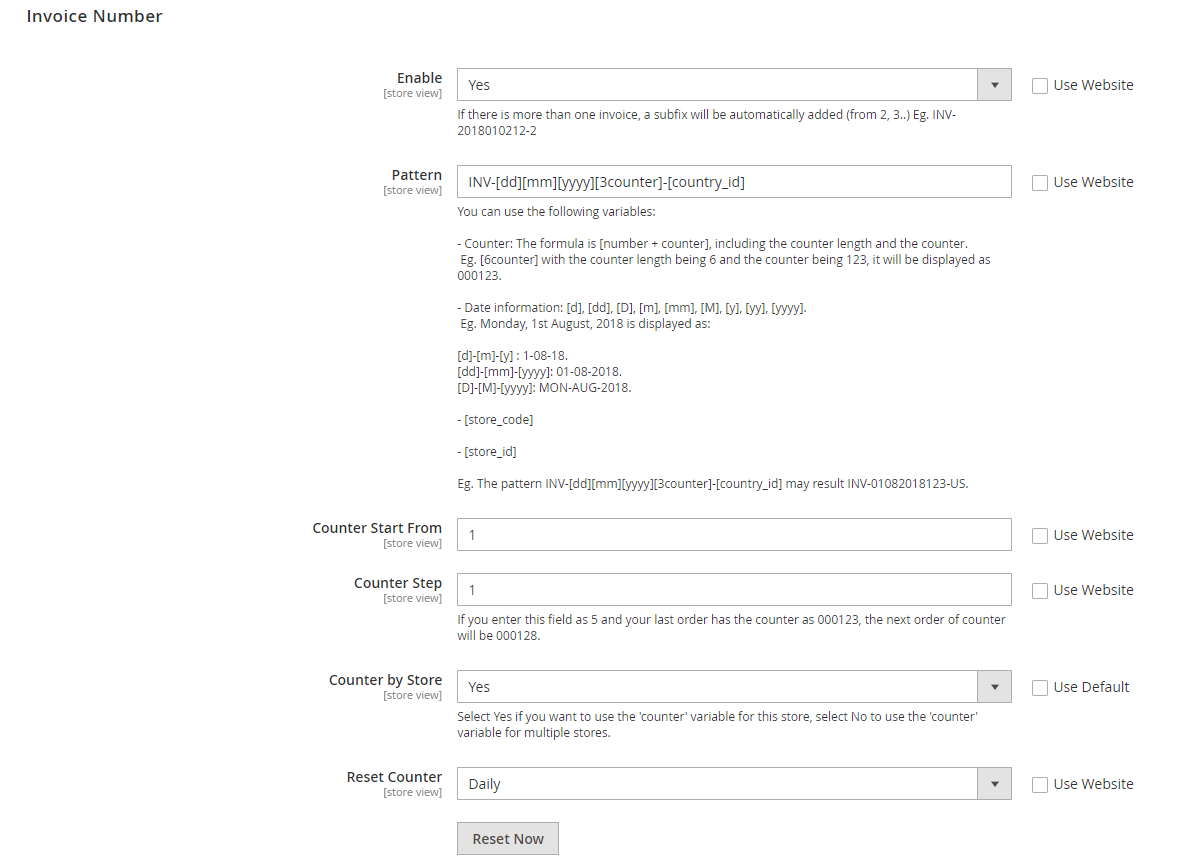
- Enable:
- Choose Yes to use the feature that allows changing the ID of Invoice
- Choose Same as Order Number to use the configuration the same as the configuration of Order Number
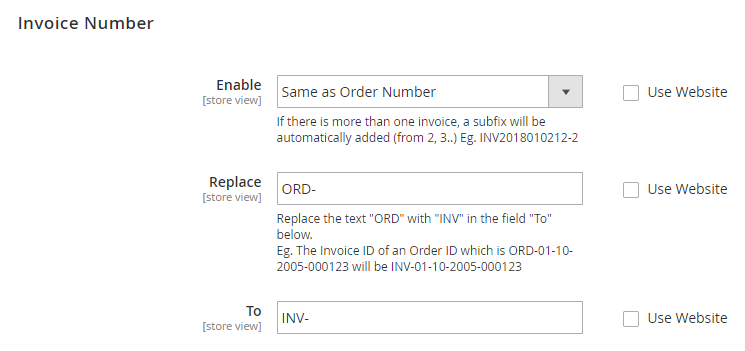
Replace
- Enter the characters you want to change if you choose the same configuration as the Order Number
- If leaving this field blank, after you save, the Invoice ID will display the same as the configuration of Magento.
To:
- If leaving this field blank, the value in front of the Replace field will be used. This value is the same as the value entered in the Order Number
- This value will replace the value of Replace field if you enter correct
Pattern:
- Enter the format for the Invoice ID. For instance, INV-[store_id]-[yy]-[mm]-[dd]-[2N]-[2counter]
- Only support some variables as: [store_id], [yy], [mm], [dd], [2N], [2counter], [4AN], [4A], [4N], [store_code], [y], [yyy], [M], [D], [m], [d], [country_id]
- If the format of supported variables is entered wrong, the Invoice ID will be displayed under the text
Counter Start From:
- Enter the counter when using the variable [counter]. When the number of digits in this field is less than the number of digits of the variable [counter], the ID is automatically added to the number 0 in front. For example: You enter as 15, counter variable that is used will be [4counter]. The ID displayed will have the format as 015
- The ID of the next invoice will begin with the number entered and it will incrementally increase based on the
Counter by Stepfield below. - For example, when you use the variable [2counter], if you enter 04, the invoice ID after configuring will start from 04
- If you want to change the
Counter Start Fromfield, after entering a new value and saving, admins need to click onReset Nowbutton so that the Invoice ID can get a newCounter Start Fromvalue.
Counter by Step:
- Enter the distance number Invoice ID of the next invoices
- For example, if you enter 2, the ID of next invoices will be separated by 2 units and gradually increased
- If leaving this field blank, the default ID of invoices will be separated by 1 unit.
Counter by Store:
- If you choose Yes, the invoice ID of the different stores will be increased separately based on the configuration of each store. For example, store A has an invoice ID as 50, store B has no invoice. Customers purchase the product at the store B, this invoice ID is 01.
- If you choose No, the invoice ID of different stores will be merged and increased in succession based on the configuration of Main Website. For instance: Store A has 50 invoices and the invoice ID is 50, store B don't have any invoice. When customers purchase the products in the store B, the invoice ID of store B is 51.
Reset Counter:
- Reset Counter = Daily: Counter will be reset to the
Counter Start Fromvalue that is using at 00h daily - Reset Counter = Weekly: Counter will be reset to the
Counter Start Fromvalue that is using at 00h the first day of the week - Reset Counter = Monthly: Counter will be reset to the
Counter Start Fromvalue that is using at 00h the first day of the month - Reset Counter = No: Counter will NOT be reset to the
Counter Start Fromvalue that is using. - Reset Now Button: Counter will be reset to the
Counter Start Fromvalue that is using instantly. For example,Counter Start Fromfield is 10000 now,Counter Stepis 5. After a long time to order and click onReset Now, the ID of the next invoice after resetting will start fromCounter Start From + Counter Stepvalues.
Shipment Number
From the Admin Panel, go to Store > Settings > Configuration > Mageplaza Extensions > Customer Order Number, choose Shipment Number section
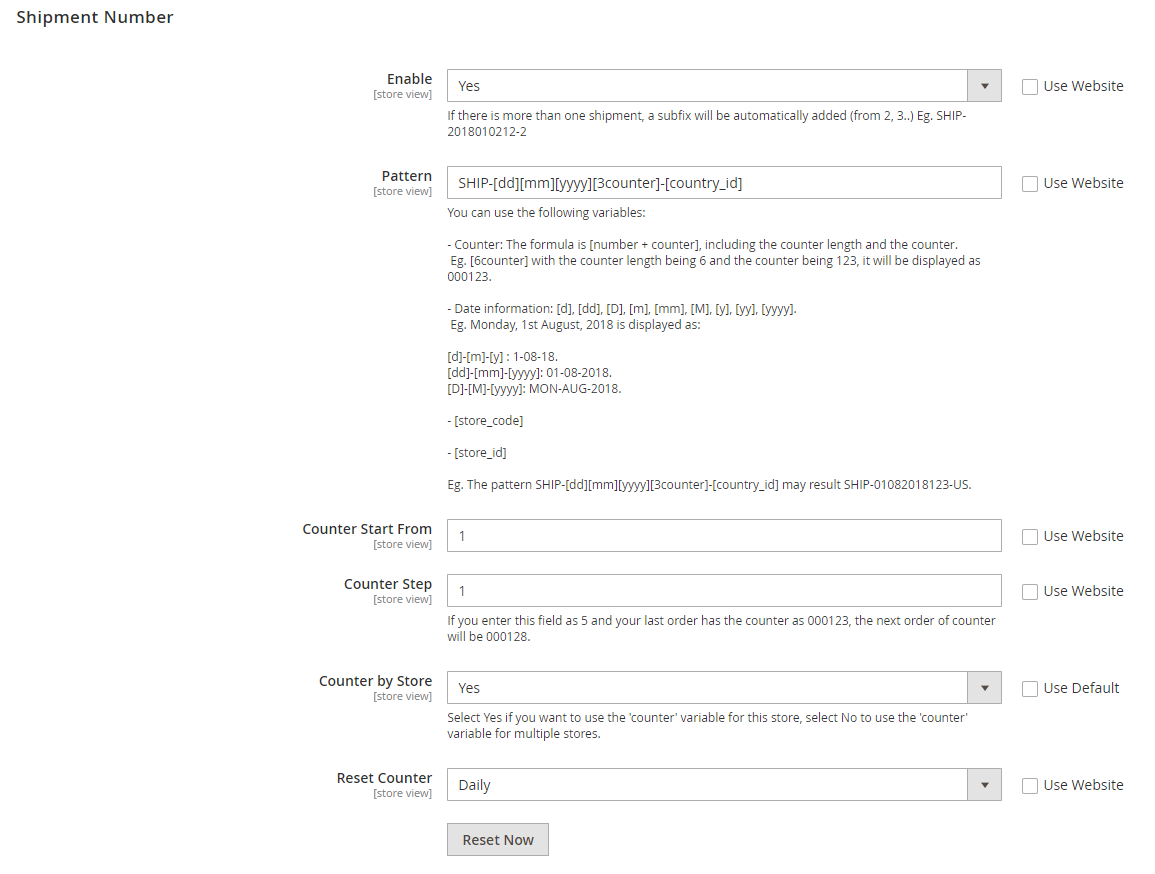
- Enable:
- Choose Yes to use the function that allows configuring the change of the Shipment ID.
- Choose Same as Order Number to use the configuration the same as the configuration of Order Number
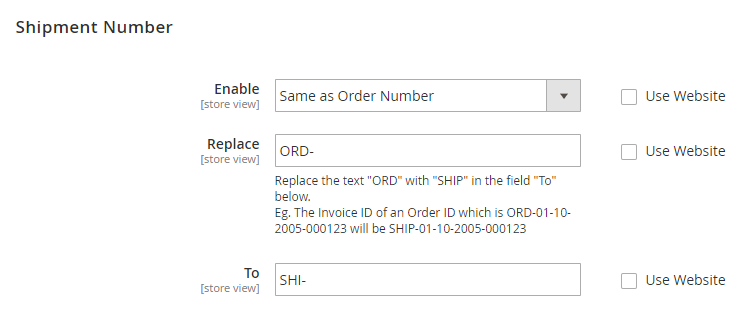
Replace
- Enter the characters you want to change if you choose the same configuration as the Order Number
- If leaving this field blank, after you save, the Shipment ID will display the same as the configuration of Magento.
To:
- If leaving this field blank, the value in front of the Replace field will be used. This value is the same as the value entered in the Order Number
- This value will replace the value of Replace field if you enter correct
Pattern:
- Enter the format for the Shipment ID. For instance, SHI-[store_id]-[yy]-[mm]-[dd]-[2N]-[2counter]
- Only support some variables as: [store_id], [yy], [mm], [dd], [2N], [2counter], [4AN], [4A], [4N], [store_code], [y], [yyy], [M], [D], [m], [d], [country_id]
- If the format of supported variables is entered wrong, the Shipment ID will be displayed under the text.
Counter Start From:
- Enter the counter when using the variable [counter]. When the number of digits in this field is less than the number of digits of the variable [counter], the ID is automatically added one or multiple number 0 in front. For example: You enter as 15, counter variable that is used will be [4counter]. The ID displayed will have the format as 0015.
- The ID of the next shipment will begin with the number entered and it will incrementally increase based on the
Counter by Stepfield below. - For example, when you use the variable [2counter], if you enter 04, the shipment ID after configuring will start from 04
- If you want to change the
Counter Start Fromfield, after entering a new value and saving, admins need to click onReset Nowbutton so that the Shipment ID can get a newCounter Start Fromvalue.
Counter by Step:
- Enter the distance number Shipment ID of the next shipments
- For example, if you enter 2, the ID of next shipments will be separated by 2 units and gradually increased
- If leaving this field blank, the default ID of shipments will be separated by 1 unit.
Counter by Store:
- If you choose Yes, the shipment ID of the different stores will be increased separately based on the configuration of each store. For example, store A has an shipment ID as 50, store B has no shipment. Customers purchase the product at the store B, this shipment ID is 01.
- If you choose No, the shipment ID of different stores will be merged and increased in succession based on the configuration of Main Website. For instance: Store A has 50 shipments and the shipment ID is 50, store B don't have any shipment. When customers purchase the products in the store B, the shipment ID of store B is 51.
Reset Counter:

- Reset Counter = Daily: Counter will be reset to the
Counter Start Fromvalue that is using at 00h daily - Reset Counter = Weekly: Counter will be reset to the
Counter Start Fromvalue that is using at 00h the first day of the week - Reset Counter = Monthly: Counter will be reset to the
Counter Start Fromvalue that is using at 00h the first day of the month - Reset Counter = No: Counter will NOT be reset to the
Counter Start Fromvalue that is using. - Reset Now Button: Counter will be reset to the
Counter Start Fromvalue that is using instantly. For example,Counter Start Fromfield is 10000 now,Counter Stepis 5. After a long time to order and click onReset Now, the ID of the next shipment after resetting will start fromCounter Start From + Counter Stepvalues.
Credit Memo
From the Admin Panel, go to Store > Settings > Configuration > Mageplaza Extensions > Customer Order Number, choose Creditmemos Number section
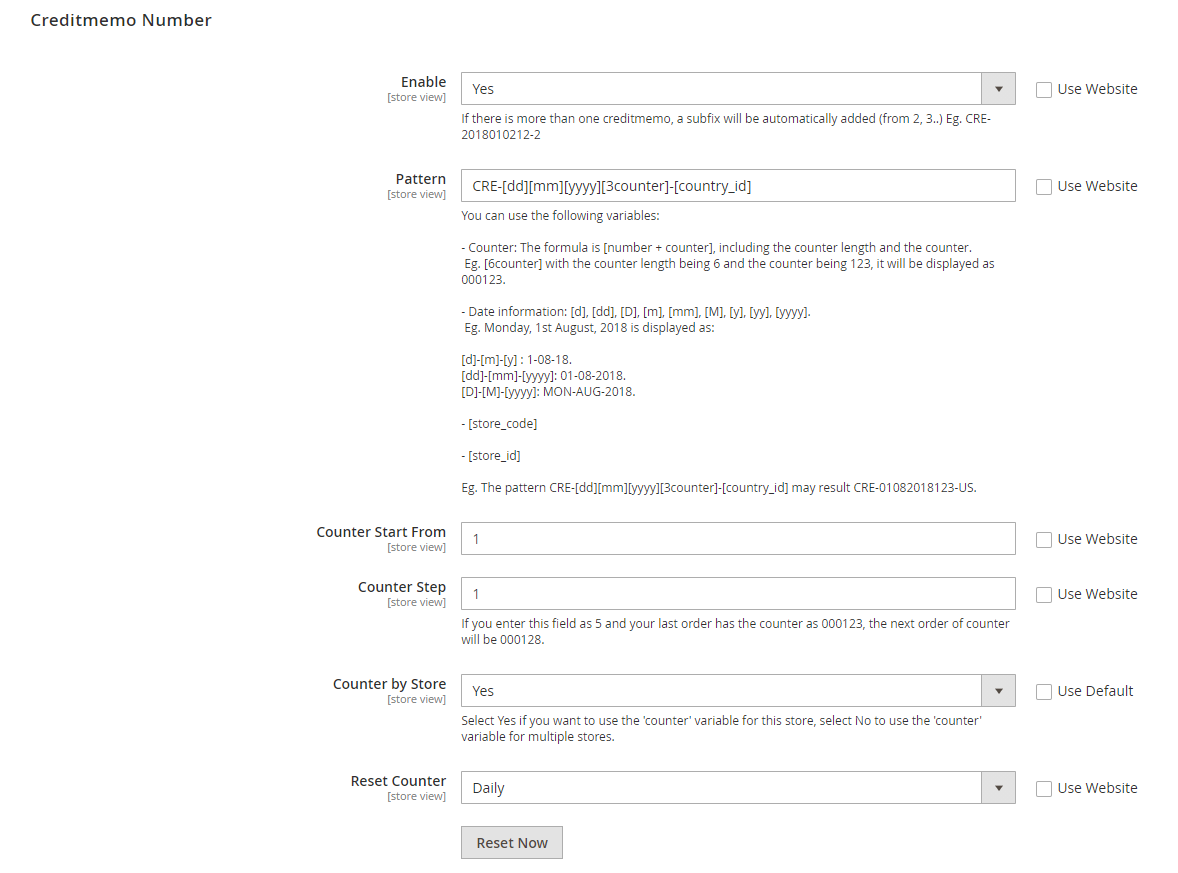
- Enable:
- Choose Yes to use the function that allows configuring the change of the Credit Memo ID.
- Choose Same as Order Number to use the configuration the same as the configuration of Order Number
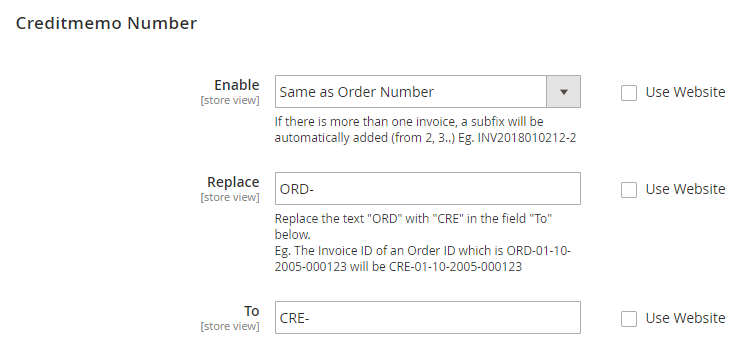
Replace
- Enter the characters you want to change if you choose the same configuration as the Order Number
- If leaving this field blank, after you save, the Shipment ID will display the same as the configuration of Magento.
To:
- If leaving this field blank, the value in front of the Replace field will be used. This value is the same as the value entered in the Order Number
- This value will replace the value of Replace field if you enter correct
Pattern:
- Enter the format for the credit memo ID. For instance, CRE-[store_id]-[yy]-[mm]-[dd]-[2N]-[2counter]
- Only support some variables as: [store_id], [yy], [mm], [dd], [2N], [2counter], [4AN], [4A], [4N], [store_code], [y], [yyy], [M], [D], [m], [d], [country_id]
- If the format of supported variables is entered wrong, the credit memo ID will be displayed under the text
Counter Start From:
- Enter the counter when using the variable [counter]. When the number of digits in this field is less than the number of digits of the variable [counter], the ID is automatically added to the number 0 in front. For example: You enter as 15, counter variable that is used will be [4counter]. The ID displayed will have the format as 015
- The ID of the next credit memo will begin with the number entered and it will incrementally increase based on the
Counter by Stepfield below. - For example, when you use the variable [2counter], if you enter 04, the credit memo ID after configuring will start from 04
- If you want to change the
Counter Start Fromfield, after entering a new value and saving, admins need to click onReset Nowbutton so that the credit memo ID can get a newCounter Start Fromvalue.
Counter by Step:
- Enter the distance number credit memo ID of the next shipments
- For example, if you enter 2, the ID of next credit memo will be separated by 2 units and gradually increased
- If leaving this field blank, the default ID of credit memos will be separated by 1 unit.
Counter by Store:
- If you choose Yes, the credit memo ID of the different stores will be increased separately based on the configuration of each store. For example, store A has an credit memo ID as 50, store B has no credit memo. Customers purchase the product at the store B, this credit memo ID is 01.
- If you choose No, the credit memo ID of different stores will be merged and increased in succession based on the configuration of Main Website. For instance: Store A has 50 credit memos and the credit memo ID is 50, store B don't have any credit memo. When customers purchase the products in the store B, after this order is refunded, the credit memo ID is 51.
Reset Counter:

- Reset Counter = Daily: Counter will be reset to the
Counter Start Fromvalue that is using at 00h daily - Reset Counter = Weekly: Counter will be reset to the
Counter Start Fromvalue that is using at 00h the first day of the week - Reset Counter = Monthly: Counter will be reset to the
Counter Start Fromvalue that is using at 00h the first day of the month - Reset Counter = No: Counter will NOT be reset to the
Counter Start Fromvalue that is using. - Reset Now Button: Counter will be reset to the
Counter Start Fromvalue that is using instantly. For example,Counter Start Fromfield is 10000 now,Counter Stepis 5. After a long time to order and click onReset Now, the ID of the next credit memo after resetting will start fromCounter Start From + Counter Stepvalues.
Mail
From the Admin Panel, go to Store > Settings > Configuration > Mageplaza Extensions > Customer Order Number, choose Email section

- Send Email To
- Enter the email to send the notification
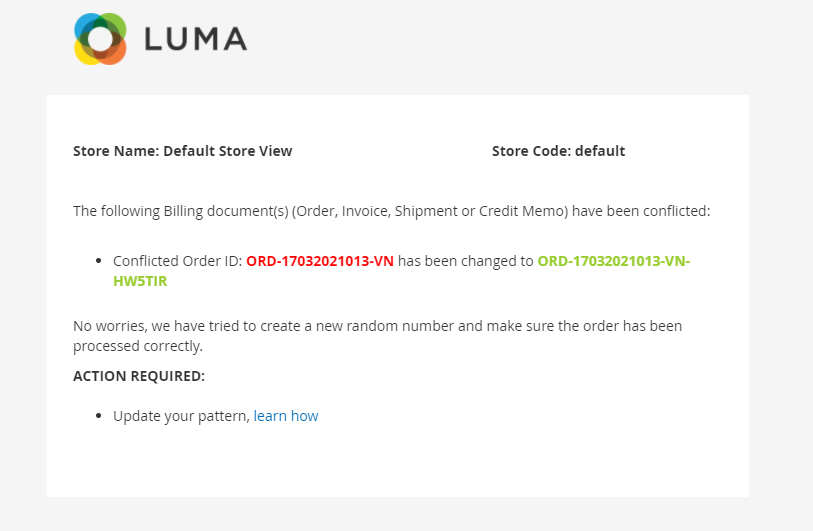
- When the ID of the order, invoice, shipment or credit memos of the next time duplicates with the ID of the previous times, the ID will be automatically added to the variable [6AN] at the back and at that time, there's an email to notify the store owner that the ID of the order, invoice, shipment or credit memos is existing and is replaced by the new ID.
- Send Email From: Choose the sender email notifications.
Note:
Reset Nowbutton is only displayed in the multiple stores- If the ID of the order, invoice, shipment or credit memo deplicates with the existing IDs, the following IDs will be added a value [6AN] at the back of the pattern.
For the Pattern field of Order Number, Invoice Number, Shipment Number or Credit Memo Number, it only supports some variables as the following:
- [4AN]: The format for the ID will be displayed as 4 numbers and letters are randomly selected
- [4A]: The format for the ID will be displayed as 4 randomly selected number
- [4N]: The format for the ID will be displayed as 4 randomly selected number
- [6counter]: The format for the ID will be displayed with 6 counts depending on the configuration of the Counter fields.
- [store_code]: The format for the ID will be displayed as the code entered for the store view
- [store_id]: The format for the ID will be displayed as the symbolic number for the created order of the store views
- [yy]: The format for the ID will be displayed as the last two digits of the year. Example: 18
- [y]: The format for the ID will be displayed as the last digit of the year. Example: 8
- [yyy]: The format for the ID will be displayed as that year. Example: 2018
- [M]: The format for the ID will be displayed as the first 3 letters of the month. Example: AUG
- [mm] = [m]: The format for the ID will be displayed as the digit 08
- [dd]: The format for the ID will be displayed as date 01, 02, 03, etc
- [D]: The format for the ID will be displayed as the first 3 letters of the day. Example: MON
- [d]: The format for the ID will be displayed as 1. This only applies for the date less than 10. With the cases, you choose the format as [dd], the date is less than 10, you need to apply the format of ID as 01, 02, 03, etc.
- [country_id]: The format for the ID will be displayed as letters as the abbreviation of the country. For example, US.
The format of Email notification
Please click on here to know more information.
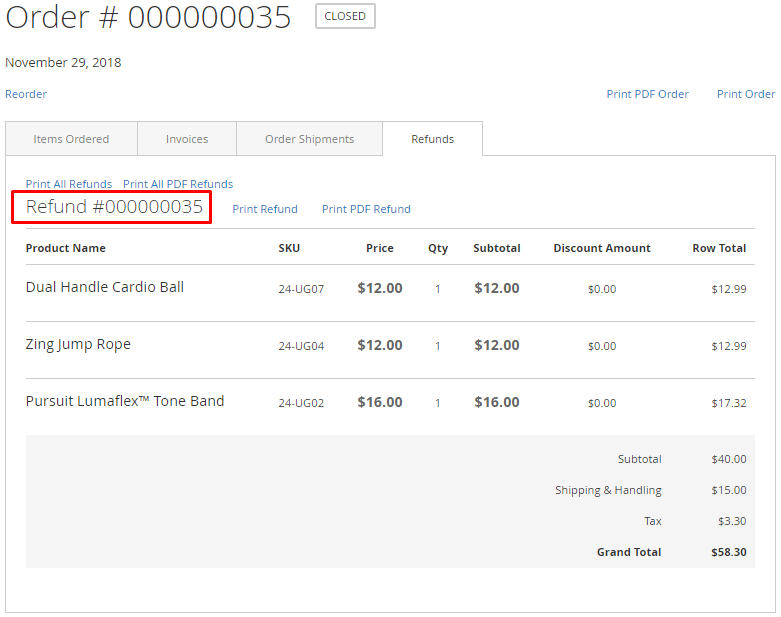
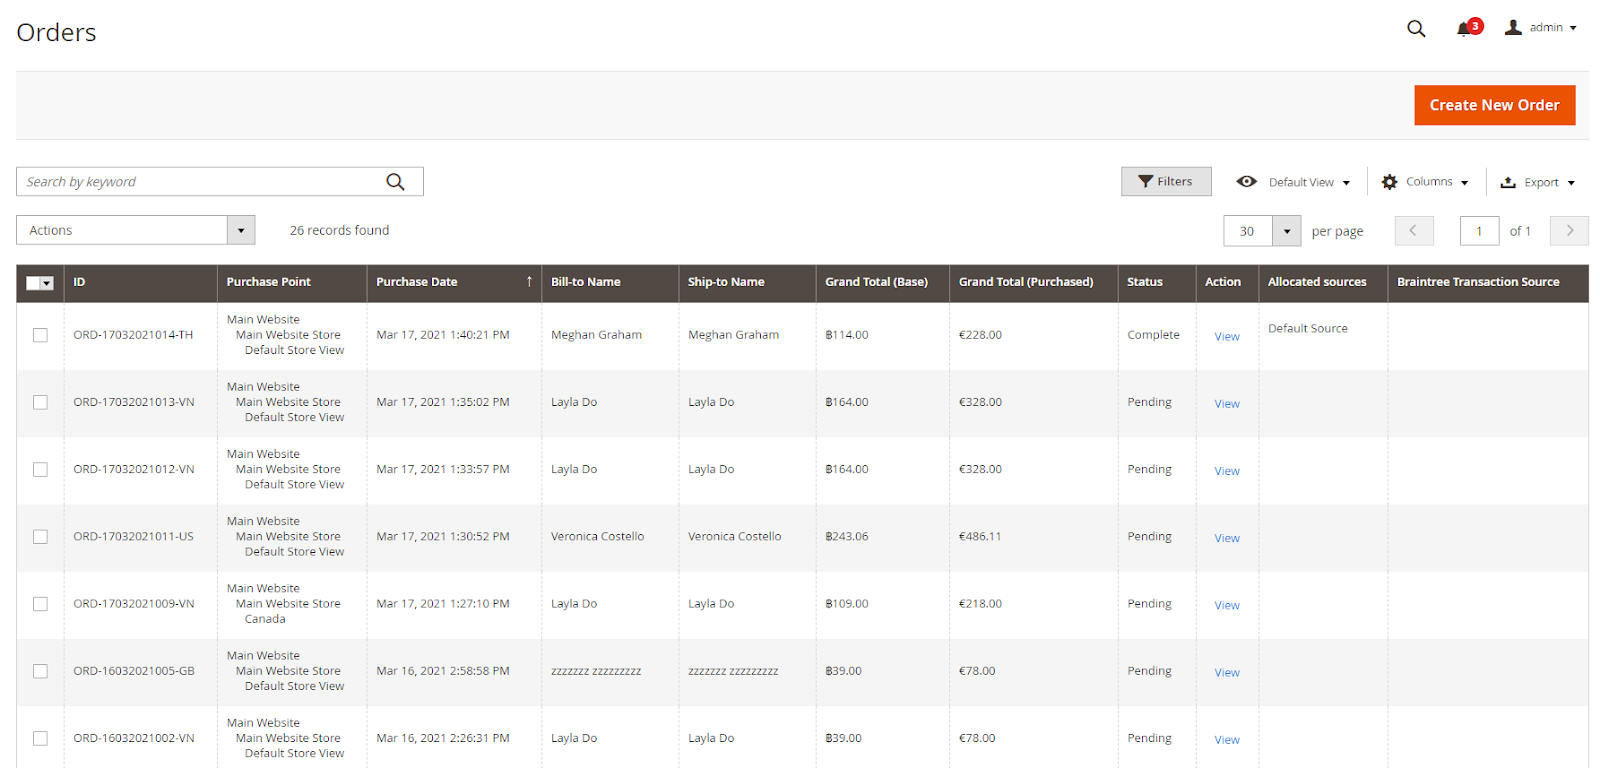
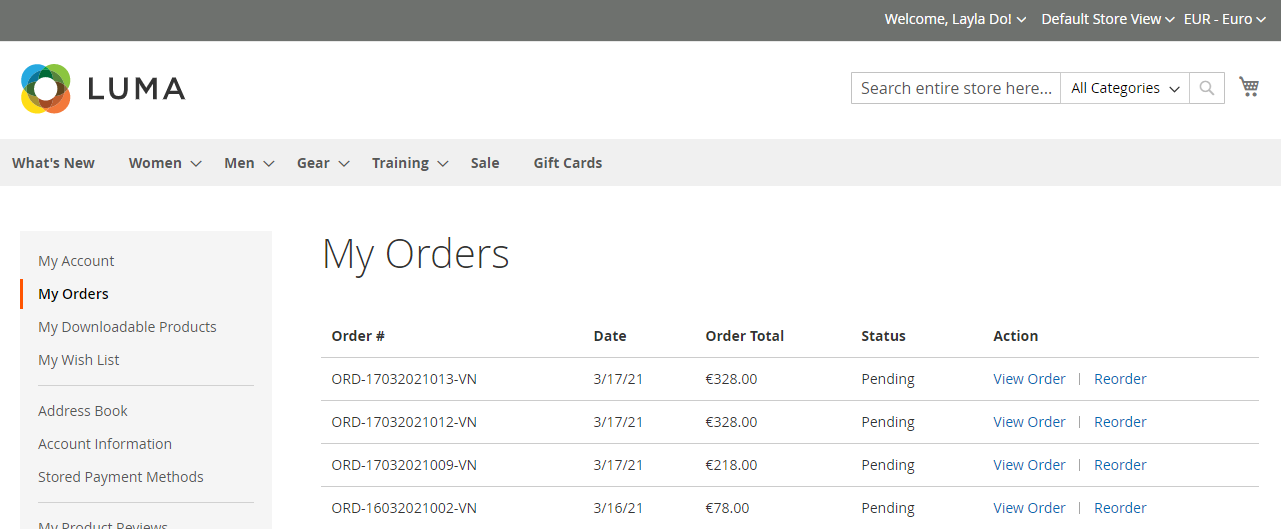
The ID's format after configured
Display in the backend
Display on the frontend
How to configure Same Order Number
From the Magento Admin, choose Store > Settings > Configuration > Mageplaza Extensions > Same Order Number

1. General Configuration
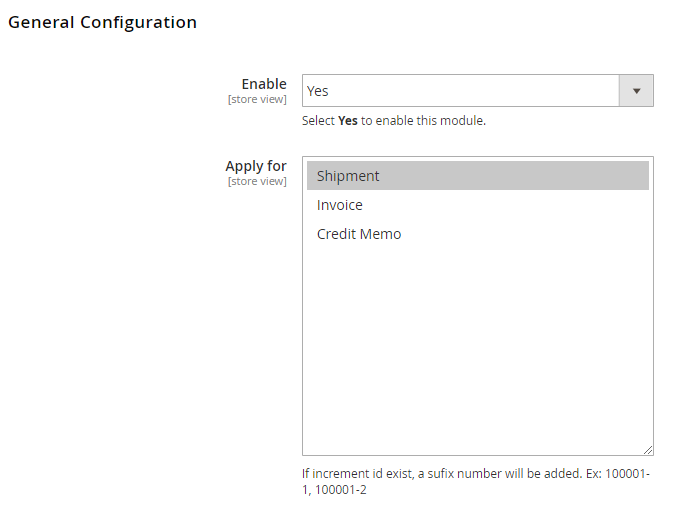
Enable: Choose Yes to use this module
Apply for: Choose the object to apply for the extension. You can apply simultaneously to Invoice, Shipment, Credit memo.
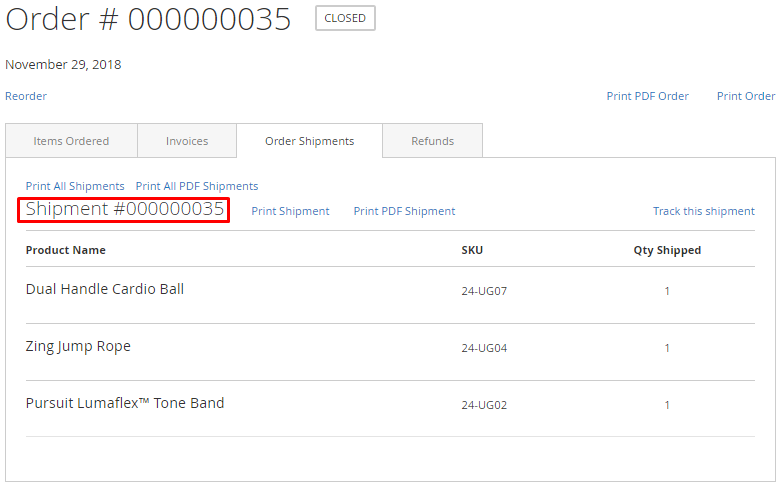
Apply for Shipment: Shipment ID will be configured according to Order ID. In the case of multiple shipments for an order, the second shipment's ID will be followed by a suffix. For example: Order's ID is Order #003, Shipment's ID is #003, the second Shipment's ID is #003-1.

If you don't apply the extension for Shipment, the Shipment ID will increase based on the Main Website.
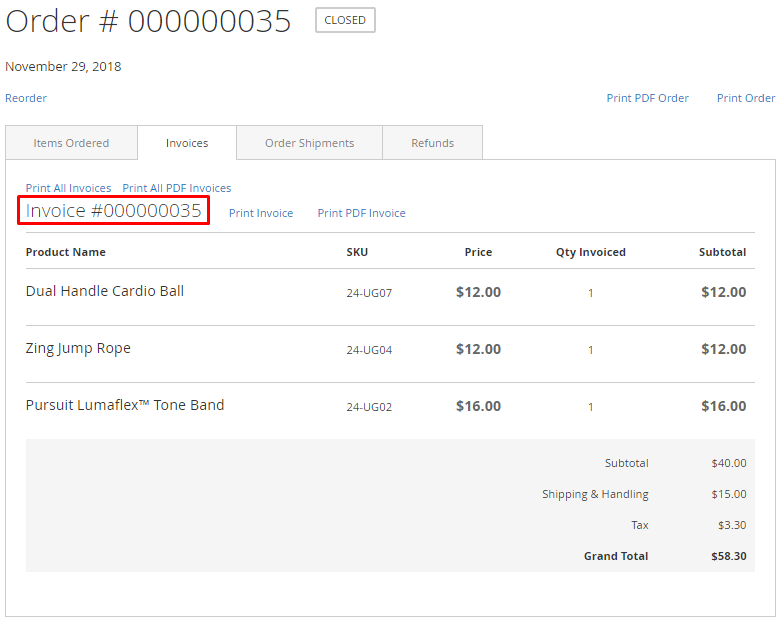
Apply for Invoice: The ID of Invoice will be configured according to Order ID.- Same Order Number is also available for the case as automatic Invoice creation when paying with Paypal.
- In the case of multiple Invoices for an Order, the second Invoice ID onwards will be followed by a suffix. For example, the Order ID is Order #003, the Invoice ID is #003, the 2nd Invoice ID is #003-1.

If you don't apply the extension for Invoice, the Invoice ID will increase based on the Main Website.
Apply for Credit Memo: Credit memo ID will be configured according to Order ID. In the case of multiple credit memos for an order, the second credit memo onwards will be followed by a suffix. For example: Order ID is Order #003, Credit Memo ID #003, the 2nd Credit Memo is #003-1.

- If you don't apply the extension for Credit Memo, the Credit Memo ID will increase based on the Main Website.
2. Apply the extension for multiple stores
- The stores is set as the default under Default Config.
- To change the extension's configuration for each store, please go to
Store View> SelectStore, then untick in theUse Websiteof each option. - The configuration in each store will be applied for that store without affecting other stores.
3. Frontend
3.1. Invoice after applying Same Order Number extension
3.2. Shipment after applying Same Order Number extension
3.3. Credit Memo after applying Same Order Number extension