Shop By Brand
By Mageplaza, you can find many extensions that will help online stores improve customer search, such as Magento 2 Layered Navigation and Magento 2 Advanced Search extension, and Magento 2 Shop by Brand extension is also one such great tool. Similar to the navigation, Shop by Brand allows filtering by product attributes, but they are neither color or material or any physical features of the product. The plugin is based on the brands (manufacturers) by which the products are made.
In this helpful documentation, you will find the guide on How to use and How to configure on the frontend and backend of Shop by Brand Magento 2 module.
Outstanding Features
| Standard | Outstanding Features | Description |
|---|---|---|
| 1 | Increase brand visibility and management | Effortlessly Manage Brands: Easily add and edit brand information via WYSIWYG editor, and bulk import brands from CSV files to optimize brand management. Enhance Brand Visibility: Display brand logo on product pages, integrate into Mega Menu, Top Menu, and sidebar, and optimize SEO for brand pages to improve rankings and engagement. Customizable Display Options: Allows for brand page customization and product filtering by brand, providing a flexible experience. Reporting and Widgets: Provides detailed sales reports and custom widgets to enhance SEO performance through canonical tags. |
| 2 | Provide a user-friendly experience | Flexible Filtering and Layouts: Provide a user-friendly experience by implementing Flexible Filtering and Layouts – allowing for letter filters, custom branded Mega Menus, and choosing between different display formats (logo, label, or both). URL configuration and AJAX pagination support ensure fast and smooth browsing. Advanced Integration: Display brand information on product pages, categories, and during checkout, ensuring customers can easily discover and identify your brand throughout the shopping journey. |
Installation
We offer two methods for installing our plugins: the Copy & Paste method and the Composer method. Please follow the detailed instructions provided below.
Method 1: Installation via Copy & Paste
To install our plugins using the Copy & Paste method, kindly follow the instructions at the link below:
How to Install Magento 2 Extension via Copy & Paste
Method 2: Installation via Composer
Composer name: mageplaza/magento-2-shop-by-brand
To install our extensions using Composer, please refer to the comprehensive guide at the link below:
How to Install Magento Extension via Composer
By following these guides, you can ensure that the installation process is handled correctly, allowing you to fully utilize the features and benefits of our plugins.
Module Update Guide
Keeping your module updated ensures optimal performance. Follow one of these steps to update your module:
- By Account Dashboard: Log in to your
Mageplaza account > go to the My Licenses section > click on the Download button > choose the latest version from the popup. - By composer: Kindly use the following commands to update the module via composer
composer require mageplaza/mageplaza/magento-2-shop-by-brand
php bin/magento setup:upgrade
php bin/magento setup:di:compile
Updating a module by Composer ensures efficient dependency management, version control, and integration with development tools, making the process faster and more reliable.
I. How to use
As soon as installing Shop by Brand completely, your customers can easily search all products under their favorite brands in your inventory. Especially on its interface, there are 4 ways of shopping by brand:
- Mega menu
- Search Box
- Alphabet Search
- Search Category
You will follow these ways here.
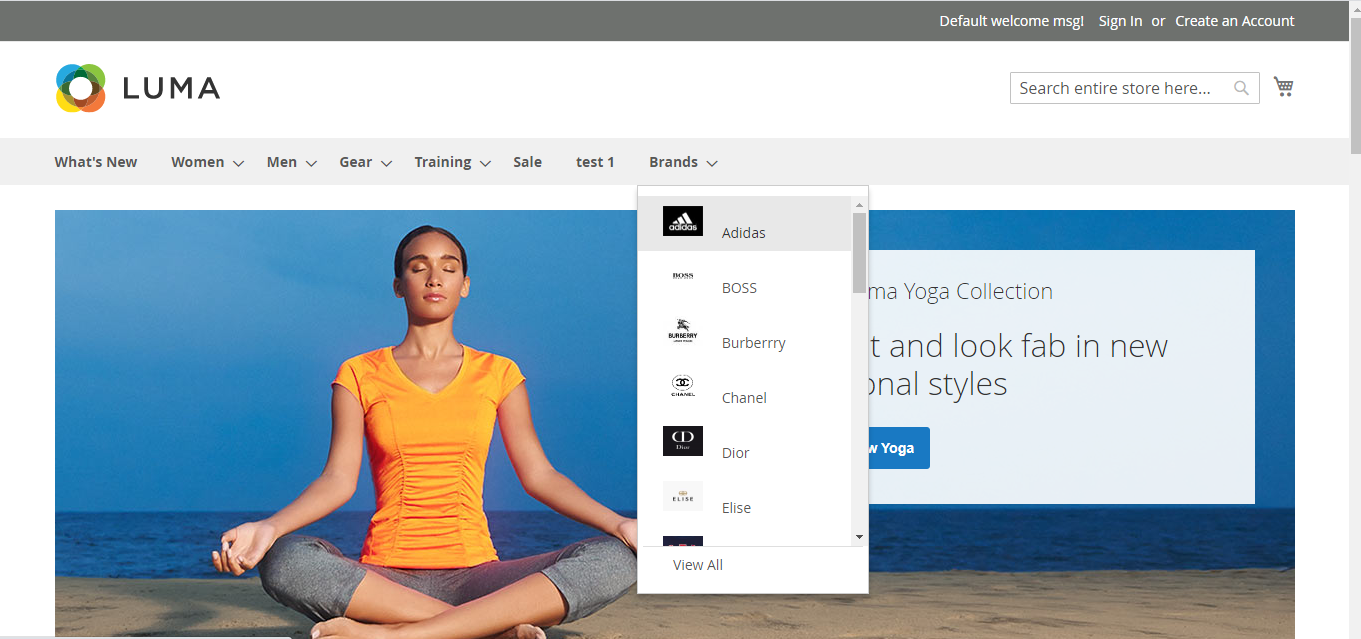
1.1 Brands on Mega menu
Right from the top of the Brand page, you’ll able to give a quick overview by a drop-down list of brands that are available on your storage. The result displays brand with its provided Logo and Label
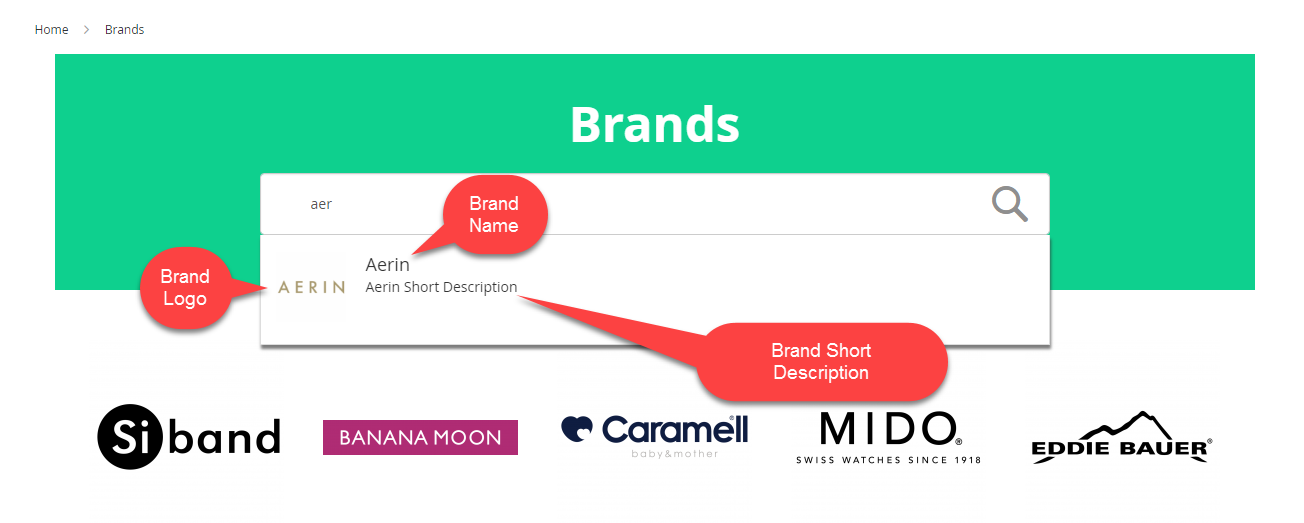
1.2 Search Box
The search box on Magento 2 Shop by Brand has some functionalities that are alike to Magento 2 Ajax Search by Mageplaza. In the box, enter some words of the brand name and achieve the drop-down results instantly on the current page.

The brand results come with Brand Logo, Brand Name, and Brand Description.
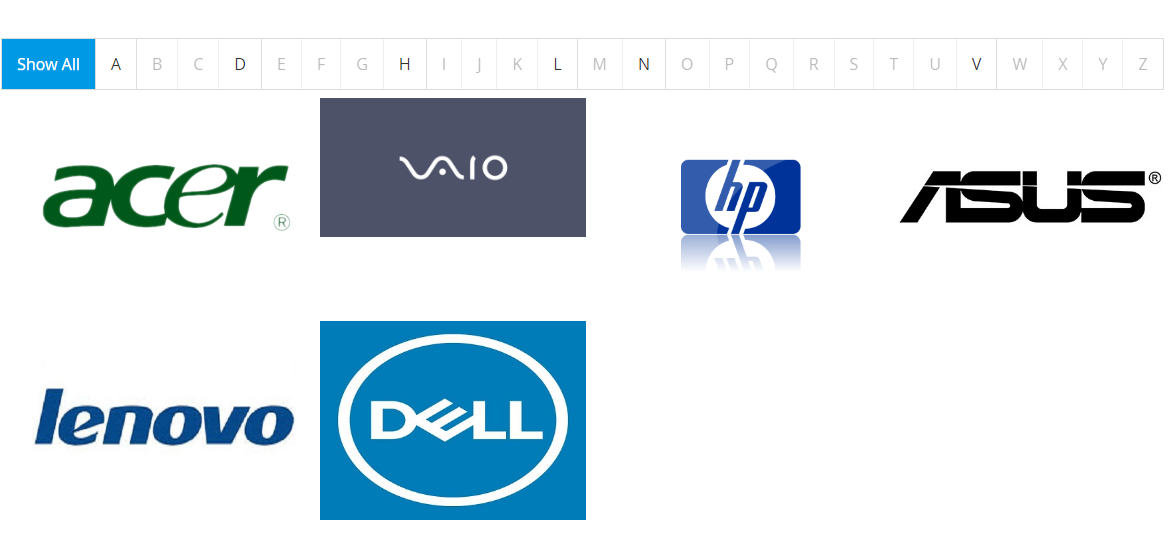
1.3 Alphabet Search
Alphabet Search, placed under Search Box, is represented, including "Show All" and the alphabet. Depending on the first characteristic of the brand name, the user will tap on the respective button.
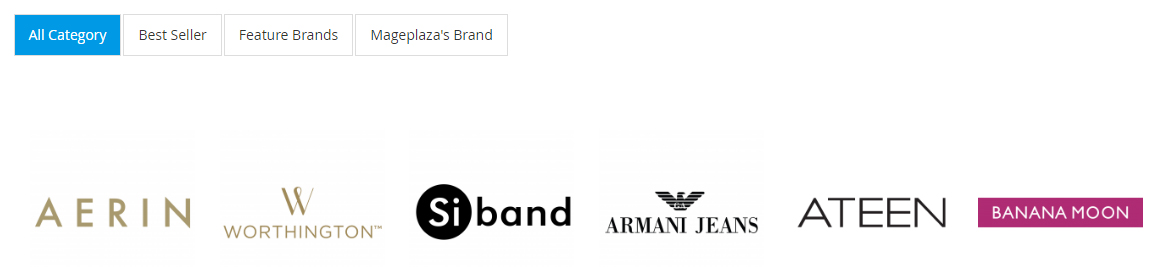
1.4 Search by Category
You can generate specific categories for brands that direct your customers' minds to gravitate toward certain brands, with fetching categories like "Feature Brands,” "Best Seller Brands,” “Mageplaza’s Brand,” etc. Do not hesitate to plan to promote the brands you desire!
1.5 Related Brand
You can display different brands related to your brand. This helps you promote more products and, at the same time, allows customers to find suitable products.
II. How to configure
2.1. Configuration
Go to Catalog > Shop by Brand > Configuration. This is a bunch of the basic configurations you need to set up first.

2.1.1 General
At the Configuration tab, expand General section; please do the following:
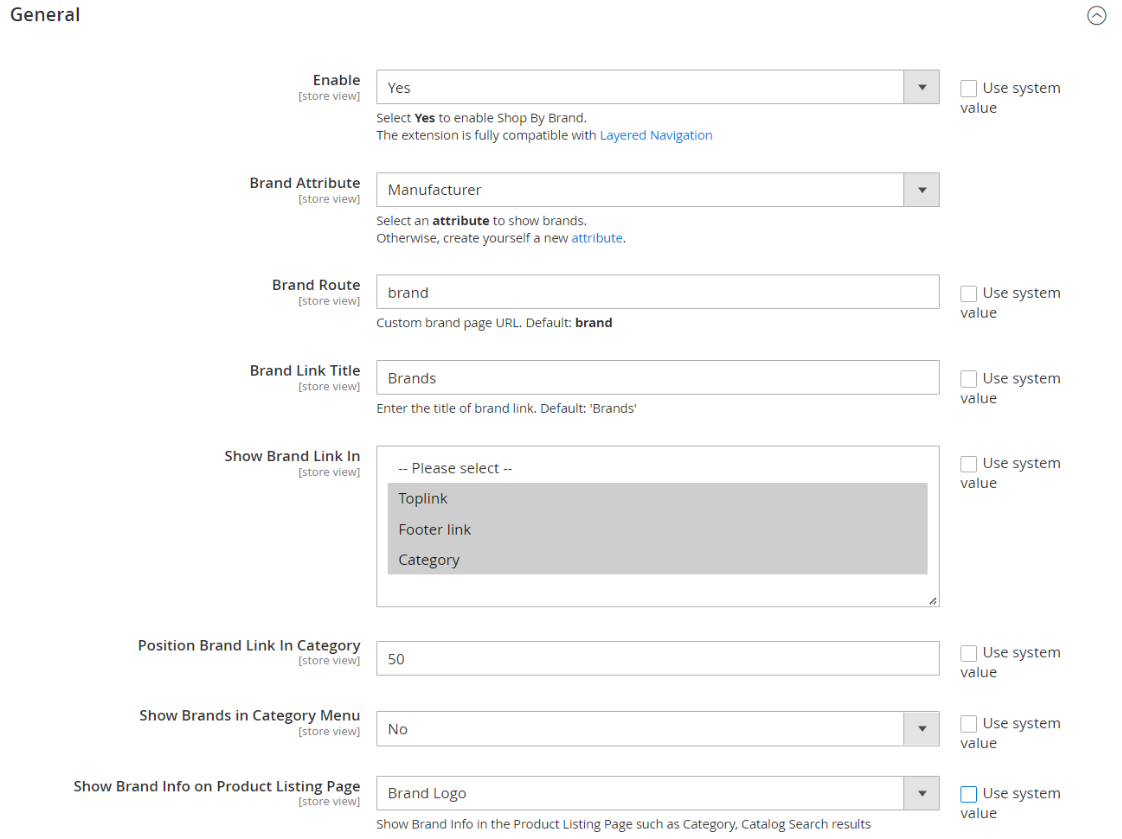

Enable the module when choosing "Yes" to allow customers to shop by brand
From the existing list of the product attributes, set Brand Attribute to the correct choice. In this guide, Manufacturer is the option you have to select
Enter Brand Route, if passing it, the default (brands) is applied
Enter Brand Link Title or leave it as the default (Brands)
In Show Brand Link In field choose the position of putting brand link: Toplink, Footer link and Category
In Position Brand Link In Category field: Select the position of the Brand on the Category section
In Show Brands in Category Menu: includes No, Drop-down type và Grid type
- No: Brands are not shown
- Drop-down type: show additional fields - What to show, Maximum brands to show, Show brands without products on menu
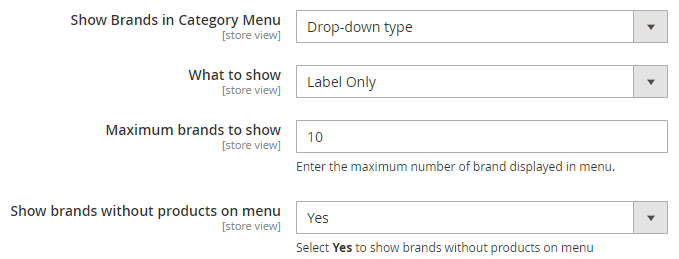
- What to show: select the elements to display
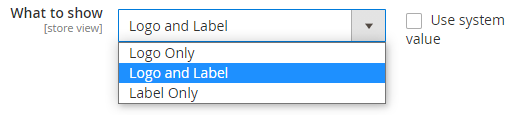
- What to show = Logo Only : show the brand logo only
- What to show = Label Only: show the brand label only
- What to show = Logo and Label: show both brand logo and label
- Maximum brands to show: enter the maximum number of brands displayed in the menu
- Show brands without products on menu: Select Yes to display the brands with no products in the menu. If No is selected, the brands with no products will not be displayed
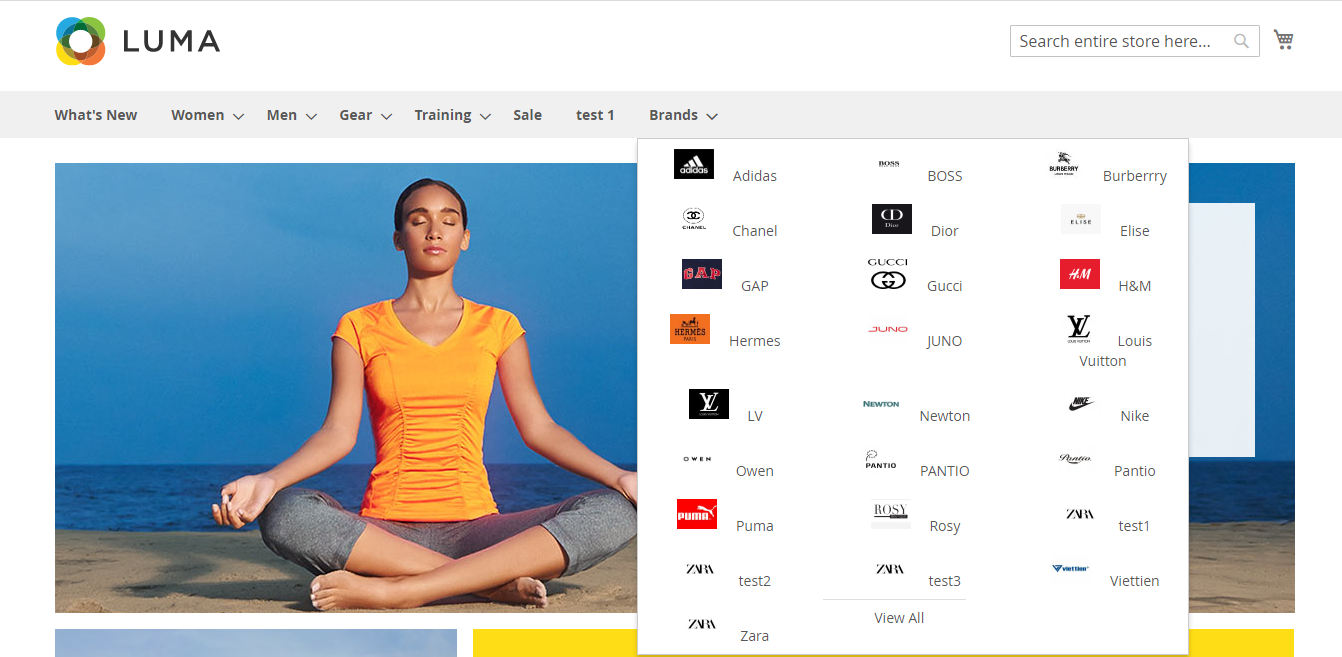
- Grid type: show additional fields - What to show, Brand Menu Gird Layout, Maximum brands to show, Show brands without products on menu
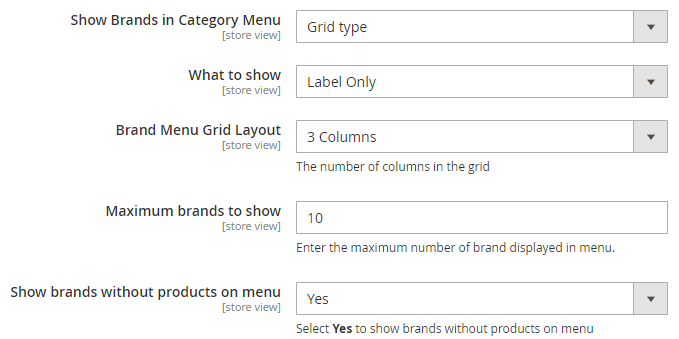
- In What to show select elements to display

What to show = Logo Only: Brands are shown with logos only
What to show = Label Only: Brands are shown with labels only
What to show = Logo and Label: Brands are shown with logos and labels
In Maximum brands to show: fill in the number of brands to show in the menu
In Brand Menu Grid Layout: choose the number of columns to show brands

- In Show brands without products on menu: Select Yes to display the brands with no products in the menu. If No is selected, the brands with no products will not be displayed
Show Brand Info on Product Listing Page: Display Product Brand Info on product listing page such as category, Catalog Search
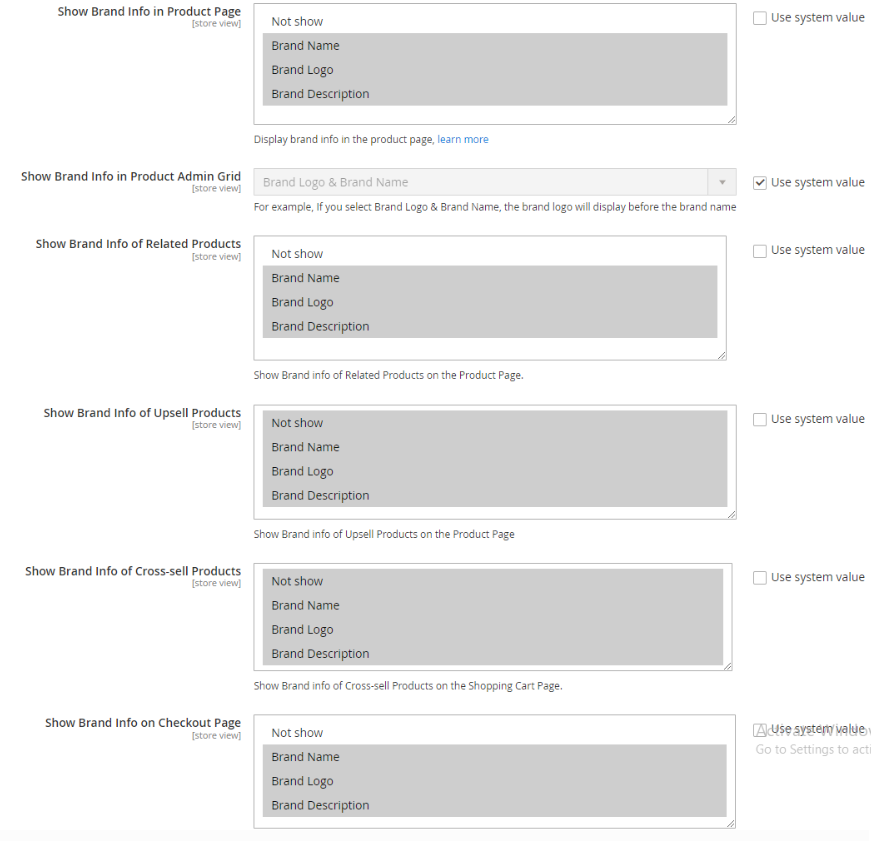
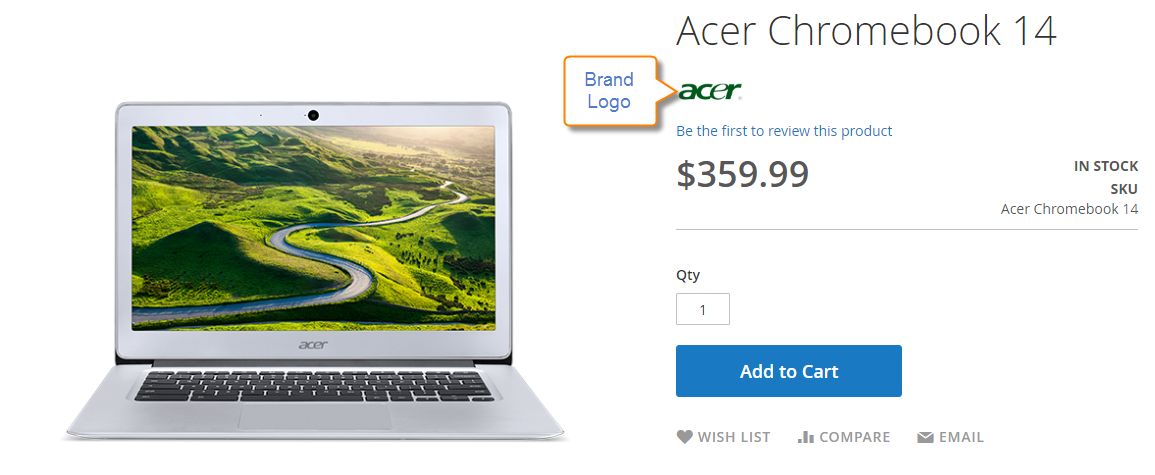
Show Brand Info in Product Page:
Show Brand Info in Product Page = Not show: Not show brand information at product page in frontend
Show Brand Info in Product Page = Brand Name: Allow showing brand information at product page in frontend
Show Brand Info in Product Page = Brand Description: Allow showing brand description at product page in frontend
Show Brand Info in Product Page = Brand Logo: Show the brand logo at the product page on frontend. Show more fields: Brand Logo Width in Product Page and Brand Logo Height in Product Page.
- Brand Logo Width in Product Page: Set the width for brand logo shown at frontend
- Brand Logo Height in Product Page: Set the height for brand logo shown at frontend
Show Brand Info in Product Admin Grid: Display information about the brand on the Product Admin Grid page, including:
- Brand Logo Only: Only display the brand logo at the Product Admin Grid
- Brand Name Only: Only display brand name at the Product Admin Grid
- Brand Logo & Brand Name: Allow showing brand logo and brand name at the Product Admin Grid respectively
- Brand Name & Brand Logo: Allow showing brand name and brand logo at the Product Admin Grid respectively
Show Brand Info of Related Products: Select the Brand Info displayed with Related Products on the Product Page. You can select one or multiple of info about the brand, such as Brand name, Brand Logo, Brand Description. If you do not want to do so, you can select Not Show.
Show Brand Info of Upsell Products: Select the Brand Info displayed with Upsell Products on the Product Page. You can select one or multiple of info about the brand, such as Brand name, Brand Logo, Brand Description. If you do not want to do so, you can select Not Show.
Show Brand Info of Cross-sell Products: Select the Brand Info displayed with Cross-sell Products on the Product Page. You can select one or multiple of info about the brand, such as Brand name, Brand Logo, Brand Description. If you do not want to do so, you can select Not Show.
Show Brand Info on Checkout Page: Select the Brand Info displayed with products on Cart Page, Mini Cart, Checkout Page and Mageplaza One Step Checkout Page extension. If you do not want to do so, you can select Not Show.
Brand Logo Width in Product Page: Enter the pixel(px) for the width of the Brand Logo on the Product Page. If left empty or 0, the default value is 30px.
Brand Logo Height in Product Page: Enter the pixel(px) for the height of the Brand Logo on the Product Page. If left empty or 0, the default value is 30px.
2.1.2 All Brands Page Settings
The All Brands Page Settings feature provides an orderly and eye-catching display of every brand offered in your shop. With the use of this functionality, users can navigate around more easily and find their favorite brands with more ease. This function enhances the whole buying experience by simplifying the way brands are presented, which should lead to increased interaction and sales.
Expand All Brands Page Settings section
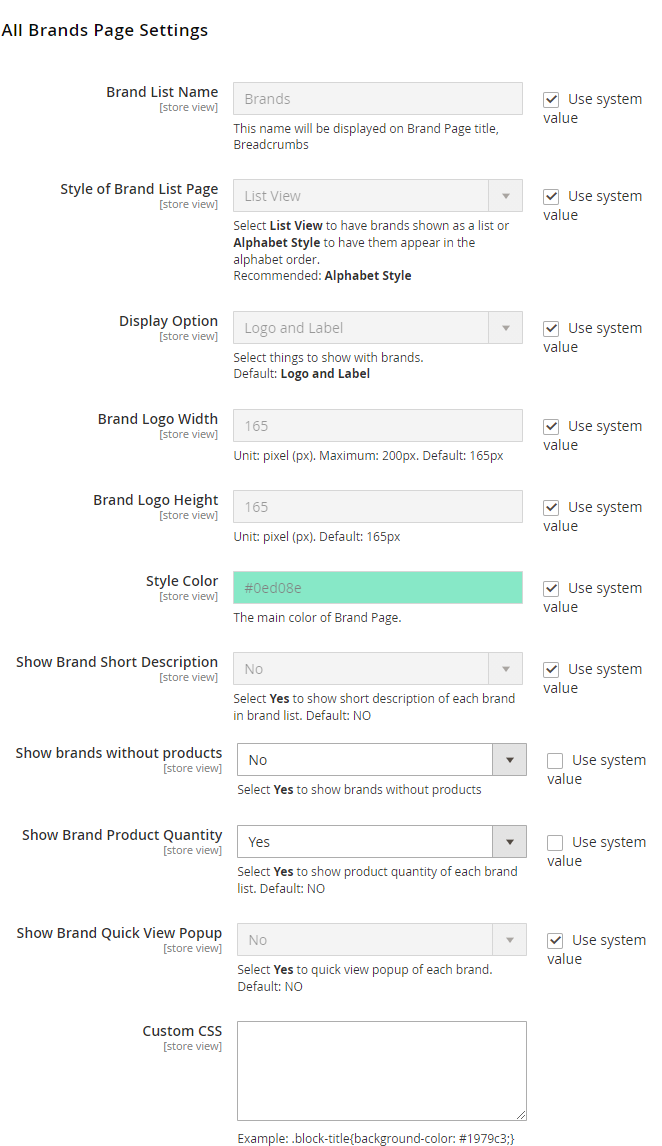
- In Brand list name type your preferred name for the Brand Page title
- In Style of Brand List Page includes options to choose the specific order of the brand list
- List View
- Alphabet Style
- In Display Option supports 3 kinds of performance
- Logo only
- Logo and Label
- Label only
- Brand Logo Width: Set logo width
- Brand Logo Height: Set logo height
- In Style Color select relevant color of the Shop by Brand's interface
- In Show Brand Short Description set up to show the brand’s description or not
- In Show brands without products: Choose Yes to show brands having no products or No to not show them
- In Show Brand Description set up to show the brand’s description or not
- In Show Brand Product Quantity option enable/disable the number.
- In Show Brand Quick View Popup select “Yes” if you want to have it opened in Popup style
- Add Custom Css for your own style
2.1.2.1 Brand Filter Function
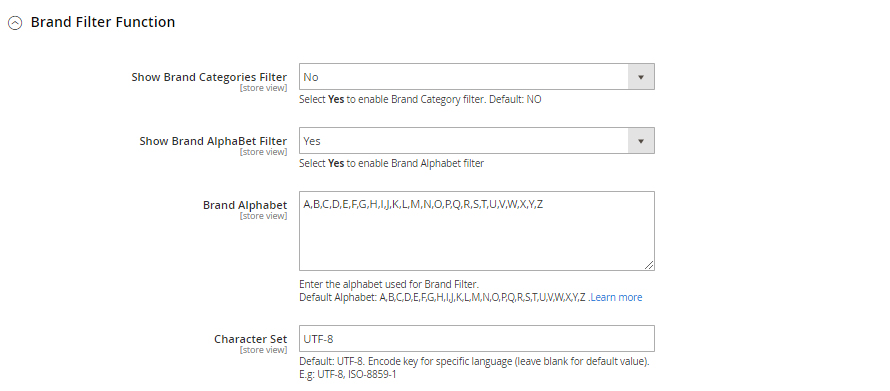
- In Show Brand Categories Filter: choose “Yes” to enable Category filter
- In Show Brand AlphaBet Filter “Yes” is the default option
- In Brand Alphabet, you rule the specific alphabet to be filtered, each of alphabet separated by a commas
- Character Set means encode key for your store’s language
2.1.2.2 Brand Search Setting
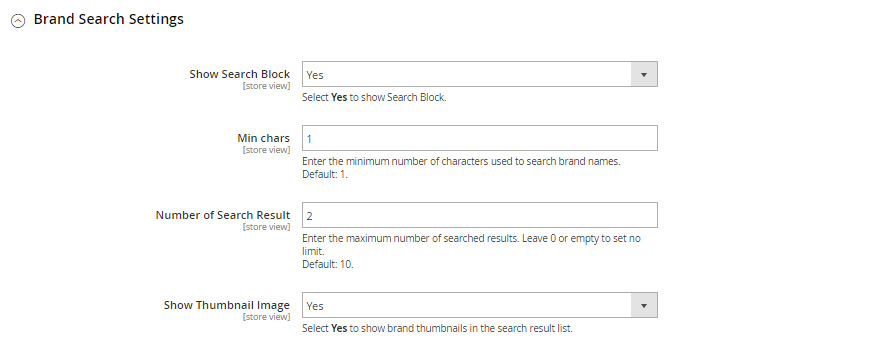
- In Show Search Block select “Yes” to enable Instant Search on the Brand page
- In Min char default minimum number is 1
- In Number of Search result 0 will show unlimited drop-down search result
- In Show Thumbnail Image decides to display thumbnail image or not
2.1.2.3 Feature Brand Settings
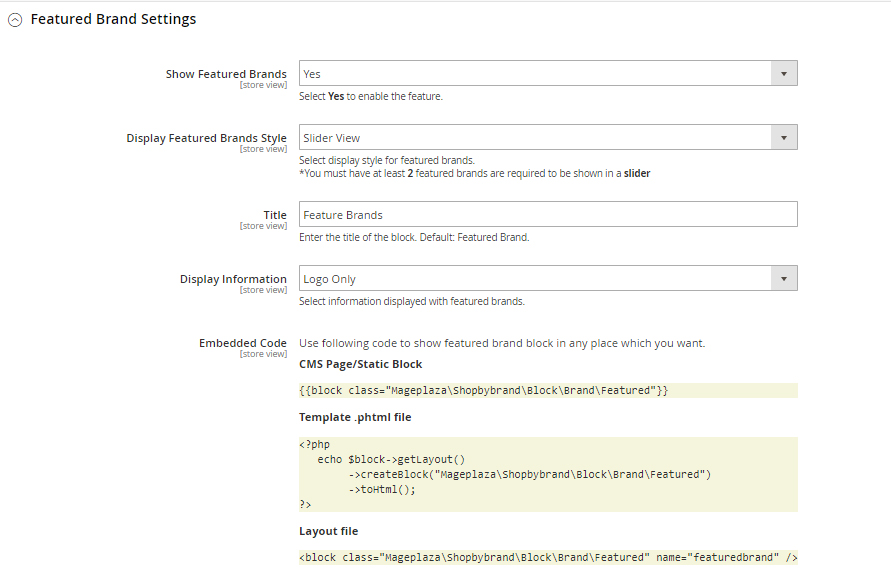
At Show Feature Brands, choose “Yes” to display.
In Display Featured Brands Style we support 2 styles
- Slider View
- Simple View
In Title, type a name for your feature brand block
In Display Information allows
- Logo only
- Logo and Label
In Embedded Code, you can show the feature brand block anywhere you want.
2.1.2.4 Brand Related Products
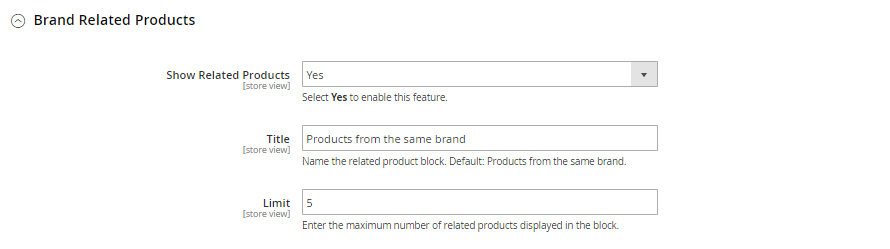
- In Show Related Products “Yes” means display brand related products block
- In Title, type a name for your brand related product block
- In Limit field, enter your preferred maximum number of products in the block
2.1.3 Brand Information
The Brand Information function is designed to enhance brand visibility and recognition within the store, offering customers comprehensive and accurate details about each brand. This feature ensures that customers have easy access to essential information, fostering trust and facilitating informed purchasing decisions.
Click to expand Brand Information
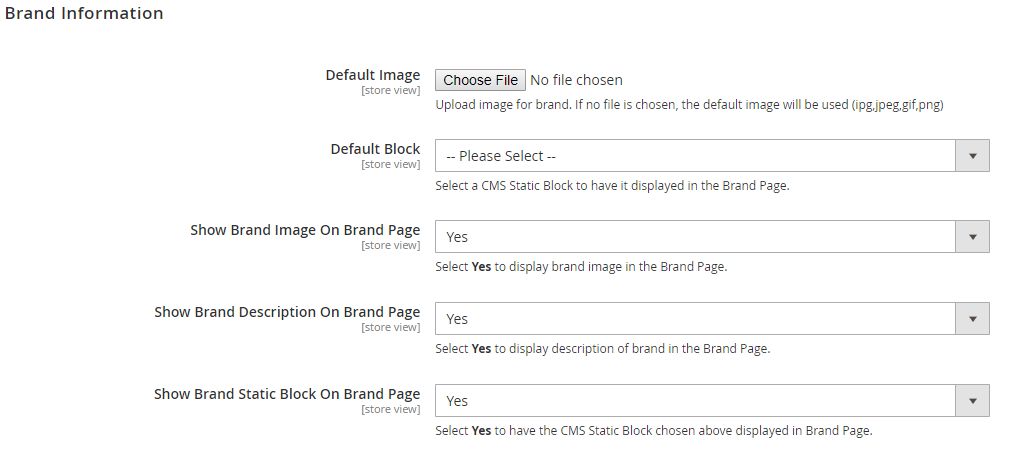
- In Default Image choose a custom stock for Brand. If passing, the product placeholder default image will be used.
- In Default Block, choose an available product block to be displayed
- Choose to Show Brand Image On Brand Page, Show Brand Description On Brand Page, and Show Brand Static Block On Brand Page or not.
2.1.4 Sidebar
This feature will make the most of the sidebar area to prominently display important brands while maintaining a tidy and orderly layout to balance visibility.
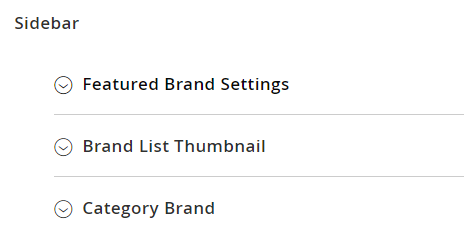
2.1.4.1 Feature Brand Settings
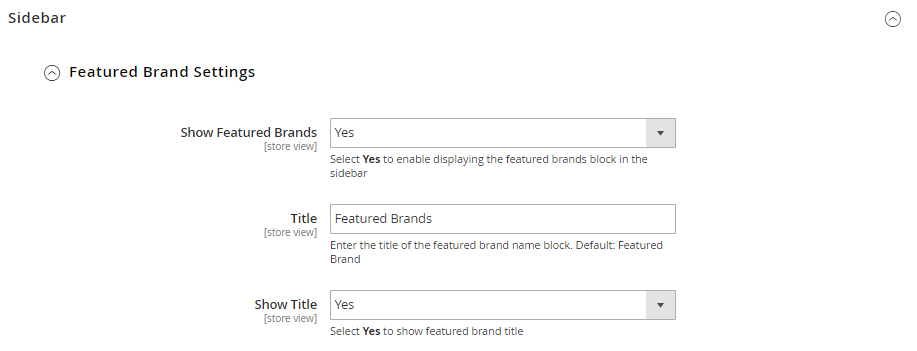
- In the Show Feature Brands option, “Yes” is the default option.
- In Title, “Feature Brand” is the default name
- In Show title choose “Yes” to show the title you named
2.1.4.2 Brand List Thumbnail
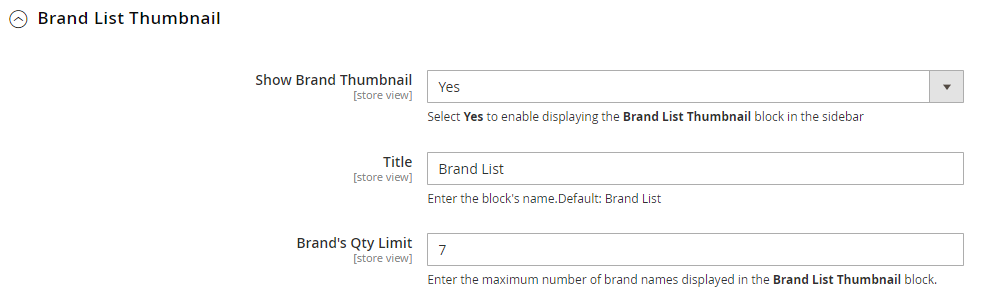
- In Show Brand Thumbnail: “Yes” is the default option
- In Title, “Feature List” is the default name
- In Brand's Qty Limit: 7 brand names in the list is the default number
2.1.4.3 Category Brand
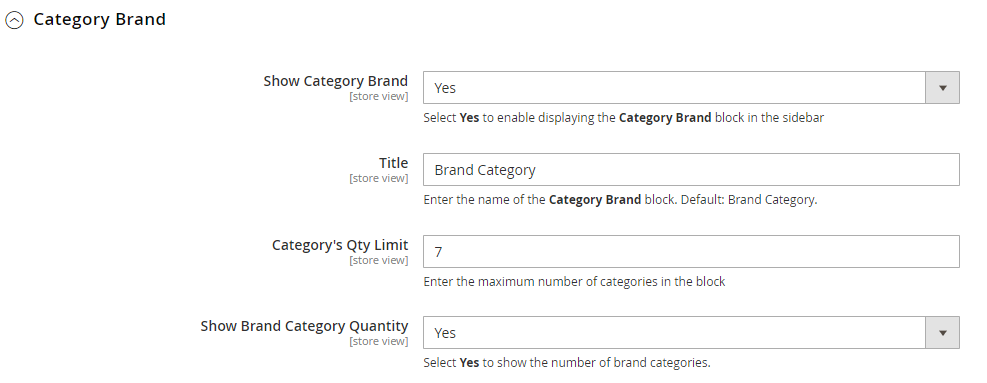
- In Show Category Brand: “Yes” is the default option to display the block
- In Title, “Brand Category” is the default name
- In Category's Qty Limit: 7 categories in the list is the default number
- In Show Brand Category Quantity “Yes” is the default option
2.1.5 SEO
SEO’s feature will increase brand page exposure in search engine results, resulting in increased organic traffic and improved brand discoverability

This is a new sweet treatment for marketing purposes; choose “No” if you don’t wish search engines to index pagination pages.
2.2. Categories
This is a separate module to manage categories when filtering. Also, you can customize some crucial metadata tags like Meta Title, Meta Description, Meta Keywords or Meta Robot.
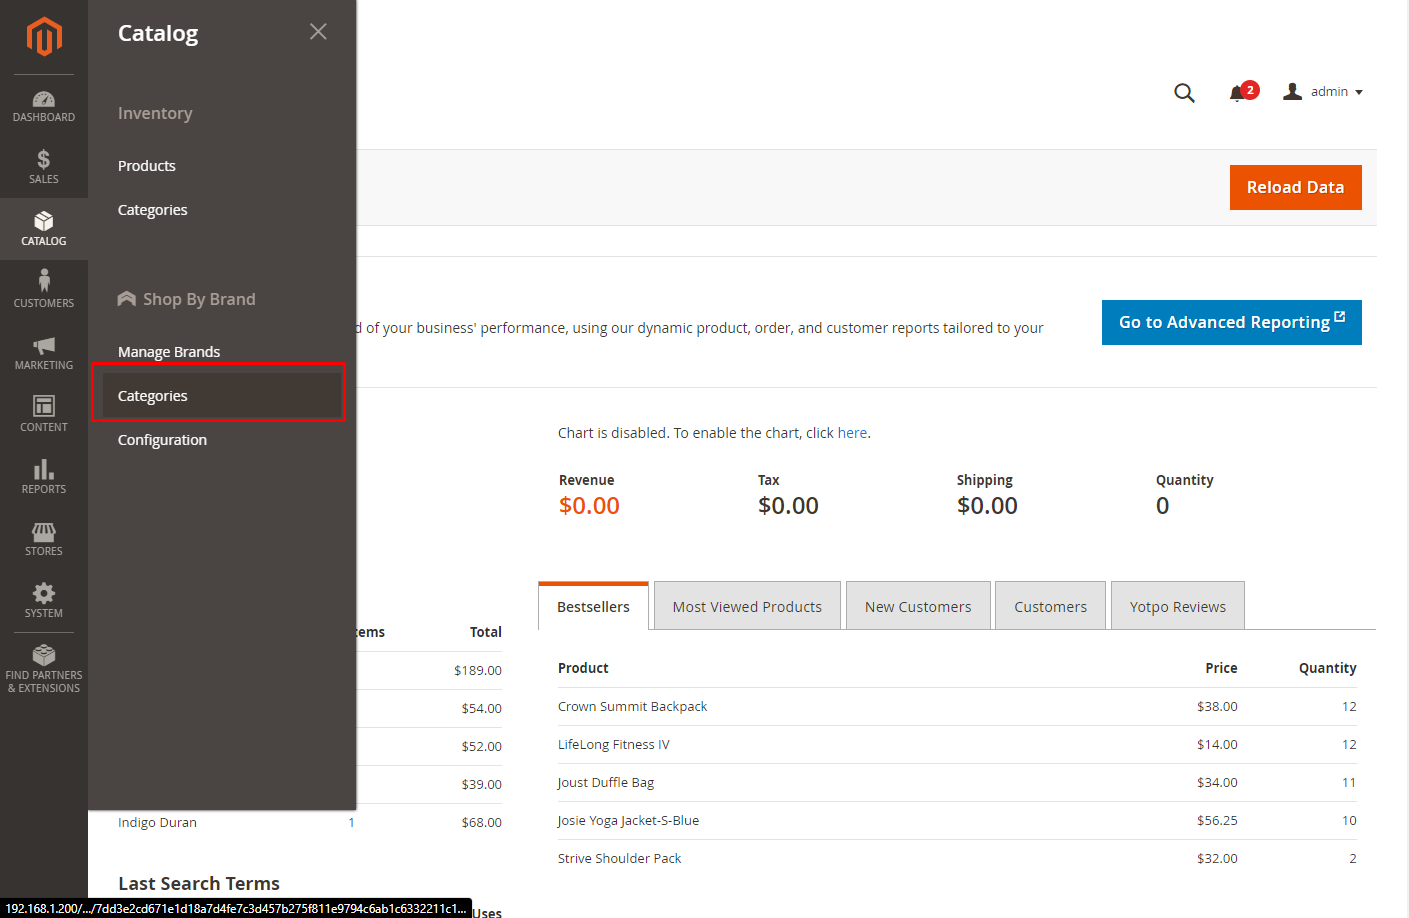
Go to Catalog > Shop by Brand > Categories
To create a brand new category, click the New Category red button.
To massively set brands into a specific category:
- Follow
Catalog > Shop By Brand: Categories - Select the category you want to change navigate, click
Edit - Choose
Brandsat the left sidebar, and a multi-select available brand list will appear. - Click
Save Category

2.3. Manage Brands
This module provides a shortcut to the "manufacturer" workplace; from here, you will manage all available brands and create new ones. Make your way to Catalog > Shop By Brand > Manage Brands
To generate a new brand, follow these steps
All brands are listed under the Manage Options section; click on Add option at the bottom of the list, and right after, a new row will appear.
Click on
Save Configto save the new brand.Tap Setting to open the "Brand Information" page for configuration.
Under Brand Information section,
- Set
Page Titlefor the new brand - Create URL Key
- Upload
Brand Imagefrom your computer - Set the brand to be displayed on featured brand slider or not in
Featuredfield - Enter
Short Description(appear on the search result) andDescription(appear on Brand Listing) - Choose the
CMS Blockto show the brand as a static block anywhere on your page. You can disable it by leaving it blank. - Related Brands: Select related brands to the brand you are setting.
- Set

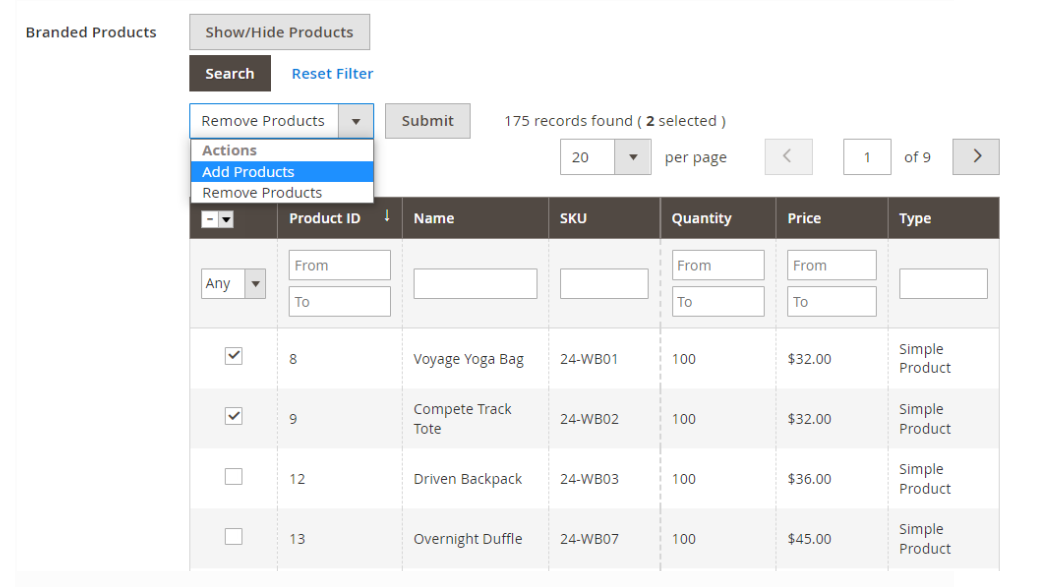
Branded Products: Add multiple products to the brand at once.
Action > Add Products > Submit: Add selected products to the brand.Action > Remove Products> Submit: Remove selected products from the brand.
Expand Meta Information section, you can complete all fields for your better SEO, including:
- Meta Title
- Meta Keywords
- Meta Description
Save Brandto ensure that the configuration for the new brand is successful.
Note: For the existing brands, you can edit their information via Setting button.
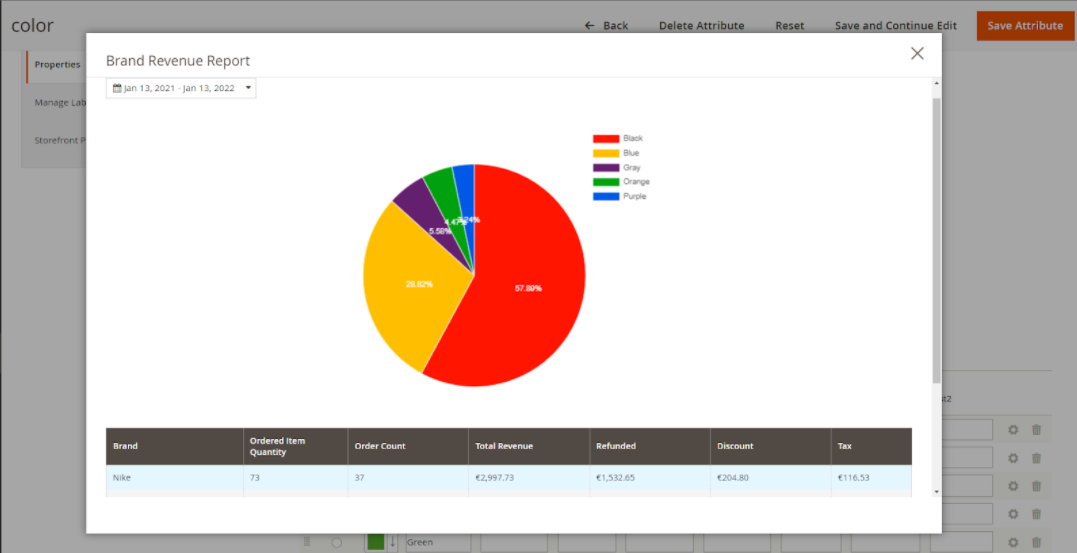
Brand Revenue Report
- Show Report: Click on the
Show reportbutton to show the Brand Revenue Report popup.

- Brand Revenue Report popup: Display the detailed reports on sales of each brand. Thanks to this report, stores can identify which brands are selling well, especially the report of different time period. The Report includes information as follows: Brand, Ordered Item Quantity, Order Count, Total Revenue, Refunder, Discount, and Tax.
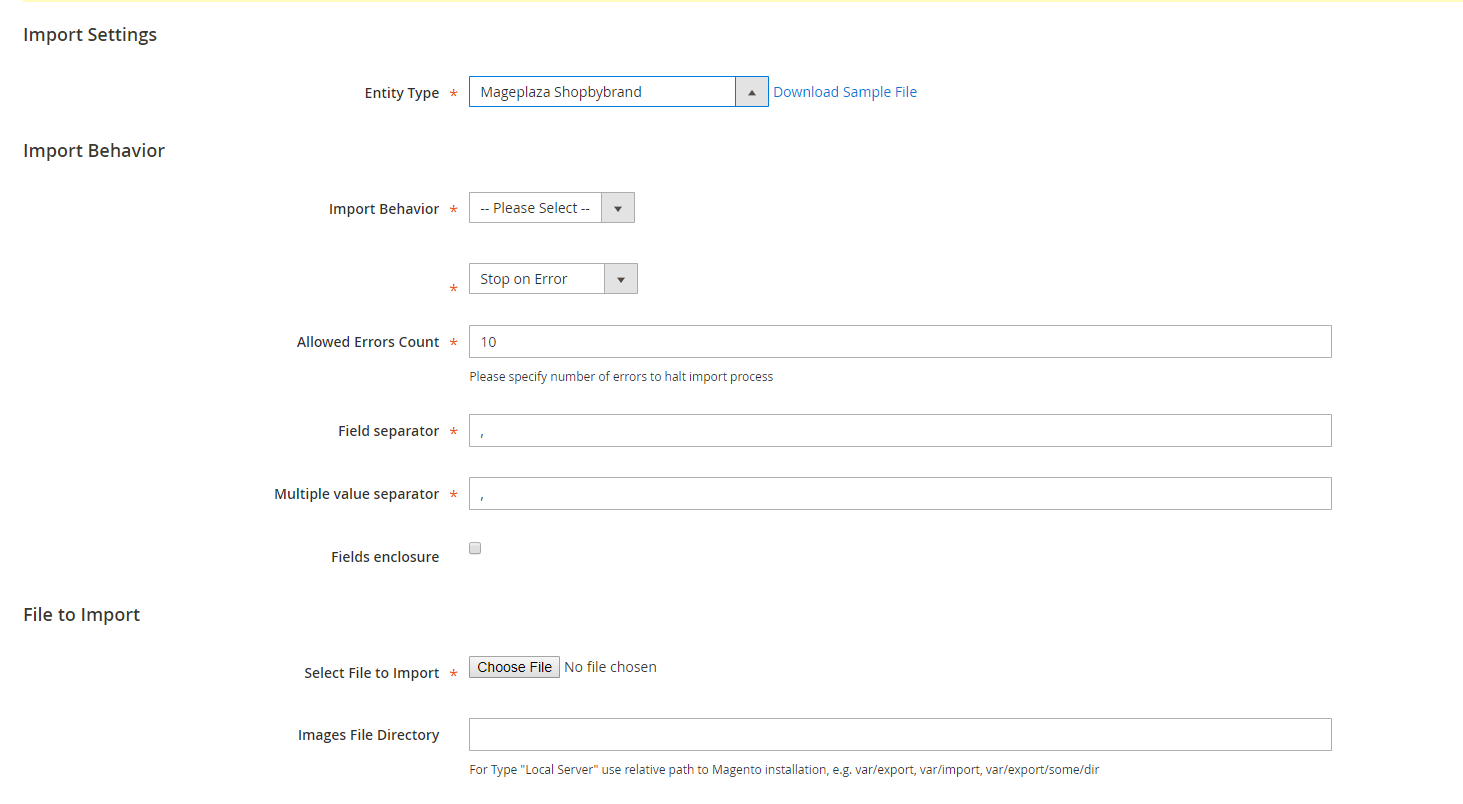
2.4. Bulk import brands
Shop by Brand extension from Mageplaza supports Magento 2 stores to bulk import brands via CSV file.
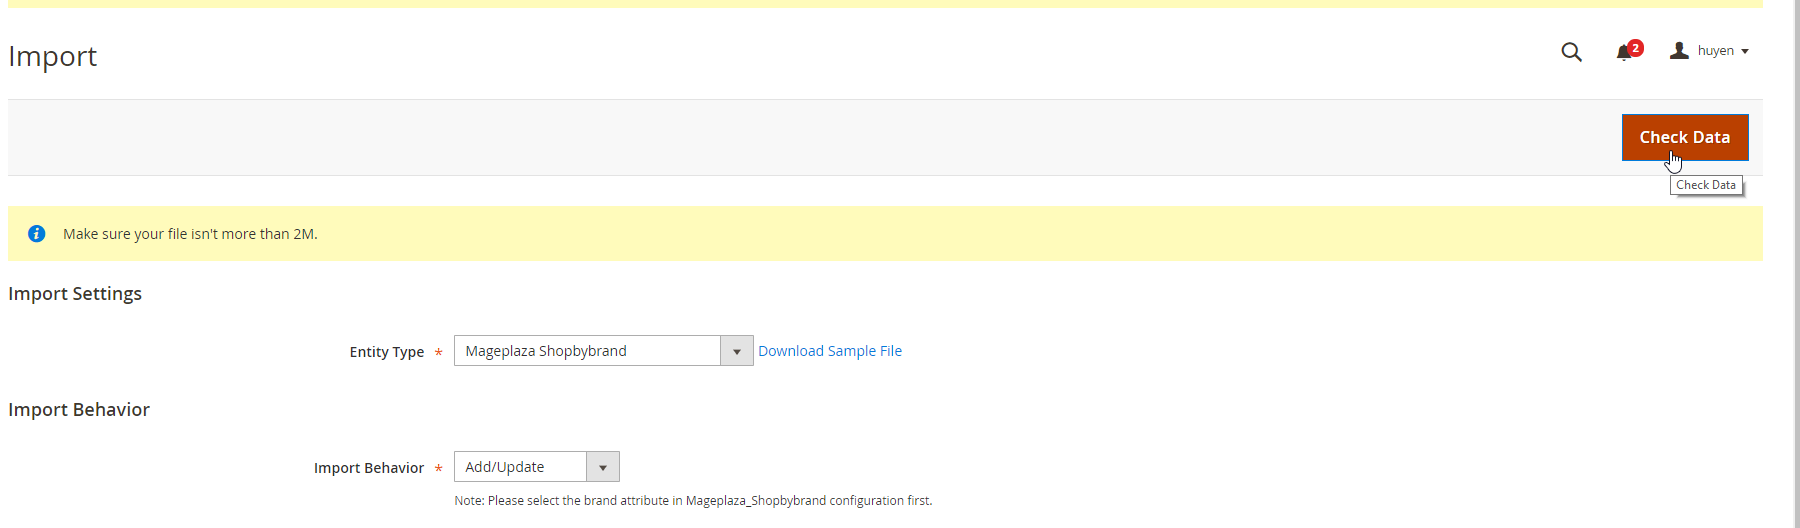
Go to System > Data Transfer > Import > Import Settings > Entity Type field, and choose "Mageplaza Shopbybrand" to expand Import Behavior and File to Import fields.
Sample CSV file:
- Online: https://goo.gl/VqbZ5o
- Offline:
Files/Sample/mageplaza_brand.csv
Follow those steps next
- In Import Behaviour field, choose Import Behaviour as "Add/Update"
- In File to Import field, browse your brand's CSV file in Select file to Import
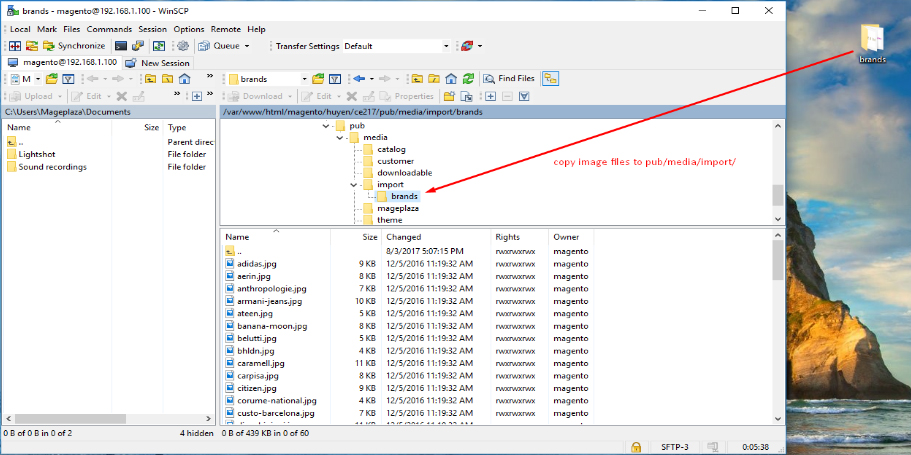
- Copy the file containing Brands in the CSV file to the pub/media/import section of the site. (Note: For Magento 2.3.3, you need to copy image file of brands and paste into the folder
/var/import/images)
Back to the Import page, click Check data button
After Check Data is completed, select Import near the footer to import the brand to Shop By Brand. If the brand name in the CSV file is included in the file to import, the import will be successful

And a report will inform this. Now you've done all the steps to import the brand by a CSV file.

2.5. Export Brand
The Export Brand feature streamlines data management by enabling the seamless export of brand information. This allows users to easily manage, backup, and handle brand data for reporting or integration purposes. Whether you're generating reports or migrating.
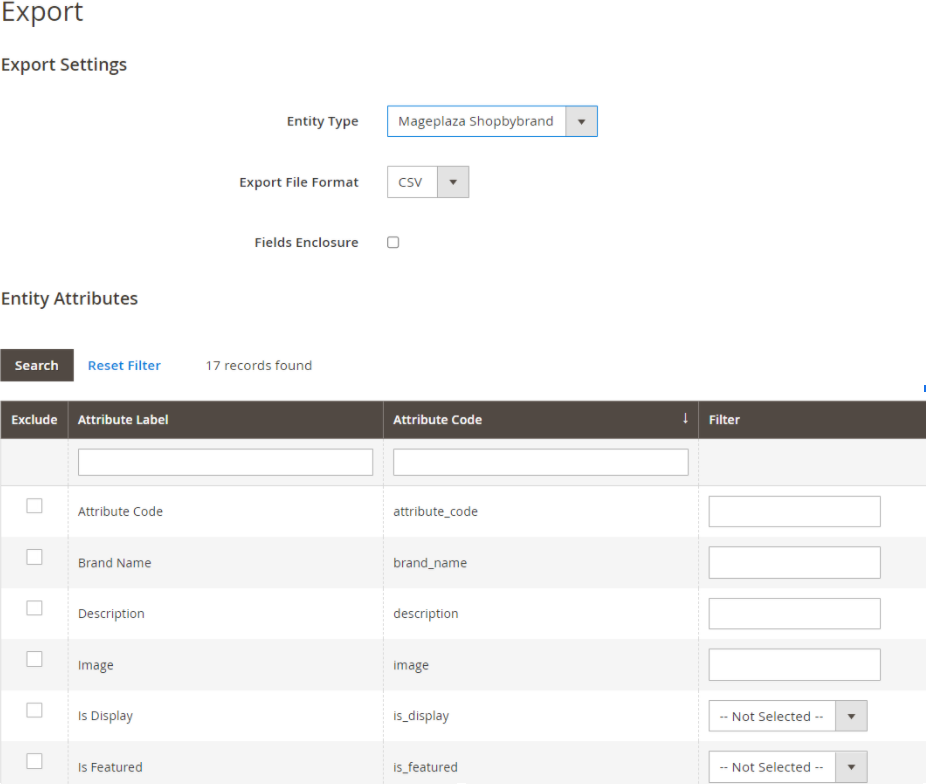
Go to System > Data Transfer > Export > Export Settings > Entity Type field, and choose Mageplaza Shopbybrand to expand Entity Attributes.
2.6. Assign product to brand
This guide helps you classify what brand a product is made by.
- On the Admin Panel,
Product > Inventory > Catalog. - Select an exact product you want to assign, and open
Editmode under Action column. - On the settings page of the product, you will see
Manufacturerfield that allows assigning a corresponding brand to that product.
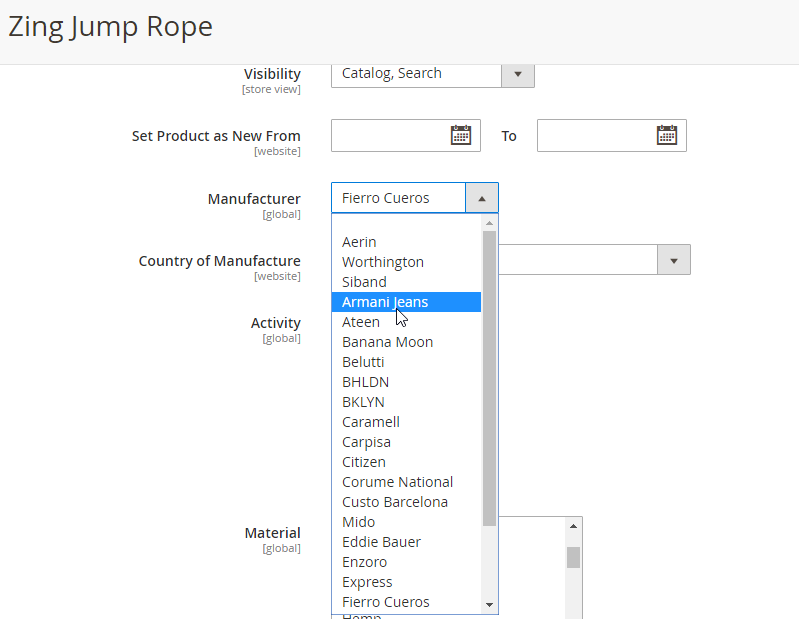
Savethe change to complete the brand attachment.- When finished, the brand logo will display on both the Brand Listing Search and the product detailed page of the assigned product.
On Brand Listing
On Product Page
2.7. Brand Widget
This widget offers a versatile and customizable solution for displaying brands across multiple store pages. It enhances brand visibility by allowing easy access to brand collections, improving the shopping experience, and driving brand engagement.
Get access to Content > Widget > Add Widget to add on brands that you want to display on your website.
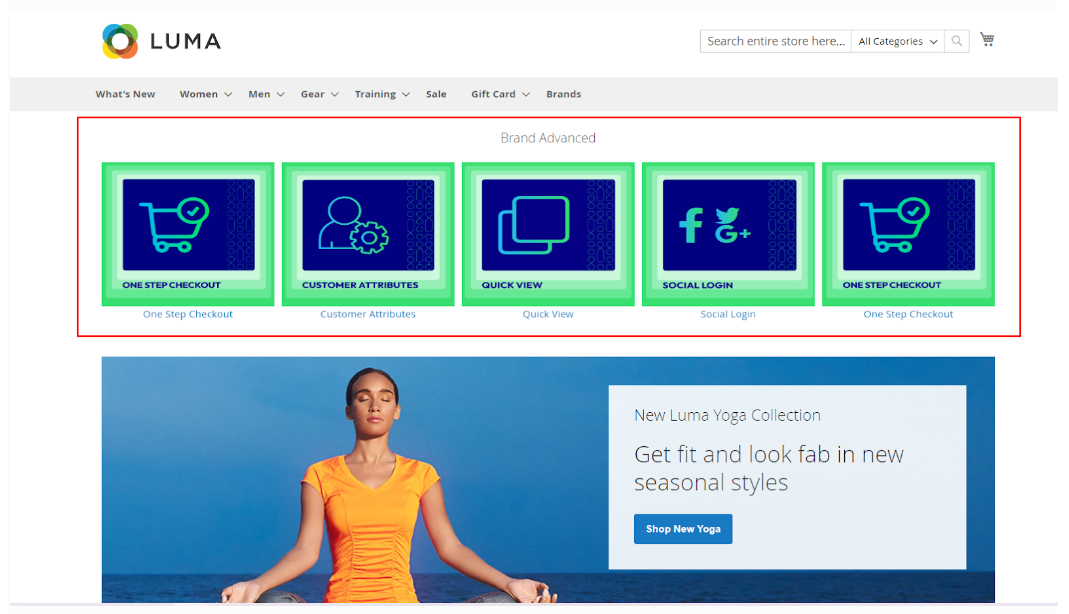
2.7.1. Brand Advanced Widget
The Brand Advanced Widget is designed to give your store the ability to showcase brands with improved functionality and flexibility, tailored to fit both your design goals and customer preferences.

Show on the frontend:
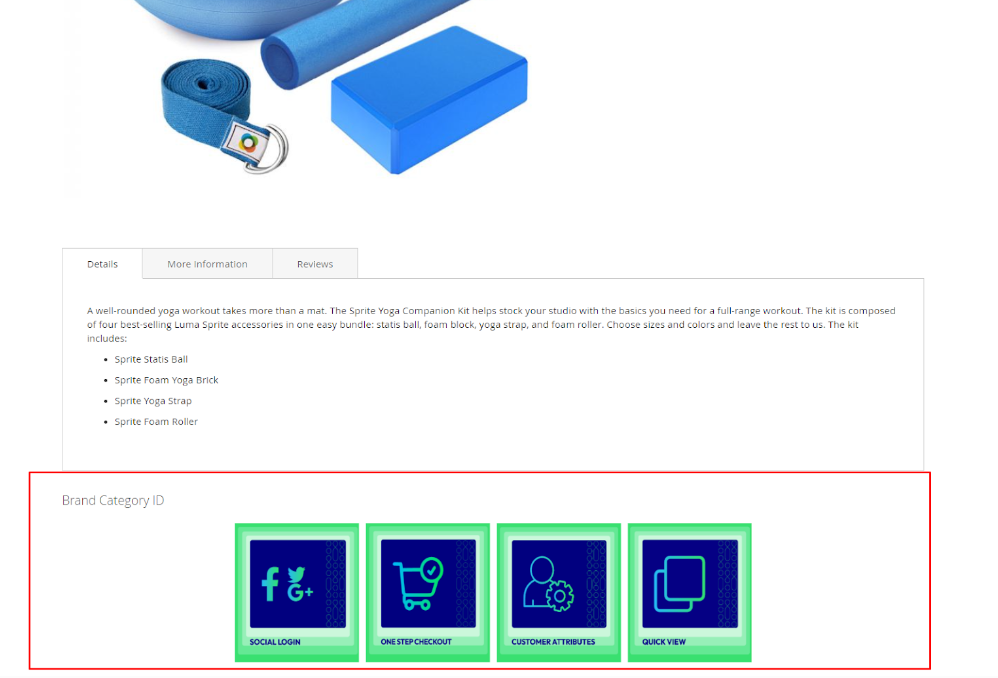
2.7.2. Brand Category ID Widget
This function helps you make brand discovery intuitive and efficient, creating a more personalized and streamlined shopping experience.

Show on the frontend:
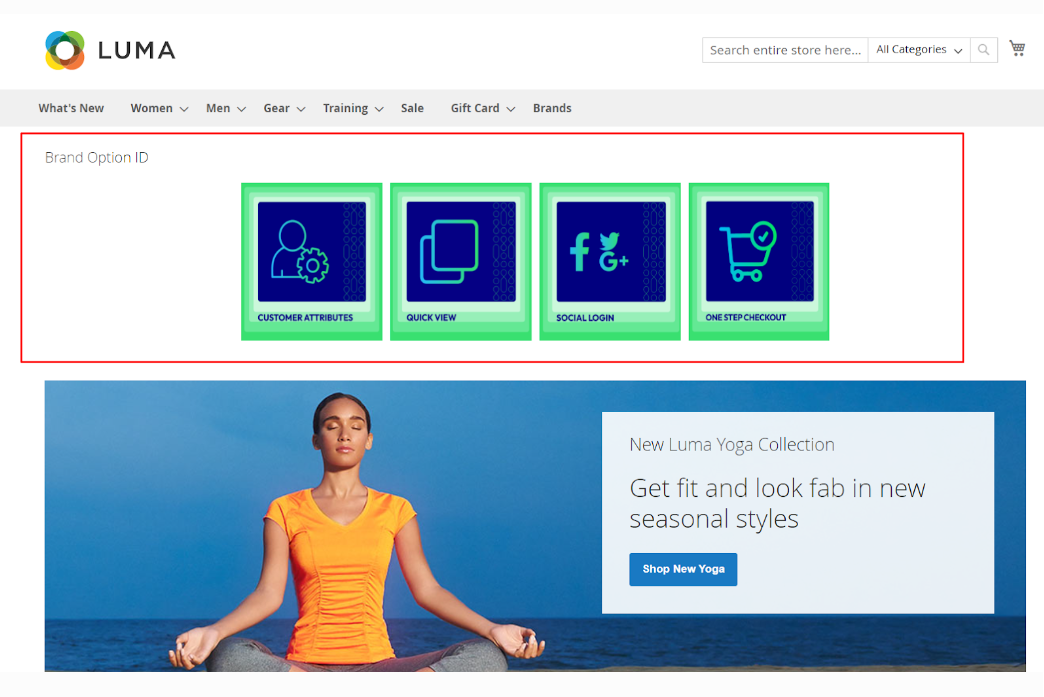
2.7.3. Brand Option ID Widget
The Brand Option ID Widget allows for a more tailored and precise display of brands associated with specific product options or attributes. By dynamically adjusting which brands are shown based on the product's specifications, this feature enhances user experience and product relevance.
Show on the frontend:
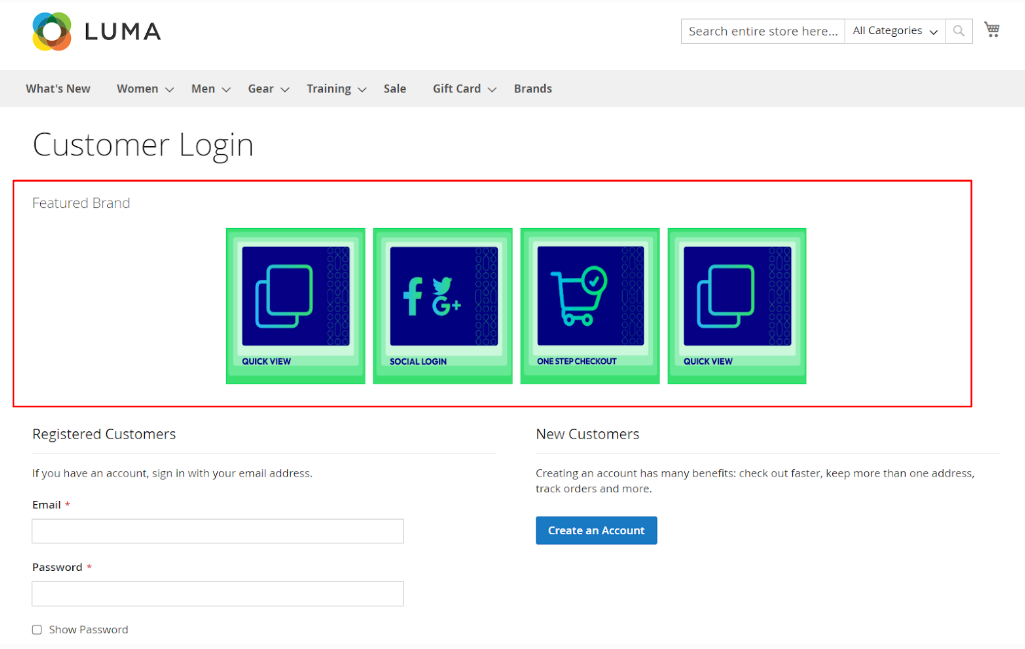
2.7.4. Featured Brand Widget
This powerful tool helps drive attention to featured or promotional brands, enhancing their visibility and encouraging customer engagement. Ideal for highlighting special offers, partnerships, or best-selling brands, this widget strategically places your key brands in front of your shoppers, ensuring they stand out and get noticed throughout the shopping experience.
Show on the frontend:
Advanced Features
1. API
Shop By Brand Extension form Mageplaza does support API, which allows users:
- Get brand list
- Add/ edit/ delete brand
- Add products to brand
- Remove the brand assigned for product
- Get the product list of brand
- Get the brand's information assigned to the product according to the product's SKU
- Get a list of feature brands
- Search for brands by name
- Get brand configuration
Guide to create token, please see here
You can see more of how to get API Request by Shop By Brand Extension via this document
2. GraphQL
Run the following command in Magento 2 root folder:
composer require mageplaza/module-shop-by-brand-graphql
php bin/magento setup:upgrade
php bin/magento setup:static-content:deploy
Mageplaza's Shop By Brand extension supports store admins in getting rule information via GraphQL.
To start working with Shop By Brand GraphQL in Magento, you need to:
- Use Magento 2.3.x. Return your site to developer mode
- Supported GraphQl requests can be viewed at this link
FAQ
Maintenance
Troubleshooting Articles
For common issues and their fixes, refer to these articles:
How to manage Shop By Brand in Magento 2?
Support and Assistance
1. Customer Support
For any assistance, please visit our Support page or email us at cs@mageplaza.com/ sales@mageplaza.com
2. Create a Ticket
If you have technical issues, please open a ticket at this link.
3. Operating Hours
Our support team is available during the following hours:
- Monday to Friday: 8:00 AM - 23:59 PM
- Saturday: 8:00 AM - 12:00 PM
- Sunday: Closed
4. Refund Policy
We understand that sometimes things don't go as planned. Please review our refund policy for detailed information:
5. Frequently Asked Questions (FAQ)
For common questions, please visit our FAQ page: