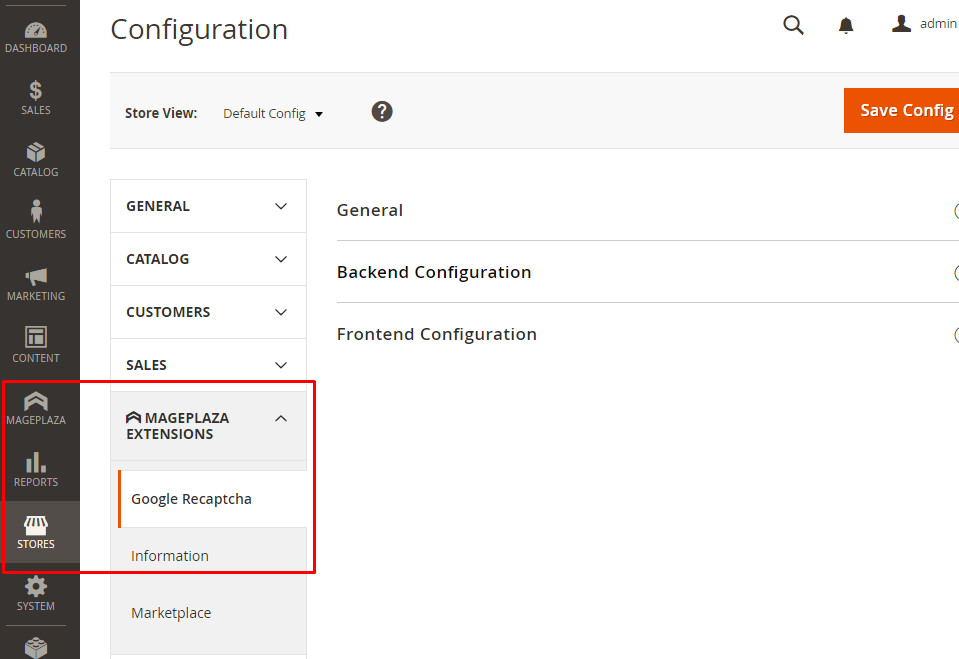
Google Recaptcha
Overview
According to the search from Economictimes, today's Artificial Intelligence (AI) technology can solve almost variant of distorted text at 99.8% accuracy. Distorted text, therefore, is no longer a dependable tool to test. To prevent human effort from accessing your online store, Magento 2 Google Recaptcha extension has been released by Mageplaza experts.
Google Recaptcha extension is the best solution to protect your e-commerce store from spams and frauds. Also, it is also a useful tool that helps online stores avoid the requirements of the bots. Thanks to this module, interestingly, valid users can be accepted easily.
Besides, Mageplaza Google Recaptcha extension is fully compatible with Mageplaza Age Verification, Better Product Reviews, One Step Checkout.
Installation
How to Configure
Configuration
General Configuration
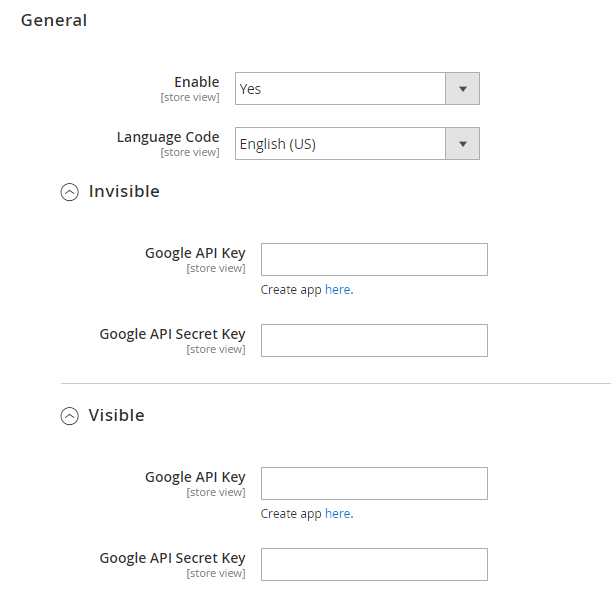
- Enable: Choose Yes to enable this module
- Language Code: Choose the language displaying the reCAPTCHA on the frontend and in the backend
- Invisible
Note: Apply for the frontend
Google API Key: Enter the Key Invisible reCAPTCHA
Google API Secret Key: Enter the Secret Key
How to create reCAPTCHA: Can be found here
Visible
Note: Apply for the backend and frontend
- Google API Key: Enter the Key Visible reCAPTCHA
- Google API Secret Key: Enter the Secret Key
- How to create reCAPTCHA: Can be found here
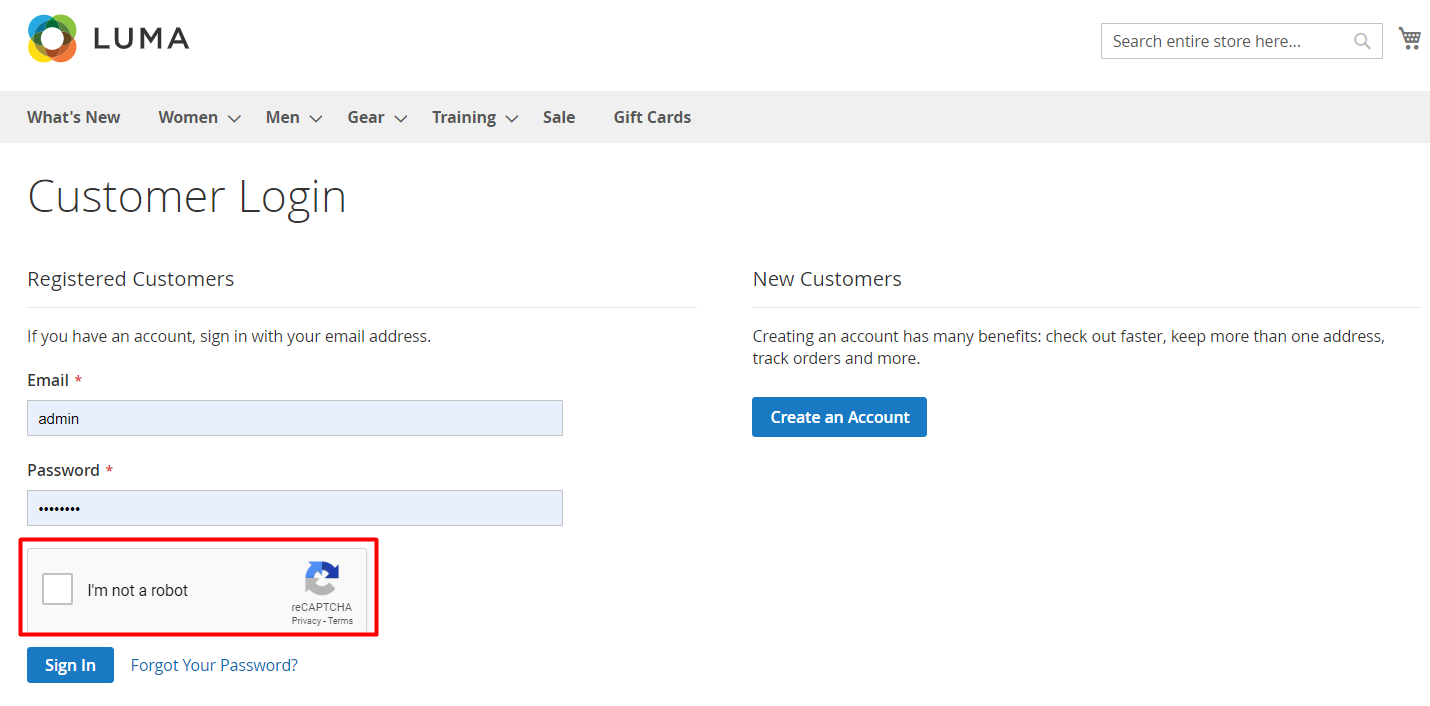
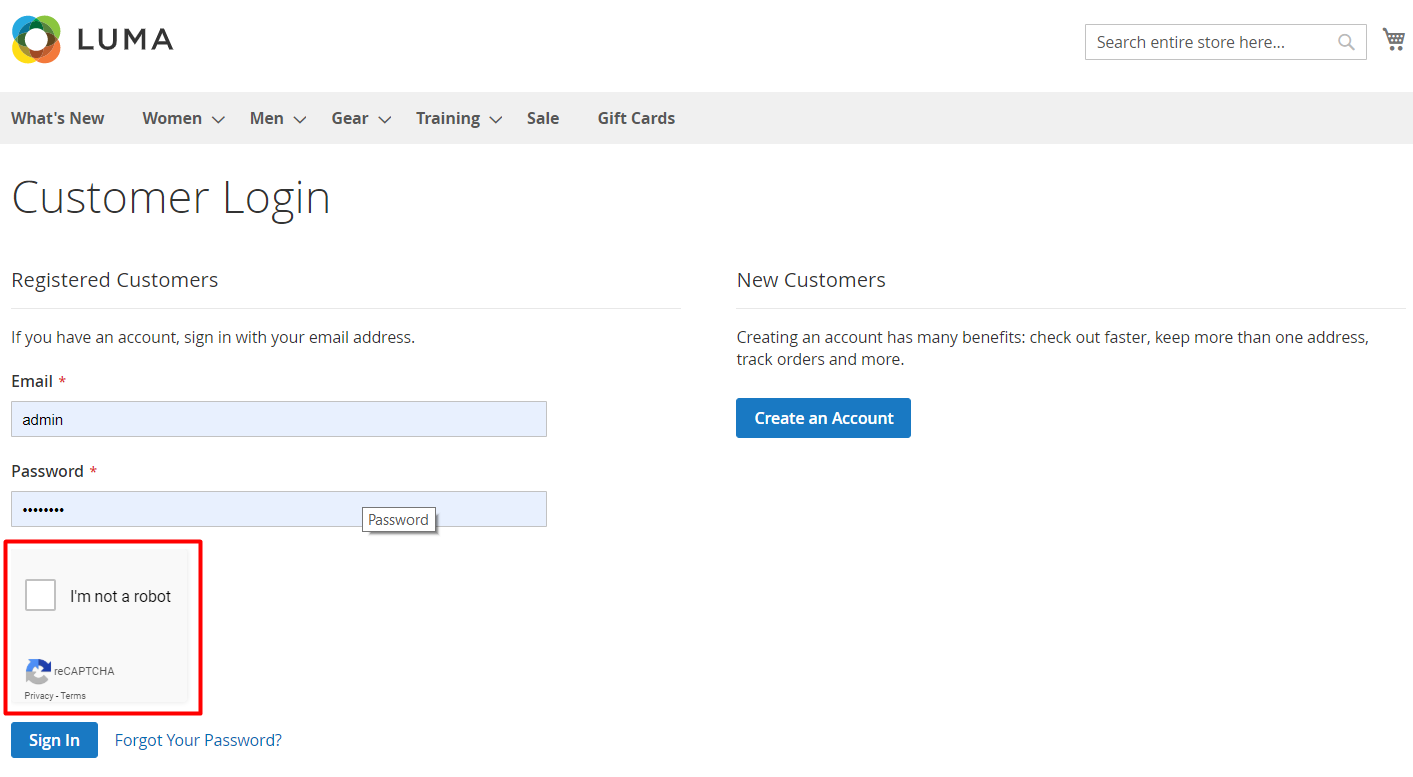
Backend Configuration
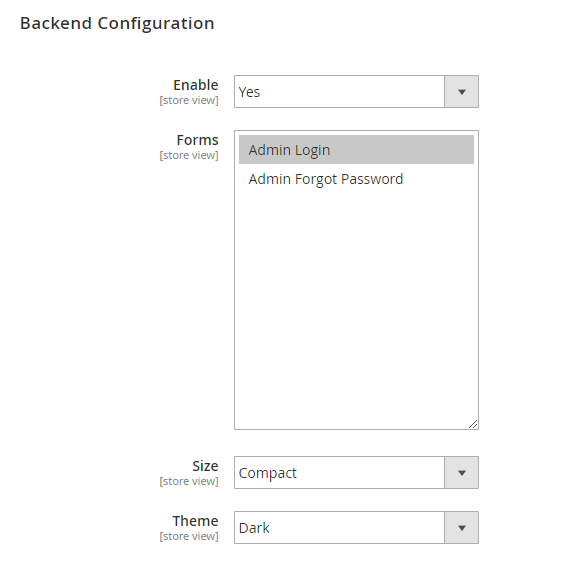
- Enable: Choose Yes to enable reCAPTCHA when accessing the admin panel
- Forms: Choose a place displaying the reCAPTCHA. Store owners can allow reCAPTCHA to display in 2 forms:
- Forms = Admin Login: reCAPTCHA will display in the Admin Login Form when store owners log into the admin page
- Forms = Admin Forgot Password: reCAPTCHA will display in the Admin Forgot Password Form when store owners access on the Admin Forgot Password page
- Size: Choose the size to show the reCAPTCHA

- Size = Compact: reCAPTCHA will display as the following image:
Size = Normal: reCAPTCHA will display as the following:

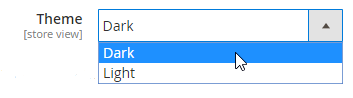
Theme
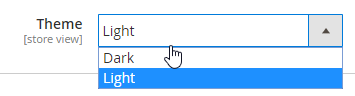
- Theme = Light: reCAPTCHA will display the light color
- Theme = Dark: reCAPTCHA will display the dark color
Frontend Configuration
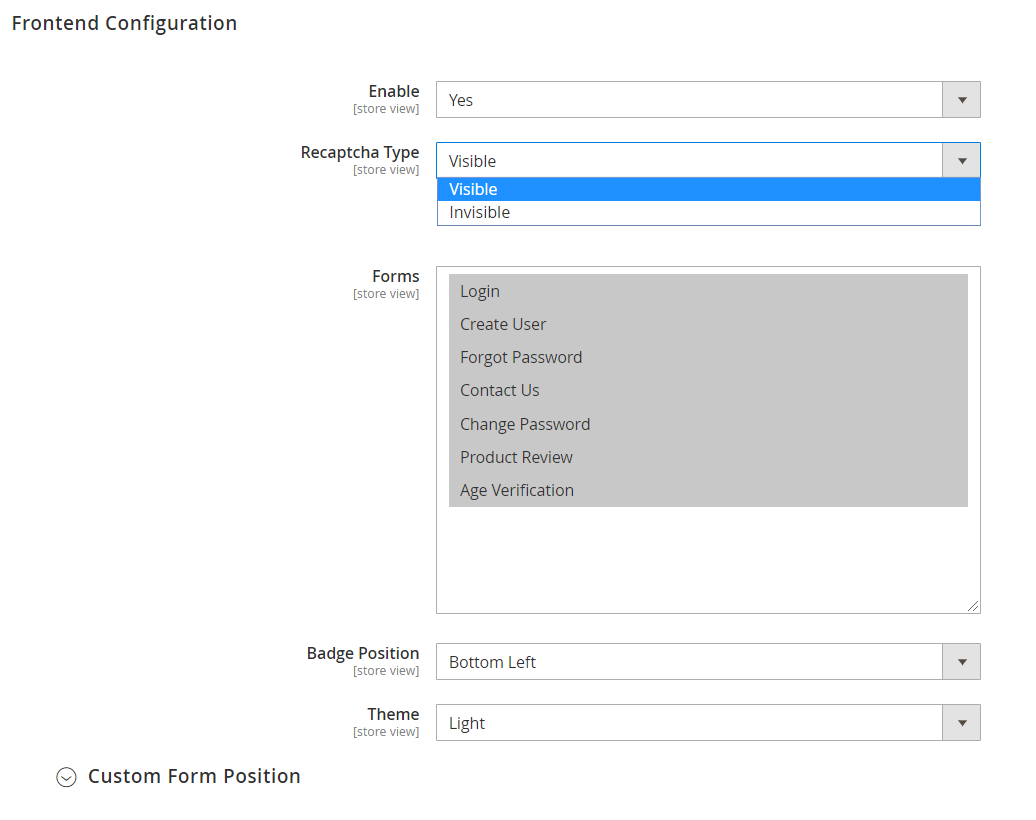
- Enable: Select Yes to display reCAPTCHA on the frontend
- Recaptcha Type: Show Recaptcha at Frontend with 2 types:
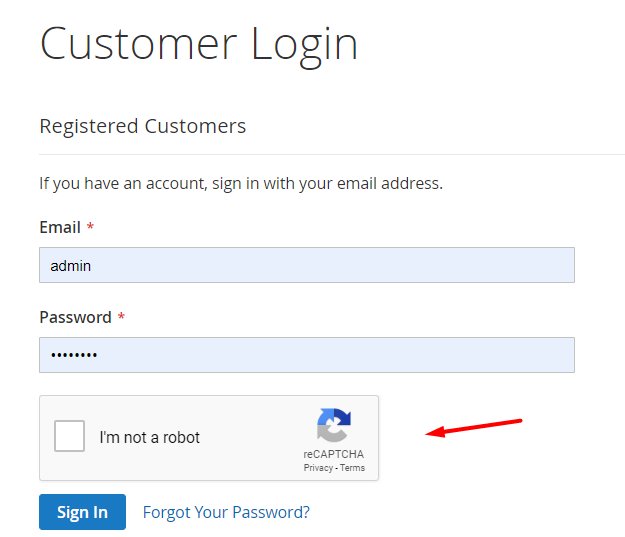
- Visible: Show Visible Recaptcha at Frontend
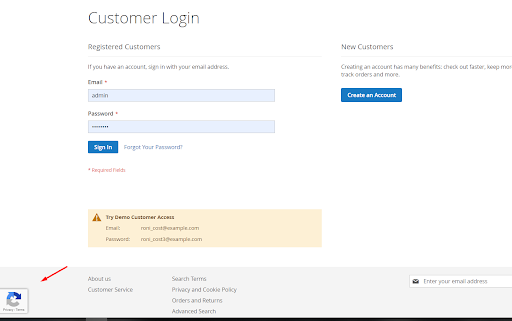
- Invisible: Show Invisible raCapcha at Frontend
- Visible: Show Visible Recaptcha at Frontend
- Forms: Choose a place displaying reCAPTCHA on the frontend. Store owners can allow reCAPTCHA to display in all forms.
- Forms = Login: reCAPTCHA will show in the Login Form when visitors login to the website
- Forms = Create User: reCAPTCHA will show in the Create User Forms when visitors create an account
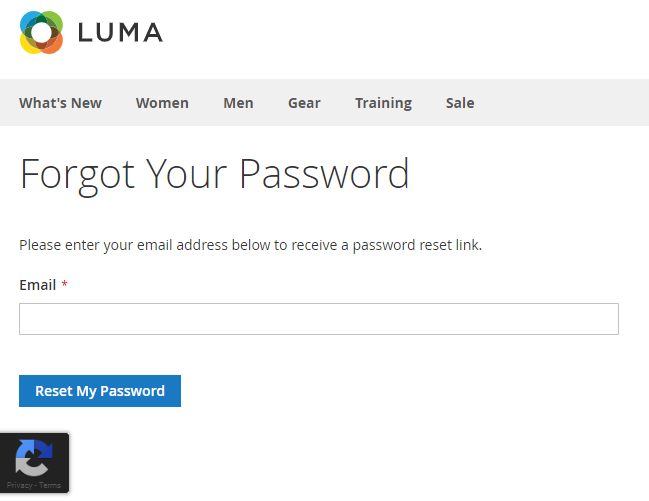
- Forms = Forgot Password: reCAPTCHA will show in the Forgot Password Form when customers access the website to get their password
- Forms = Contact Us: reCAPTCHA will display in the Contact Us Form
- Forms = Change Password: reCAPTCHA will show in the Change Password Form
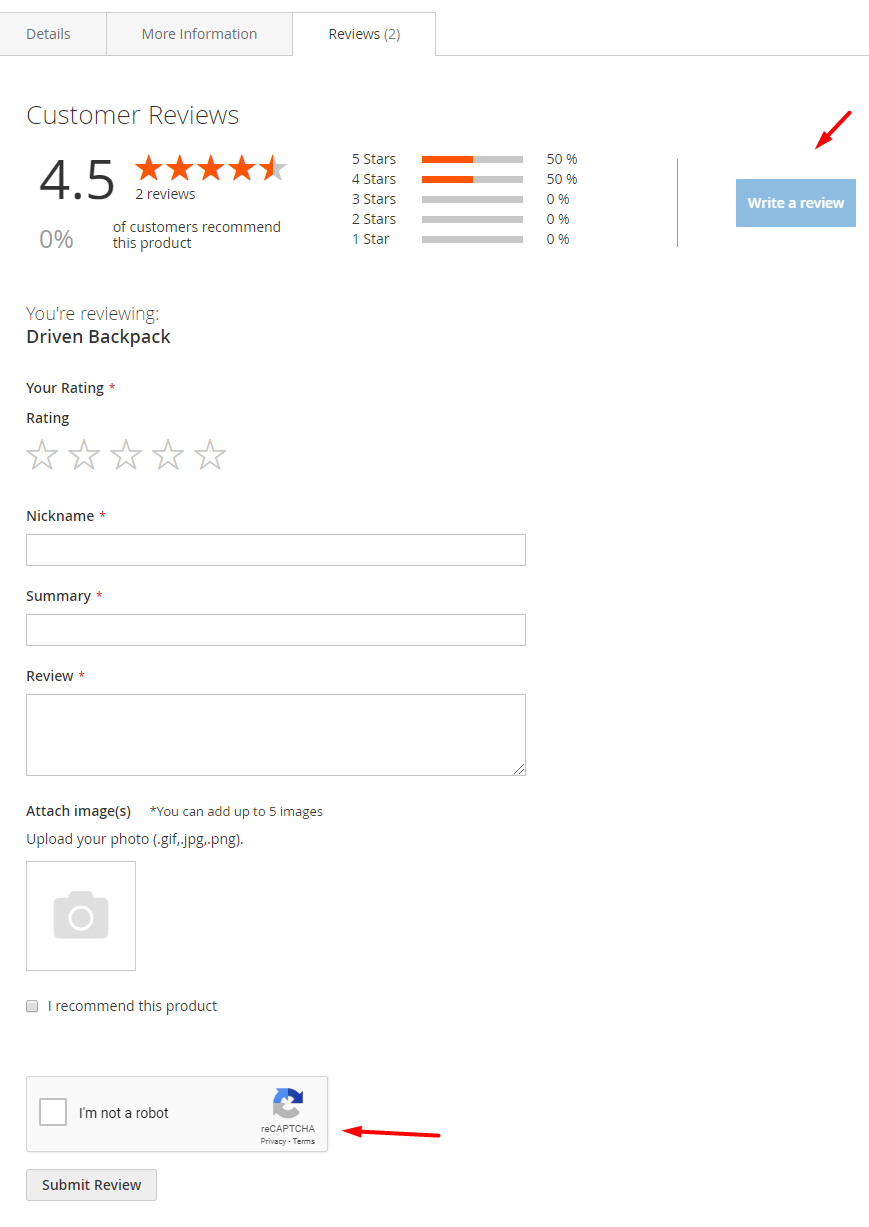
- Forms = Product ReView: reCAPTCHA will display when visitors access the product page to review
- Google Recaptcha is totally compatible with Better Product Reviews extension which supports customers to leave reviews to your product pages easily and accurately. Recaptcha will be shown when you click to Write a review button.
Age Verification: Only show this feature configuration when installing Mageplaza Age Verification extension which supports your store to show reCaptcha at age verification popup.
Badge Position: Show this field when choosing Invisible reCaptcha
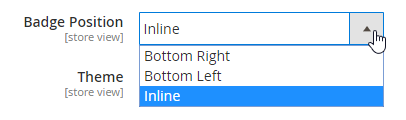
- Badge Position = Inline: Recaptcha will display in the selected form on the frontend
- Badge Position = Bottom Right: Recaptcha will display at the bottom right of the page
- Badge Position = Bottom Left: Recaptcha will display at the bottom left of the page
- Size: Show this field when choosing Visible reCaptcha
- Normal: Show reCaptcha at Frontend as in the following image:
- Compact: Recaptcha is shown at Frontend like this:
- Normal: Show reCaptcha at Frontend as in the following image:
- Theme
Theme = Light: reCAPTCHA will display the light color
Theme = Dark: reCAPTCHA will display the dark color
Custom Form Position: Use this feature to add reCAPTCHA into any form on your store

- Form Post Paths
- Enter the path (url) where will process your form information For example: newsletter/subscriber/new/, display reCAPTCHA in the email address field on the website.
Below are some detailed steps:
- Step 1: Login to your website
- Step 2: Choose Form that you want to display reCAPTCHA and open the Test window
- Step 3: After that, choose Element tab, then choose the form that contains the field you want to add reCAPTCHA
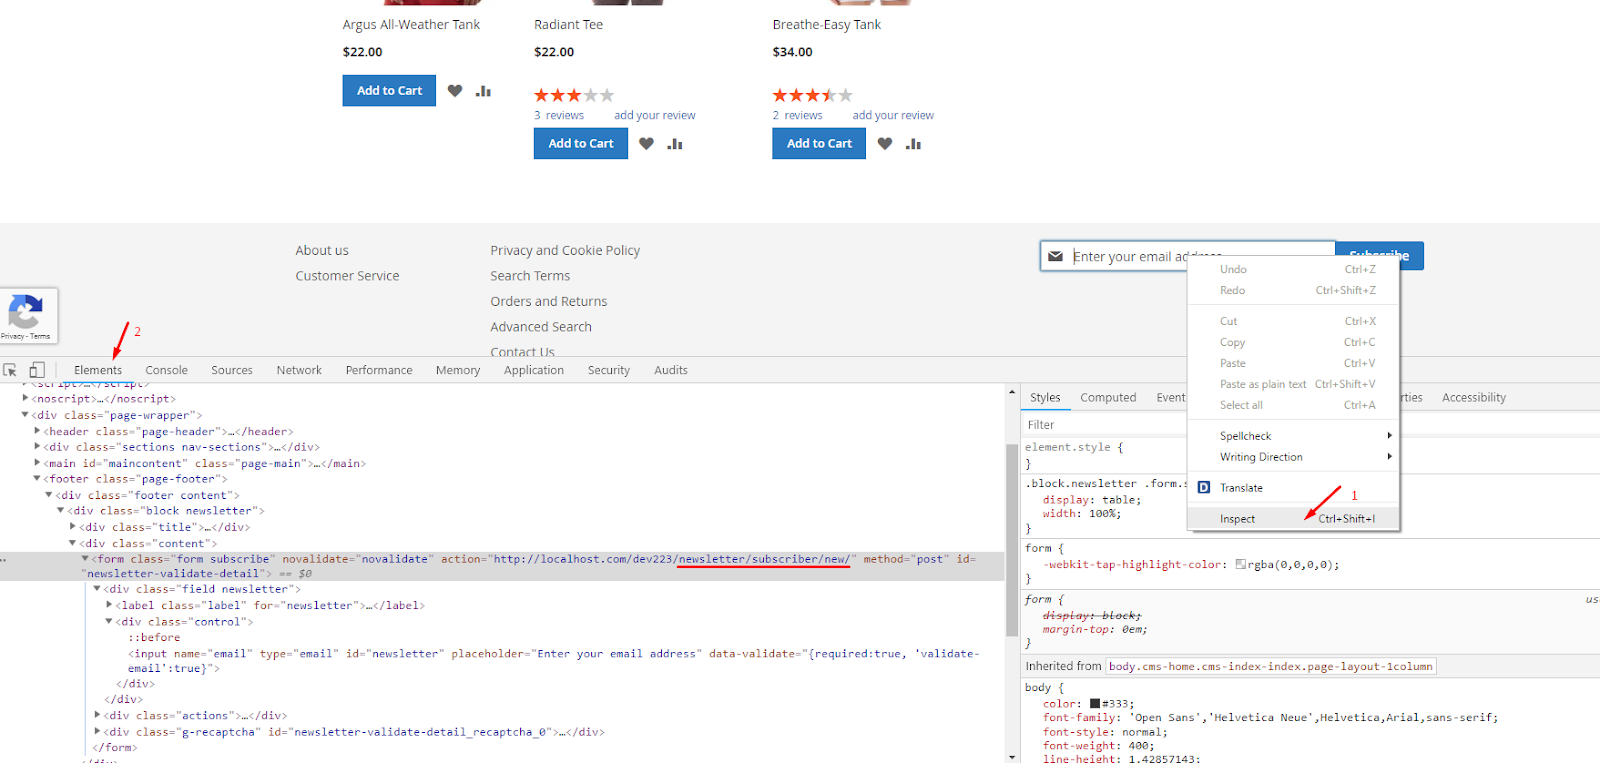
Step 4: In the Subscriber Form in the Action field, copy the URL path. (In this example, the URL is "newsletter/subscriber/new/")
Step 5: Paste the URL into the Form Post Paths field
The paths are separated by down stream.
If you this field is empty and you fill in the information in the CSS Selectors field, reCAPTCHA still displays on the form that you fill in the information CSS Selectors, but it doesn't still work on that form.

- CSS Selectors
- You need to take CSS Selector of the form. At our example, we will take ID of the form. For example: #newsletter-validate-detail, display reCAPTCHA in the Subscriber
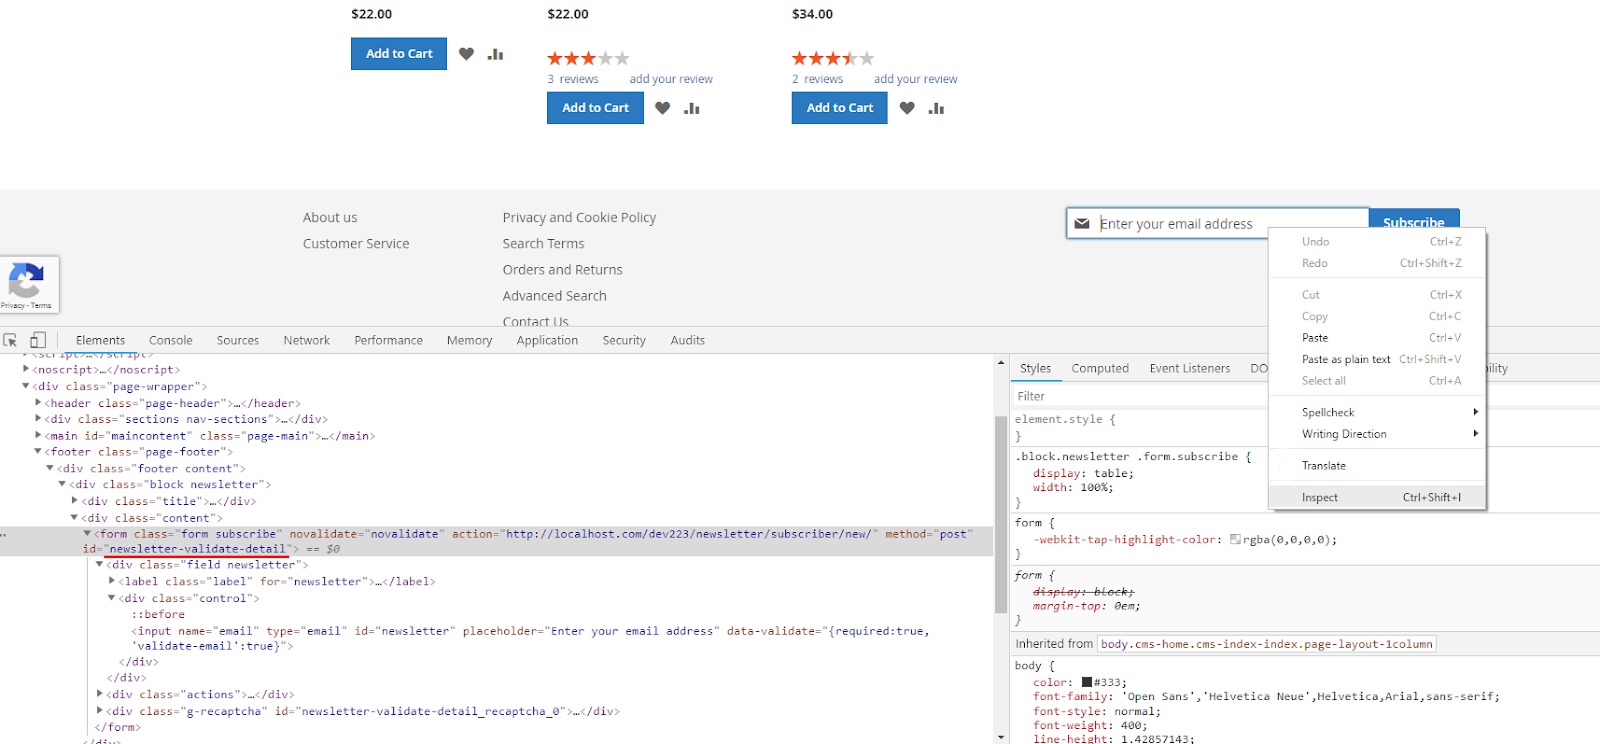
- The IDs are separated by down stream.
- If you leave this field blank while filling in the information in Form Post Paths field, reCAPTCHA won't display on the form you want.
- You need to take CSS Selector of the form. At our example, we will take ID of the form. For example: #newsletter-validate-detail, display reCAPTCHA in the Subscriber
Note:
- In the Custom Form Position field, if you want to show reCAPTCHA on the form you want, you have to fill in all information of 2 fields: Form Post Paths and CSS Selectors.
- Using the invisible CAPTCHA system outside the frontend, most users won't see CAPTCHAs at all, not even the "I'm not a robot" checkbox. If you are flagged as "suspicious" by the system, then it will display the usual challenges. Hence, If you want to check it you can try to click the Create an Account button many times.
Need to download the library of Google Recaptcha so that when you run this extension, there's no error occur- When you cannot access to the admin panel while reCAPTCHA enables, you can use the following command to disable the module via composer as well as can access the admin page as usual.
php bin/magento module:disable Mageplaza_Recaptcha
Or you also disable the configuration by the command below:
php bin/magento mageplaza:core:disable Mageplaza_Recaptcha
Refer the guide to download the library
- Create the folder: lib/internal/Mageplaza
- Go to the path to download the library of Google Recaptcha here
- Extract
magento-2-google-recaptcha-library.zipintolib/internal/Mageplaza, then change the name of the file that you have just extracted,Recaptcha

- Run the following command to install:
php bin/magento setup:upgrade
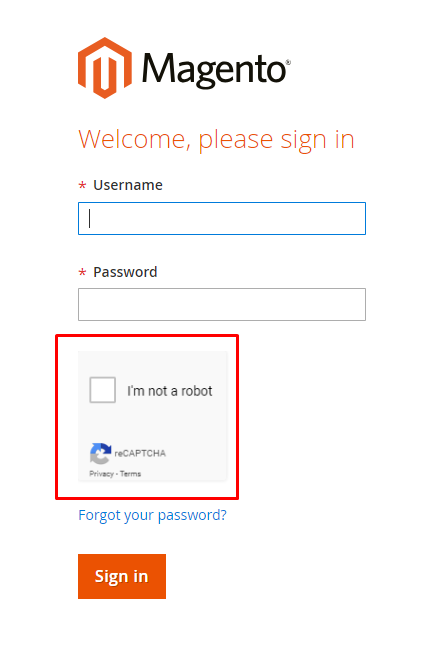
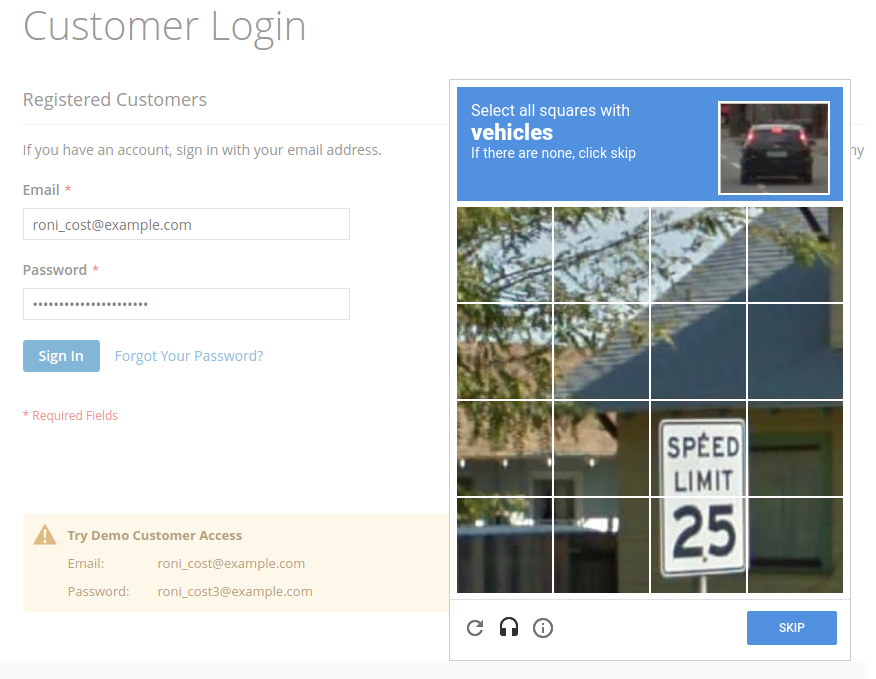
The display of reCAPTCHA on the frontend
The display of reCAPTCHA in the backend

Command line
Run the following command to enable or disable google recaptcha display in the backend:
php bin/magento mpgooglerecaptcha:backend:enable
php bin/magento mpgooglerecaptcha:backend:disable