Thank You Page
Overview
With the help of Mageplaza Thank You Page, you can impress your customers with ease. They can completely check their orders including various information such as order number and status, order date, shipping address, payment method, and so on. This will help the customers know that they have successfully placed orders. Also, it helps customers feel your respect and concern. Moreover, you can insert useful information into the Thank You Page such as coupon, product slider, FAQ, and social sharing buttons that allow customers to share with their friends. This gives customers many interesting benefits during the payment process. It is a great way to bring satisfaction to grumpy customers. More interestingly, this is a way to promote your brand in the memory of the customer.
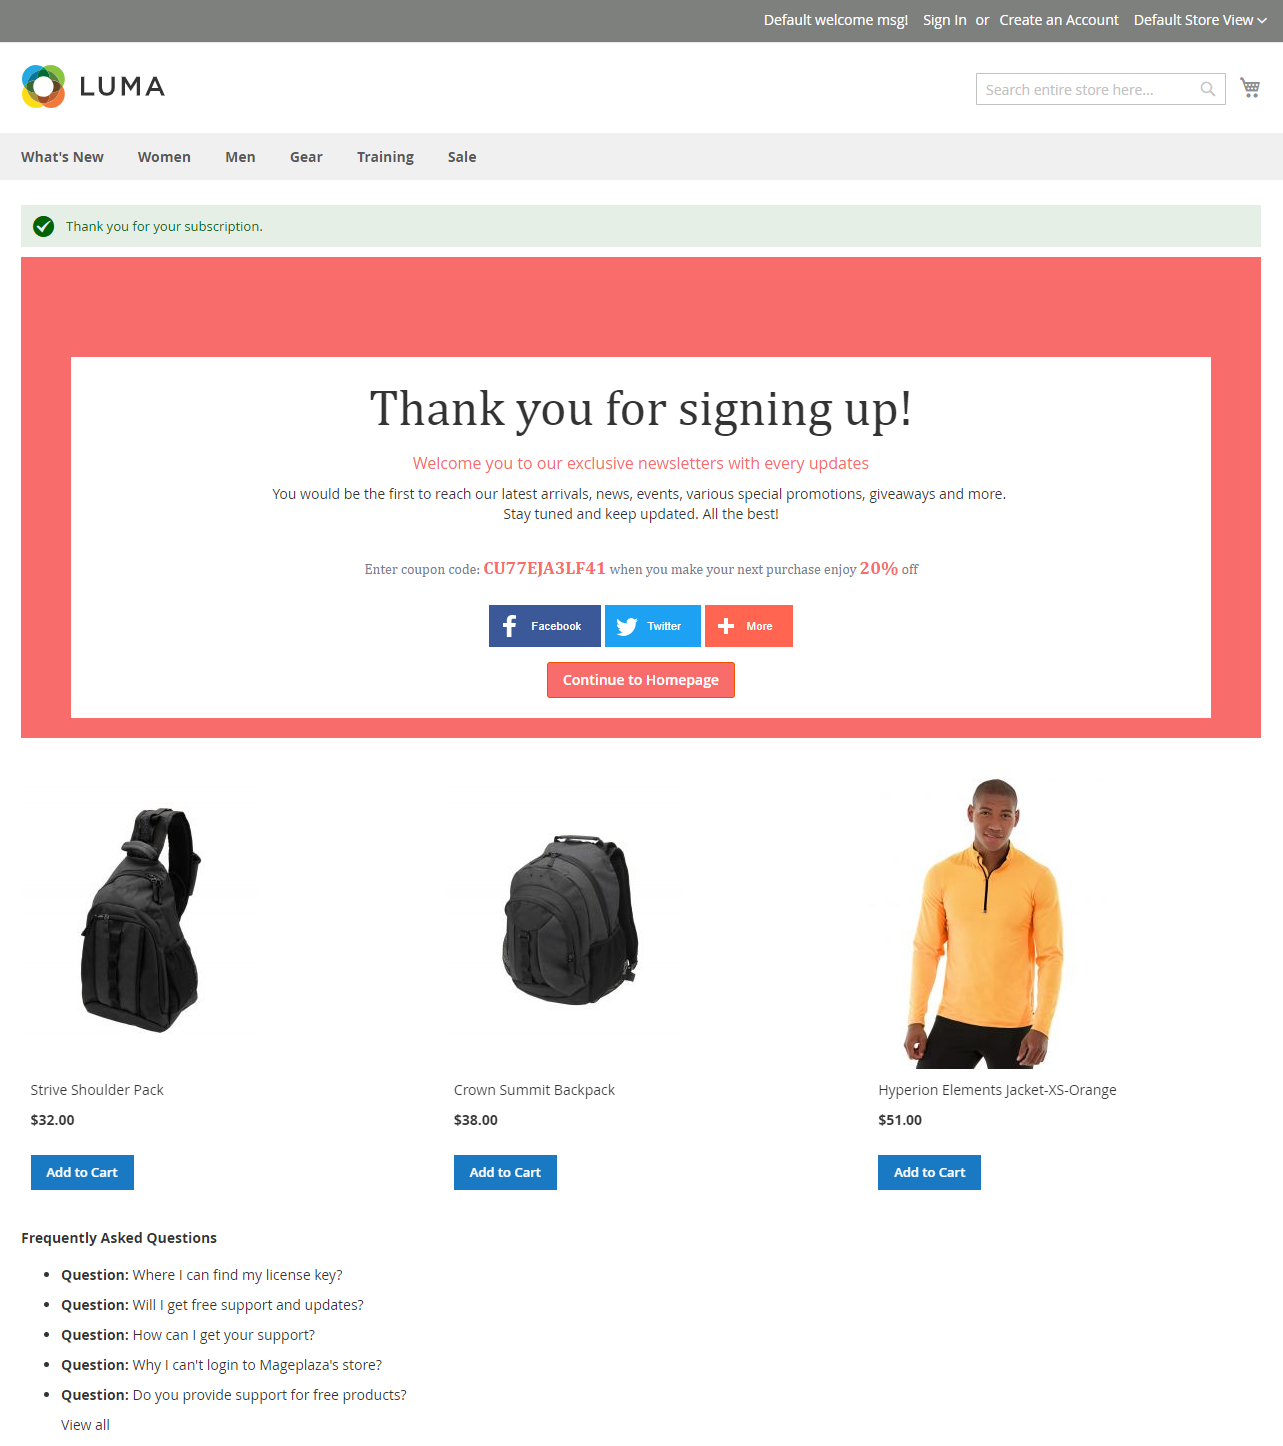
We also support the Newsletter Success page with similar features.
How to use
1. Display Thank You Page after customers complete the order

2. Display Thank You Page after customers click on subscribe
How to configure
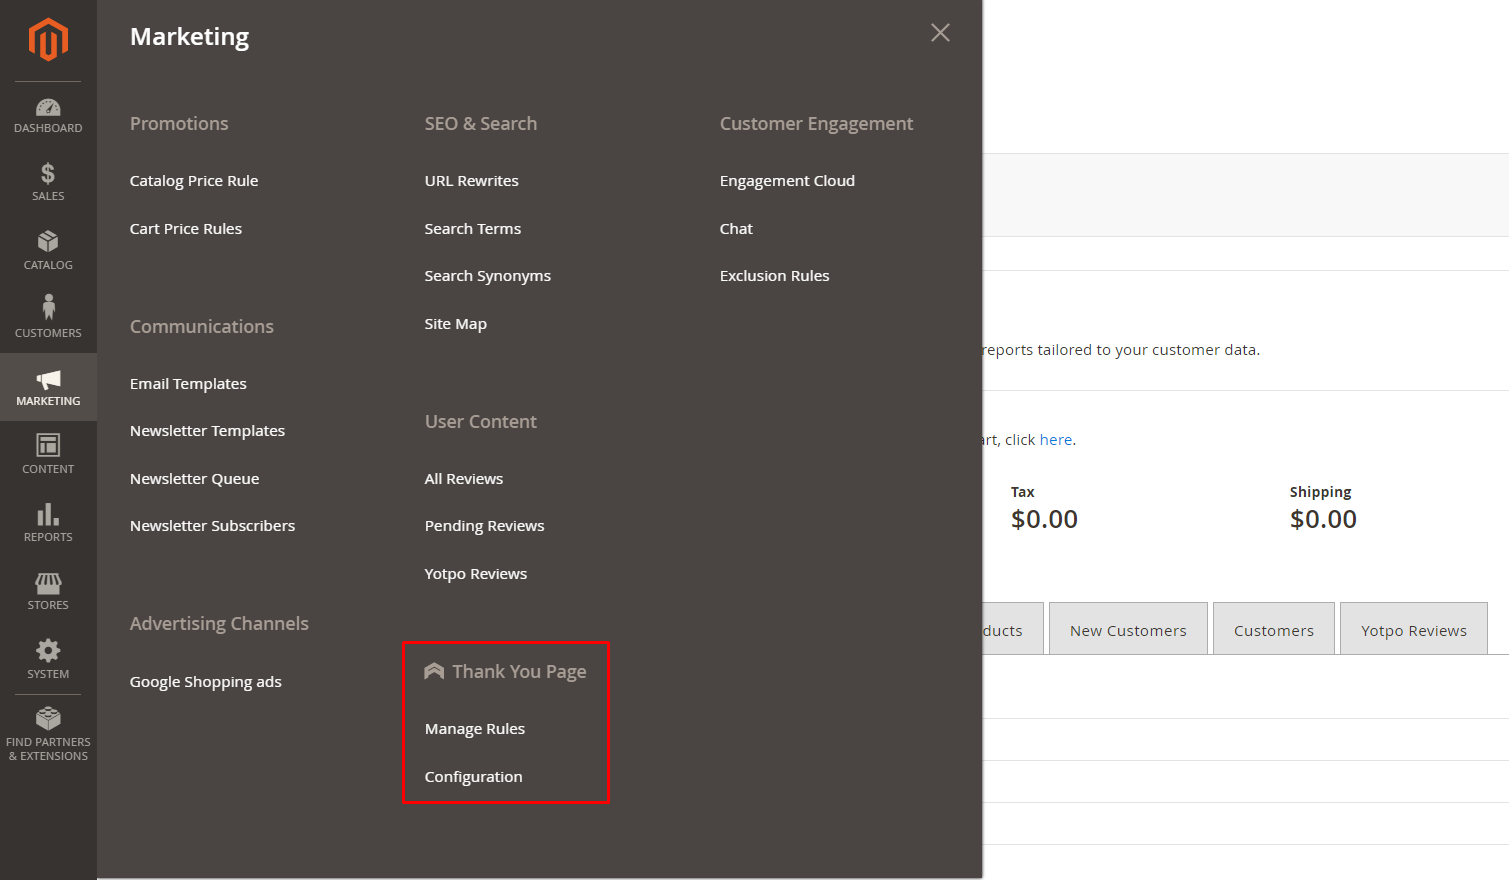
From the Admin Panel, go to Marketing > Thank You Page > Configuration
1. Configuration
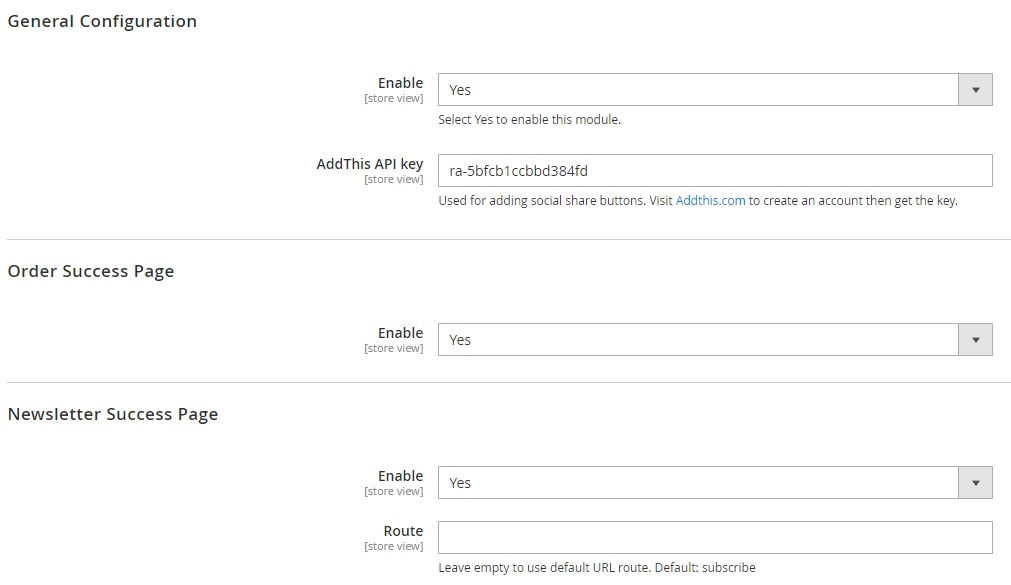
1.1 General Configuration
Enable: Select
Yesto enable the moduleAddThis API key
- Enter the key of AddThis to refer to the friends via AddThis
1.2 Order Success Page
Enable: Select Yes to show Thank You Page after customer placed orders
1.3 Newsletter Success Page
- Enable: Select
Yesto show Thank You page after customers click to subcribe - Route
- Add the route for Thank You Page
- If you leave this field blank, the default route applied is: subscribe
2. Manage Templates
From the Admin Panel, go to Marketing > Thank You Page > Manage Rules
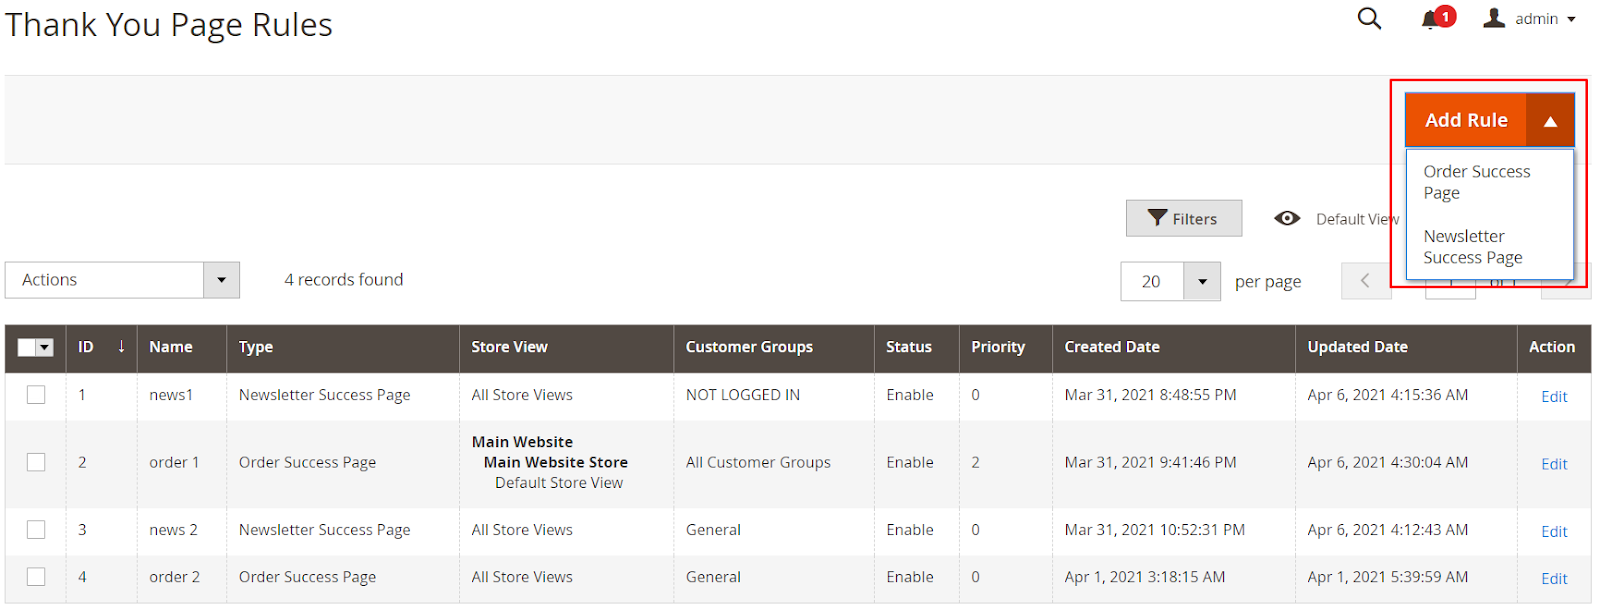
2.1 Order Success Page
2.1.1 General

Name
- Enter a name for the template
- This is a required field
Status: Select
Enableto use the templateStore Views
- Select storeview to apply the template
- You can choose multiple stores once
Customer Group(s)
- Only customers of the selected group can see the product that has been applied to the rule
- You can select multiple groups at the same time
Priority - Enter the priority order for applying templates
- The smaller the number, the greater the priority. If different templates have equal priority, the priority will be considered by ID
2.1.2 Condition
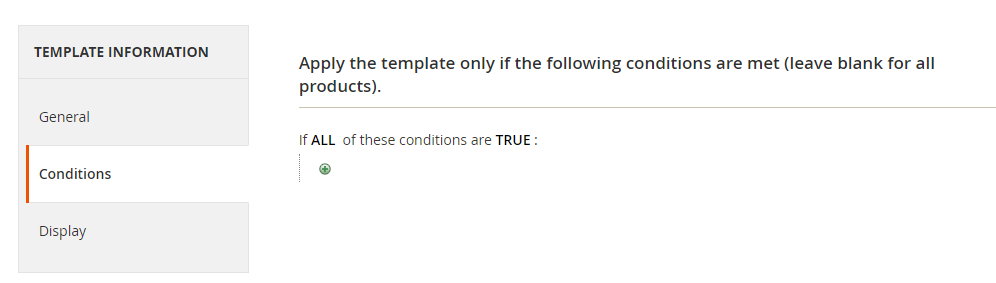
- Select the condition to apply the rule
- You can set the conditions for the Cart or Product section like: Subtotal greater than 50, Total Items Quantity less than 5 ...
2.1.3 Display

Select Style:
- Choose the style for Thank You Page
- The default style is Simple Style
Custom Style:
- Custom Style = Use Default Style:
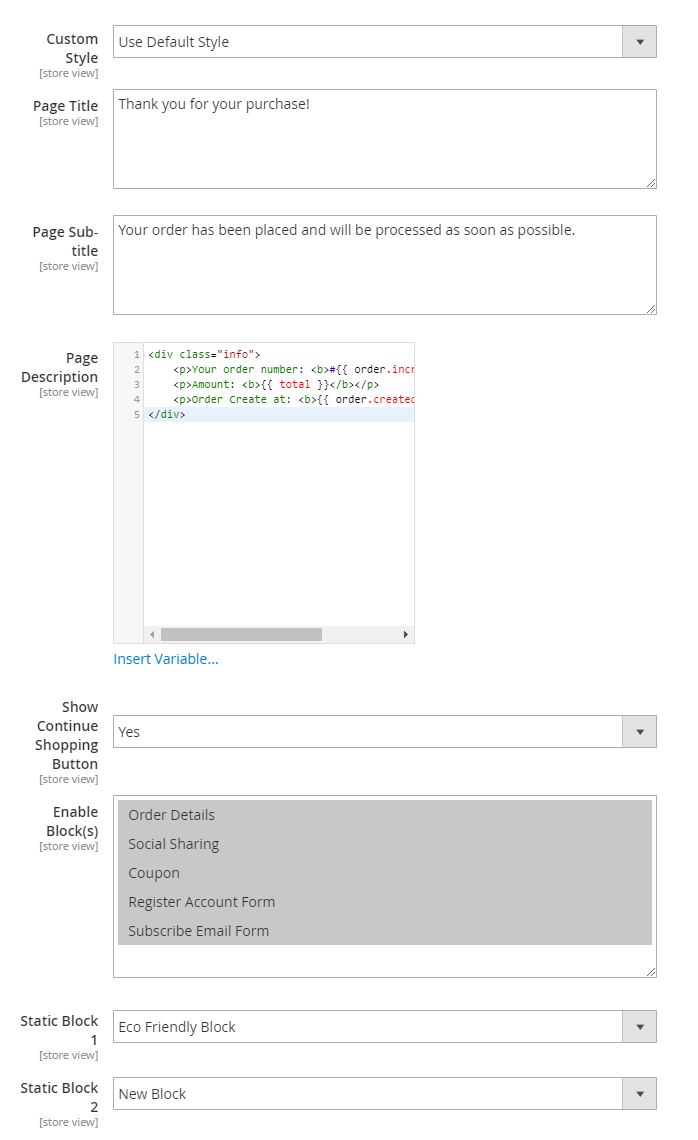
Page Title:- Enter the title for Thank You Page
- The default title is Thank you for your purchase
Page Sub-title:- Enter the sub-title for Thank You Page
- The default Sub-title is Your order has been placed and will be processed as soon as possible.
Page Description:- Enter the information that needs to display on Thank You Page
- The default information is *Your order number, Amount, Order Create at
- You can use many availale variblies by clicking on
Insert Variablelink - Support HTML
Show Continue Shopping Button: Choose "Yes" to displayContinue ShoppingbuttonEnable Block(s):- Choose the block that displays on Thank You Page as Order Details, Social Sharing, Coupon, Register Account Form, Subscribe Email Form
- Multiple blocks can be displayed at the same time.
Custom Style = Edit Default Style:
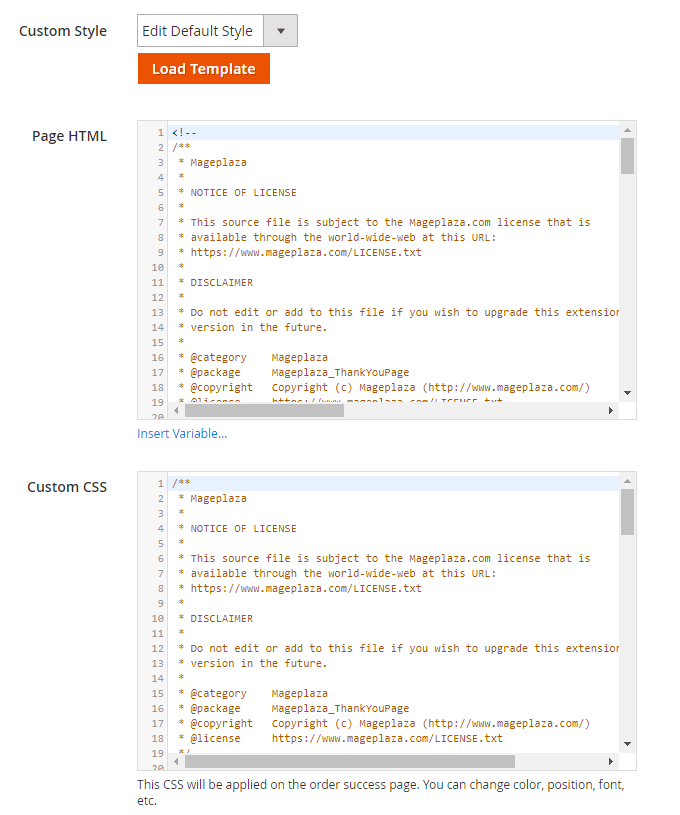
Load Template button: After clicking on this button, the code of the selected style inSelect Stylefield will be loaded and displayed onPage HTMLfield and CSS of the selected style is also loaded and displayed on theCustom CSSfield.Page HTML:- Allow editing the code of the selected style
- You can use the available variablies that we have supported by clicing on the
Insert Variablelink
Custom CSS: You can edit the color, font text, etc of the selected style- Static Block 1:
- Choose Static Block that will display on the Thank You Page
Static Block 1 = No display: This means that there're no any block to display on Thank You Page
- Static Block 2:
- Choose Static Block that will display on the Thank You Page
Static Block 2 = No display: This means that there're no any block to display on Thank You Page
2.1.3.1 Coupon Block

Select Rule:
- Choose the rule (The rule is created at
Marketing > Promotions > Cart Price Rules) - Only display the rules that have
Coupon = Specific Couponand useUse Auto Generation.
- Choose the rule (The rule is created at
Coupon Pattern:
- Enter the pattern for the coupon
- Coupon code after being created automatically will adhere to thí pattern
- If you leave this field blank, the default pattern is [12AN]
- How to create Pattern:
[4A] - 4 alpha, [4N] - 4 numeric, [4AN] - 4 alphanumeric.
For example: GIFT-[4AN]-[3A]-[5N] => GIFT-J34T-OEC-54354
- Coupon Label:
- Enter the label for created coupon codes
- The default label is Use this coupon code: {{ coupon.code }} to get {{ coupon.discount_amount }} on your next order
- You can use multiple available variables that are supported by clicking on the
Insert Variablelink - HTML is supported
2.1.3.2 Product Slider Block
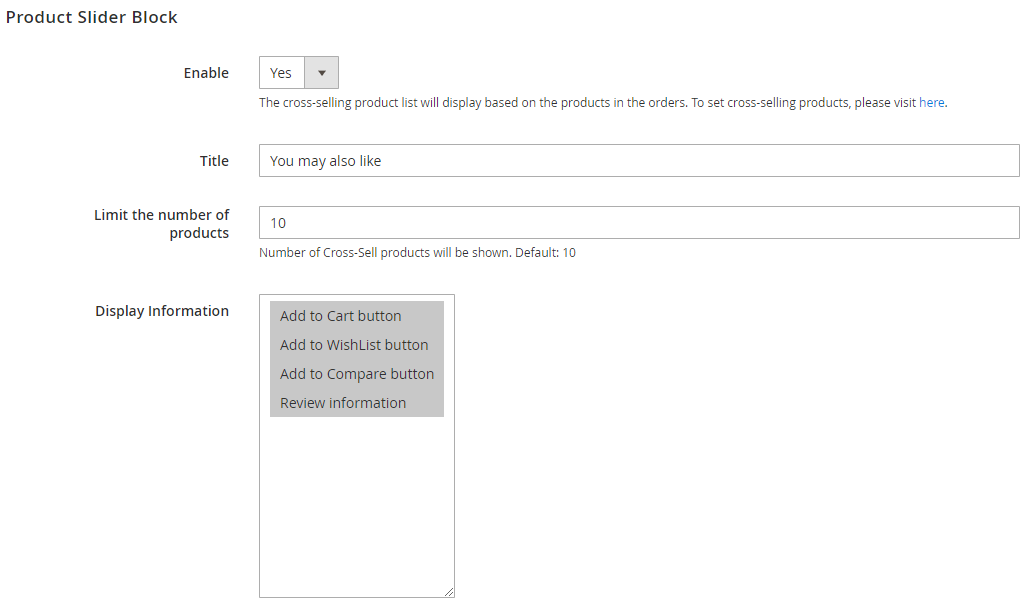
- Enable : Choose Yes to display Product Slider Block on Thank You Page
- Title:
- Enter a tilte for Product Slider Block
- The default title is
You may also like
- Limit the number of products
- Enter the number of product to dispaly
- The default number is 10
- Display Information
- Select the information to display in the Product Slider Block. That can be Add To Cart button, Add To Compare button, Add To Wishlist button, Review information section,etc.
- You can choose to display multiple information
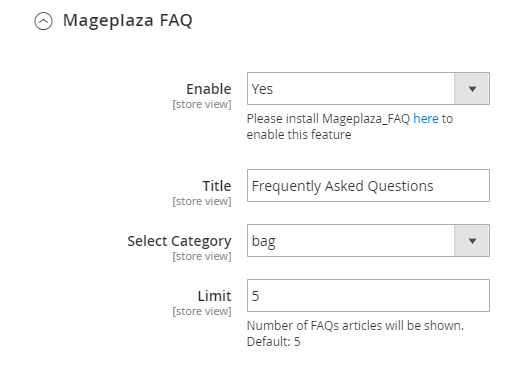
2.1.3.3 Mageplaza FAQ block
Install Mageplaza FAQs Extension to activate these features.
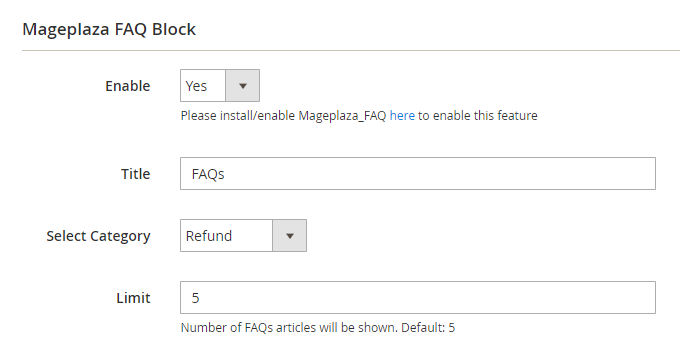
- Enable: Choose "Yes" to display FAQ on Thank You Page
- Title:
- Enter the title for FAQ
- The default title is
Frequently Asked Questions
- Select Category:
- Choose Category to apply for displaying FAQ
- For example: choose
Select Category = Category 1of FAQ, then FAQ will be displayed at Category 1.
- Limit:
- Enter the number of FAQ that will display
- The default number of display is 5
2.2 Newsletter Success Page
2.2.1 General
Name
- Enter a name for the template
- This is a required field
Status: Select
Enableto use the templateStore Views
- Select storeview to apply the template
- You can choose multiple stores once
Customer Group(s)
- Only customers of the selected group can see the product that has been applied to the rule
- You can select multiple groups at the same time
Priority - Enter the priority order for applying templates
- The smaller the number, the greater the priority. If different templates have equal priority, the priority will be considered by ID
2.2.2 Display
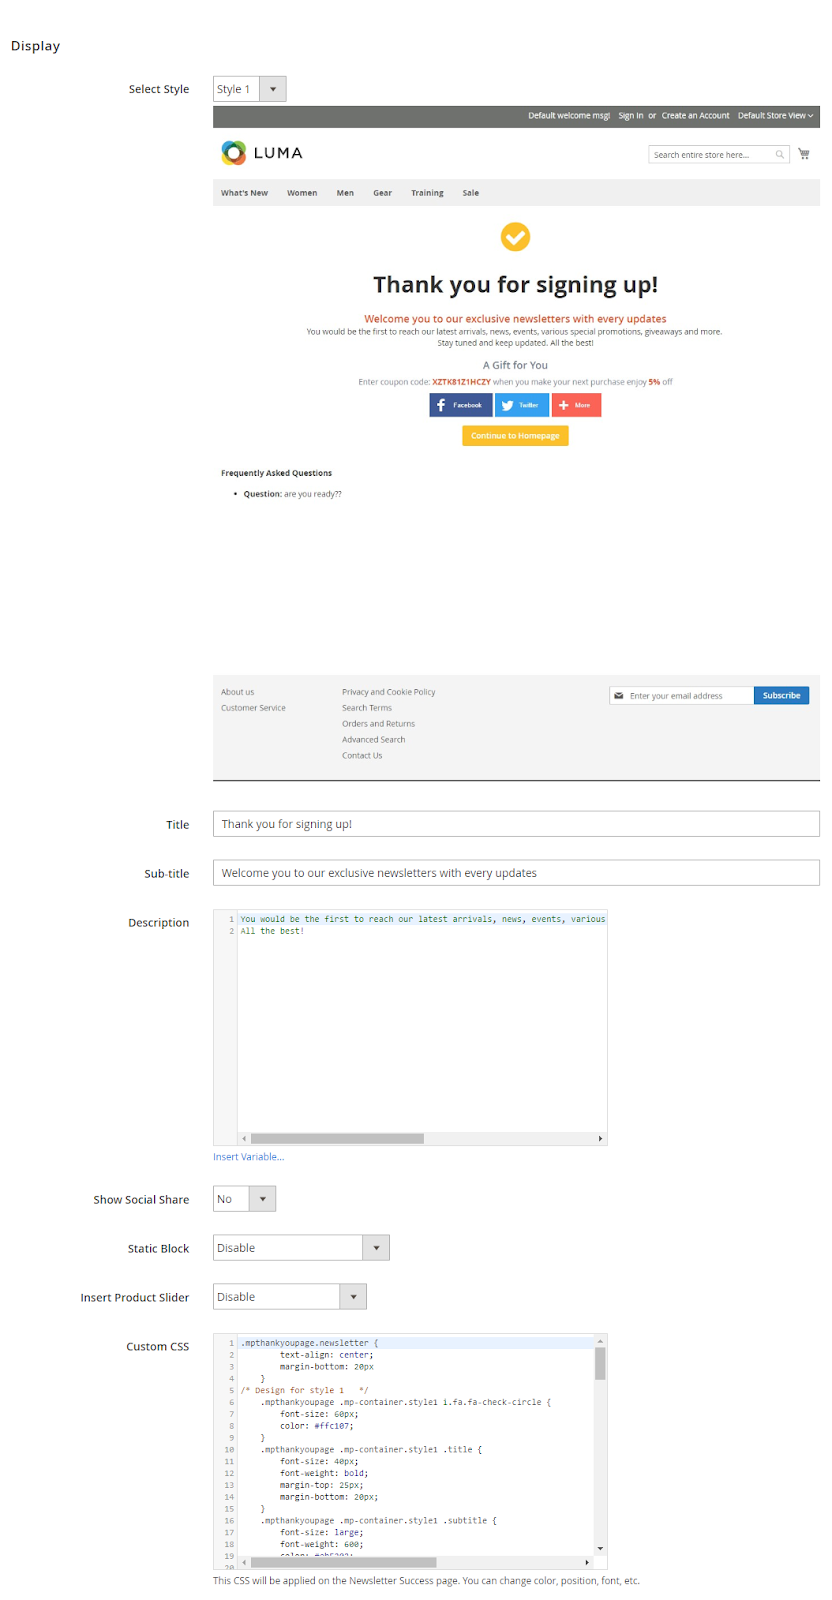
Select Style: Select the style for the Thank You page after the customer has subscribed
Page Title
- Enter the title for Thank You Page
- The default title is Thank you for signing up!
Page Sub-title:
- Enter the title for Thank You Page
- The default title is Welcome you to our exclusive newsletters with every updates
Page Description:
- Enter the information that needs to display on Thank You Page
- The default detailed description is: You would be the first to reach our latest arrivals, news, events, various special promotions, giveaways and more. Stay tuned and keep updated. All the best!
- HTML is supported
Enable Block(s):
- Choose the block that displays on Thank You Page as OCoupon, Social Sharing
- Multiple blocks can be displayed at the same time.
Static Block:
- Choose Static Block that will display on the Thank You Page
Static Block = No display: Not allow displaying any block oon Thank You Page
Mageplaza Product Slider:
- Choose the block of Product Slider extension displaying on Thank You Page
Mageplaza Product Slider = No display: There're no any block to display on Thank You Page
Custom CSS: You can edit the color, font text, etc of the selected style
2.2.2.1 Coupon Block
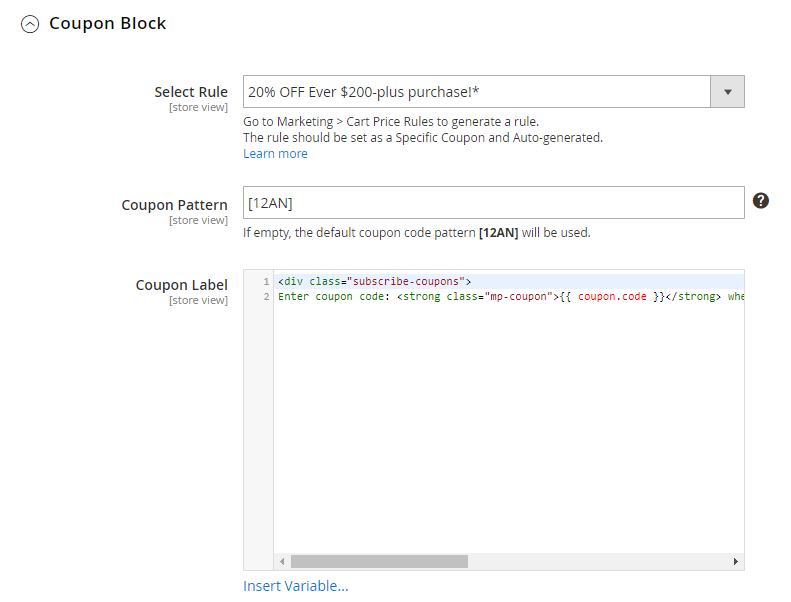
Select Rule:
- Choose the rule (The rule is created at
Marketing > Promotions > Cart Price Rules) - Only display the rules that have
Coupon = Specific Couponand useUse Auto Generation.
- Choose the rule (The rule is created at
Coupon Pattern:
- Enter the pattern for the coupon
- Coupon code after being created automatically will adhere to thí pattern
- If you leave this field blank, the default pattern is [12AN]
- How to create Pattern:
[4A] - 4 alpha, [4N] - 4 numeric, [4AN] - 4 alphanumeric.
For example: GIFT-[4AN]-[3A]-[5N] => GIFT-J34T-OEC-54354
- Coupon Label:
- Enter the label for created coupon codes
- The default label is Enter coupon code: {{ coupon.code }} when you make your next purchase enjoy {{ coupon.discount_amount }} off
- You can use multiple available variables that are supported by clicking on the
Insert Variablelink - HTML is supported
2.2.2.2 Mageplaza FAQ
Install Mageplaza FAQs Extension to activate these features.
- Enable: Choose "Yes" to display FAQ on Thank You Page
- Title:
- Enter the title for FAQ
- The default title is
Frequently Asked Questions
- Select Category:
- Choose Category to apply for displaying FAQ
- For example: choose
Select Category = Category 1of FAQ, then FAQ will be displayed at Category 1.
- Limit:
- Enter the number of FAQ that will display
- The default number of display is 5
3. The guide to install the library
Install via composer
- Run the following command to install the library:
composer require liquid/liquid
php bin/magento setup:upgrade
php bin/magento setup:static-content:deploy
4. API
Mageplaza's Thank You Page extension supports the use of the Rest API to get information about rules, create rules, delete rules, and the admin can also get information when Subcribe Newsletter Success and Order Success.
- Details can be viewed here.
- Instructions for creating Integration tokens here.
6. GraphQL
How to install
Run the following command in Magento 2 root folder:
composer require mageplaza/module-thank-you-page-graphql
php bin/magento setup:upgrade
php bin/magento setup:static-content:deploy
How to use
Mageplaza's Membership GraphQL supports to get the rule's template when making subscribe newsletter and order through GraphQL
To start working with Membership GraphQL in Magento, you need to:
Use Magento 2.3.x. Return your site to developer mode
Refer to the GraphQL requests we support here