SEO Ultimate
To help you automatically optimize and greatly improve the performance of your Magento-based store in Search Engines, the Mageplaza SEO extension will bring your store a great chance to own amazing speed as well as to gain higher and higher ranks in the popular and famous search engines such as Google, Bing, or Yahoo
In order to install SEO extension on your store, you can learn and do it by yourself via Instalation Guide or use Installation Service Package to request the specialist helps from Mageplaza Team.
Outstanding Features
| ULTIMATE | Outstanding Features | Description |
|---|---|---|
| 1 | Improved Search Ranking | Avoid Duplicate Content: The module includes tools to prevent and manage duplicate content issues. This helps in maintaining the uniqueness of each page on the website, which is crucial for SEO rankings. Structured Data: Structured data helps search engines understand the content and context of your products better. This can potentially lead to a more accurate ranking of your products in search results for relevant queries. Site Verifications: It allows easy integration of various site verification services, such as Google Search Console, Bing Webmaster Tools, etc. This simplifies the process of verifying site ownership and accessing valuable insights and data from these platforms. Meta Tag Management: You can set up rules for how meta tags are generated throughout your store. Customizable Meta Tags: You have the ability to create custom meta titles, descriptions and keywords for specific products or pages. Sitemaps: It can generate both HTML and XML sitemaps, which helps search engines discover and index your store's content effectively. Hreflang Tags: Effectively target international audiences by managing hreflang tags, which signal to search engines the language variations of your website content. SEO URL: This feature optimizes SEO for layered navigation, which is often used to filter products by attributes. |
| 2 | Increased Website Traffic | Business Information: The module enables the inclusion of essential business information directly into the website's code, which is beneficial for local SEO efforts. This information includes details like business address, phone number, hours of operation, etc., helping local customers find and engage with the business more easily. |
| 3 | Enhanced User Experience | SEO Redirects: The module allows you to create automatic redirects from old URLs to new ones, ensuring that visitors and search engines land on the correct pages. Automatic Redirects: You can set up rules to automatically create redirects for specific scenarios, streamlining SEO management. Cross Linking: Strategically insert links between relevant pages within your store, improving website navigation and user engagement. (Available in the Ultimate version) |
| 4 | Streamlined SEO Optimization | SEO Checklist: Get a clear roadmap for optimizing your store's SEO with a comprehensive checklist highlighting areas for improvement. SEO Report: Gain valuable insights into your website's SEO health through detailed reports that identify issues like missing meta tags, duplicate content, and low word count pages. (Available in the Ultimate version) Page Analysis: Preview how your pages might appear in search engine results and receive actionable suggestions for improvement, like optimizing meta titles and headings |
| 5 | Enhanced Website Performance | Image Optimizer Function: Optimize product image sizes for faster loading times, improving website performance and SEO. (Available in the Ultimate version) |
Installation
We offer two methods for installing our plugins: the Copy & Paste method and the Composer method. Please follow the detailed instructions provided below.
Method 1: Installation via Copy & Paste
To install our plugins using the Copy & Paste method, kindly follow the instructions at the link below:
How to Install Magento 2 Extension via Copy & Paste
Method 2: Installation via Composer
Composer name: mageplaza/module-seo-ultimate
To install our extensions using Composer, please refer to the comprehensive guide at the link below:
How to Install Magento Extension via Composer
By following these guides, you can ensure that the installation process is handled correctly, allowing you to fully utilize the features and benefits of our plugins.
Module Update Guide
Keeping your module updated ensures optimal performance. Follow one of these steps to update your module:
- By Account Dashboard: Log in to your
Mageplaza account > go to the My Licenses section > click on the Download button > choose the latest version from the popup. - By composer: Kindly use the following commands to update the module via composer
composer require mageplaza/mageplaza/module-seo-ultimate
php bin/magento setup:upgrade
php bin/magento setup:di:compile
Updating a module by Composer ensures efficient dependency management, version control, and integration with development tools, making the process faster and more reliable.
I. Configuration
Login to your Magento 2 backend Stores > Settings > Configurations > Mageplaza Extension: SEO, follow our given guide below to complete those SEO configurations
Include the "Use system value” section for some missing fields
- General
- Duplicate Content
- Structure Data
- Business Information
- Social Profiles
- Verifications
- HTML Sitemap
- XML Sitemap
- Canonical URLs
- Redirects
- SEO Rules
- Page Analysis
- Cross Links
- Dashboard Reports
- Hreflang Tags
1.1. General Configuration
Choose Enable = "Yes" to turn Mageplaza SEO on generally.

1.2. Duplicate Content
This feature helps admin identify and eliminate duplicate content issues, the module ensures search engines don't penalize your website for having the same content on multiple pages. This can lead to improved search ranking.
Filtering results (from layered navigation pages, etc) is the main cause of generating many similar URLs, and search crawlers assess them are all the same, in other words, it's called duplicate content. Therefore, you must have assistance from Canonical tags to reduce the duplication of content on the page, this is an onpage SEO tip to note obviously.
The Dupplicate Content section is now optimized. Category and Products are included in the “ Use Canonical Link Meta Tag For” field. Using canonical URLs will avoid duplicating content between product and category pages, avoiding low quality ratings and reduced rankings on search engines.
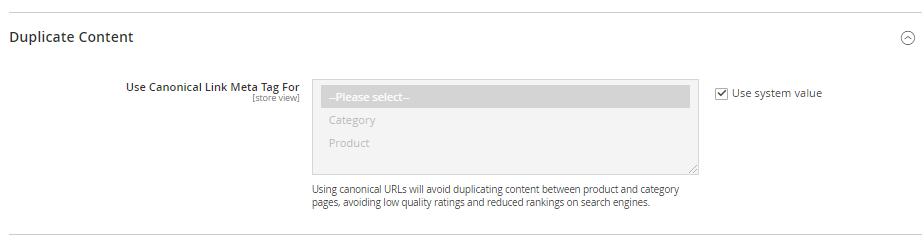
- Choose "Category" to display Canonical tags of Category pages which are from Source Category on the frontend.

- Choose "Product" to display Canonical tags of Source Product on the frontend.

1.3. Structure Data
Proper configuration allows you to implement structured data markup. This provides search engines with richer information about your products and business, potentially resulting in more informative and visually appealing snippets in search results. This can significantly improve click-through rates.
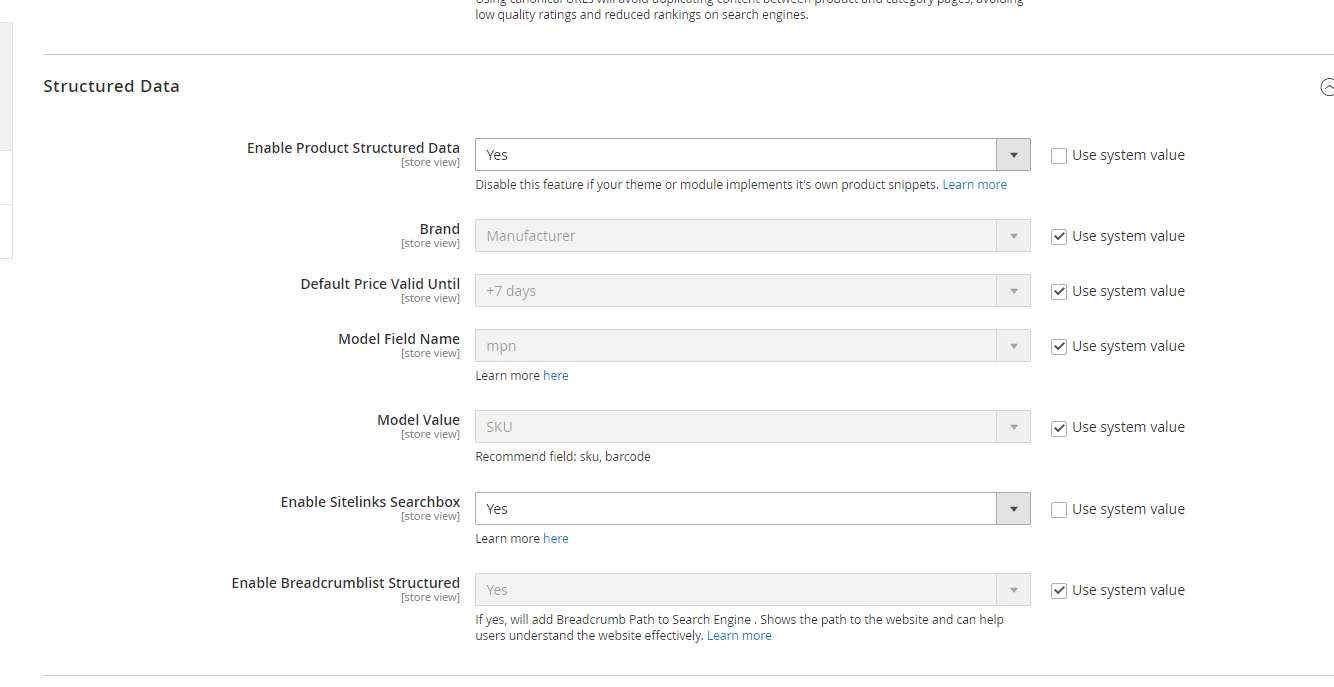
In the Enable Product Structured Data field:
- Display fields that allow admins to fill in default information like Brand, Aggregate Rating, Price, and Model.
- Select "Yes" to display the basic information of products like Mageplaza SEO templates when they are searched by search engines.
- By this intuitive design, Product Structured Data by Mageplaza SEO will increase click through rate (CTR) drastically. Thus, products from your store will be ranked higher on search results.
- You can check Product Structure Data at the Page Source of Product Detail Page. Structure Data will mirror exactly as the basic information of that product.
In the Enable Sitelinks Searchbox field:
- Select "Yes" to display your store's Searchbox on the Sitelinks. As soon as your store displays on the search results, your store searchbox will also display with the store's link.
- You can test the code in Page Source of Homepage.
In the Enable Breadcrumblist Structured field:
- Select "Yes" to display the breadcrumb path that indicates the page's position in the site hierarchy and helps users understand and explore the site effectively.
- You can test the code in the Page Source of the Homepage.
1.4. Business Information
Configuring business information like name, address, and phone number helps search engines understand your location and potentially improve your ranking in local search results
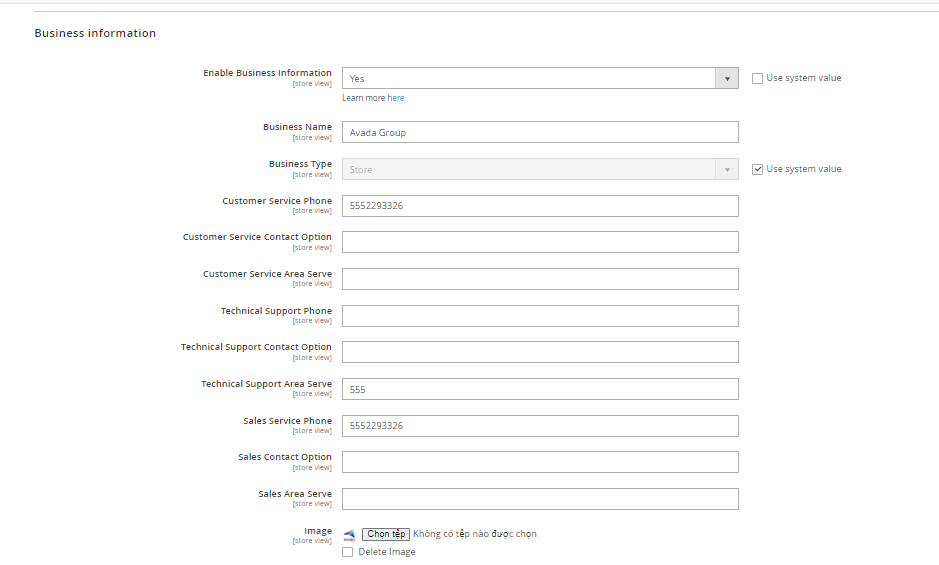
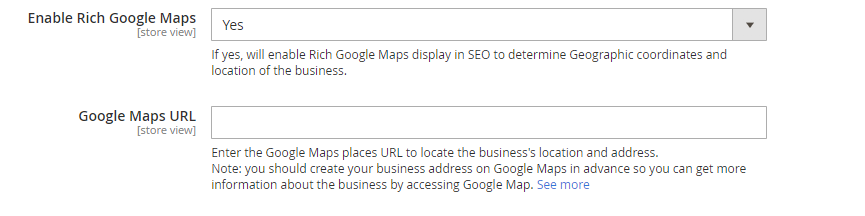
In the Enable Business Information field: Select "Yes" to display information about your business in the search result. The system will then display more fields:
- When you leave any field blank, the information for that field will not display.
- You can test the code in the Page Source of the Homepage.
- Business Name: Provide the name of your business to show in the Business Information section.
- Business Type: Choose a suitable option for your main business type.
- Enter some of your business's contact information like Customer Service Phone, Customer Service Contact Option, Customer Service Area Serve, Technical Support Phone, Technical Support Contact Option, Technical Support Area Serve, Sales Service Phone, Sales Contact Option, and Sales Area Serve.
- Image: Add an image for your business logo.
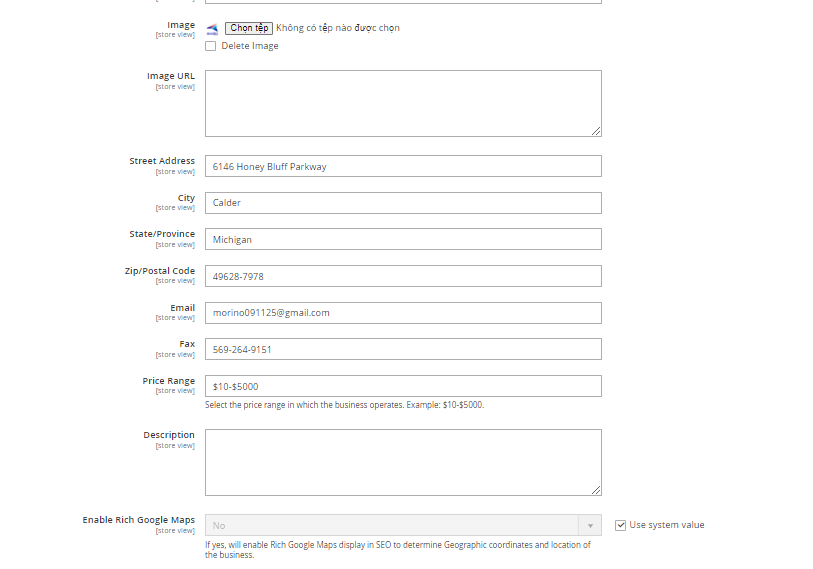
- Image URL: Insert one or several image links to display for your business.
- Then, provide some information about your business, including Street Address, City, State/Province, Zip/Postal Code, Email, Fax, Price Range, Description.
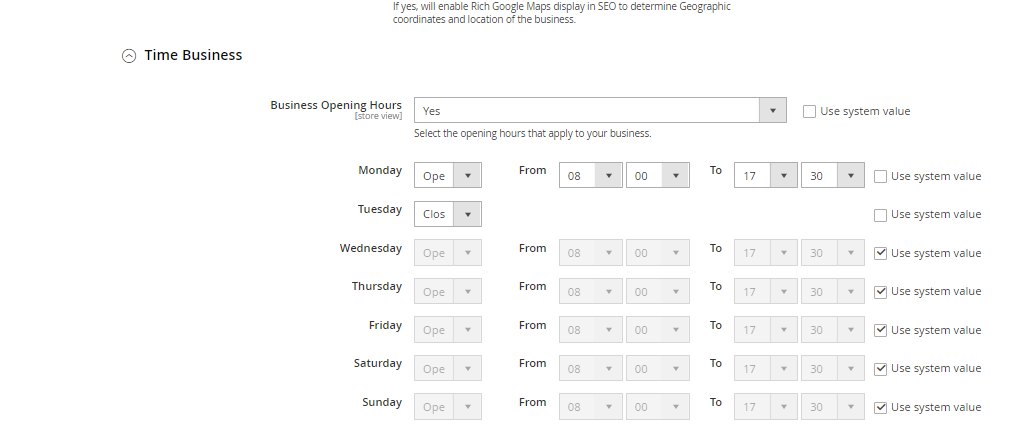
In the Time Business field:
- Business Opening Hours: If Yes, you can select the opening hours that apply to your business.
1.5. Social Profiles
Linking your social profiles allows search engines to gather a more comprehensive picture of your business, potentially boosting your overall ranking.
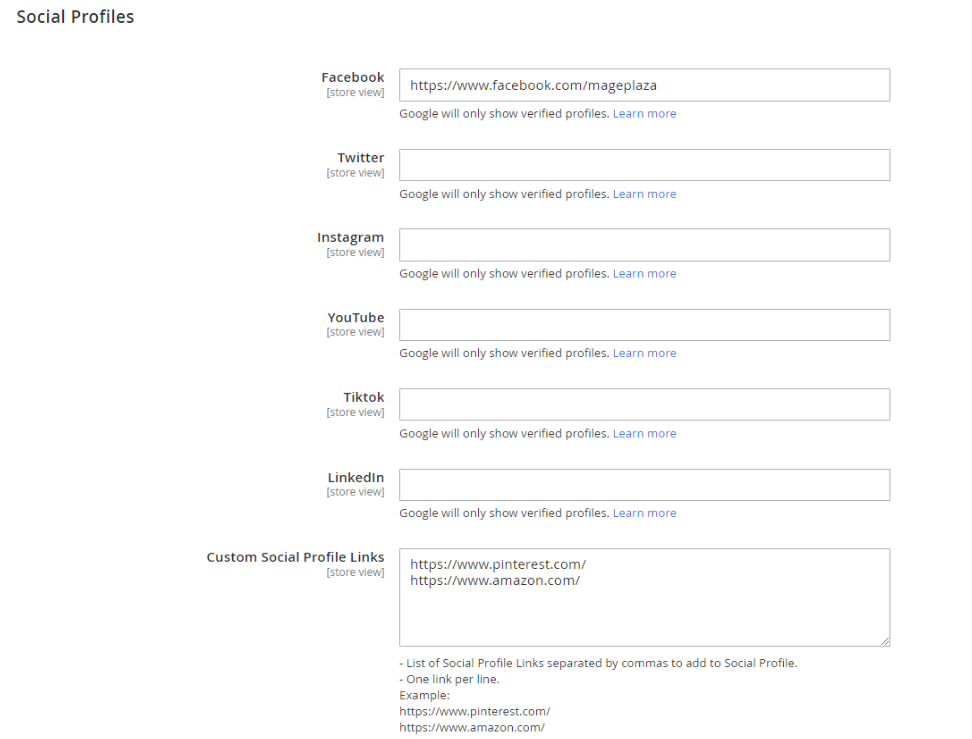
- You can paste your social addresses in here. Make sure that all the accounts have been verified.
- Social Profile will display along with Business Information. If Business Information is not enabled, Social Profile won't display in search results.
- You can leave unnecessary Social Profiles in blank status.
- When the searcher clicks on one of your social links, they will be redirected to that social page of your store.
- You can test the code in the Page Source of the Homepage.
1.6. Verifications
Configuration options might include verification tools for search engines. Verification can lead to a more prominent display of your business information in search results, potentially boosting trust and click-through rates.
In the Verification field, you need to enter the verification code to confirm the ownership of your site. Hence, you can use the Web services such as Google Search Console, Bing Webmaster Tools, Pinterest and Yandex Webmaster Tools.
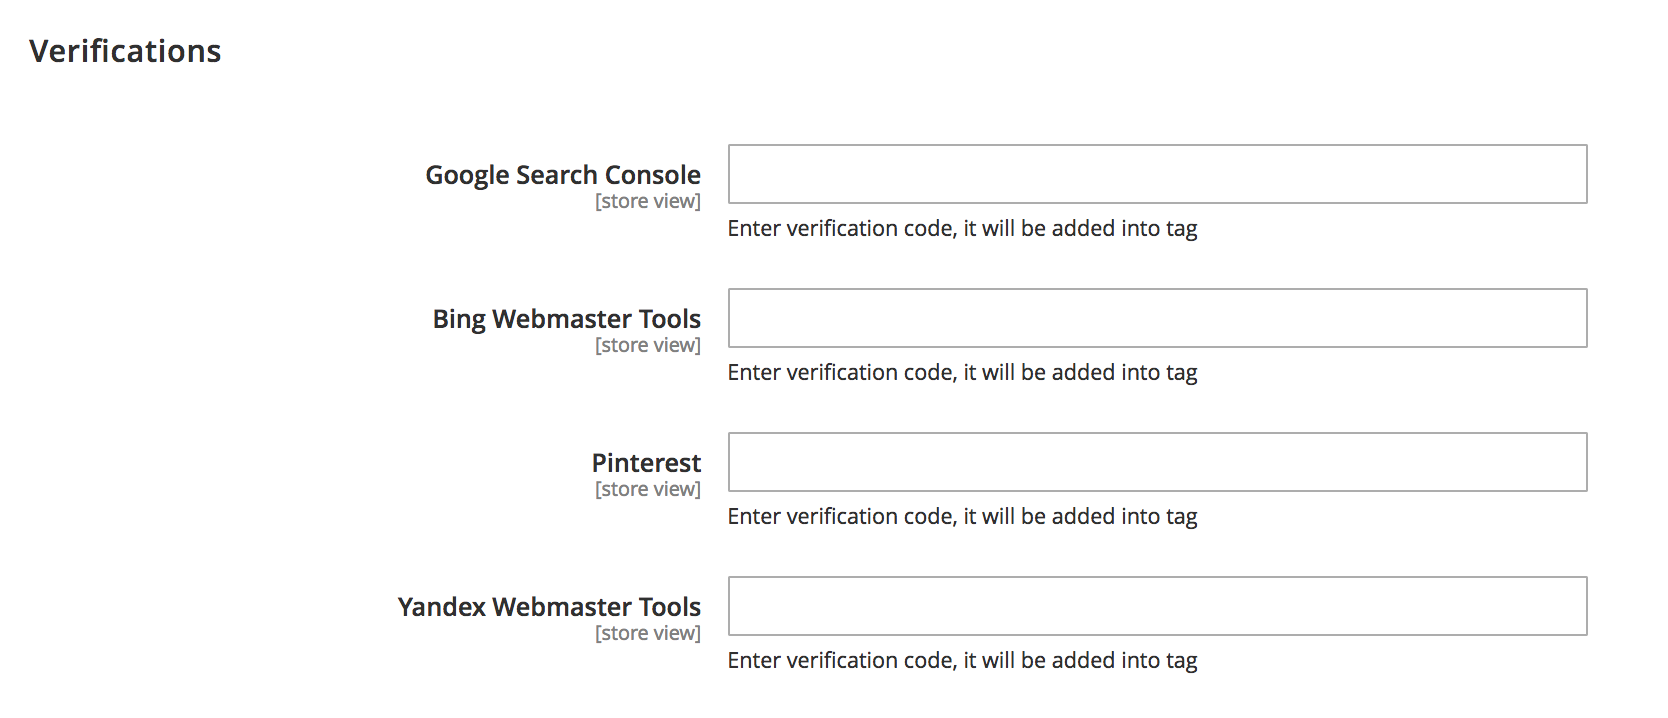
- In the Google Search Console field: Enter the verification code for Google Search Console.
- In the Bing Webmaster Tools field: Enter the verification code for Bing Webmaster Tools.
- In the Pinterest field: Enter the verification code for Pinterest.
- In the Yandex Webmaster Tools field: Enter the verification code for Yandex Webmaster Tools.
1.7. Canonical URLs
If the content of your site has the same article with others, search engines will underestimate the quality of your content and thus reduce the ranking of your website. Therefore, you must have a Canonical tags to reduce the duplication of content on the page, this is an onpage SEO tips which should be noted.
Expand Canonical URLs configuration to see basic modules:
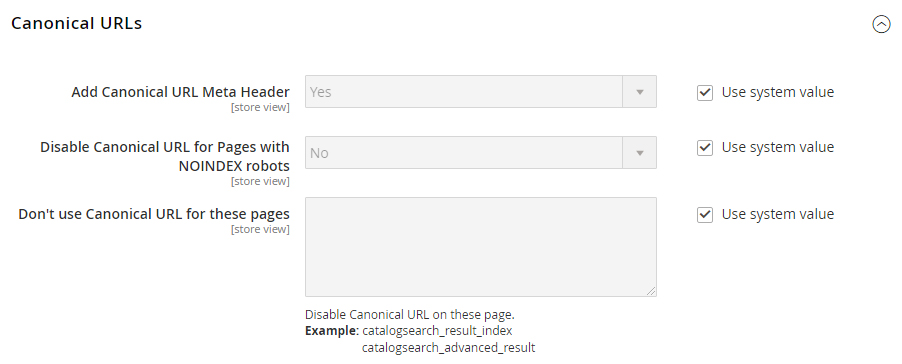
- In the Add Canonical URL Meta Header field: Choose “Yes” if you want to add canonical URL for Meta Header Tags
- In the Disable Canonical URL for Pages with NOINDEX robots field: Choose “No” if you want to disable all canonical URL for pages with NOINDEX robots since it’s not good for your SEO procedure (eg Search Pages, 404 Pages, etc)
- In the Don’t use Canonical URL for these pages field: Default option is “No”. Entered pages won't display Canonical URL.
1.8. Redirects
Admin can also create redirects to automatically send users from old URLs to new ones, preventing broken links and ensuring search engines reach the correct content.
Scroll until Redirect’s general configuration reaches your eyes.
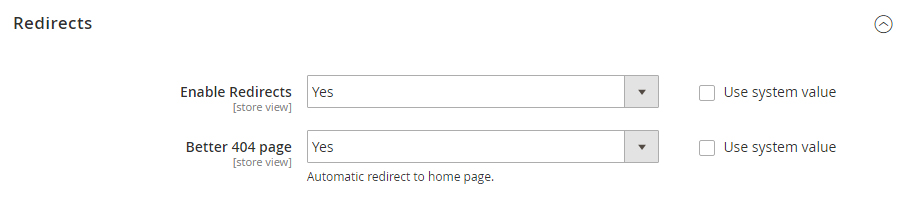
- In the Enable Redirects field: choose “Yes” to allow this function to work.
- In the Better 404 Page field: choose “Yes” if you want all 404 Pages to be redirected to your Homepage.
1.9. SEO Rules
Define rules to automate various SEO tasks.
Head forward to Mageplaza > SEO: Configuration > SEO Rules in order to take the basic control for Rules generally.
The SEO Rules section is now optimized. Product Page and Category Page are now included in the “Use H1 Heading for” field
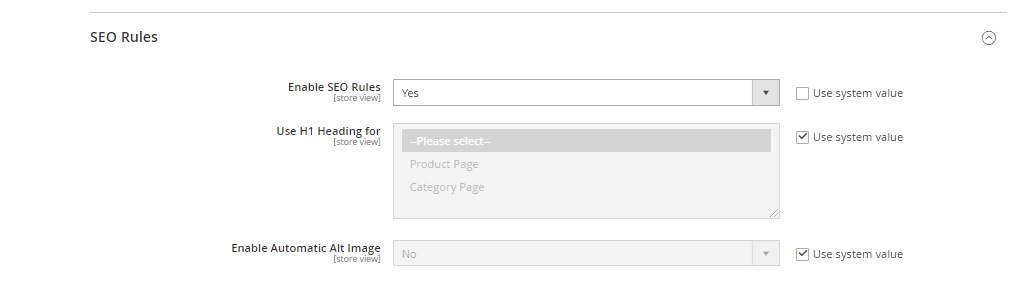
- In the Enable SEO Rules field: Choose “Yes” to enable all set SEO rules
- Select “Product Page” in the Use H1 Heading for field if you want to apply H1 Heading for Product Pages.
- Choose “Category Page” in the Use H1 Heading for field if you want to apply H1 Heading for Category Pages.
- In the Enable Automatic Alt Image field: The required alt attribute specifies an alternate text for an image, if the image cannot be displayed. Choose “Yes” to enable this function”
1.10. Page Analysis
Analyze individual pages to see how they might appear in search results. This allows you to identify areas for improvement for better search engine visibility.

Page Analysis will assist you on marking which and how to perform the structured data is the best for SEO progress. Choose “Yes” to turn the page analysis function on.
Take a look at how it works by this example. Go to Products > Catalog > choose a product.
Then, expand Search Engine Optimization tab.
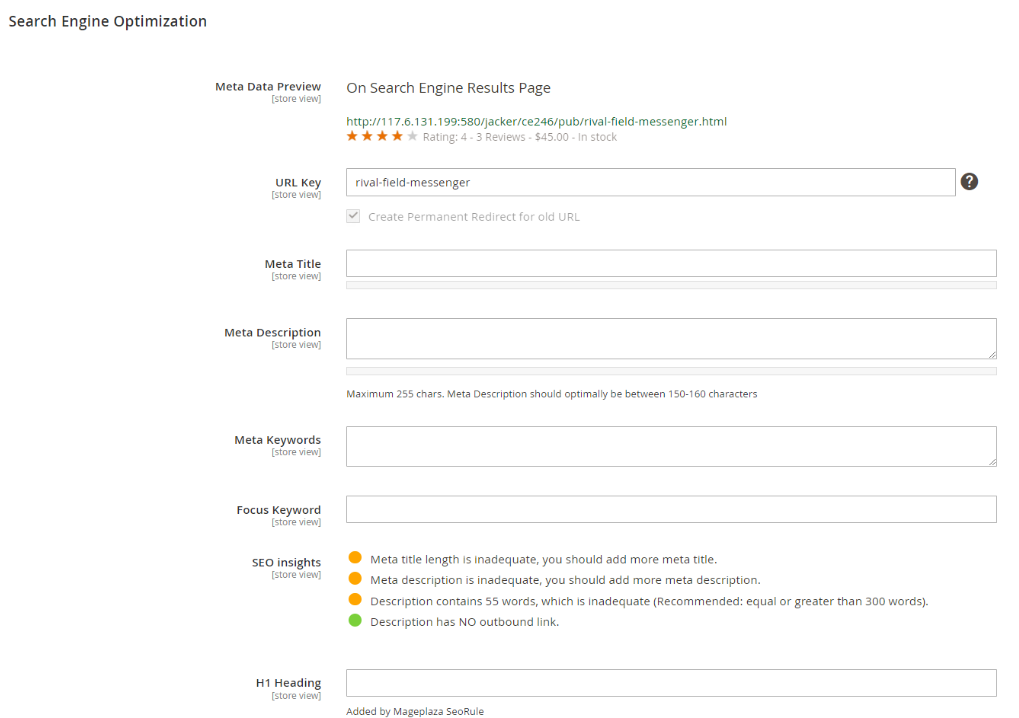
This field allows the users can edit and see visually how the structured data will be displayed in the Search Engine Result Pages.
- Add the Meta Title.
- Add the URL Key.
- Insert the Meta Description.
Below the Meta Title and Meta Description field, there is a bar which notices the status of the text length.
- Red: The text lengh is not good for SEO.
- Orange: The text length is short and not good for SEO.
- Green: The text length is good for SEO.
After inserting the content on the other Main Keyword field, the system will automatically check and show the analysis. The analysis is based on:
- The Focus keyword.
- The Meta title, URL Key, Meta Description content.
- The Description and Short Description content on the
Contenttab. - The Product Image's description.
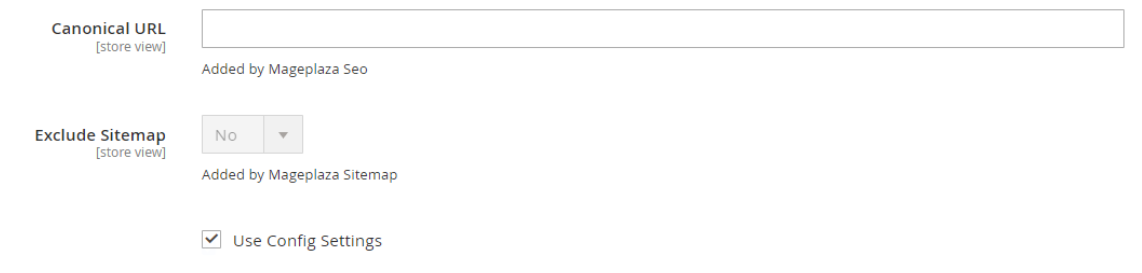
- Exclude Sitemap: Can choose Use Config Setting to use the exclude sitemap like in Configuration. If not, you can setup each product.
1.11. Cross Links
Strategically configure cross links between relevant pages within your store. This improves website structure, keeps users engaged, and encourages them to explore deeper, potentially improving bounce rates and time spent on site.

In the Enable/Disable field, select “Yes” to enable cross links work, or “No” if you wish for the vice versa result. For more configuration how to set up crosslinks, please refer to this Part V.
1.12. Dashboard Reports
Dashboard Reports will gather and notice you all negative factors are harmful to your sites, which is also decreasing your SEO ranking badly.
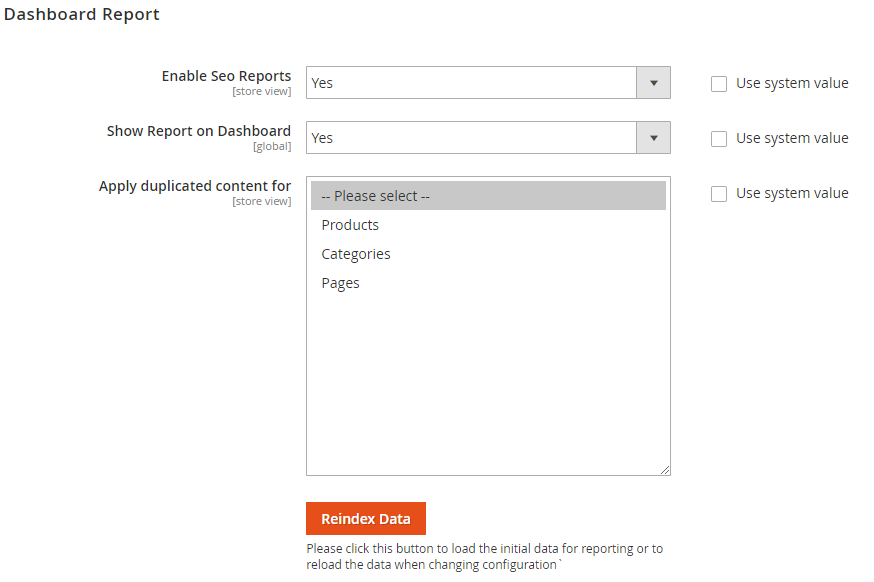
- In the Enable SEO Reports field: If you want to enable this function, choose “Yes”.
- In the Show Report on Dashboard field: Choose "Yes" if you want to display the report on the dashboard.
- In the Apply name duplicate report content field: If you enable Dashboard Reports, this module will be added and you can be allowed to configure it now. Select a page you want to apply name duplicate report content (such as Meta, Content, Frontend Identify, Description of products, Category pages or Product View pages)
- Click on
Reindex Databutton to apply the module for data or configuration changes.
A new report system will be displayed at the dashboard of your admin backend which is obviously useful for daily checkings. This helpful friend will help you keep track of these pages:
- Duplicate Content
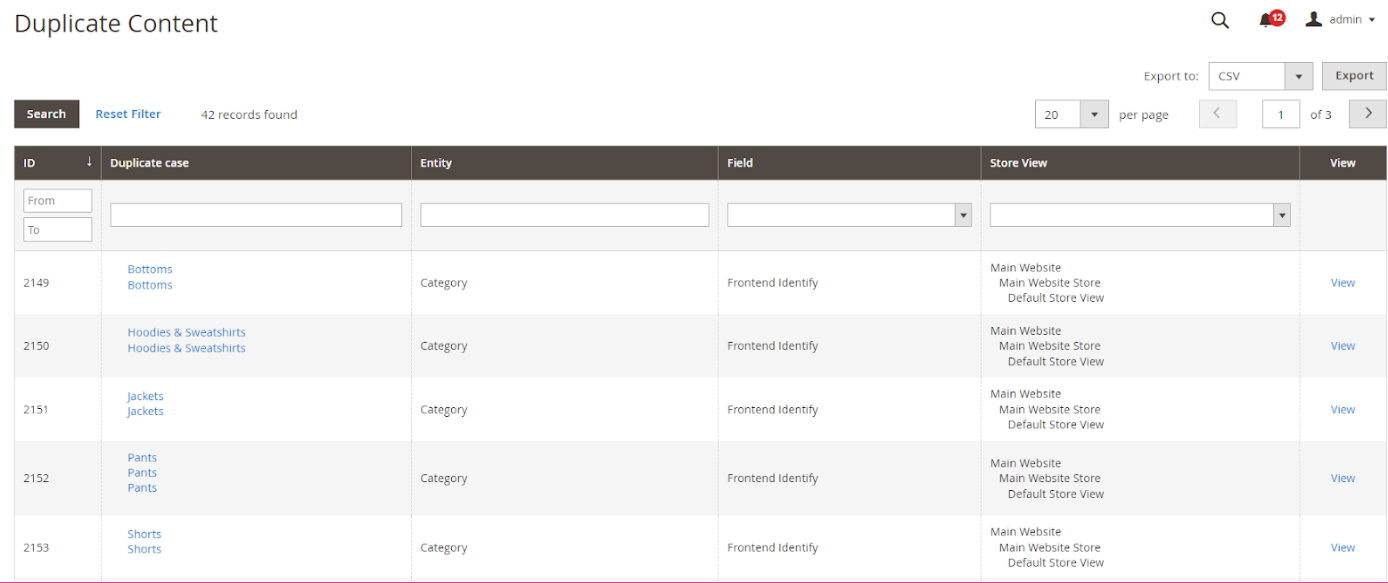
- Missing Meta Data
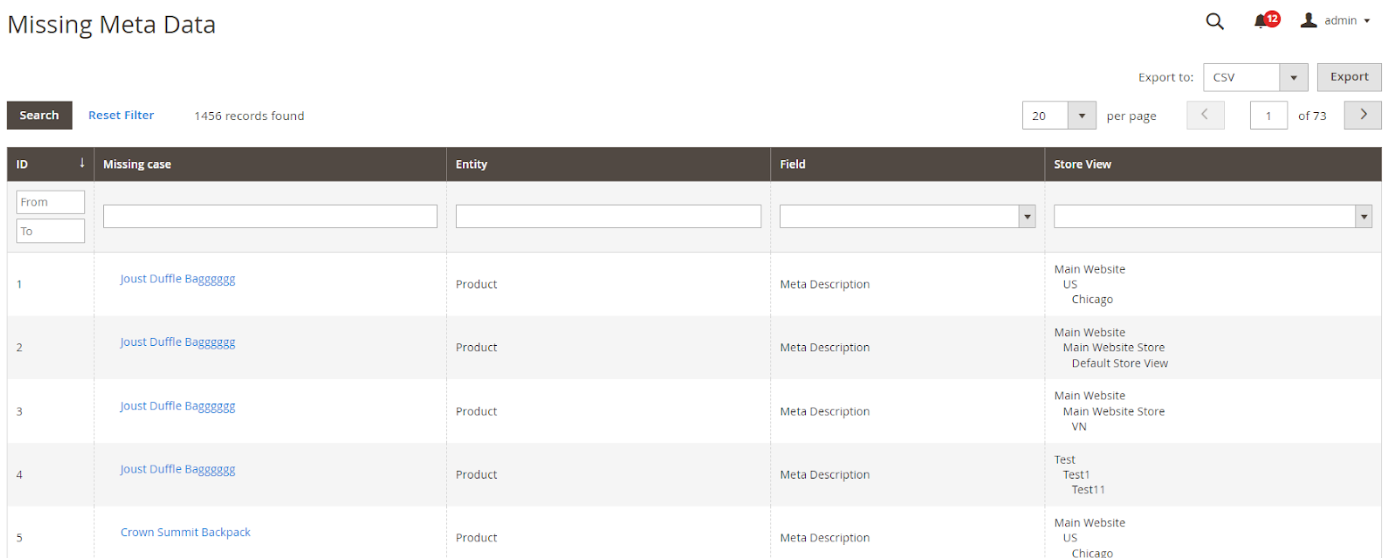
- Low Count Word

- 404 Pages
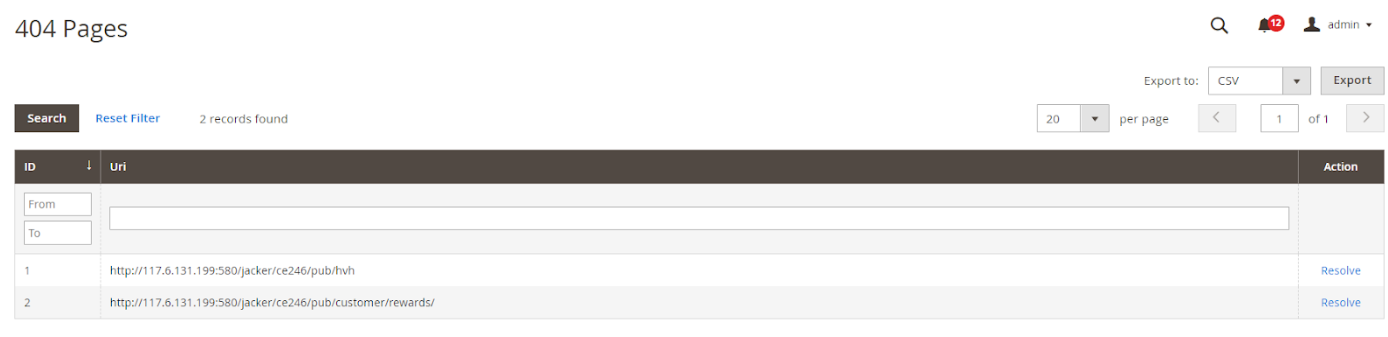
If Dashboard report is disable, you can check it at Report > Mageplaza: SEO Report.
1.13. Hreflang Tags
Configure hreflang tags to effectively target international audiences. These tags signal to search engines the language variations of your website content, ensuring users are directed to the most relevant version based on their location. This can significantly expand your global reach.
Hrefleng Tag section is now optimized. The product page, category page, CMS page are now included in the “Hreflang Url for” field.
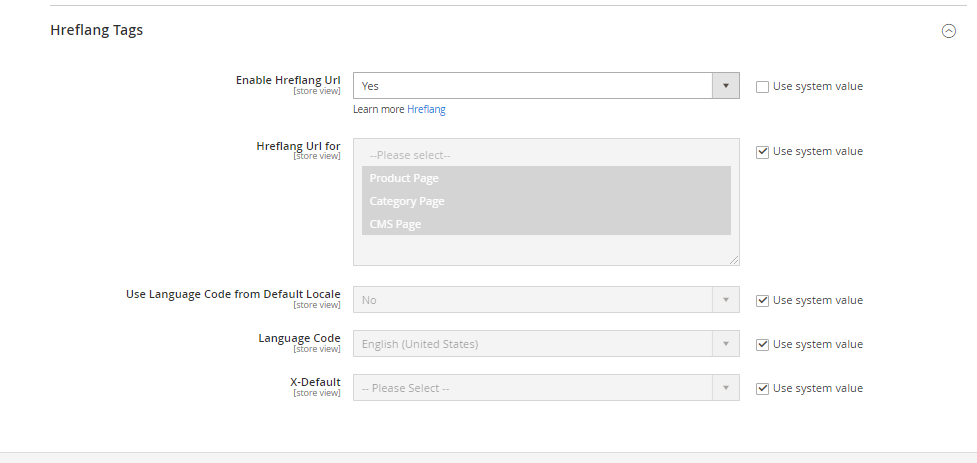
In the Enable Hreflang Url field: Choose “Yes” to enable Hreflang tags for your sites.
In the Hreflang Url for section:
- Choose “Product Page” to enable Hreflang for Product pages
- Choose “Category Page” to enable Hreflang for Category Page
- Choose “CMS Page” to enable Hreflang for CMS Page
In the Use Language Code from Default Locale field: Choose “Yes” if you want to use Language Code from Default Locale section.
In the Language Code field: Choose your preferred Language Code
In the X-Default field: Choose “Choose “Default Store View” if you want to set the above Language Code” as the default language.
II. Manage Rules
To add a new rule, please follow the path Marketing > SEO: Manage Rules, click on Add Rule button, choose one type of page you want to create a new rule apply for:
- Product Pages
- Category Pages
- CMS Pages
- Layered Navigation
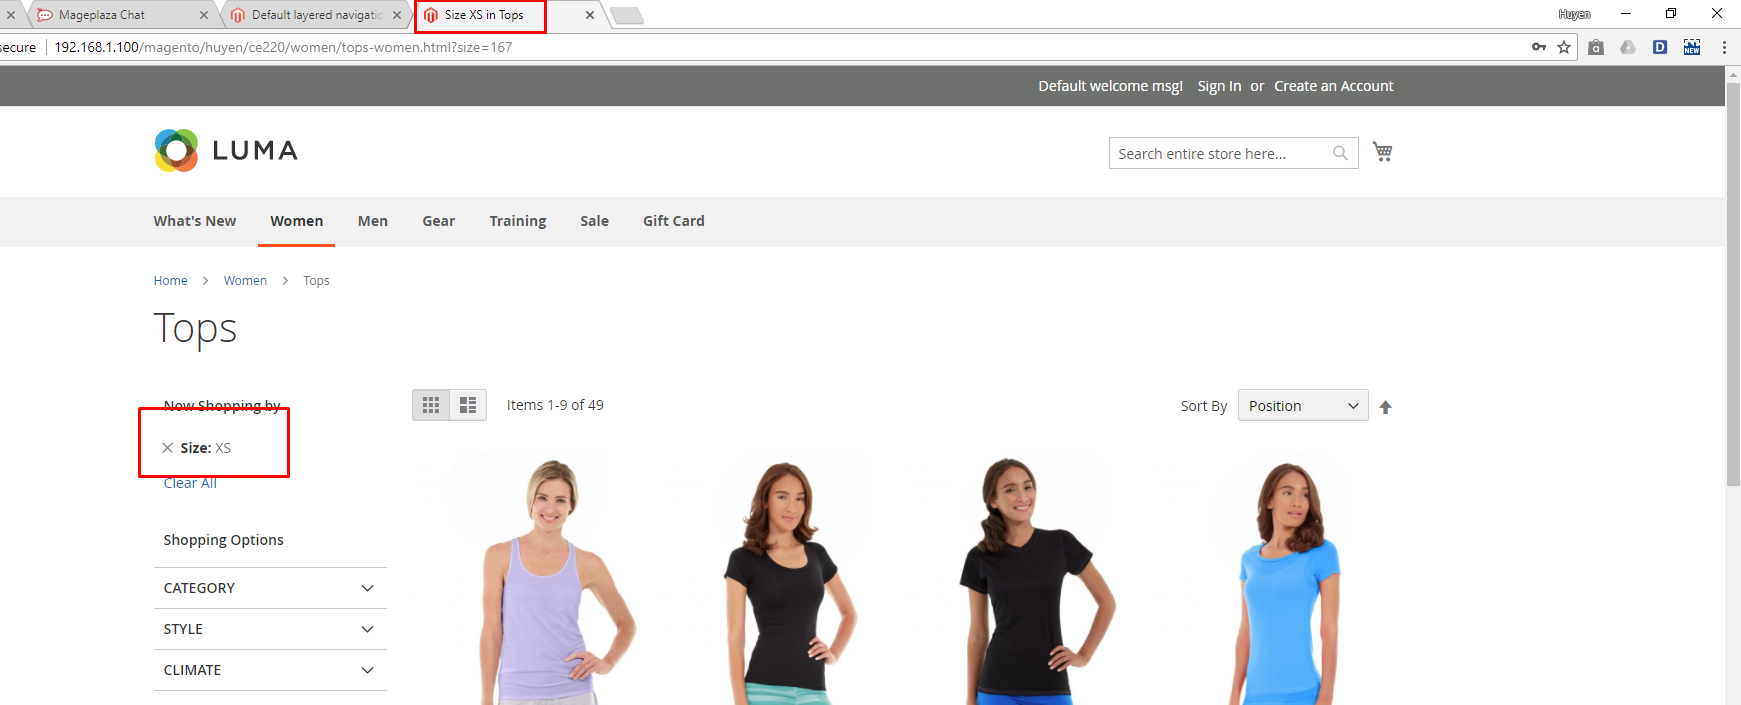
Note: There existed Default: Layered Navigation in the Rule Management. This rule's function is for fixing filtered result's title like this below screenshot. It can't be eliminated. However, you can Enable/Disable or modify the rule as your favor.
In this below guide, let’s take a try with the Product Pages
A new rule information page appears. Fill all required information which are divided into 4 parts at the sidebar, please follow those explanation for each field
2.1 Rule Information
Clearly define the rule's purpose and target area.
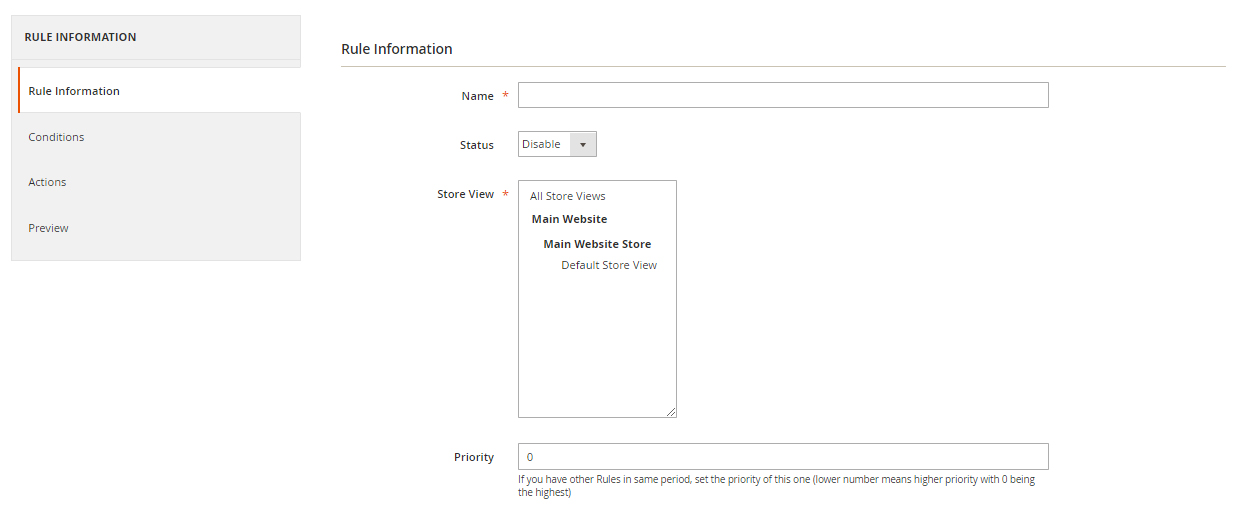
- In the Name field: Enter a Rule Name
- In the Status field: Set Status to “Enable” for the active rule
- In the Store view field: Choose Store View where the rule is applied
- In the Priority field: Set Priority number, 0 is the highest level.
2.2 Conditions
Set specific criteria for when the rule should apply (e.g., product category, specific pages)
It’s pretty easy to add/remove its content

2.3 Actions
Choose the desired actions the rule will perform. This level of automation saves you time and ensures consistent optimization across your store.
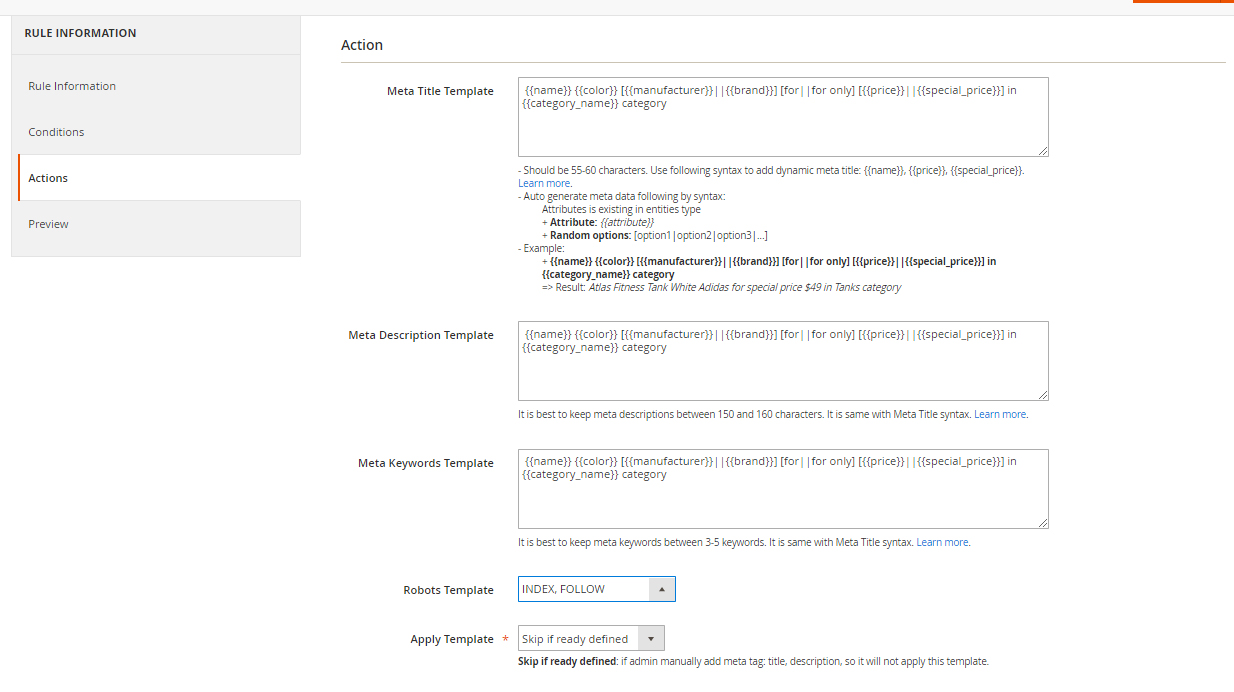
- In the Meta Title Template box: Enter the Meta Tile Template
- In the Meta Description Template box: Enter the Meta Tile Template. Use following syntax to add dynamic meta title:
{{name}}, {{price}}, {{special_price}}, {{page_number}}. - In the Meta Keywords Template field: Enter the Meta Keywords Template. It should be between 3-5 keywords. Use following syntax to add dynamic meta title:
{{name}}, {{price}}, {{special_price}}, {{page_number}}. - In the Robot Template field: Select Robots Template from one of the options to set the index permission for search engine’s robots:
- Index, Follow
- NoIndex, Follow
- Index, NoFollow
- NoIndex, NoFollow
- In the Apply Template field there are two modes:
- “Skip if already defined” means if admin manually added meta tag: title, description, so it will not apply this template.
- “Force Update” means auto-applying the template for all meta tags
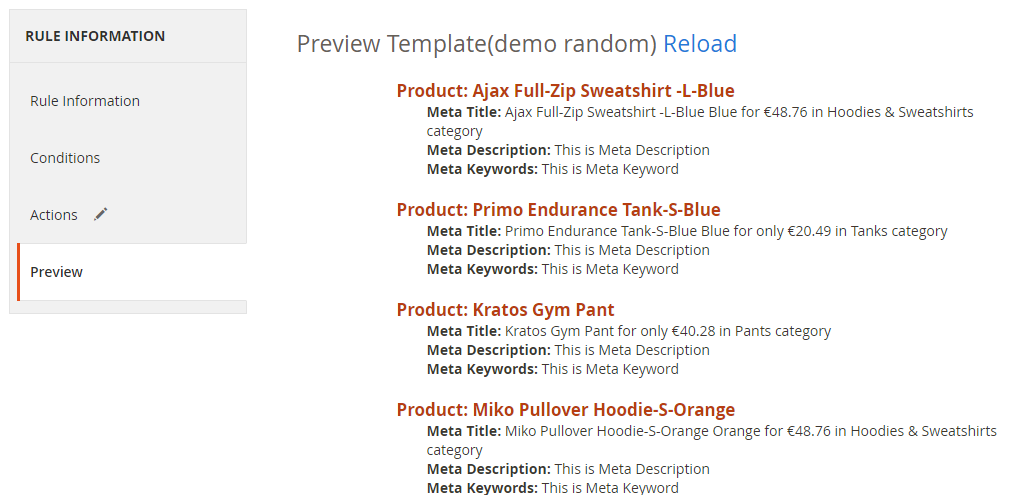
2.4 Preview
See a preview of how the rule will be applied before implementation.
This is the final step where you can check the result after setting up a bunch of required information. For example, it will appear like this
The rule form and its action of the rest Category Pages, CMS Pages or Layered Navigation is pretty similar to the Product Page’s form
Editing template rule form is the same with creating a new one. At Marketing > SEO: Manage Rules choose Edit the rule you want to alter. Remember to clicl on Apply Rulesevery time you edit a rule to apply it properly.
III. SEO Tools
This add-on tool will assist SEO extension in assessing and marking which and how to perform the structured data at the best for SEO progress. You can have a general review for the SEO analysis at the Product Page, Category Page and CMS Page.
For example with a product:
- Go to
Product > Catalog, choose Edit a random one. - Choose
PageSpeed Insightbutton at the header
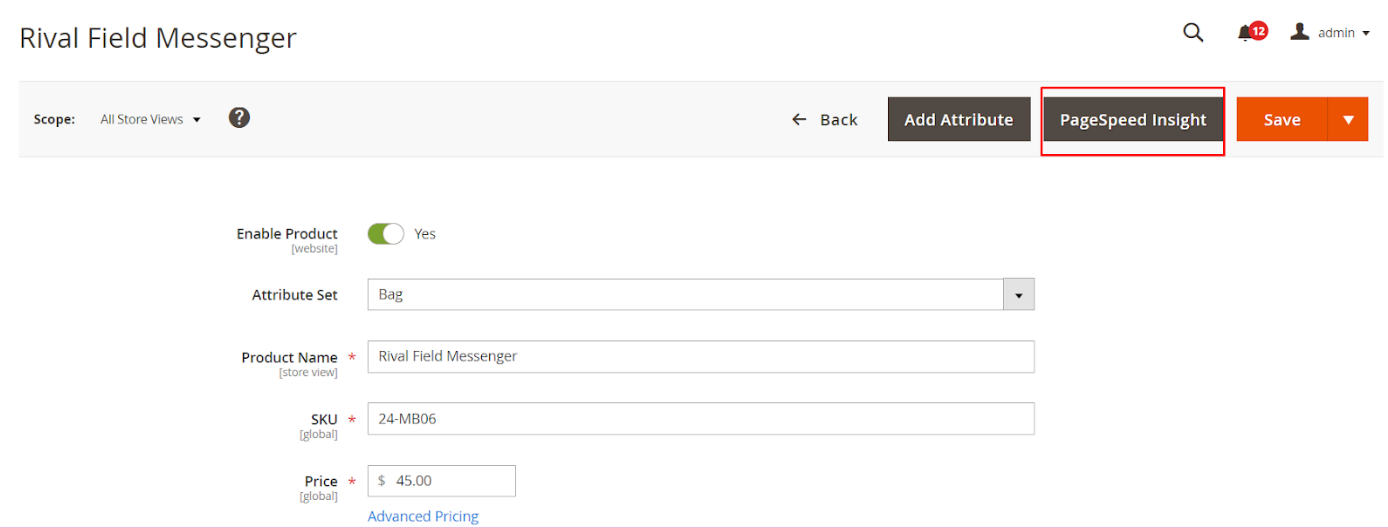
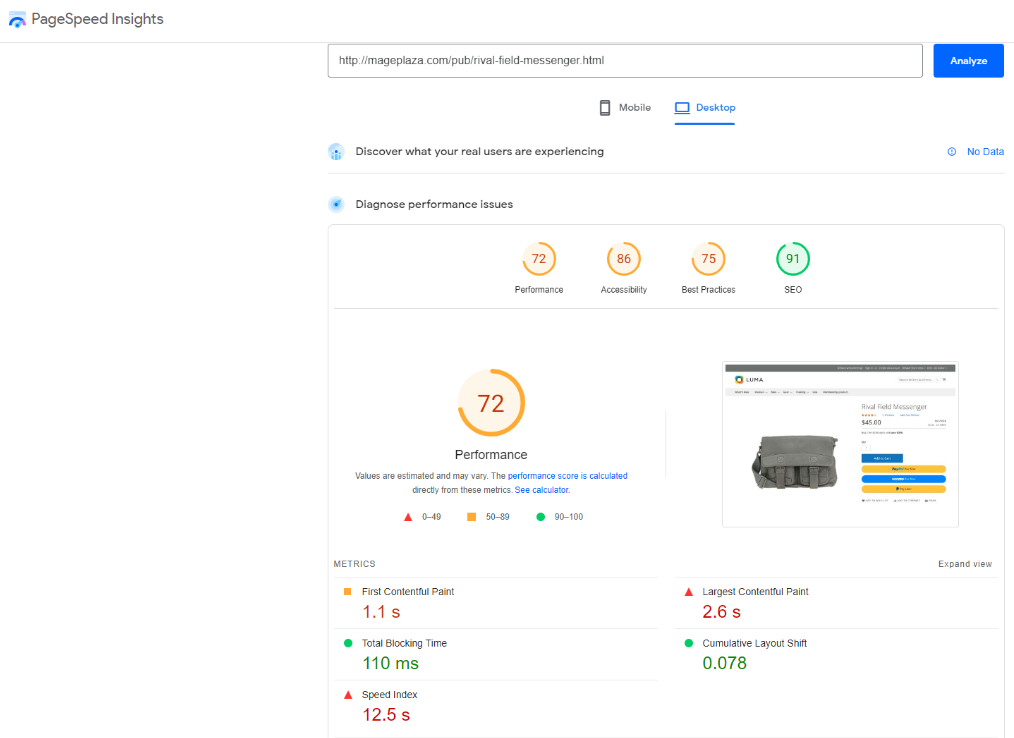
The page will be directed to PageSpeed Insight page for the check execution.
PageSpeed Insights will focus on 2 key issues: page loading speed and user friendliness. These factors comply with Google web optimization methods as well as automate adjustment process.
- Apply the same action with Category Page and CMS Page.
IV. Manage Crosslinks
Easily manage and edit existing cross links to ensure they remain relevant and effective over time.
4.1 How to create a new term
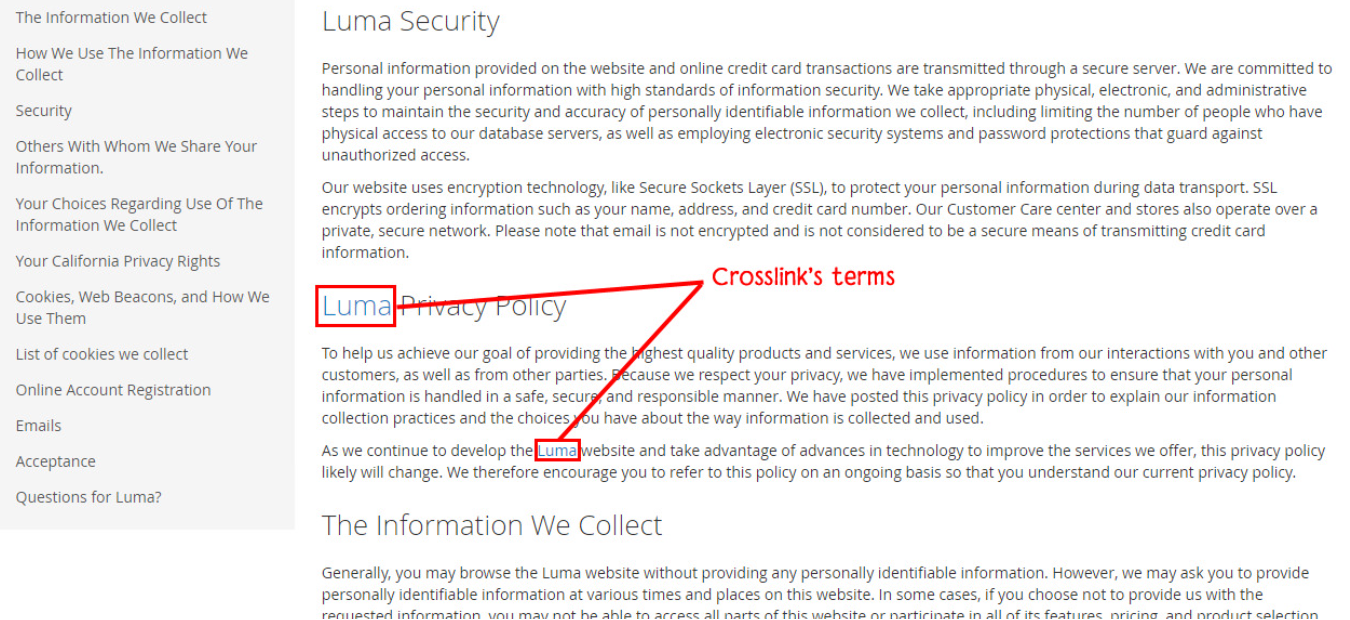
Our crosslinks feature will work under customizable terms. In the other words, It will retrieve keywords and automatically place a pre-installed internal link that makes it’s possible to associate with other sales pages E.g Crosslinks will replace all appeared “Luma” words by an internal link. You won’t have to do all the syntax works manually which also can cut down the decorate content time.
Please make sure that the Crosslink’s genenal configuration in here has been enabled.
To make a new term for your store, go to Mageplaza > SEO > Manage Crosslinks. Click red button Add new Term.
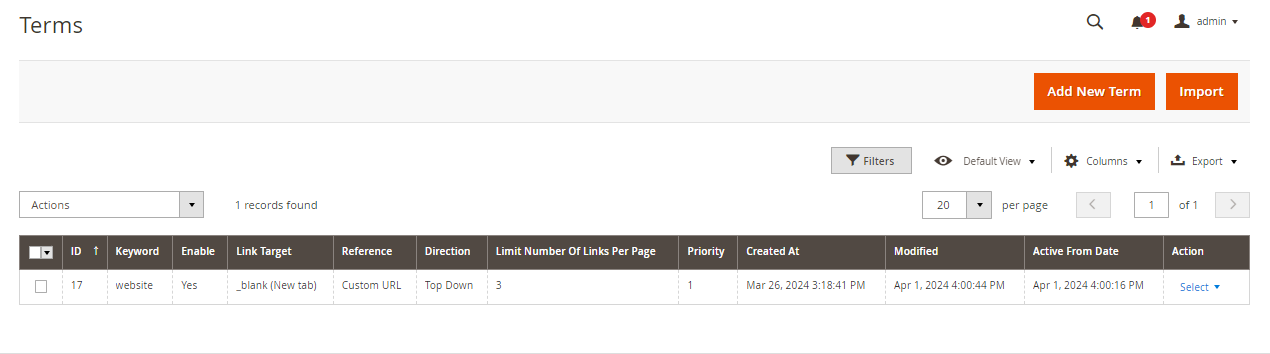
The “Active from Date” and “Created at” columns are added in the Term Grid.
The “Active from Date” and “ Active to Date” columns are updated for the Import Term. When importing term, the “Active from Date” and “Active to Date” columns are added in the Sample file when import.
Fill up all the required information fields you wish to set up for your new term. Creating a new term’s form will be performed like this.
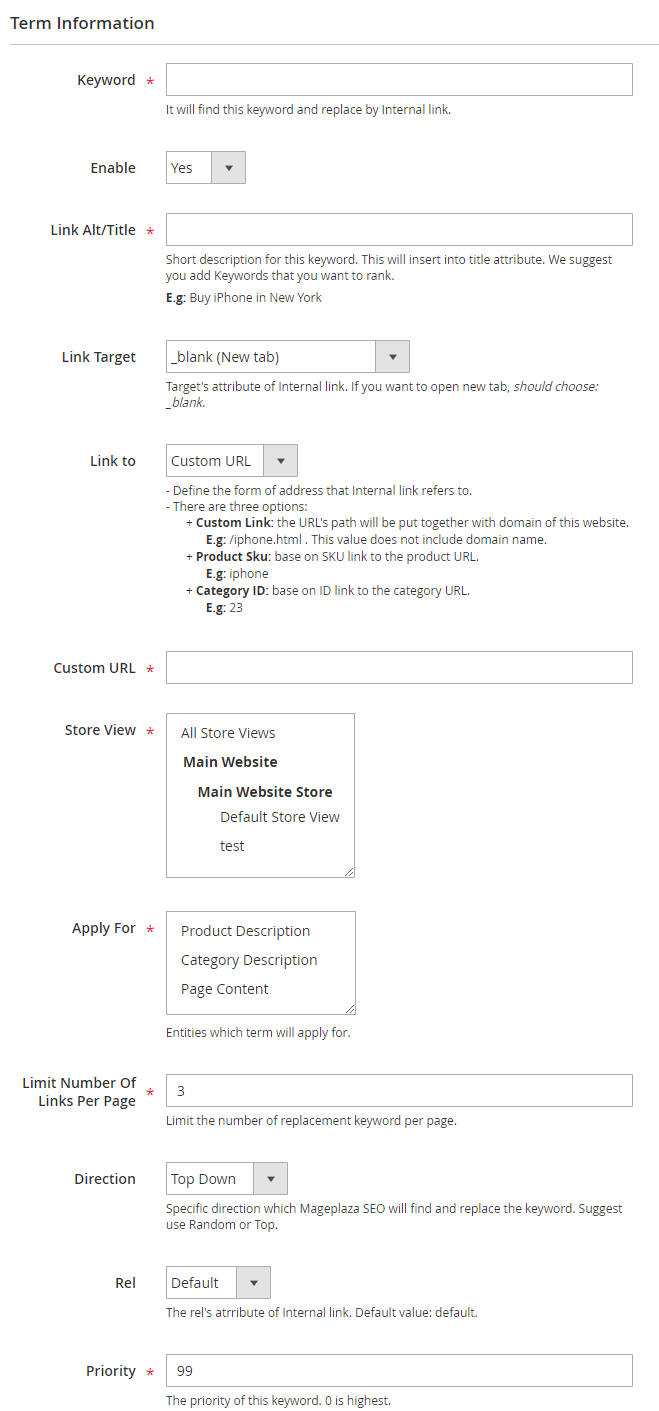
In the Keyword field (require information): Enter a new keyword you want to create.
In the Enable field: Set up the status for the term. Choose “Yes” if you want to apply for this term
In the Link Alt/Title field: This is for the short description for this keyword. This will be inserted into a title attribute. We suggest that you should add keywords that you want to boost your ranking in SERPs. E.g: Buy iPhone in New York
In the Link Target field: Target’s attribute of the Internal link.
- If you want to open a new tab, you should choose: _blank (New tab)
- If you want to open it in a popup box, choose _self (Current tab)
- If you want to open it in the current page, choose _top (Full body of the window)
In the Link to field: Define the form of address that Internal links refer to. There will be 3 kinds of form.
- Custom Link: URL’s path will be put together with domain of this website. E.g: /iphone.html . This value does not include the domain name.
- Product stock keeping unit (SKU): Base on SKU link to the product URL. E.g: iphone
- Category ID: Base on ID link to the category URL. E.g: 23
Store View: Choose the Store View that you want to apply Term.
Apply for: Choose where the Crosslinks are inserted.
- Product Description
- Category Description
- Page Content
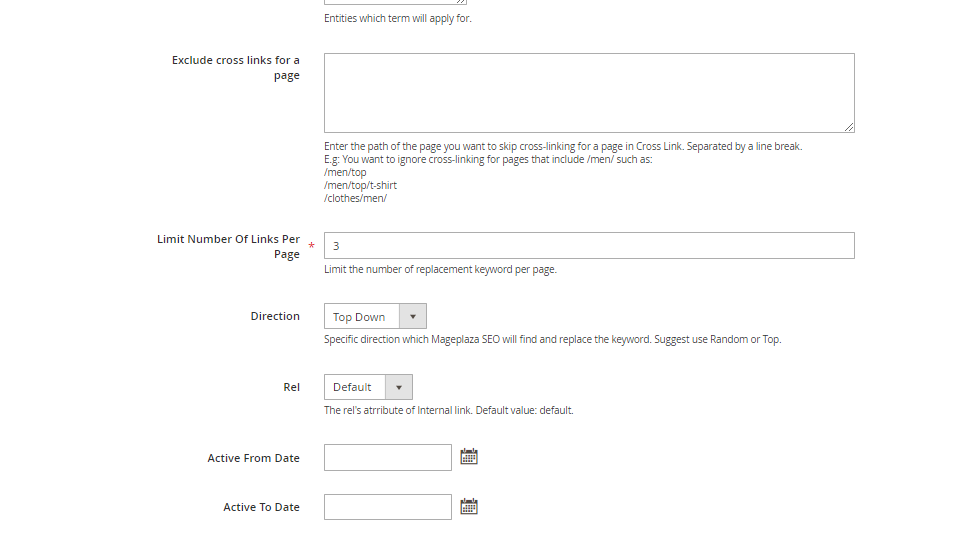
Exclude cross links for a page: Exclude the application of cross links on some pages. Multiple pages can be entered and separated by line breaks
In the Limit Number Of Links Per Page field: Enter a value which limits the number of links per page. Default: 3.
In the Direction field: Specify direction which Crosslinks function will find and replace the keyword. Random or Top down will be good recommendation.
In the Rel field: The rel’s attribute of Internal link. There are 2 options: Default or Nofollow.
- Active from Date: Time for applying the cross links
- Active to Date: Time for applying the cross links
In the Priority field: Set up value for the priority of this keyword. Higher priority term will be applied first. 0 is the highest.
4.2 How to import new terms
Step 1: Prepare data
To import a new term for your store, go to Marketing > SEO > Manage Crosslinks. Click the red button Import.
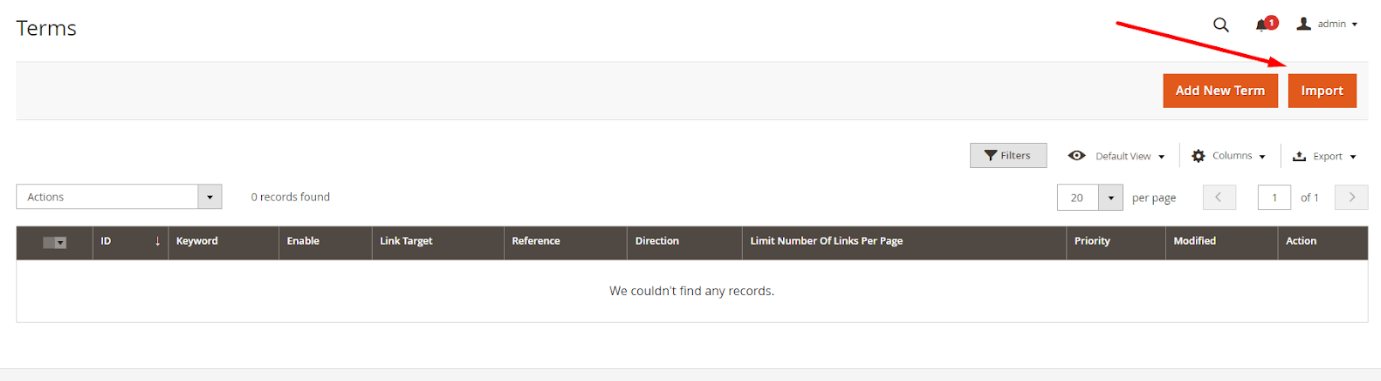
- In the Import New Term section, select File Type CSV and click Download Sample File that you want to download. The admin needs to download and edit the sample file so that it can be imported correctly.
- Check that the input file size does not exceed the limit shown in the message, which is 2M.

- Edit the information you want to import in the template file
- Active from Date field is added
- Active to Date field is added

Step 2: Configure Import Behavior
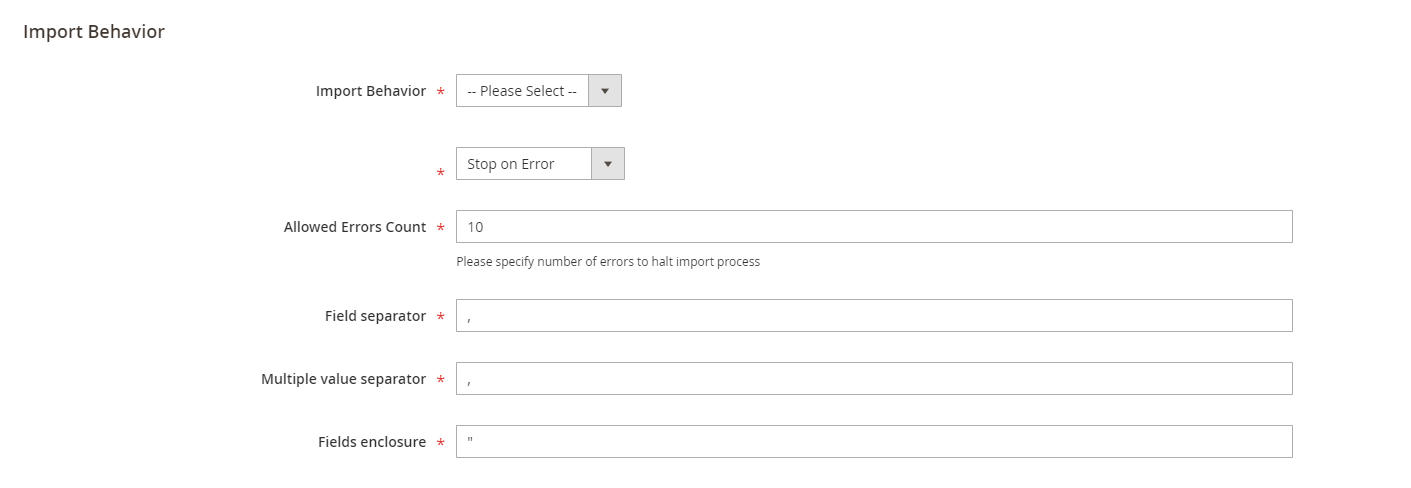
In the Import Behavior section,
Select the action you want when importing data in the Import Behavior field:
- Add/ Update
- Delete
The data stream is compared and executed based on the identity of each block imported
With the option Stop on Error or Skip Error to stop importing when you get an error or ignore the error to continue importing
Next, in the Allowed Errors Count field, enter the error number to pause the import process. The default value is 10.
In the field separator field:
Field separator: Enter a marker to separate the field in the column. Default value is a comma (,)
Multiple value separator: Enter the mark to separate multiple values in the cell of 1 column. Default value is a comma (,)
- Note: In a CSV file, a comma is the default delimiter. To use a different character, make sure that the data in the CSV file matches the character you specify.
Fields enclosure: Enter a mark to enclose the value in the column. The default value is apostrophe (”)
Step 3: Select File to Import

- In the Select File to Import section, click “Choose File” to select your block input file.
- Note: If you select File Type = CSV , your input file must be a CSV file correctly.
Step 4: Check data and finish data entry
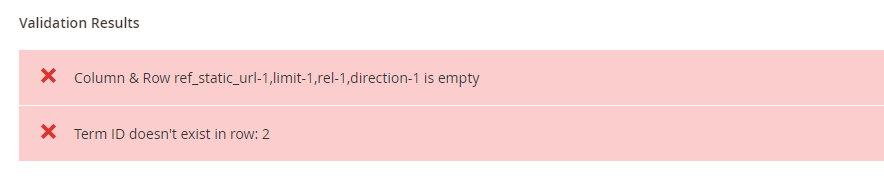
After entering the above information, click “Check Data” at the top right of the popup to check if the data you entered is correct.
- If the file is valid, click “Import” is displayed in the Validation Results section.

- Otherwise, if the upload file is invalid, please correct the error reported in the message and try again.
- Example of error message:
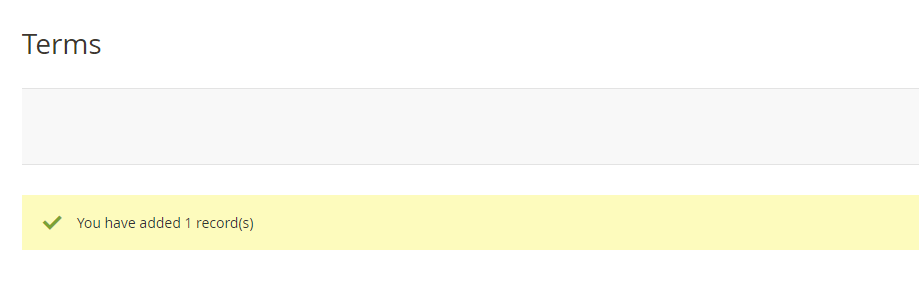
- When the import process is complete, the system turn off the popup and displays your action message in addition to the grid.
- Example of displaying message success on grid.
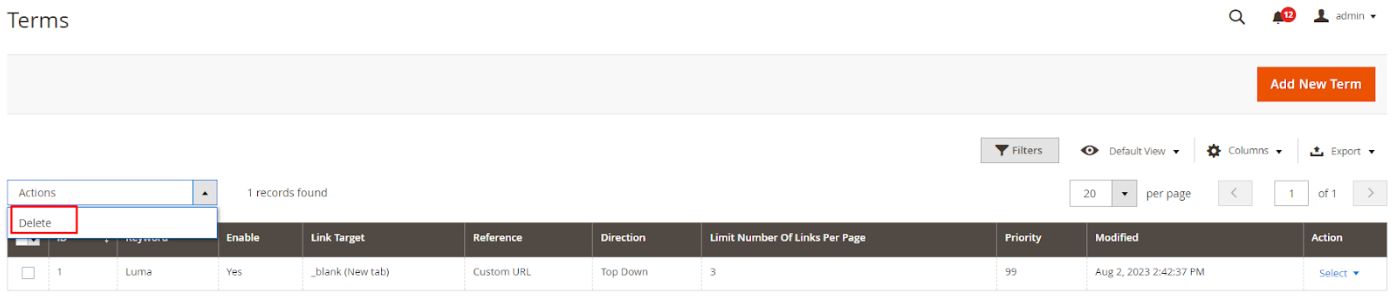
4.3 How to delete existed terms
Follow Marketing > SEO > Manage Crosslinks. A list of existed terms will appear. Select in the Action button to customize the term you want to delete.
V. SEO Checklist
Utilize the configurable checklist to prioritize SEO tasks. This feature provides a roadmap for optimization, highlighting areas that need immediate attention and ensuring you don't miss any crucial aspects.
SEO Checklist includes a list of the notifications: Success, Error, and Warning. Based on this status of the notification, you will know whether your store is optimized and ready for SEO or not. Follow Marketing > SEO: Checklist
FAQs
Maintenance
Troubleshooting Articles
For common issues and their fixes, refer to these articles:
Support And Assistance
1. Customer Support
For any assistance, please visit our Support page or email us at cs@mageplaza.com/ sales@mageplaza.com
2. Create a Ticket
If you have technical issues, please open a ticket at this link.
3. Operating Hours
Our support team is available during the following hours:
- Monday to Friday: 8:00 AM - 23:59 PM
- Saturday: 8:00 AM - 12:00 PM
- Sunday: Closed
Refund Policy
We understand that sometimes things don't go as planned. Please review our refund policy for detailed information:
Frequently Asked Questions (FAQ)
For common questions, please visit our FAQ page: