Blog Professional
Updating Blog regularly is one of the effective content marketing strategies in the present eCommerce marketplace. This activity will draw a more interactive website and make your website more attractive to visitors. Magento 2 Blog extension by Mageplaza, you will get an impressive chance to provide the latest news about your store, upcoming products, promotions, and get customers’ feedback in easy and simple way. To help users with SEO and synchronize posts to social networks (Facebook, Twitter), we have also added more capabilities than the standard blog version. This will make the post become more popular and expansive.
Download & Install
You can download from the following resources:
Install via composer (recommend)
Run the following command in Magento 2 root folder:
composer require mageplaza/magento-2-blog-extension php bin/magento setup:upgrade php bin/magento setup:static-content:deploy
Here we go how to know detail in instructions and configuration in extension’s backend.
How to Configure
I. Configuration
1.1. General Configuration
Login to Magento Admin, Content > Better Blog: Configuration. Open General section
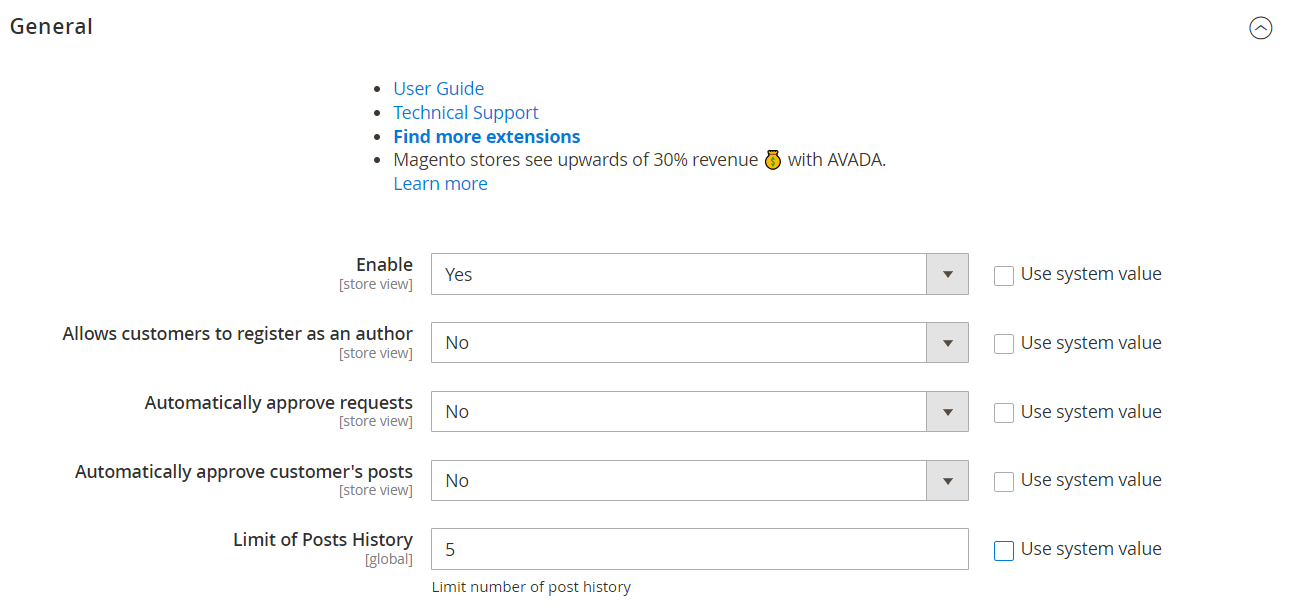
- In the Enable field: Choose Yes to turn the extension on.
- Allows customers to register as an author: Select Yes to allow customers to register as an author for the store blog
- Automatically approve requests: Select Yes to allow auto-approving request of customer author's registration.
- Automatically approve customer's posts: Select Yes to allow auto-approving customer posts when creating new posts outside the frontend
- Limit of Posts History: Maximum number of history records in the Edit History of posts section at the backend. Once the number of history records has reached maximum, the oldest one will be auto-deleted if creating new ones. The default is 5.
1.2. Display
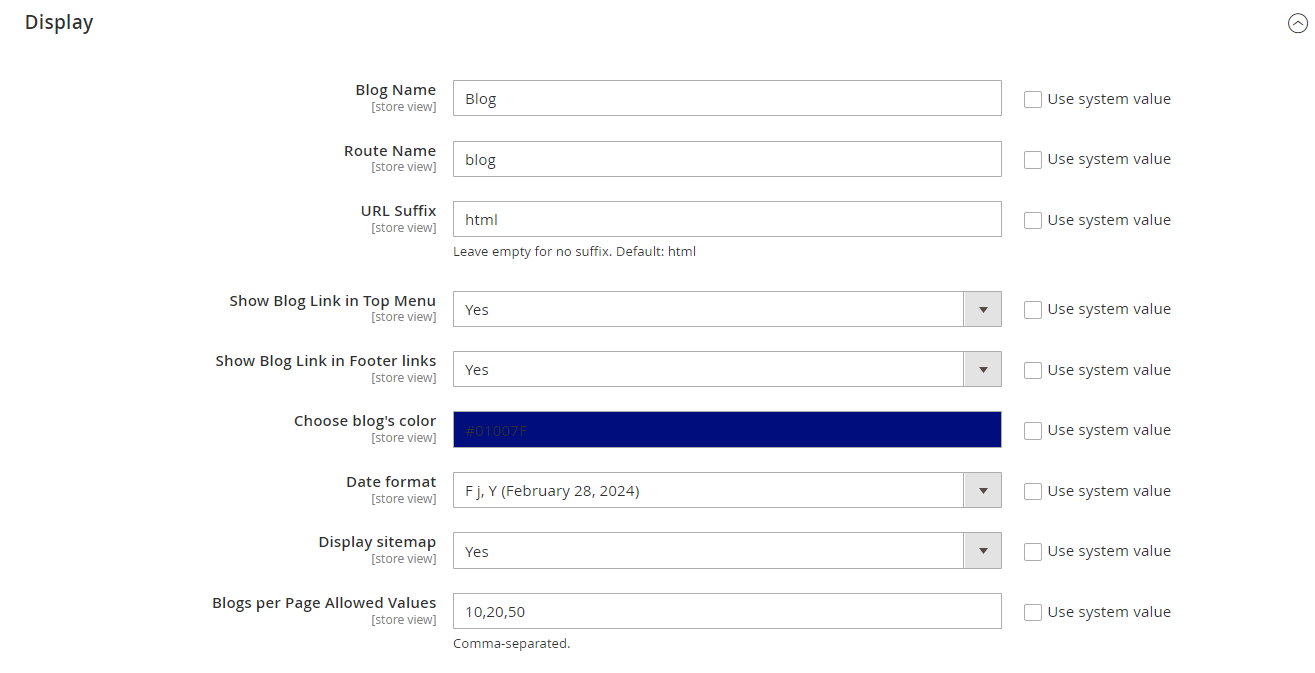
- In the Blog Name field: Set name for the new blog
- In the Route Name field: Enter the route name which appears on the URL. If you leave it blank, the default Route name is blog. E.x https://domain.com/blog. You can change to news, docs.
- In the URL Suffix: Enter the Url Suffix. There won’t be no suffix if you leave it blank.
- In the Show Blog Link in Top Menu field: Choose “Yes” if you want to show blog links in the top of the menu.
- In the Show Blog in Footer Links field: To make the blog link visible on footer links on your site, set "Yes".
- In the Choose Blog’s Color field: Pick up a color for your blog’s text.
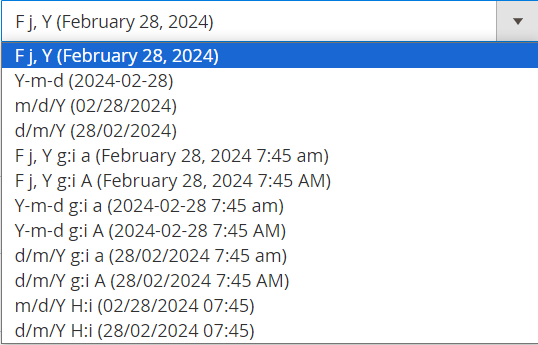
- In the Date Format field: Choose the date format to display. We have 12 types of date format.
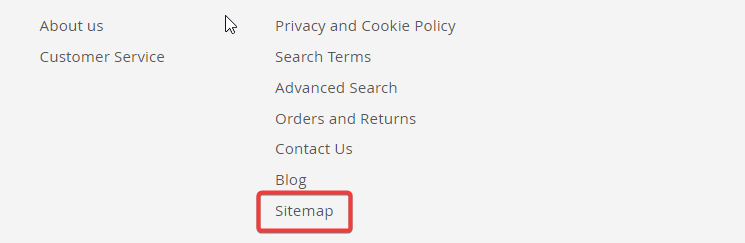
- Display Sitemap: Choose Yes to display sitemap at the footer links.
- In the Blogs per Page Allowed Values field: The number of post per page will be set in this field.


1.3 Blog Home
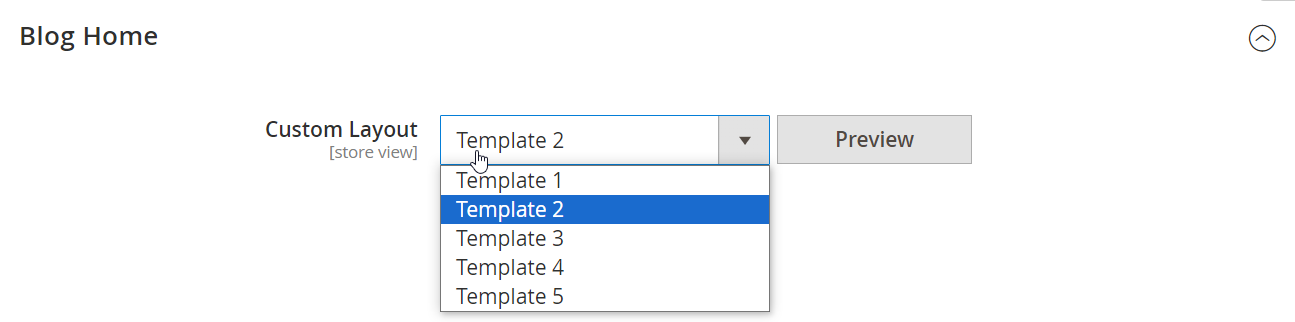
- Custom Layout: Choose one template to apply for the Blog Home page
- Click the Preview button to preview the format of each template
- These templates have a fixed design on the Blog Home page. This page's design is independent of the configurations on other tabs.
1.4 Blog List Page & Post View Page
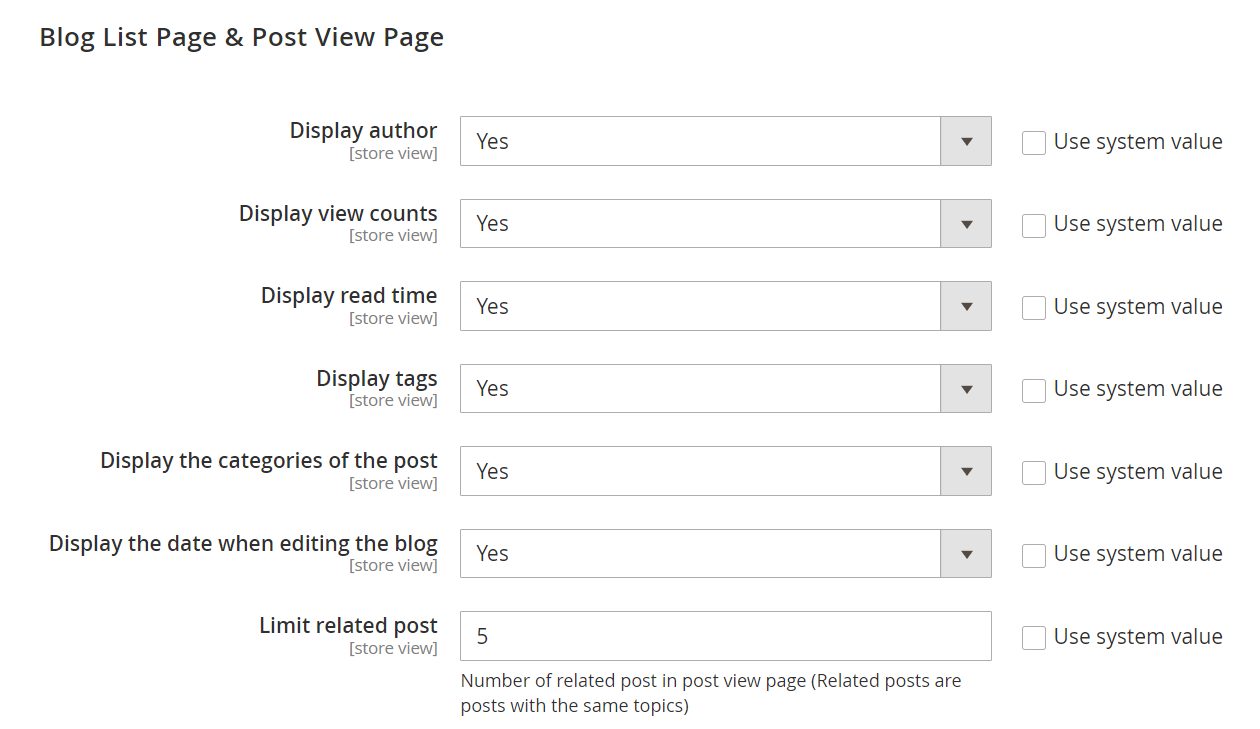
- In the Display Author field: Select Yes to display name of post’s author on the frontend.
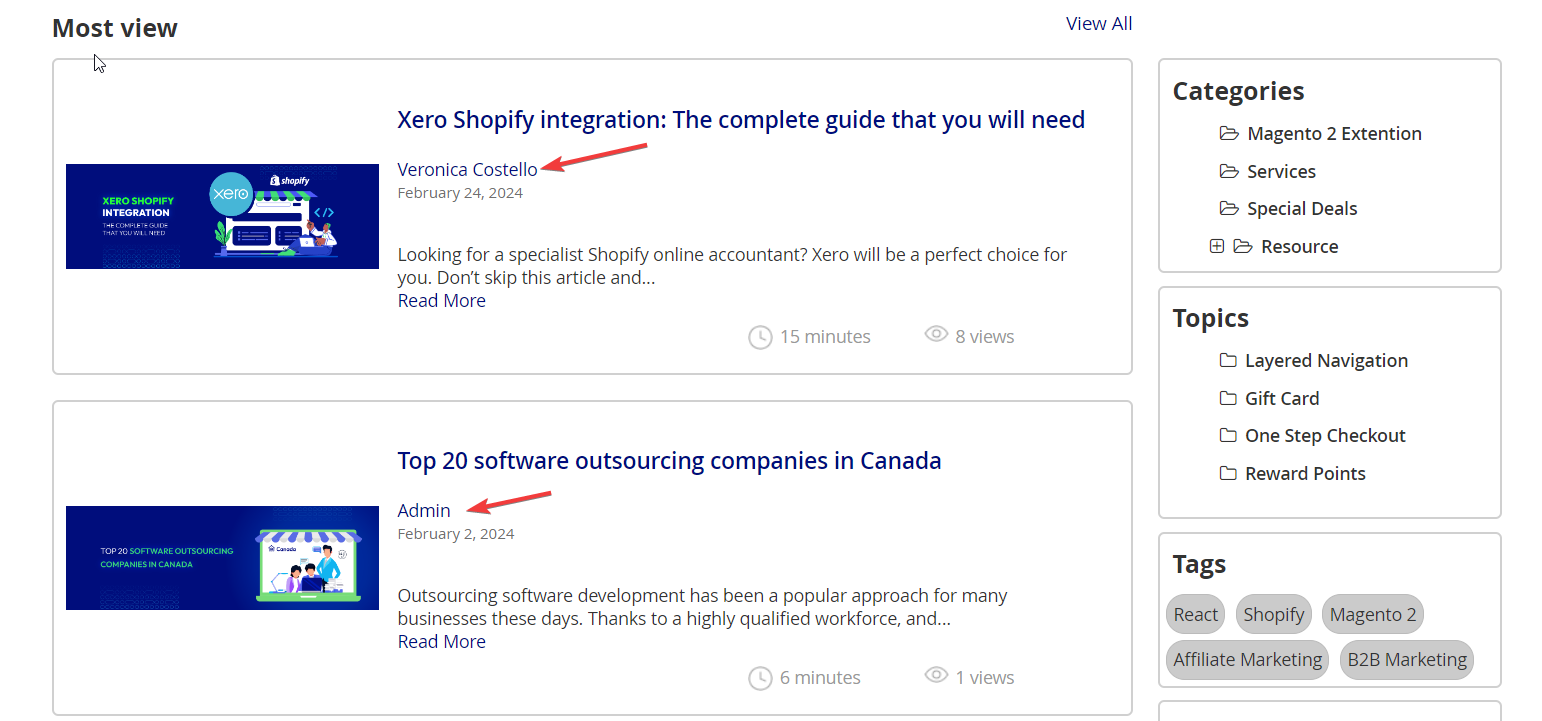
- Display view counts: Select “Yes” to display views of each post.

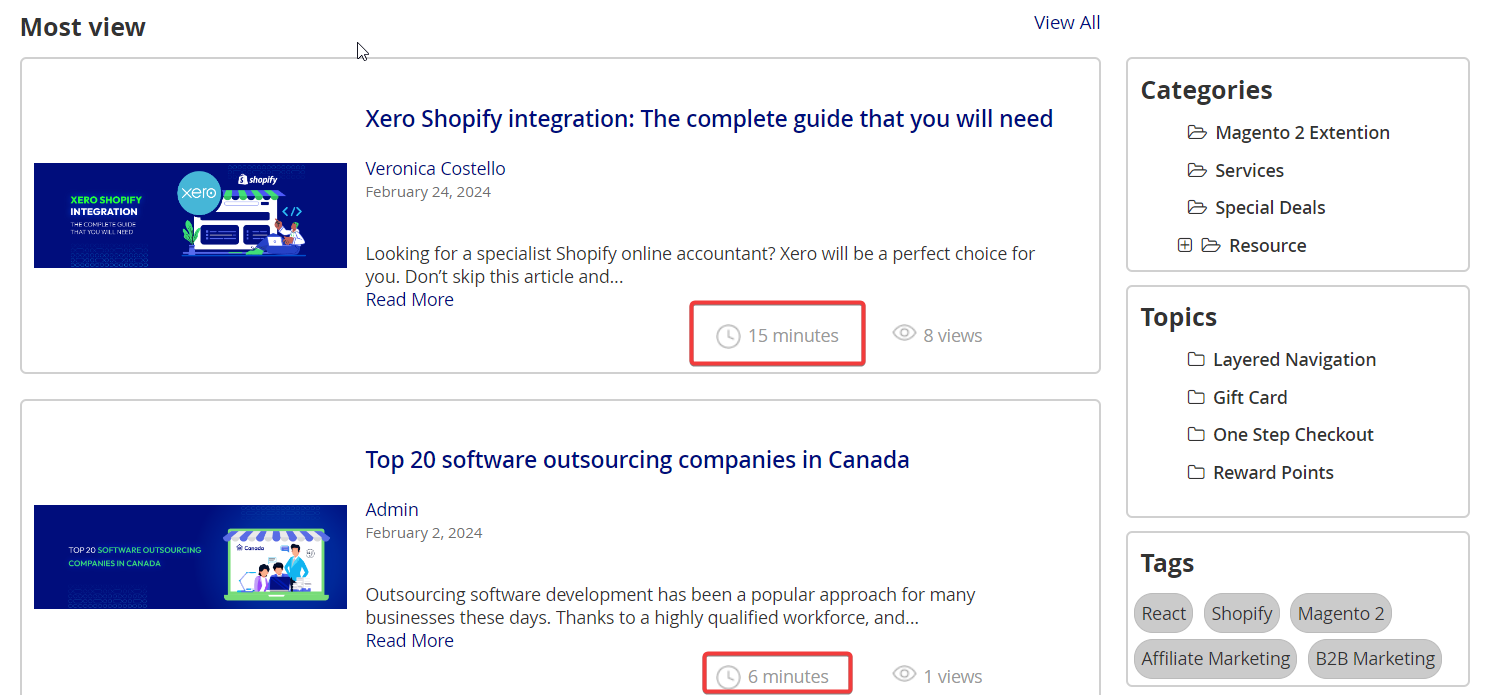
- Display read time:. Select “Yes” to display the reading time of a post.
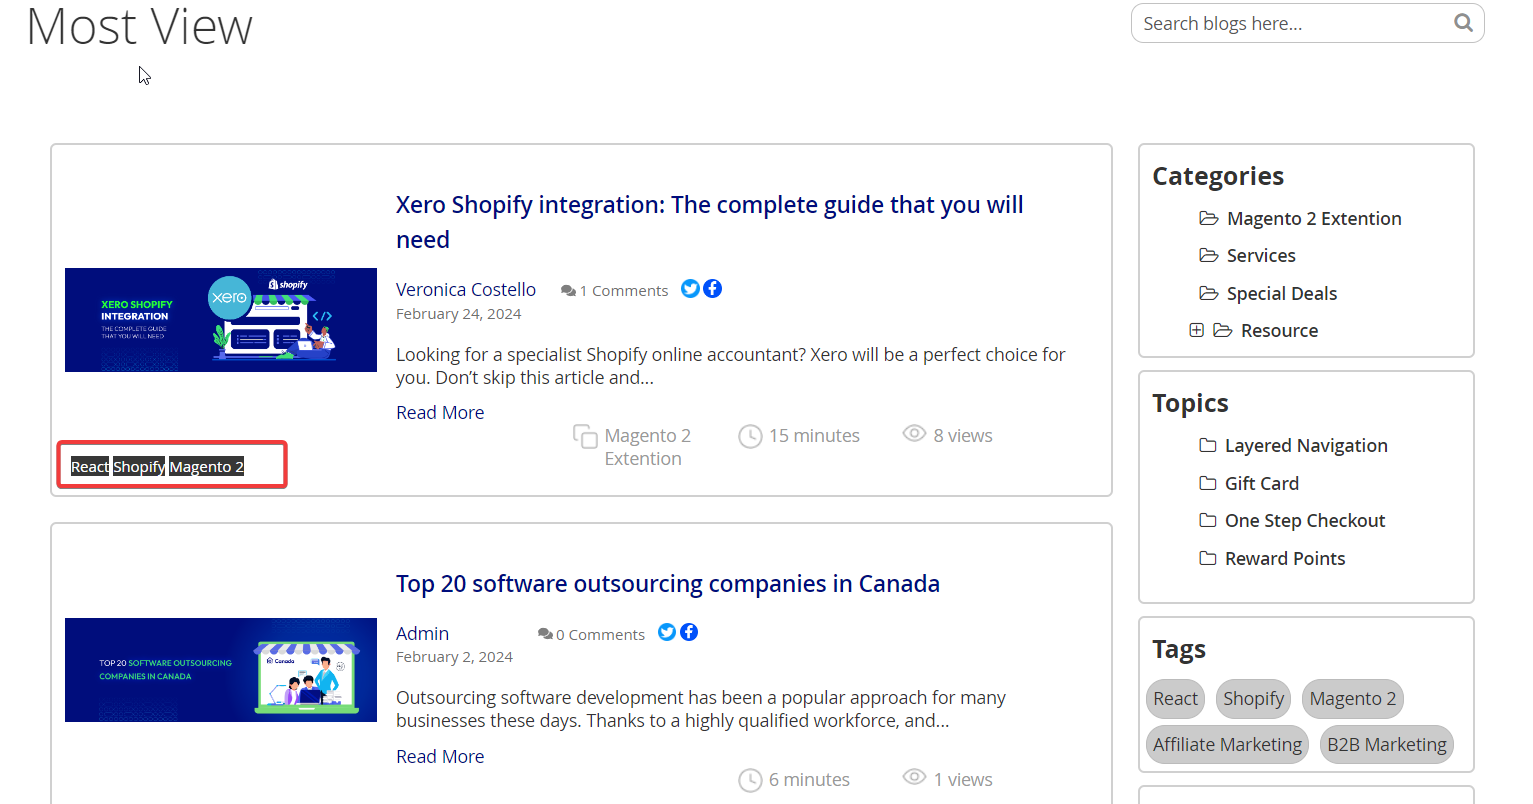
- Display tags: Choose "Yes" to make each post's tag visible. For each post, only three tags with the highest priority may be shown.
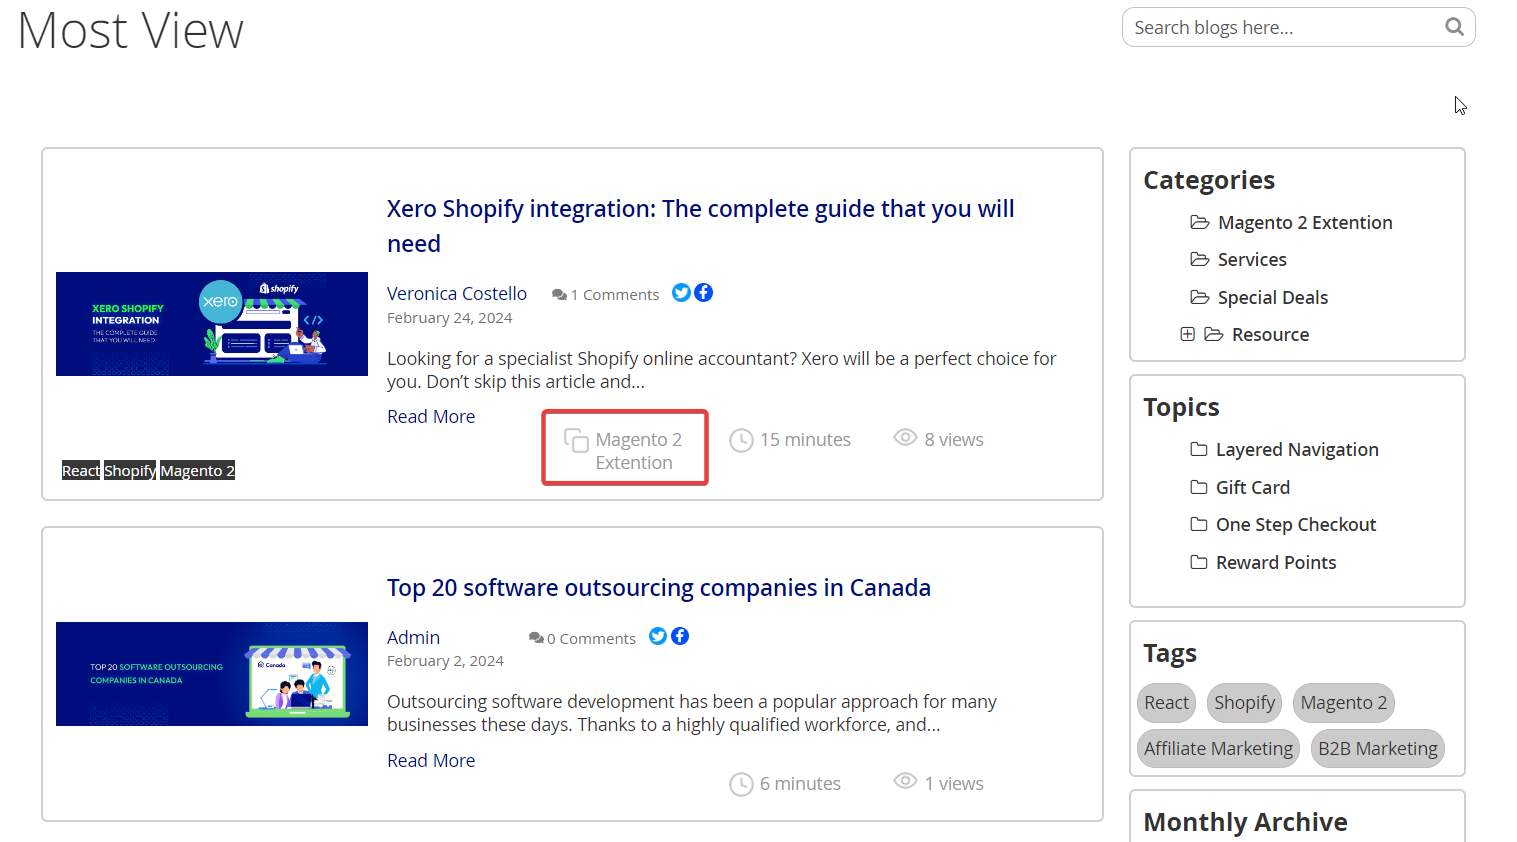
- Display the categories of the post: Showing the Category of the Post and only the top-priority category is displayed in each post.
- Display the date when editing the blog: Showing the time of the most recent post edit on the post detail page.

In the Limit Related Post field:
- Related Post is defined posts have the same Topic.
- You’re able to limit the related posts in this section.
- If you leave it blank, all the related posts will display on Post View page.
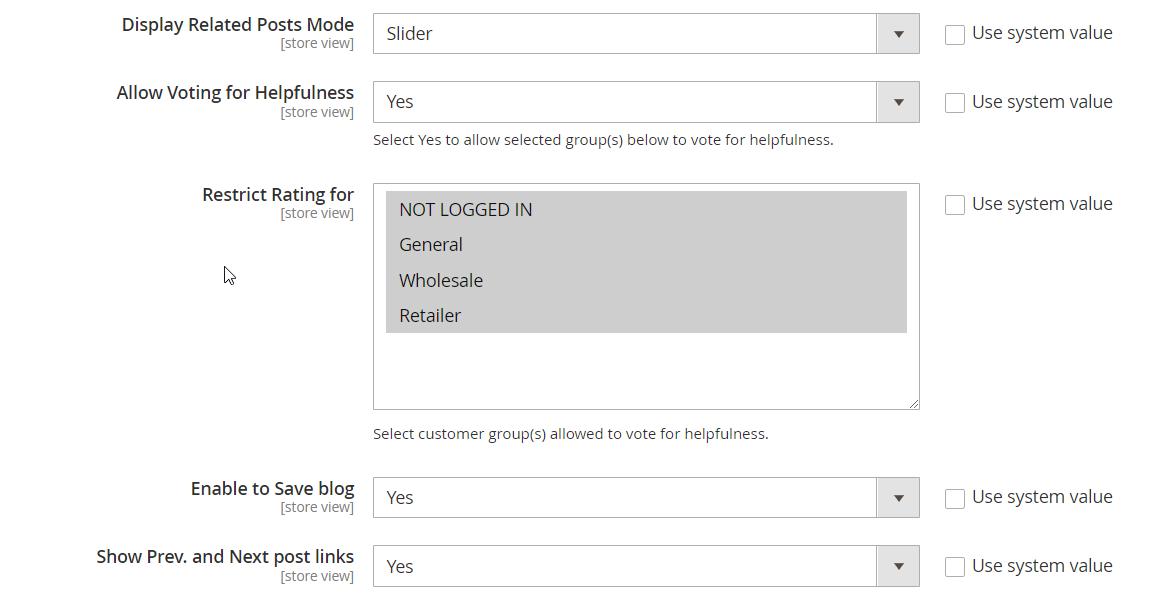
- In the Display Related Posts Mode: Set the Related Post at view post page shown in grid or slider.

- In the Display Blogs Mode field: You can configure to display posts at post listing page under Grid View or List View.
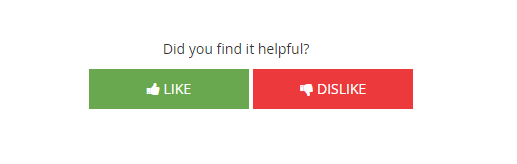
- Allow Voting for Helpfulness: Select Yes to allow Like/Dislike below each post.
- Restrict Rating for: Select the customer group that is allowed to vote (Like/Dislike). You can select multiple groups.
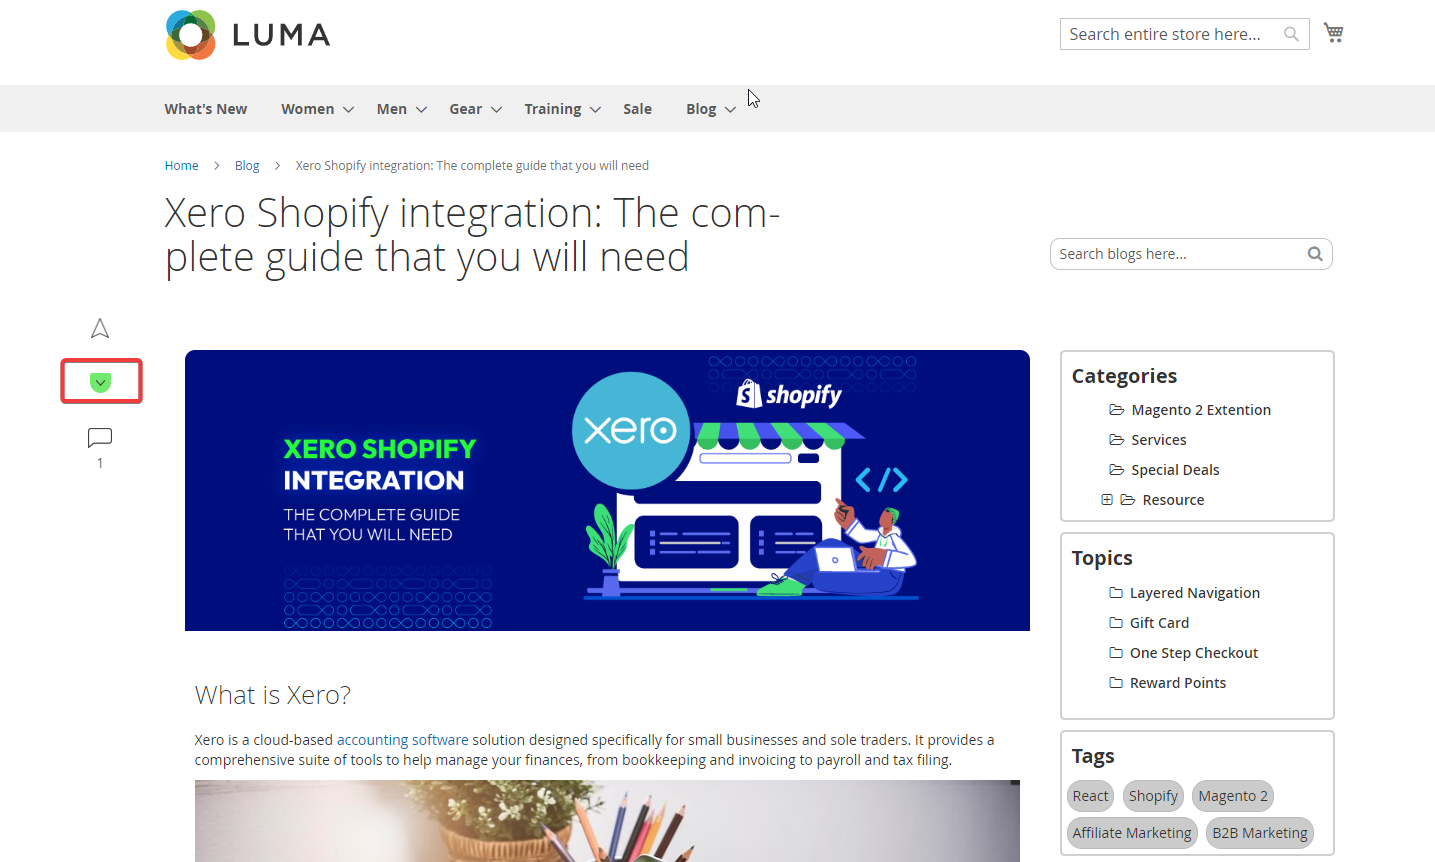
- Enable to Save blog:. Select “Yes” to enable users to store articles written by other writers to their account. In order to complete this action, users must have an account. If users are not logged in, after clicking the save icon, they will be redirected to the Login page. After logging in, users will be redirected to the previous post and this post has been saved in their Post Save List.
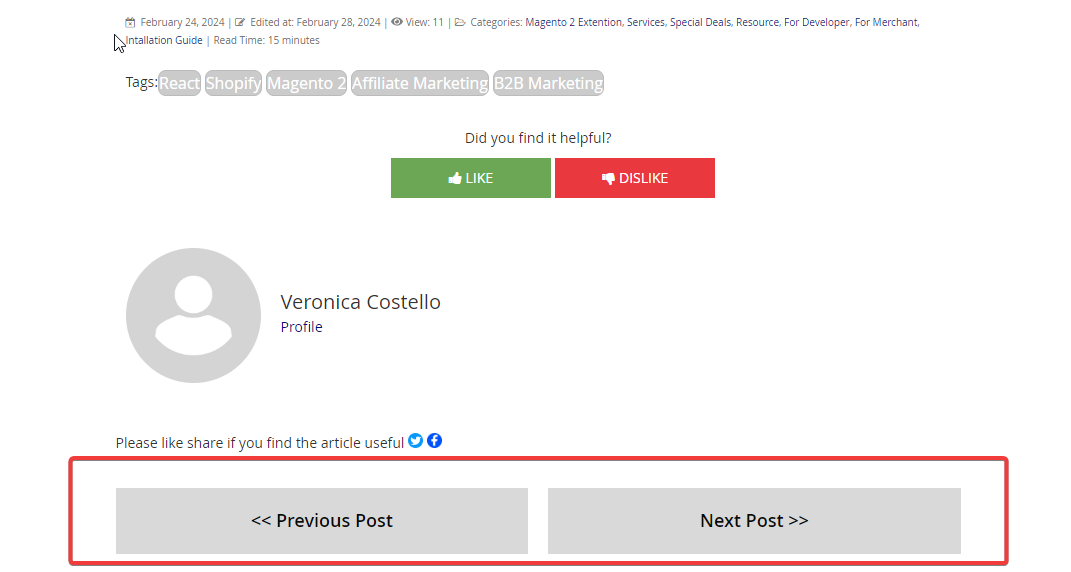
- Show Prev. and Next post links: Choose "Yes" to make the Post View Page's Previous and Next buttons visible. Users can access the previous or next article they are currently reading.
1.4. Related Products Content
When open the Related Products Content section, there will be two sub-section parts.
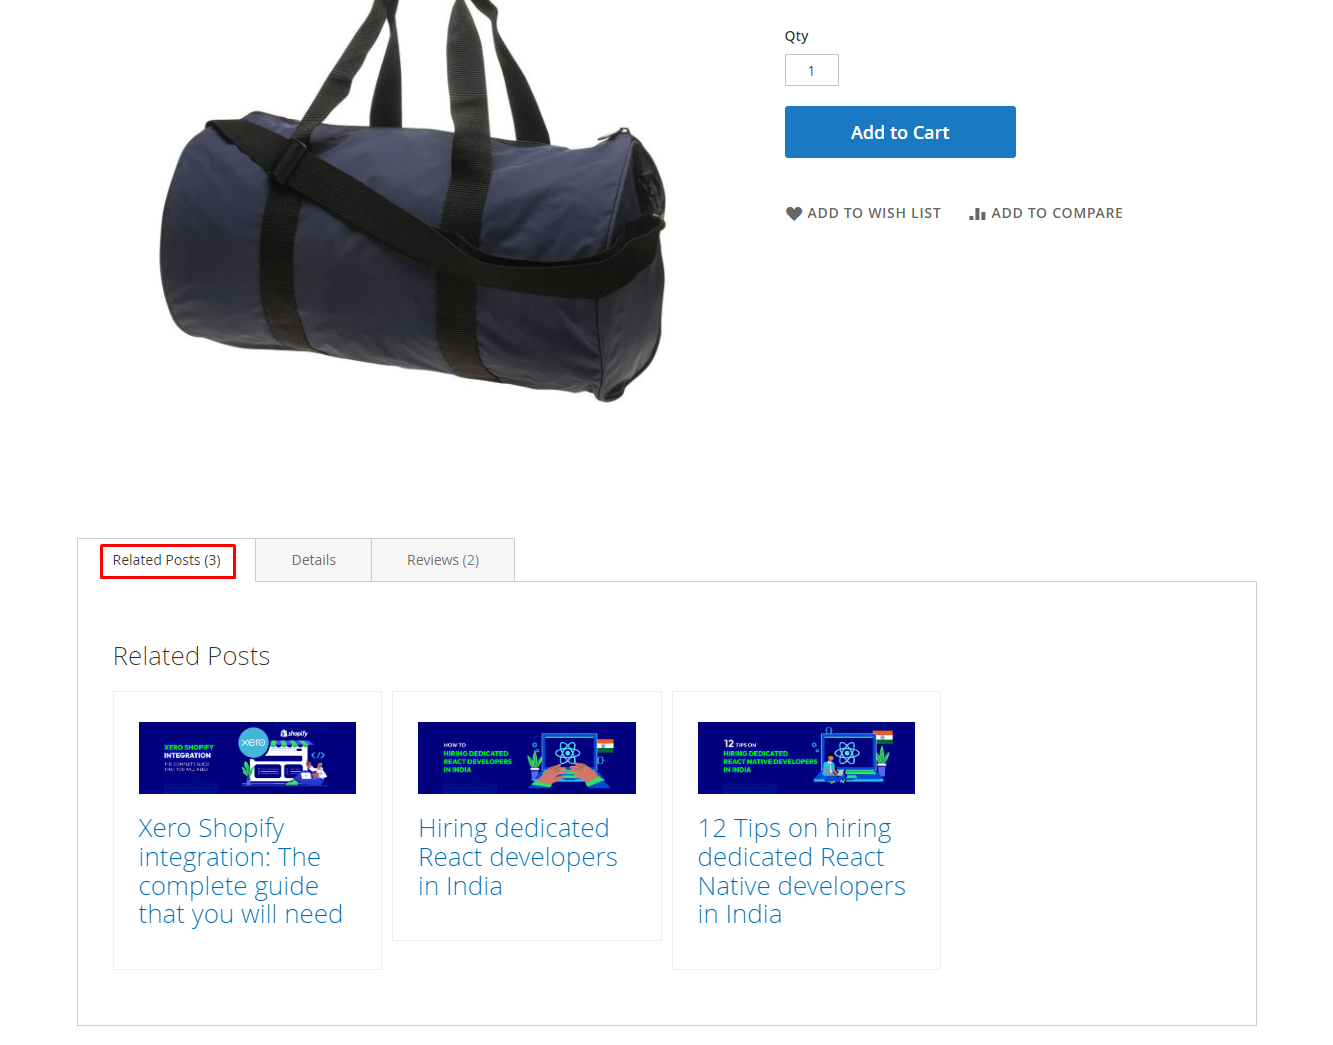
1.4.1 . Product Detail Page
Product Detail Page contain posts can be added to Related Products to display in Post View Page. The selected products will recognize those posts are Related Posts and display them on the Product Detail Page.
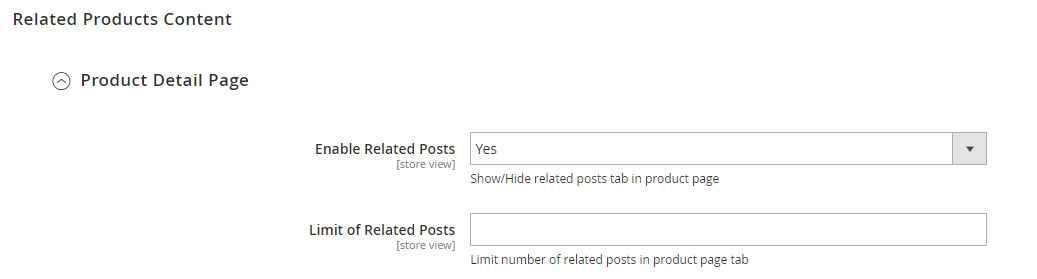
- In the Enable Related Post field: Choose Yes to show related posts on Product Detail Page.
- In the Limit of Related Post field: Enter the number of related posts can display. If you leave it blank, the default number is 1 post.
1.4.2 . Post View Page

- In the Enable Related Product field: Choose Yes to show related products on Post View Page.
- In the Display Related Products Mode field: Set the Related Post at Post View Page shown in grid or slider.
- In the Limit of Related Products field: Enter the number of related products can display. If you leave it blank, the default number is 12.
- In the Title of Related Products field: Name the title of the block which contains related products. If you leave it blank, the default name is “Related Products”
1.5 Sidebar
Expand the Sidebar section, select Left/Right to set the position of the sidebar in Blog

1.5.1. Search
- In the Enable Search Box field: Choose Yes to active the search box at the sidebar.
- In the Maximum Query Result field: Enter the maximum number of posts that the search box will search. Without setting the limitation, the search box will search all posts that match the search character.
- In the Min Chars field: Search results will only be displayed if the customer enters in the search box with enough configured characters in this section.
- In the Visible Image field: Select Yes to display the thumbnail of the post when the post is found in the search box.
- In the Description length field: Limit the length of the short description can show along with found posts. If you leave it blank, the short description will not display.
1.5.2. Categories

- Enable: Select Yes to display the Category on the sidebar.
- The maximum of categories to show on post: Enter a number to restrict the amount of Categories shown on the sidebar. All categories with posts will be shown if left empty.
1.5.3. Topics & Tags
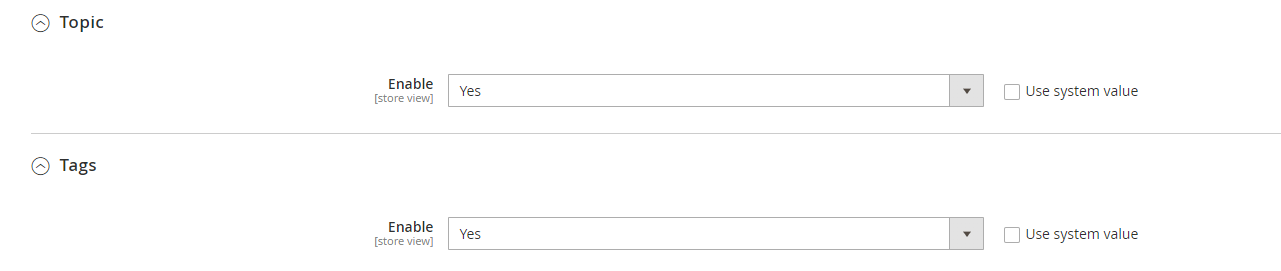
- Enable: Select Yes to display Topics and Tags on the sidebar
1.5.4. Monthly Archive
Monthly Archive helps to summary the number of post published for each month. Open Monthly Archive section.
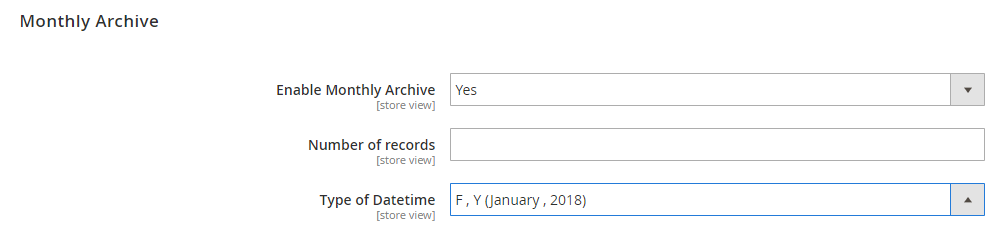
- In the Enable Monthly Archive field: Select “Yes” to display the monthly archive on the frontend.
- In the Number of records field: Set the number of months to display on the frontend. If you leave it blank, the default number is 5 (the last 5 months statistic).
- In the Type of Datetime field: Choose your favourite format of the date. We offer 4 types of month/year displays.
1.6. Comments

Open Comments section, set a comment type with one of the following options.
1.6.1. Default Comment:
- Customers need to login a new account to be able to comment, admins can manage those comments in the backend. Choose 'No' at the Need for Approval field to disable the comment management feature. After that, those comments will be shown on the frontend as soon as customers comment.
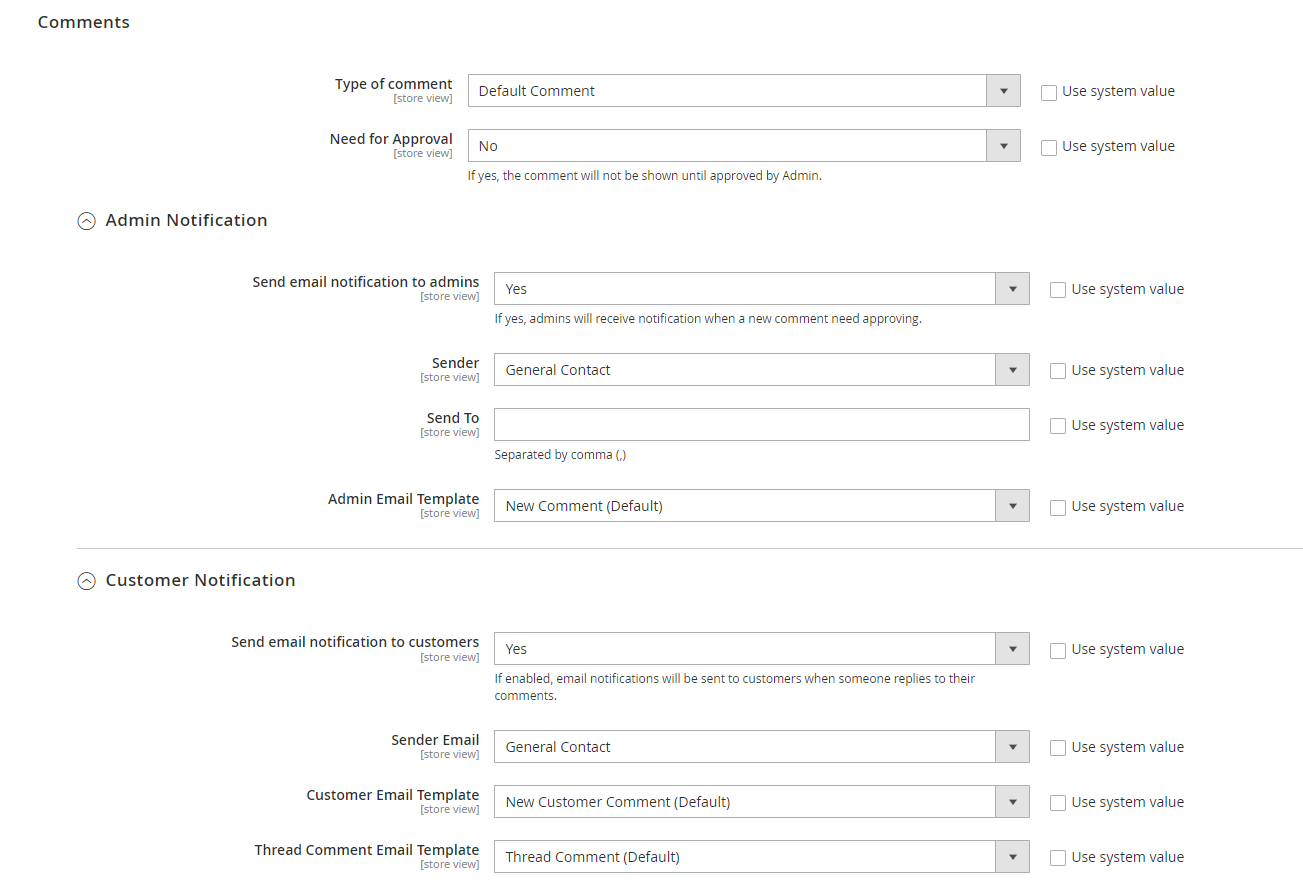
Admin Notification:
- Send email notification to admins: Choose “Yes” to enable the administrator to get email notifications whenever a remark requires approval.
Customer Notification:
- Send email notification to customers: Select “Yes” so that authors will receive email notifications whenever there are new comments on their articles, and consumers will receive notifications when someone responds to their comments.
1.6.2. Disqus Comment:
Admin needs to create a Disqus unique name and fill it in the configuration. This also requires the customer have a Disqus account to be able to comment.

1.6.3. Facebook Comment:
If you choose this type of comment, some add-on fields will display like the below:

In the AppID field: Admins need to create a Facebook App to get the AppID to fill this field. You can refer more in here.
In the Facebook: Number of Comment field: This limits the number of comment displaying on the Post View Page. If you leave it blank, it will show all available comments.
In the Facebook: Color Scheme field: Choose the color which display commenter’s information.
In the Facebook: Order by field: Choose the arrangement for comment displaying.
- Social: The comment which has more like(s) will display from the top.
- Reverse Time: The comment which is published first will display from the bottom.
- Time: The comment which is published first will display from the top.
1.6.4. Disable Completely:
- Choose this type if you don’t want to display comments.
1.7. Social Platforms
1.7.1. Facebook
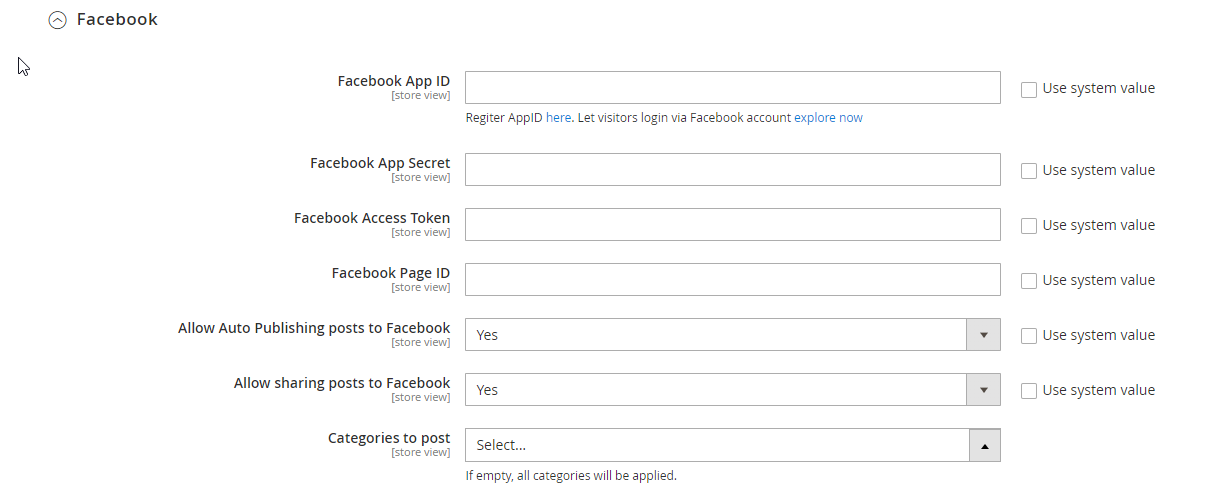
- Click Here for the instructions of generating the Facebook API.
- Allow Auto Publishing posts to Facebook: Select Yes to allow the article to automatically be published on Facebook after being posted on the website
- Allow sharing posts to Facebook: Select Yes to allow customers to share the posts on their Facebook.
- Categories to post: Select Categories containing articles that are automatically published to Facebook.
1.7.2. Twitter
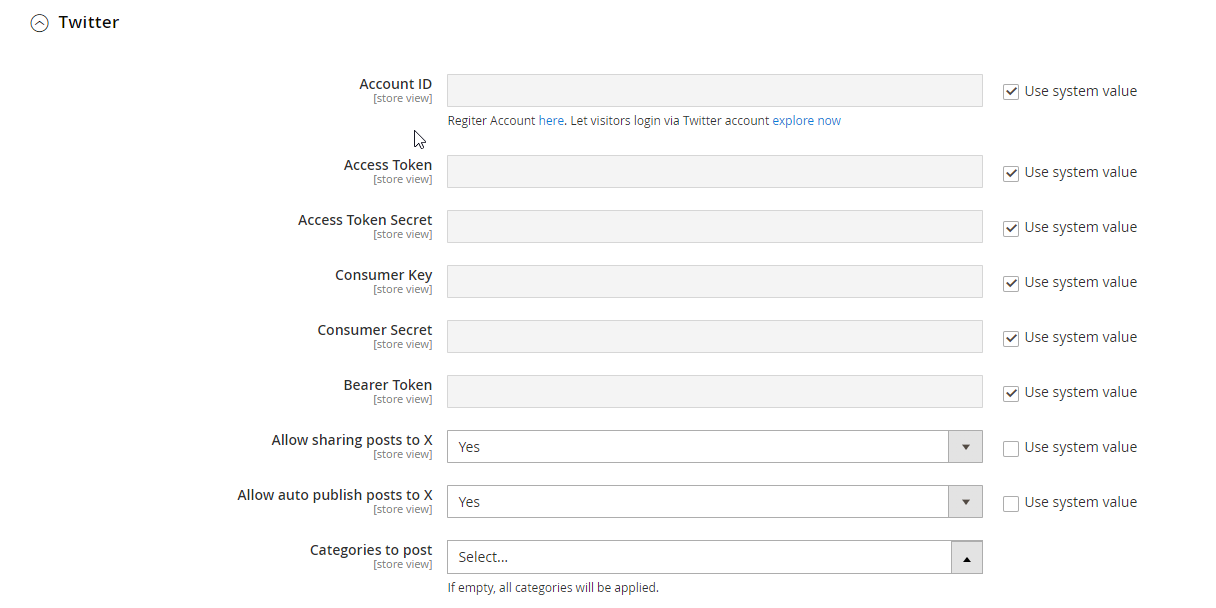
- Click Here for the instruction of generating Twitter API
- Allow sharing posts to X: Select Yes to allow posts to be automatically published on Twitter after being posted on the website
- Allow auto publish posts to X: Select Yes to allow customers to share the posts on their Twitter..
- Categories to post: Select Categories containing articles that are automatically published to Twitter.
1.8. Seo
Open SEO section, there will be 2 additional sub section in this part.
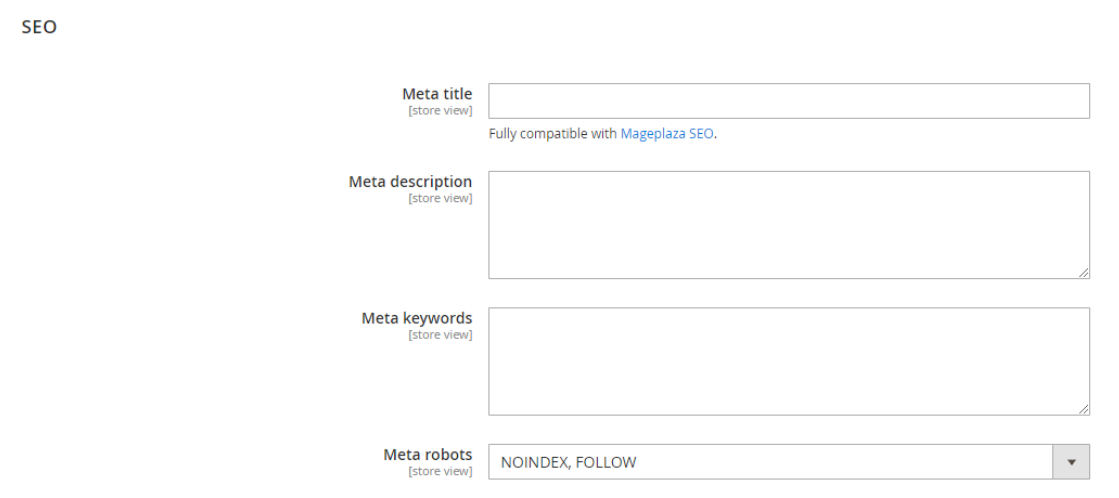
1.8.1. SEO
You can configure the meta that is useful for your better SEO
- Meta Title: Set Meta title for posts list page (Blog Page)
- Meta Description: Set Meta description for posts list page
- Meta Keyword: Set Meta keywords for posts list page
- Meta Robots: Set Meta Robots for posts list page
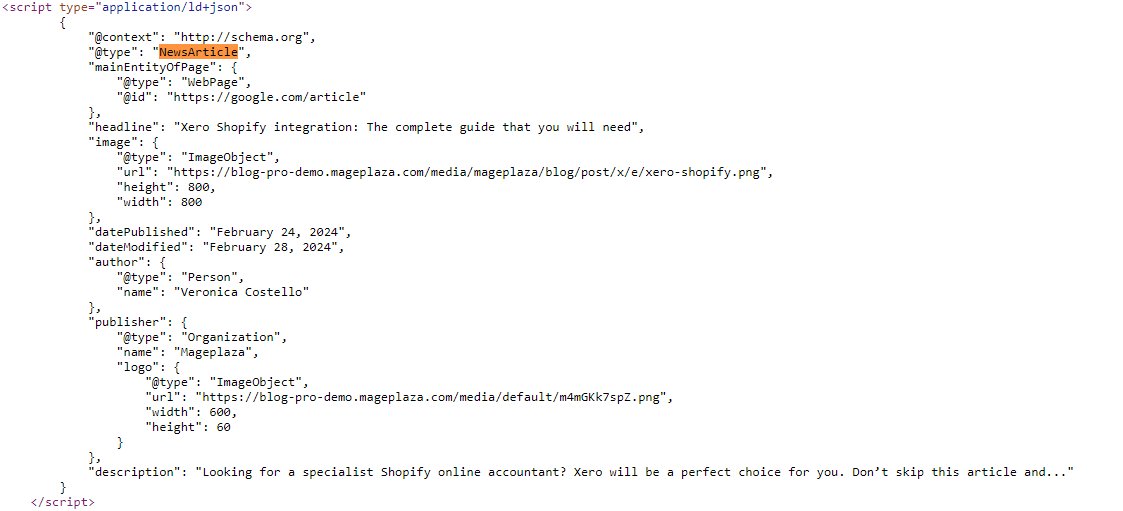
1.8.2. Article Snippet
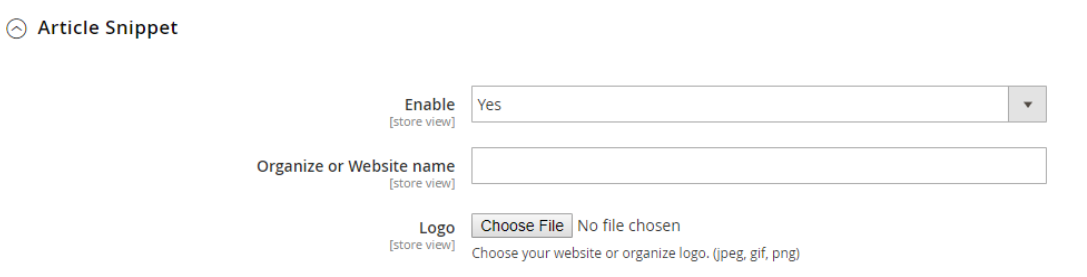
- In the Enable field: Choose “Yes” to enable Article Snippet.
- In the Organize or Website Name field: Enter your organize or website name.
- In the Logo field: Upload your logo.
II. Manage Post
2.1. Create new post
Step 1: Complete the post information
Login to Magento Admin, follow
Content > Better Blog: Manage Posts.On the upper-right corner, tap Add New Posts button
Set Name for the new post
Select author for the post. This is a required field.
To display the new post, choose “Enable” in the Status field
Enter Short Description if it’s necessary.
Use WYSIWYG Mode to insert the post content that allows showing right as on the frontend. If you want to show the content under code, tap Show/Hide Editor button.
Choose the Store View where you want to display the post.
Upload image from your browser in the Image option.
Choose Topic, Tag, Category for the post. Also, you can create a new Topic, Tag, Sub Category in this section.
Choose In RSS = Yes to display the post information in the file rss.xml
To allow the readers leave comments on your post, choose “Yes” in the Allow Comment field (Make sure that in the 1.5. Comments, the comment type IS NOT *Disable Completely**)
Publish Date: Configure the displaying of the post date
Enter the URL Key that the visitor can access the blog post
Complete Meta Title, Meta Description, and Meta Keywords for your better SEO.
Set Meta Robots to one of the following options:
- Index, Follow
- NoIndex, NoFollow
- NoIndex, Follow
- Index, NoFollow
Set the layout for posts based on 5 following options:
- Empty
- 1 column
- 2 columns with left bar
- 2 columns with right bar
- 3 columns
- Tap
Save and Continue Editat the header
Step 2: Assign Products to the post
- You can do it when you create a new post in the Products tab, or go to Posts tab
- In the list of the available posts, mark the checkbox that is next to the products you want to assign
Tap Save and Continue Edit, then hit Save Post to finish.
Edit History Tab: When performing Edit Post then Save as Draft/Save & add History, the data for that edit will be saved as a record on the Edit History tab.
Save as Draft: Post data will be saved as a draft on the Edit History tab
Save & add History: the post's data is saved, the post is displayed in the frontend according to the saved data.
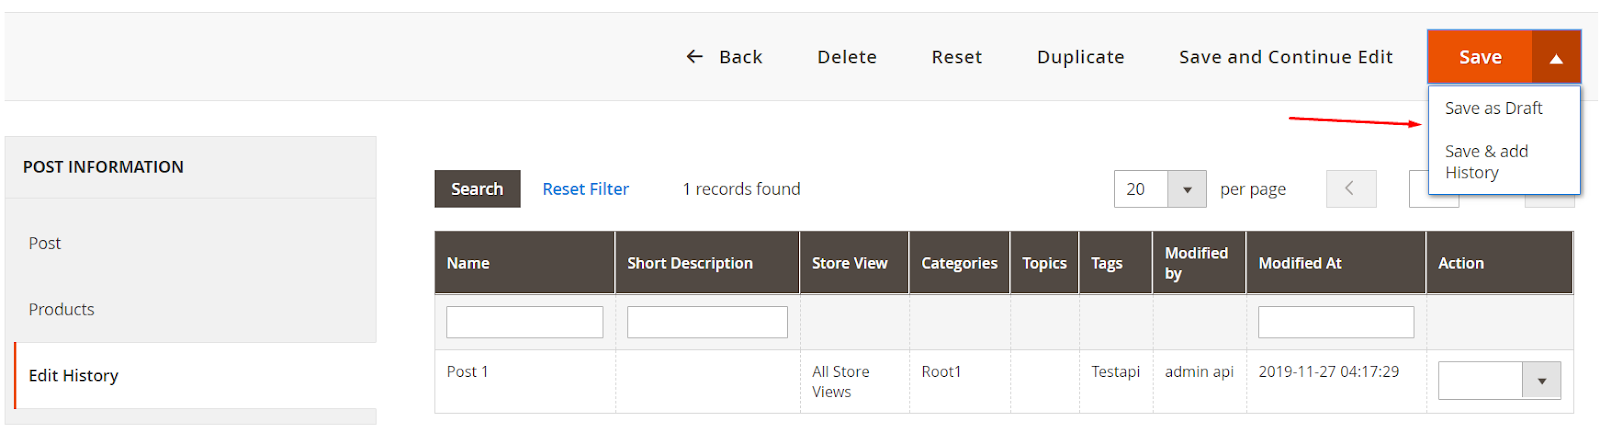
- Grid Edit History: includes information: Name, Short Description, Store View, Categories, Topics, Tags, Modified by, Modified At and some Action such as Edit, Preview, Restore, Delete
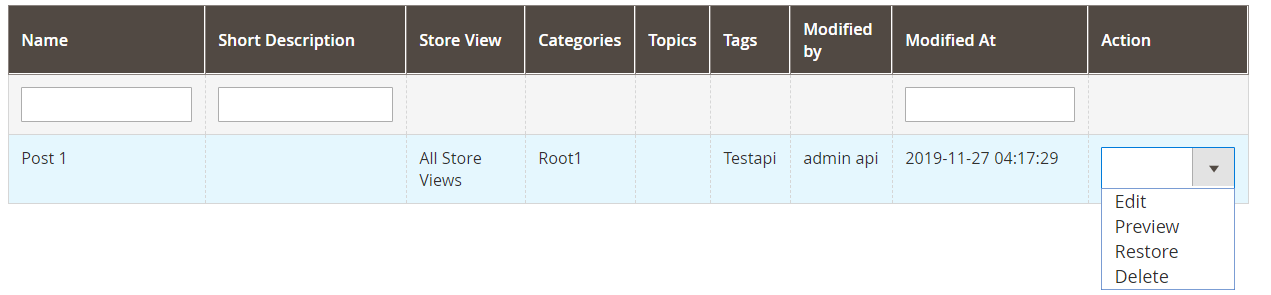
- Action = Edit: You can edit information for each post
2.2. Duplicate Post
- With Mageplaza Better Blog extension, you can duplicate the available post to create the new one.
- Login to Magento Admin > Content > Better Blog > Manage Posts, click Edit to the post you want to duplicate

- At detailed post page, click Duplicate on menu tab, a new post will be created which is the same as the previous one. Admins can modify the post information and content.
III. Create New Tag
- Login to Magento Admin, follow
Mageplaza > Better Blog: Manage Tags
To active the new tag, set Status to “Yes”
Set Name for the new tag
Choose Store View where you want to display tags
Enter the URL Key that the visitor can access the tag
Complete Meta Title, Meta Description, and Meta Keywords for your better SEO.
Set Meta Robots to one of the following option:
- Index, Follow
- NoIndex, NoFollow
- NoIndex, Follow
- Index, NoFollow
- If necessary, you can assign the new tag to a specific post.
- Click on
Save Tagwhen complete.
IV. Create New Topic
Login to Magento Admin, follow
Content > Better Blog: Manage TopicsTo active the new topic, set Status to “Enable”
Set Name for the new topic
Enter Description if you need
Choose Store View where you want to display the topic
Enter the URL Key that the visitor can access the topic
Complete Meta Title, Meta Description,and Meta Keywords for your better SEO.
Set Meta Robots to one of the following options:
- Index, Follow
- NoIndex, NoFollow
- NoIndex, Follow
- Index, NoFollow
- If necessary, you can assign the new topic to a specific post.
- Click on
Save Topicwhen complete.
V. Category
5.1. Create new category
Login to Magento Admin, follow
Content > Better Blog: CategoriesTo active the new category, set Status to "enable"
Set Name for the new topic
Choose Store View where you want to display the category
Enter the URL Key that the visitor can access the category
Complete Meta Title, Meta Description,and Meta Keywords for your better SEO.
Set Meta Robots to one of the following options:
- Index, Follow
- NoIndex, NoFollow
- NoIndex, Follow
- Index, NoFollow
- If necessary, you can assign the new category to a specific post.
- Click on
Save Categorywhen complete.
5.2. Duplicate Category
- With Mageplaza Better Blog extension, you can duplicate the available category to create the new one.
- Login to Magento Admin > Content > Better Blog > Categories, choose category you want to duplicate. Choose Duplicate at menu tab.
- A new category is created. You can modify it's information.
VI. Manage Authors
- Login to Magento Admin,
Content > Better Blog > Manage Authors
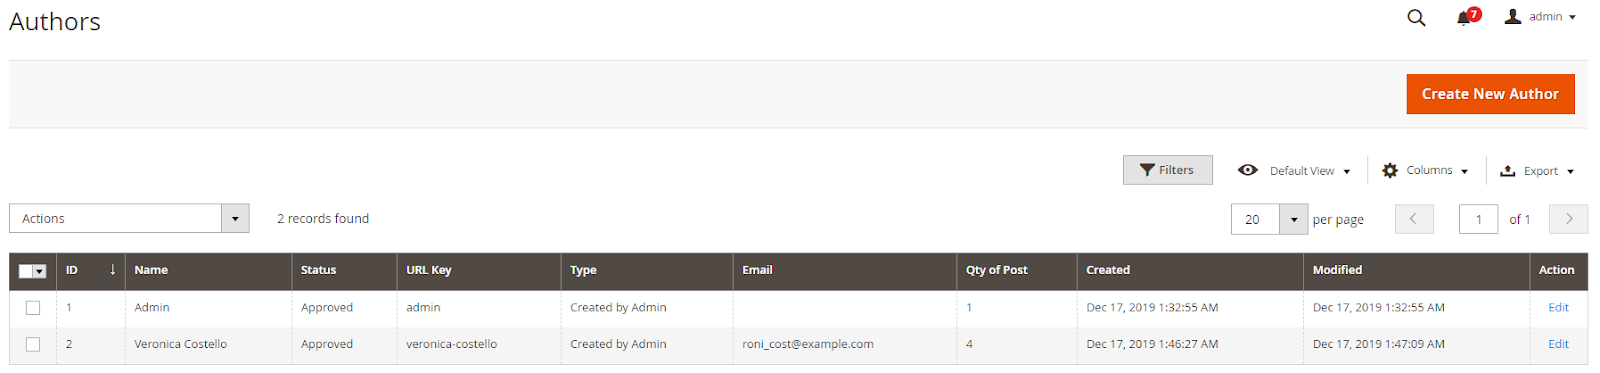
6.1. Create New Author
Login to Magento Admin,
Content > Better Blog > Manage Authors > click the Create New Author buttonAuthor Info Tab:
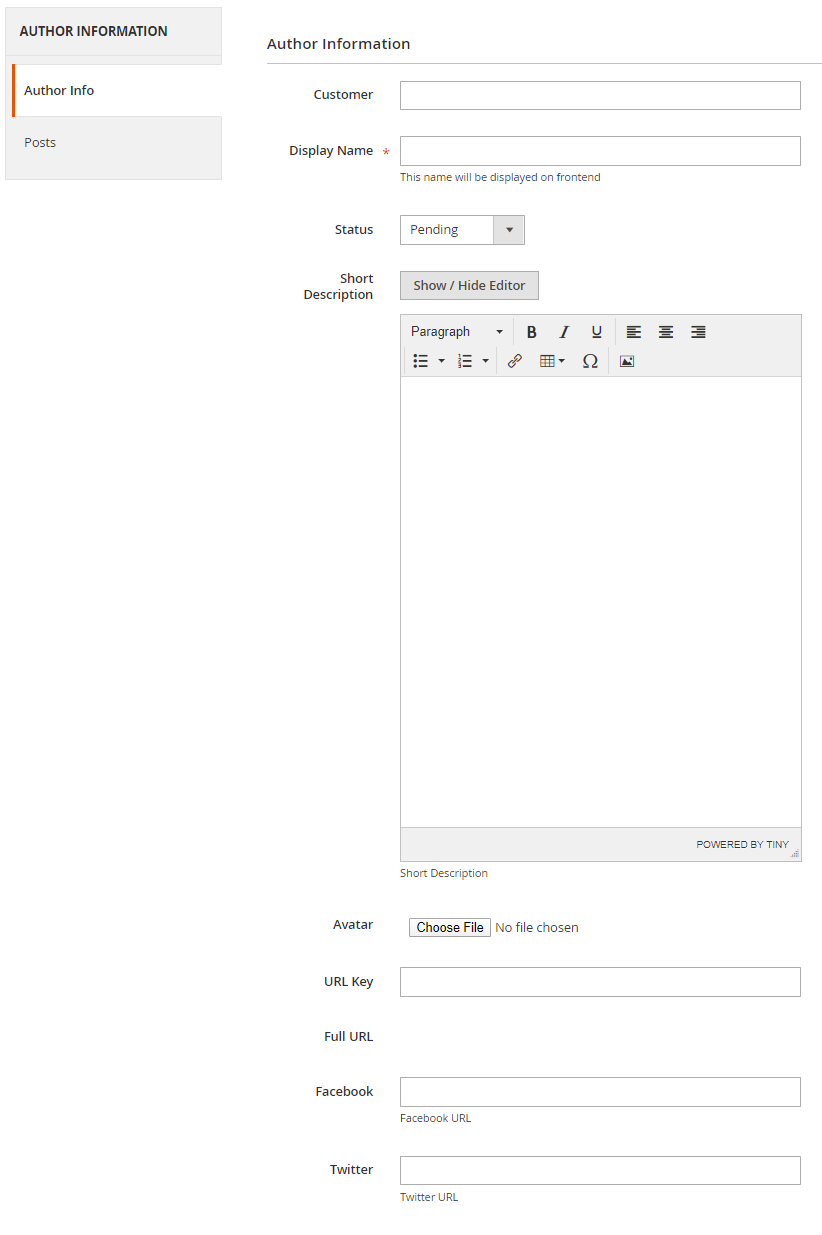
- Customer: Select customer as author
- Display Name: This name will be displayed on frontend. This is a required field
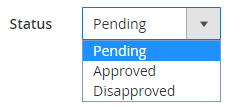
- Status: Author's status, there are 3 author's status: Pending, Approved and Disapproved
Enter Short Description if you need to
Upload image from your browser in the Avatar option.
Enter the URL Key that the visitor can access the list post of author
Full URL: after saving here will display the full URL link to access the list of author posts
Enter Facebook link and Twitter if you want
Post tab: grid of author posts

VII. Manage Comments
- Only being able to manage Default Comment when choosing "Yes"" at Need for Approval field at the
Content/Better Blog//Configuration/Comment - When choosing "No", the status of the default comment is Approved and it will display as soon as customers comment.
- After the customer comments a post, the comment will be sent to the admin with the status
Pending. - The comment is displayed if the admin switches the comment status into
Approve, and in vice versa result if Status isSpamorPending.
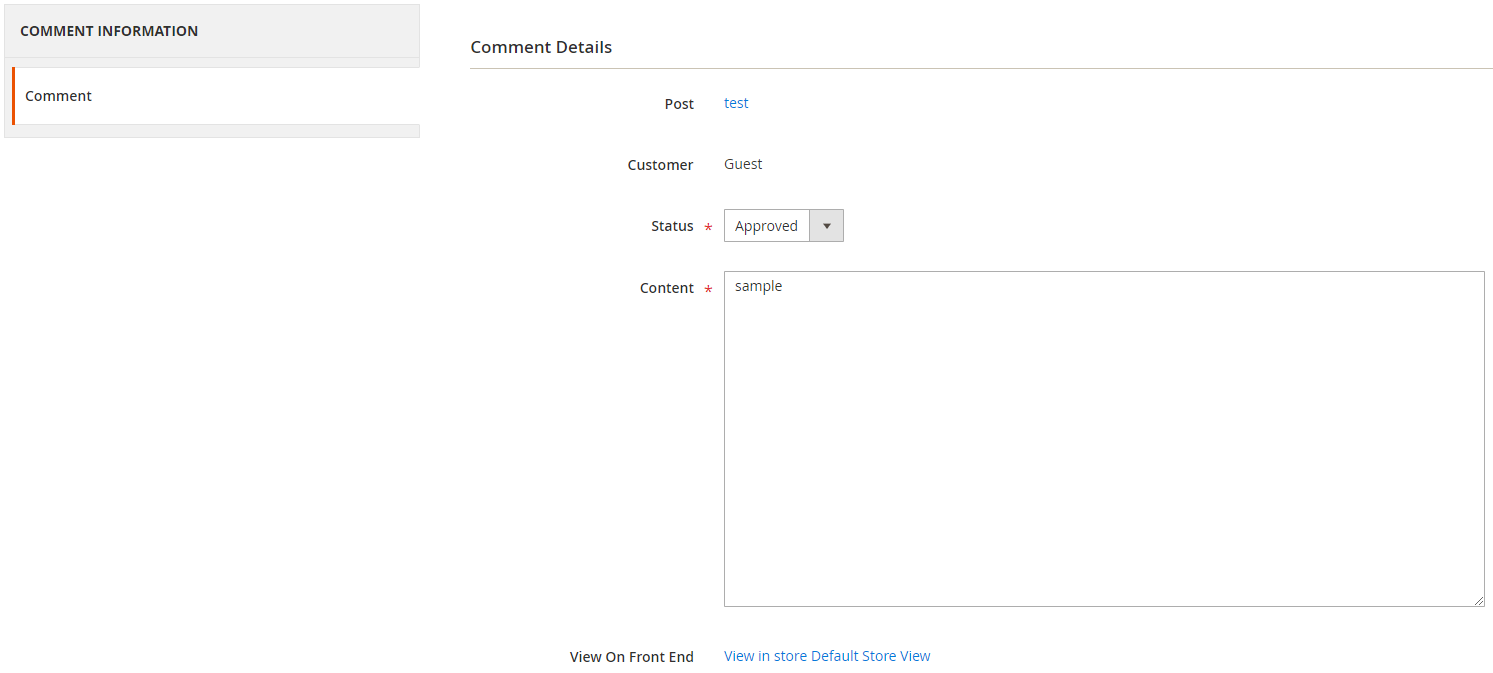
when editing a comment, admin need to note as the following:
- Post: The post title which is linked to Edit Post of Manage Post in the backend.
- Customer: The commenter, who is linked to Edit Customer in the backend
- Status: Admins only need to select Status = Approved to allow those comments showing in the frontend.
- Content: Admins can edit the content of the comment at this field. The comment at the frontend will change as the backend. In the comment management grid, admins only see up to 150 characters of the content.
- View on Frontend: link of the post on the frontend.
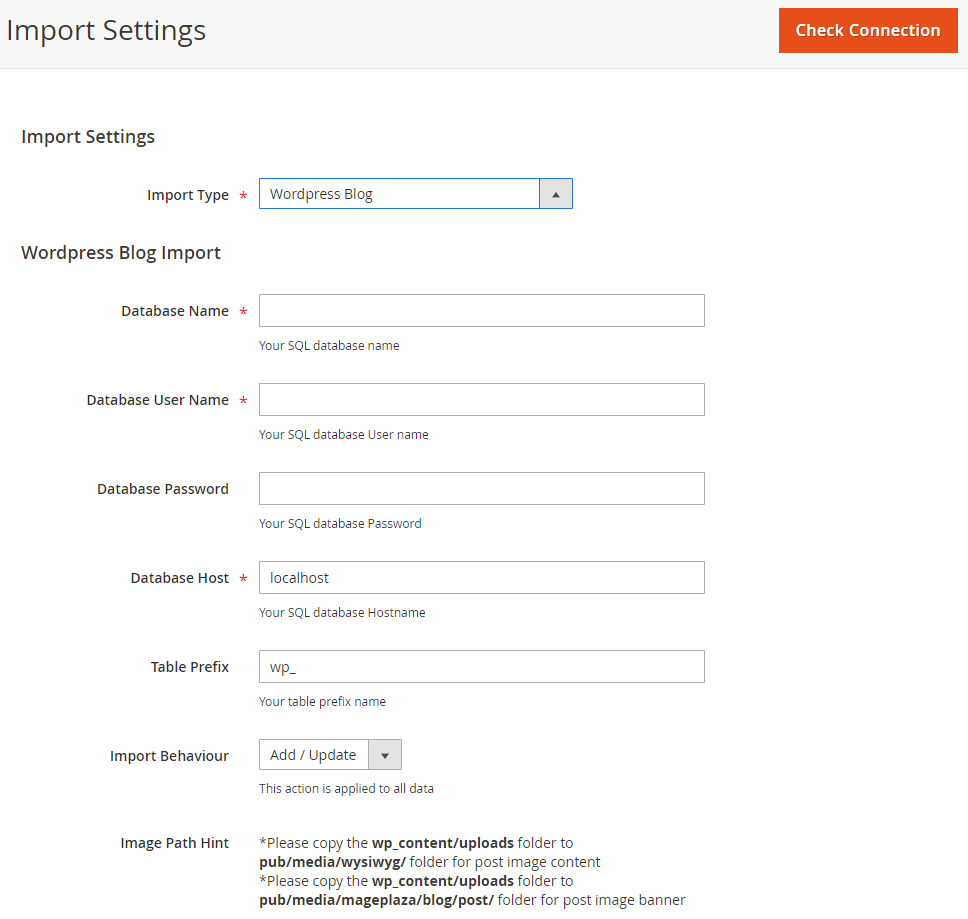
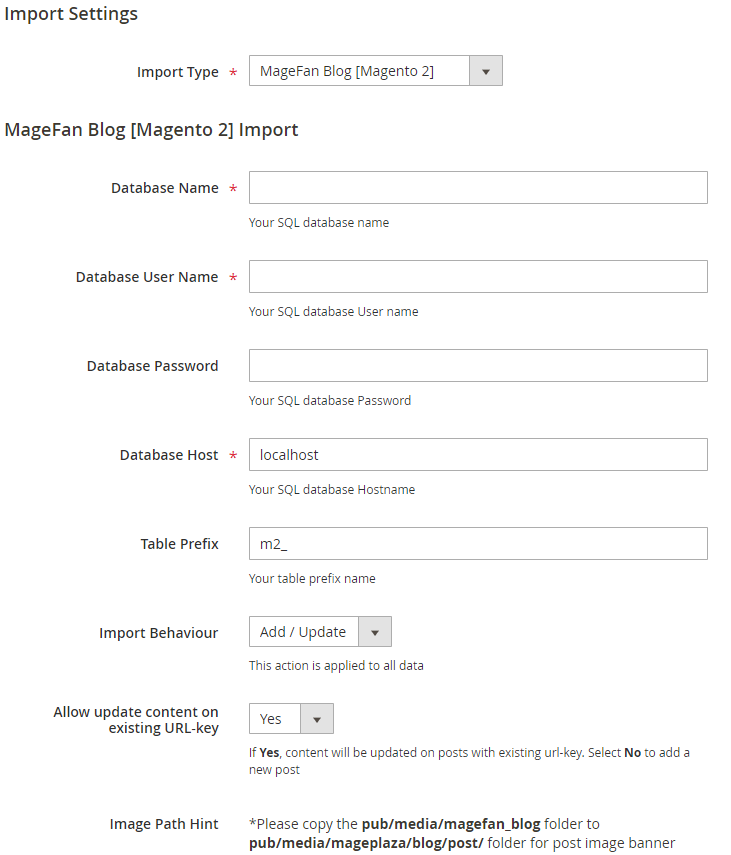
VIII. Import
- Login to the Magento Admin, choose
Content > better Blog > Import - Choose import source is "Wordpress" or "AheadWork Blog extension" [Magento 1] or "MageFan Blog" [Magento 2]
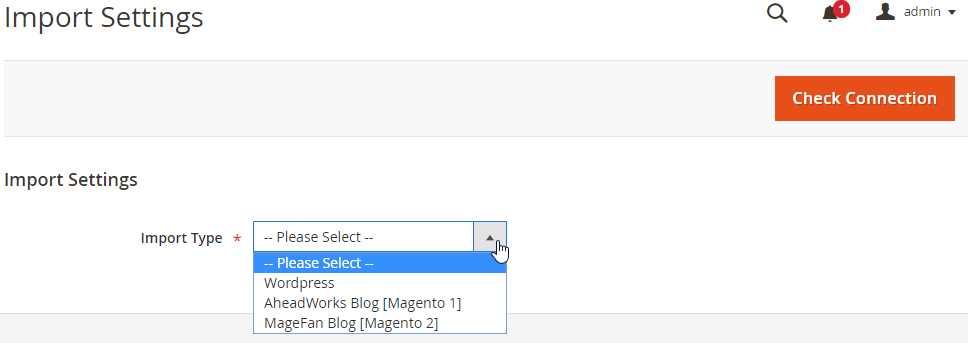
- Wordpress
- AheadWork Blog extension [Magento 1]

- MageFan Blog [Magento 2]
- How to import in details can be found here
IX. Create new Widget
Widget is an awesome functionality you can insert to the CMS page from Magento 2 Configuration because it can be considered as a predefined set of configuration options. In the widget, you can add links that navigate directly to any content page, category, or product as you need.
In Magento 2 Better Blog extension, you can add a widget in which shows Related blog posts, Lastest blog post, etc. Follow this instruction to learn how to create a new widget to enrich your content immdiately.
Choose the page you want to add a new widget by following
Mageplaza > Better Blog: Post. You can add the widget by two methods- Option 1: Click on the widget icon in the Content’s edit
- Option 2: Switch the content’ mode into HTML mode, then choose Insert widget
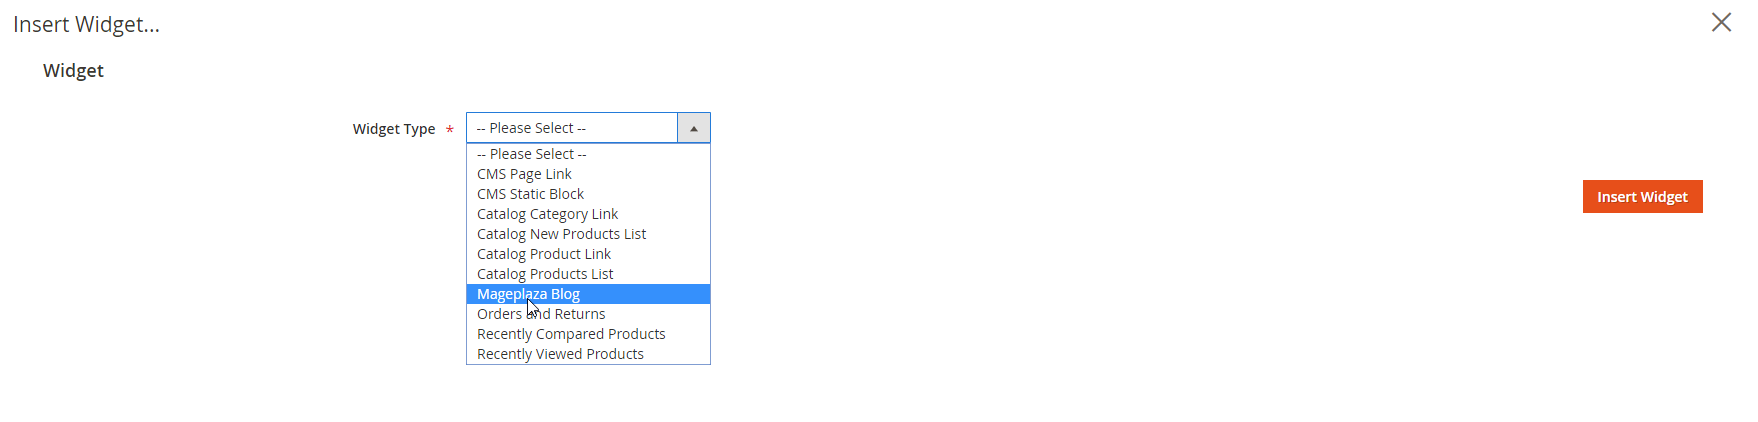
- Choose the widget’s type: We created an available blog widget. In Widget Type, choose
Mageplaza Blogto use this widget for adding posts in the content of any optional pages.
- Setup the widget: in the Insert widget… information:
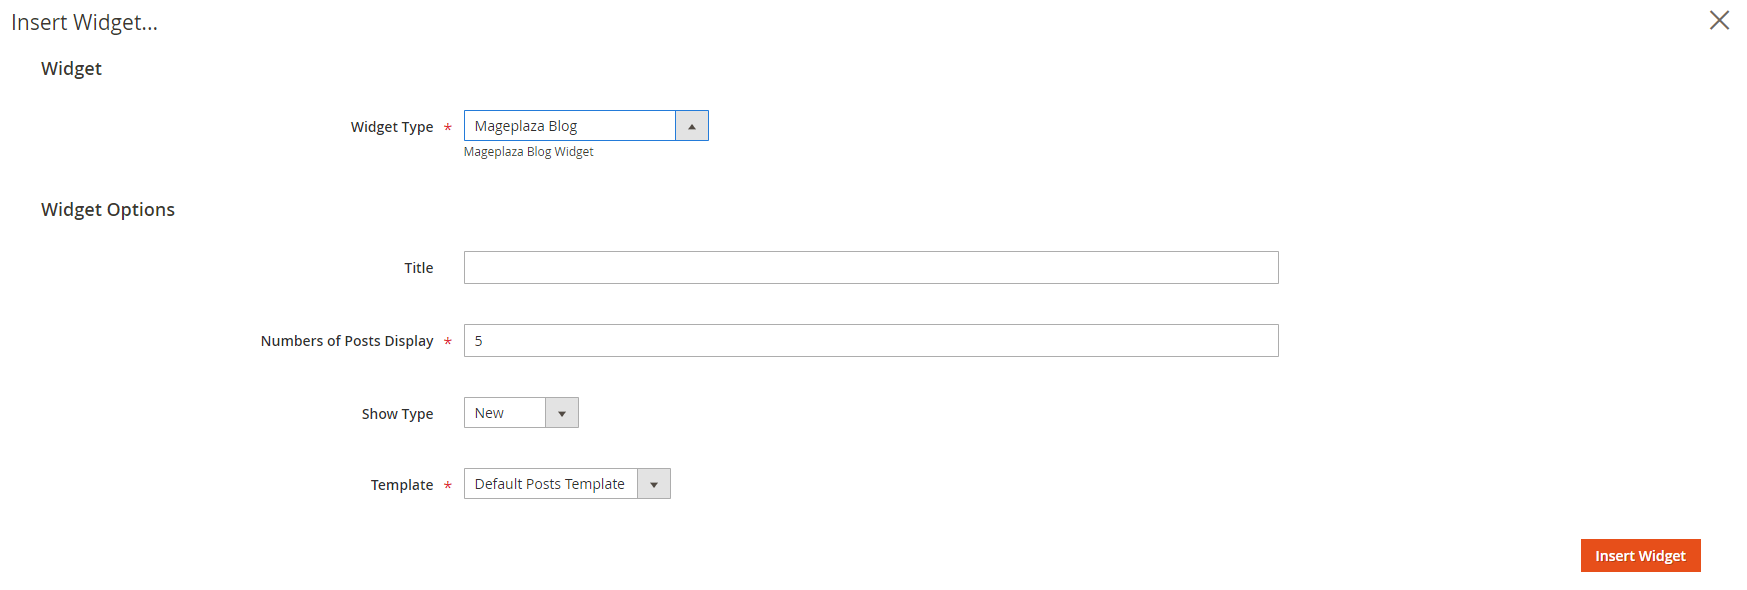
In the Tittle field:
- Choose the widget’s tittle you want to display it in the frontend
- This title will be inserted an internal link to your blog post
- If you leave it blank, the widget won’t have a title.
In the Number of Post Display field:
- This is the field where you can limit the number of post in the widget
- The default number is 5.
- If you leave it blank, there will be an error message.
In the Show Type field, there’re two options:
New type: The newest posts will be displayed in the widget. The number of newest posts won’t exceed the entered number in Number of Post Display
Category type:
- The Category ID will be expanded when you choose this option, then enter the Category ID you want to display in the blog.
- The default number is 2.
- You have to ensure that the Category you entered is valid. If it isn’t, there will be an error message at the frontend.
- You can check the Category ID in
Mageplaza > Bettter Blog: Categoriesclick the Category name to see its ID.

In the Template field:
- We created a new default template and this is the only one you can use.
- If you want to create a new template, please contact with our Support Department by submit a ticket to https://www.mageplaza.com/contact.html or via the email support@mageplaza.com <support@mageplaza.com
Finally, click
Insert widgetbutton to add the widget into the content.Don’t forget to click the
Savebutton at the top of the backend.Check the frontend to see the final result.

X. API
- Mageplaza's Blog Extension supports the use of REST APIs for Post, Categories, Tags, Topic, Author, Comment, Likes
- Details see more here
- Instructions for creating tokens see here
XI. GraphQL
11.1. How to install
Run the following command in Magento 2 root folder:
composer require mageplaza/module-blog-graphql
php bin/magento setup:upgrade
php bin/magento setup: static-content:deploy
11.2. How to use
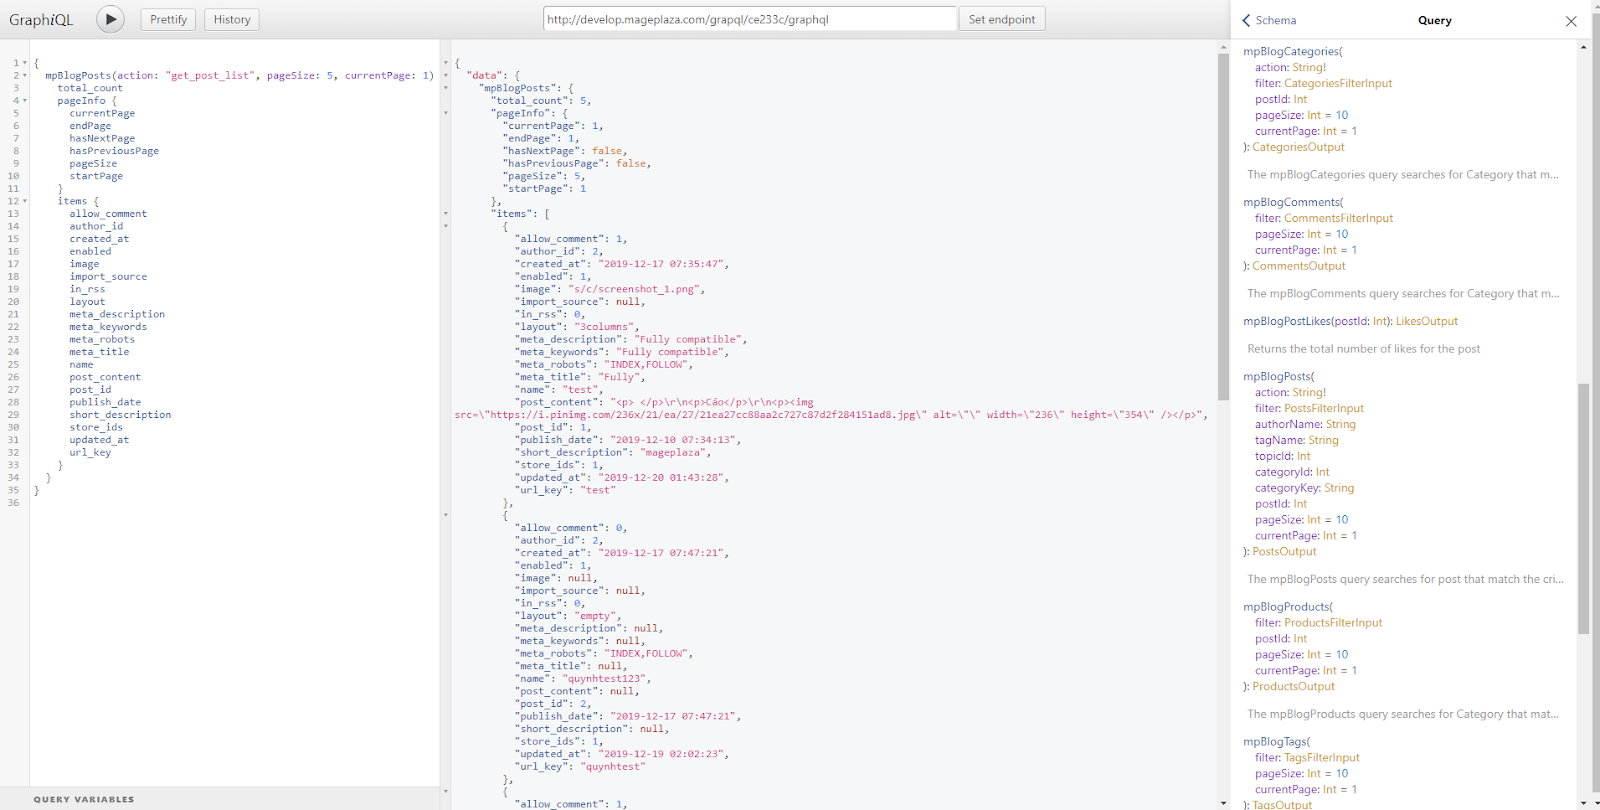
To perform GraphQL queries in Magento, the following requirements are required:
Install the ChromeiQL extension for the Chrome browser (currently does not support other browsers)
Use Magento 2.3.x. Return your site to developer mode
Set GraphQL endpoint as
http://<magento2-3-server>/graphqlin url box, click Set endpoint. (e.g. http://develop.mageplaza.com/graphql/ce232/graphql)Perform a query in the left pane, click the Run button or Ctrl + Enter to see the result in the right cell
To view the queries that the Mageplaza Blog GraphQL extension supports, you can look in
Docs > Queryin the right corner
- See Mageplaza supported GraphQL requests here
XII. Author in Frontend
12.1. Sign up for author
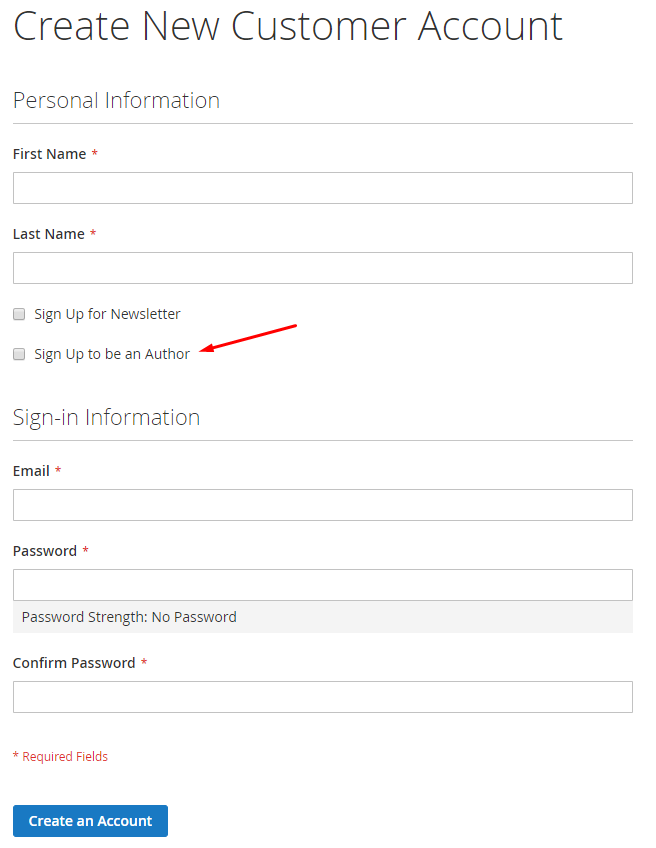
Method 1: Sign up for an author when Create New Customer Account
Tick Sign up to be an Author, then click Save
Go to My account > My Better Blog to view registered author information, which can change your author information
Method 2: Sign up for an author when you have a customer account
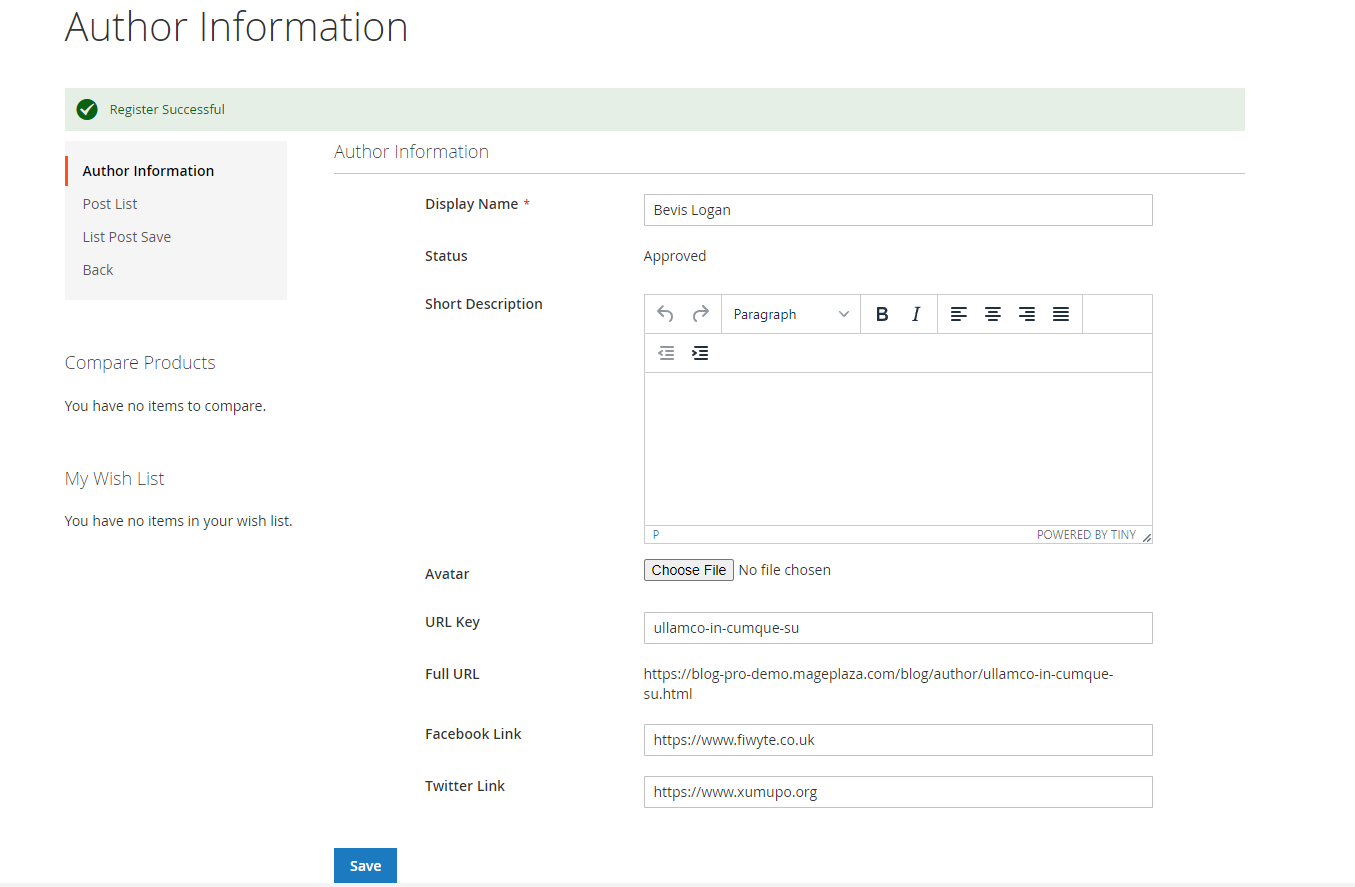
- Go to My account > My Better Blog, here you will see the Signup Author, complete the fields in the registration form then click Submit button to complete the registration

- Display Name: the author's name is displayed in the frontend, this is a required field
- Short Description: short description for author
- Avatar: choose a picture to represent the author
- URL Key: Enter the URL Key that the visitor can access the list post of author
- Full URL: This will display the full URL link to access the list of author posts
- Enter Facebook Link and Twitter Link if you want
12.2. Create New Post
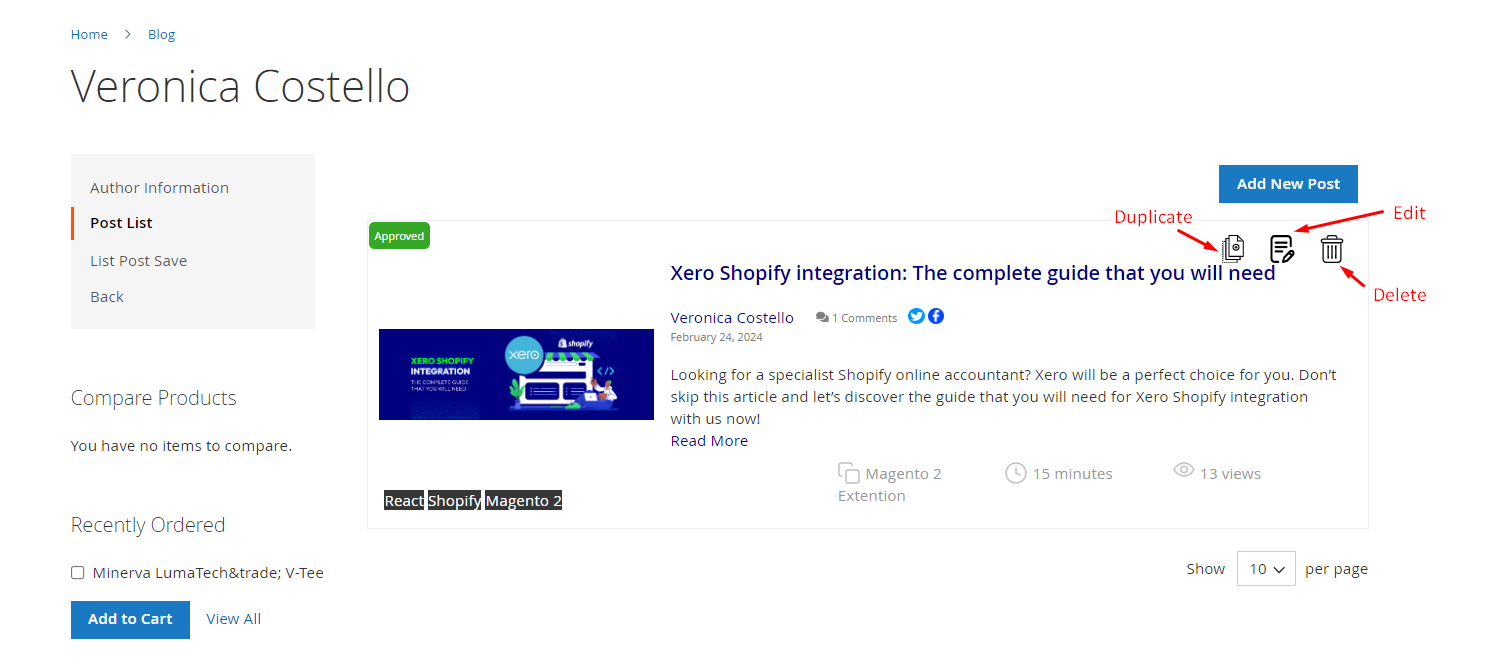
Go to My account > My Better Blog > Post List > click Add New Post button
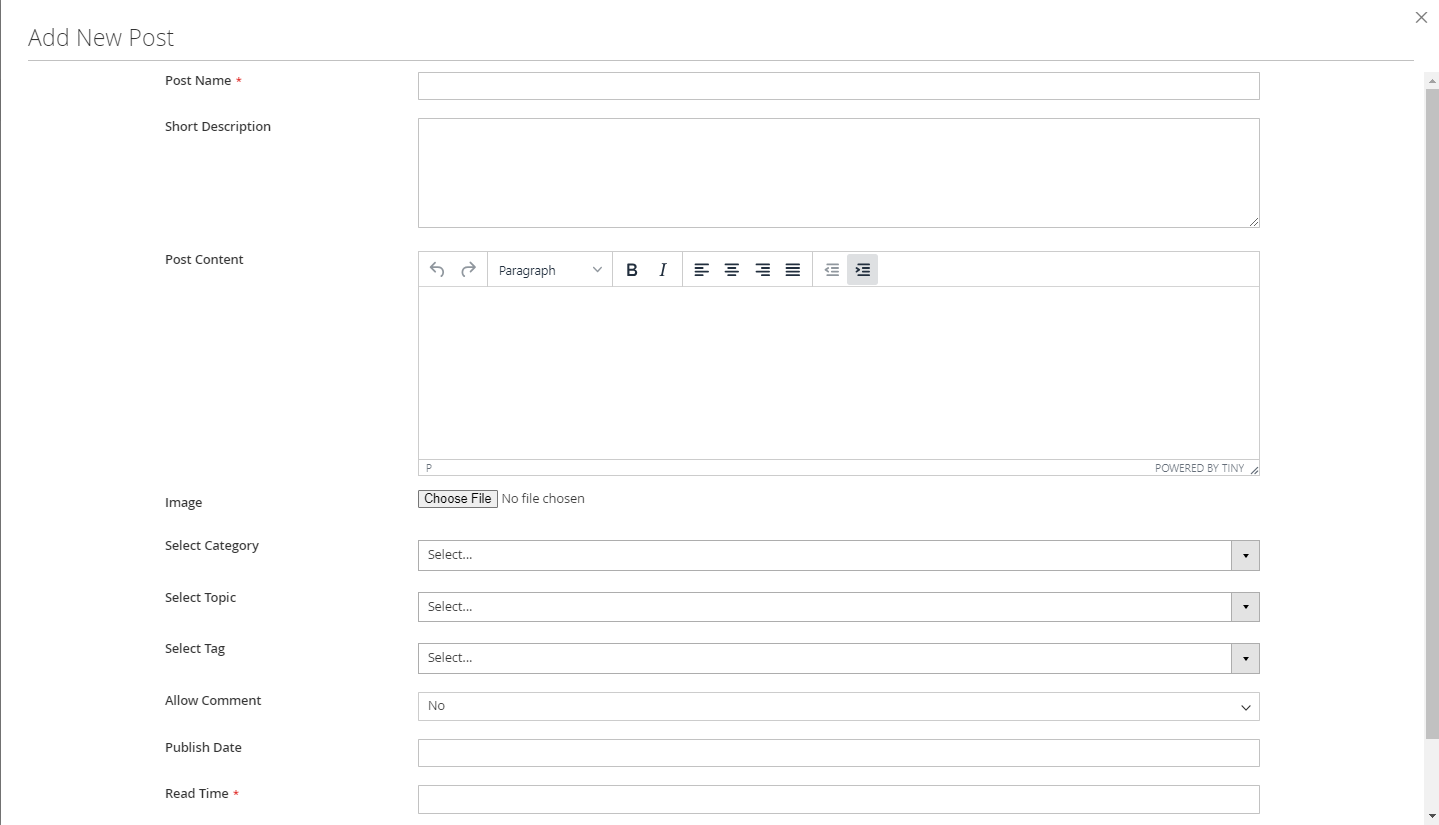
- Post Name: The name of the post, this is a required field
- Short Description: short description for the post
- Post Content: post content
- Image: Insert image for post
- Select Category: select category for post, can select multiple categories
- Select Topic: select the topic assigned to the post, can select multiple topics
- Select Tag: select the tag assigned to the post, can select multiple tags
- Allow Comment: Choose "Yes" to allow comments for the post
- Publish Date: Select the date for publishing the post
- Read Time:. Add the amount of time needed to read a complete article.
After creating the post, the author can Duplicate/ Edit/ Delete post