Layered Navigation Ultimate
Overview
Mageplaza Layered Navigation Extension for Magento 2
Enhance your online store's filtering system with Mageplaza Magento 2 Layered Navigation. This extension allows customers to quickly find desired products using attributes like color, size, and price. The integration of Ajax technology ensures search results are displayed instantly without reloading the page, leading to faster buying decisions and potentially higher conversion rates.
For detailed instructions on using and configuring Layered Navigation, refer to our comprehensive User Guide.
Outstanding features
| PRO | Outstanding Feature | Description |
|---|---|---|
| 1 | Improve Search Experience | Multiple Filter Selection: Allows customers to refine their search by applying multiple filters simultaneously, narrowing down product selections quickly. Ajax Search: Update filters instantly without reloading the page, providing a smooth search experience. Quick Lookup Options: Display a search box to filter options, helping customers have a more intuitive browsing experience. Filter by State & Rating: Allows customers to refine searches by product availability in specific regions and filter based on customer reviews. |
| 2 | Interface Improvement Features | Display Product Quantities: Displays the number of products associated with each filter option, helping customers evaluate the variety of choices. Arrange Product Display Position: Controls how filtered products are displayed on the page, allowing customization based on your preferences. Highlight Selected Option: Instantly see which filters are currently applied, helping shoppers clearly understand what is influencing their search results. |
| 3 | User Interface Improvement Features | Smart Price Slider: Allow shoppers to choose any price with the slider, instead of being limited to preset options. Scroll to Top: After applying filters, the page will automatically scroll back to the top, helping customers save time. Supports 6 Slider Types: Provides a variety of slider types: Default, Flat UI, HTML5, Modern, Nice White, Simple Dark, improving user experience. Vertical & Horizontal Navigation: Allows store owners to choose the layout that best suits the store design and customer preferences. |
| 4 | Filter Management Feature | Show/Hide Filter Attributes for a Specific Category: Allows store owners to adjust filtering options for each category. For example, you can hide the "Color" filter for categories containing only monochrome products, keeping navigation focused and relevant to that section of your store. Include Shop By Brand: Facilitates brand-specific searches. Customers easily refine their search and find products from their favorite brands right in the navigation. |
Installation Guide
We offer two methods for installing our plugins: the Copy & Paste method and the Composer method. Please follow the detailed instructions provided below.
Method 1: Installation via Copy & Paste
To install our plugins using the Copy & Paste method, kindly follow the instructions at the link below:
How to Install Magento 2 Extension via Copy & Paste
Method 2: Installation via Composer
Composer name: mageplaza/layered-navigation-m2-pro
To install our extensions using Composer, please refer to the comprehensive guide at the link below:
How to Install Magento Extension via Composer
By following these guides, you can ensure that the installation process is handled correctly, allowing you to fully utilize the features and benefits of our plugins.
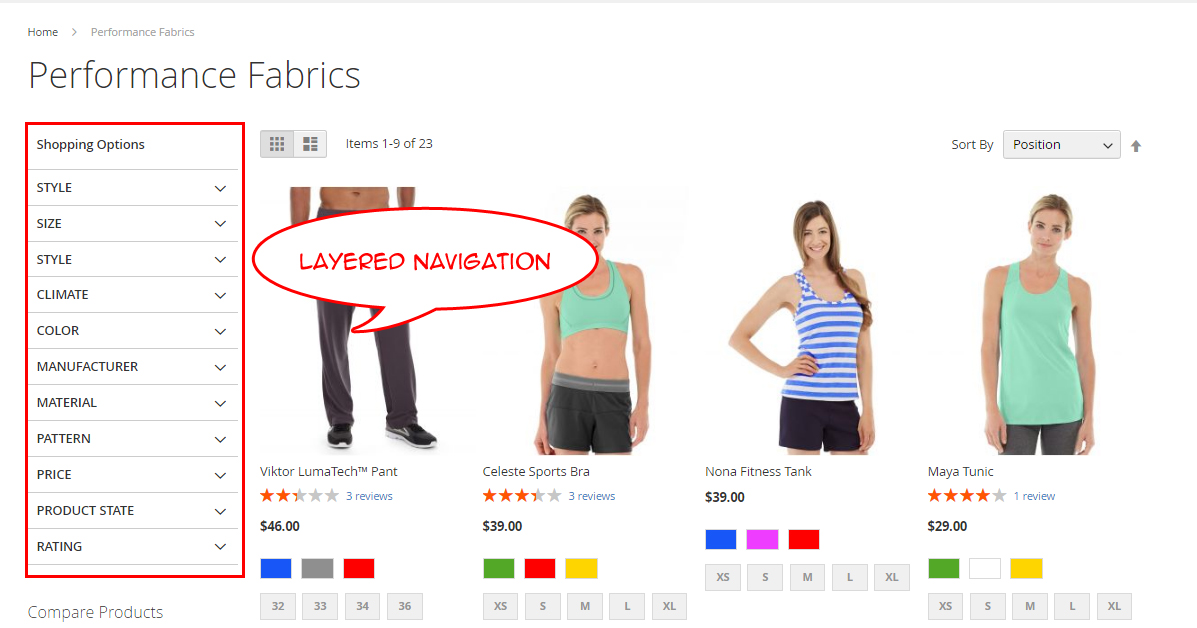
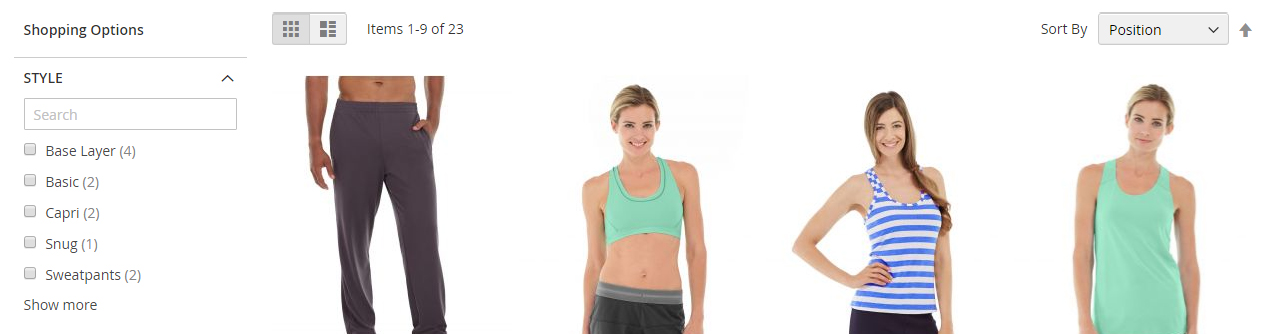
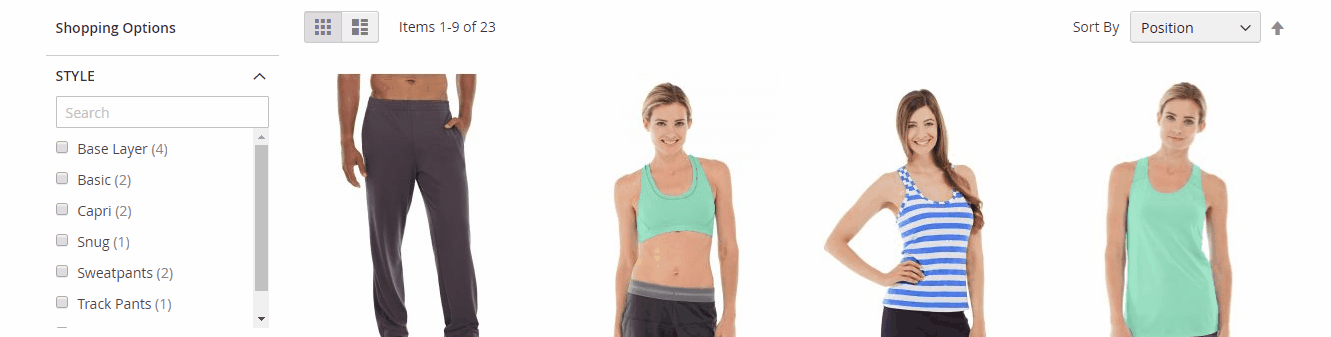
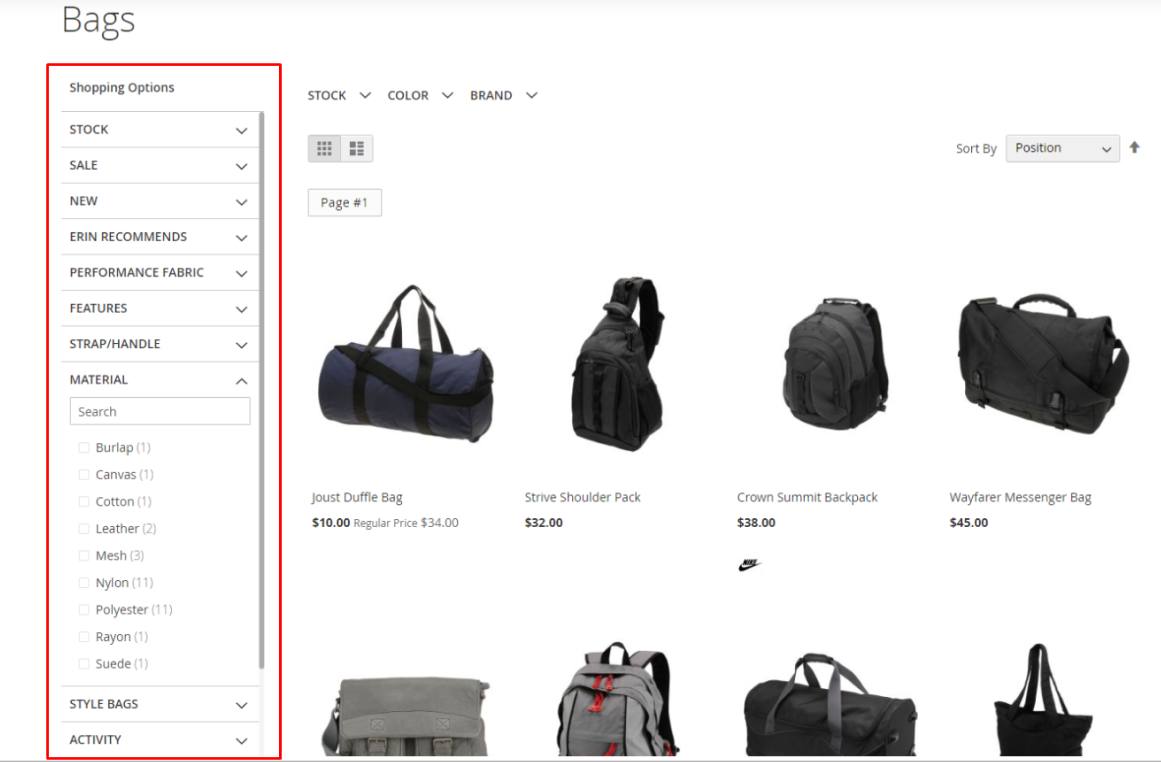
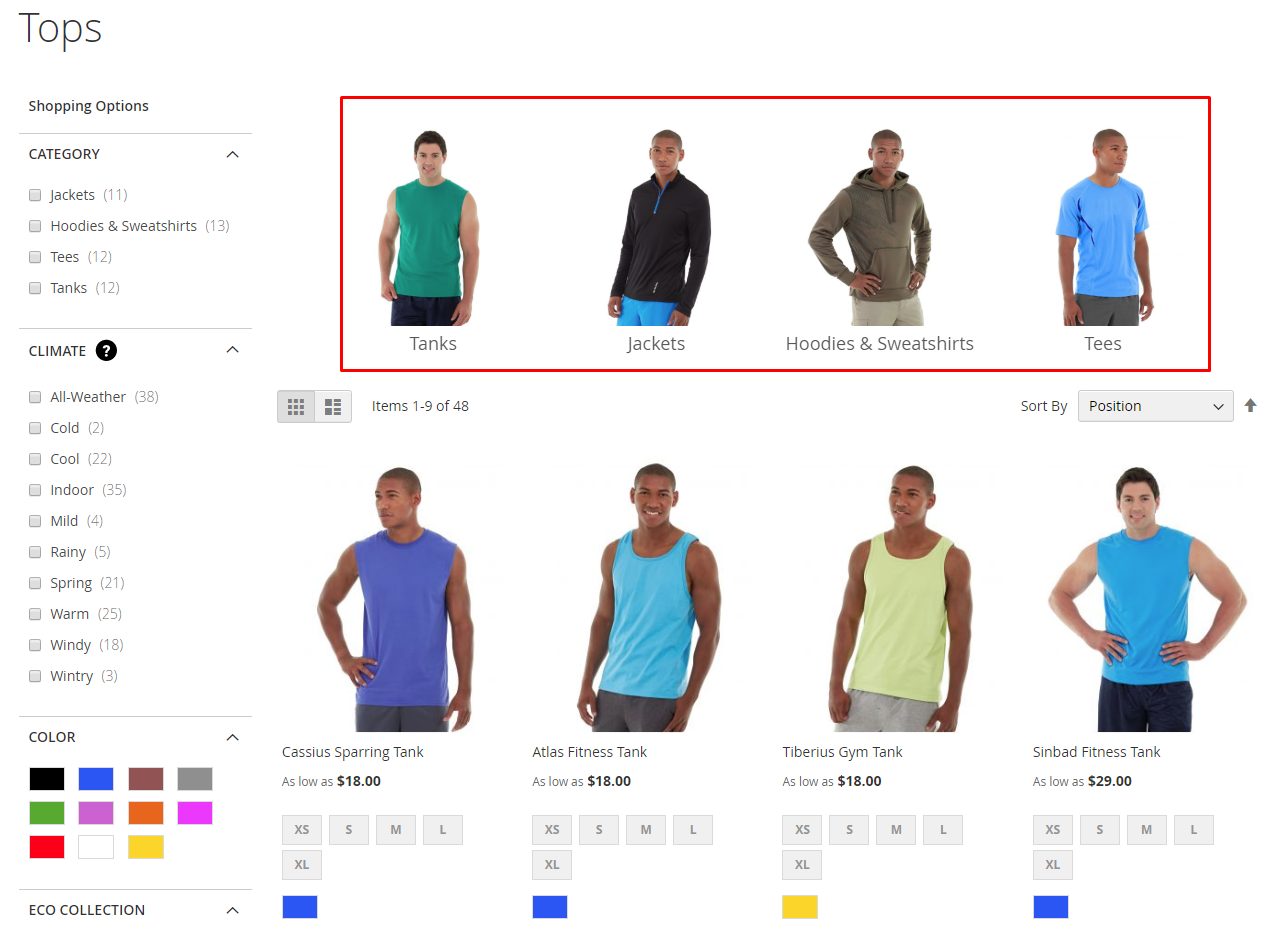
After enabling the module, the Layered Navigation will be displayed on the left sidebar on Categories pages.
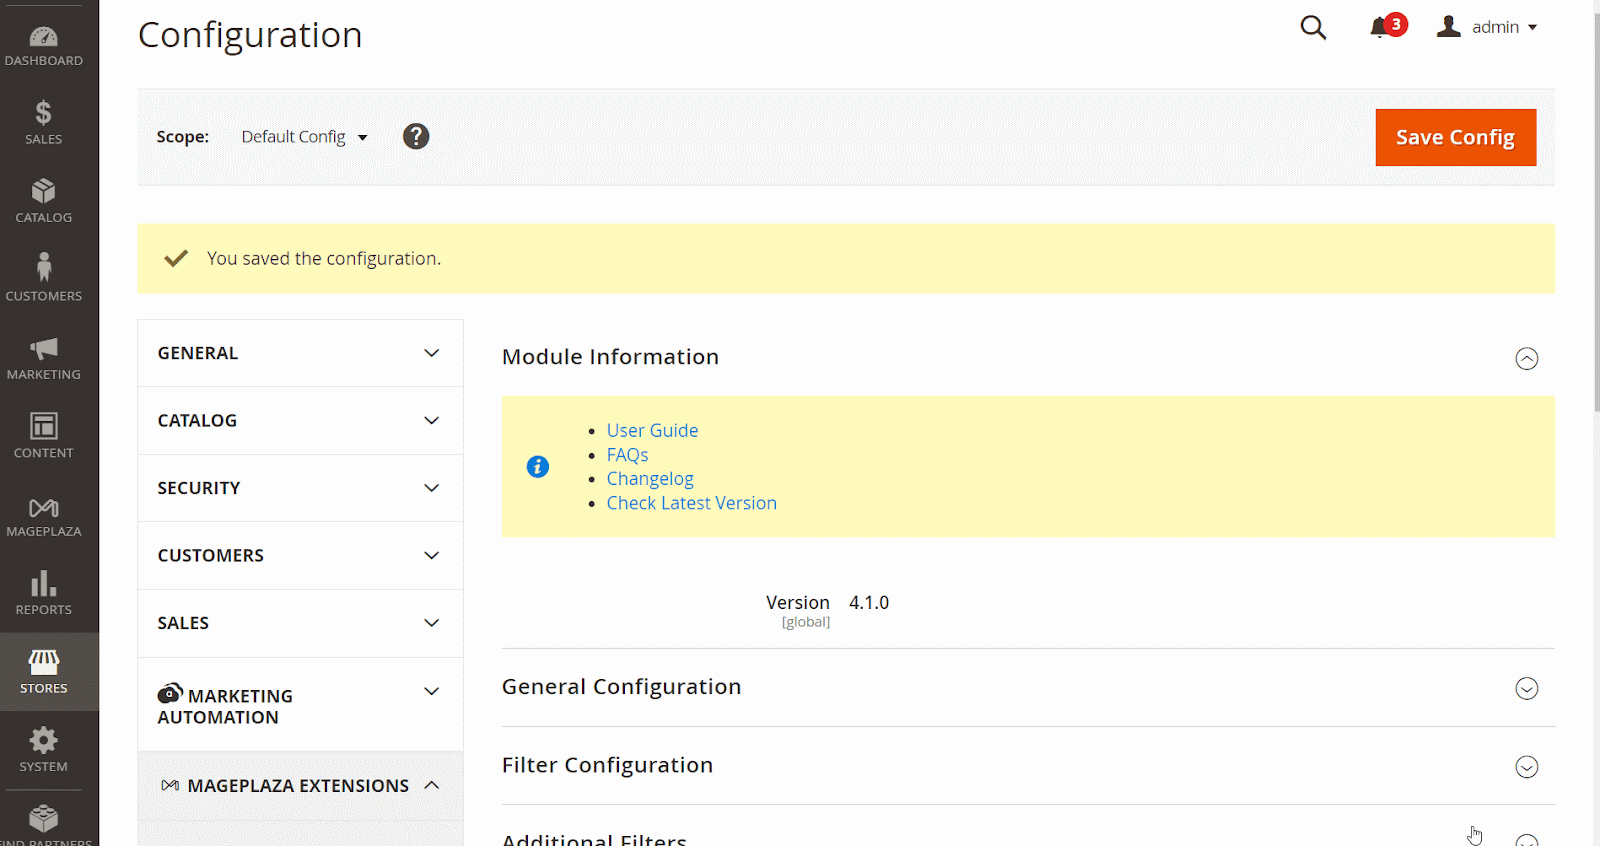
Configuration
The Configuration is available under Admin Panel > Mageplaza > Layered Navigation > Configuration.
- General configuration
- Filter configuration
- Additional Filters
- SubCategory Slider
- Design configuration
Here are the details for the settings of each tab.
1. General Configuration tab
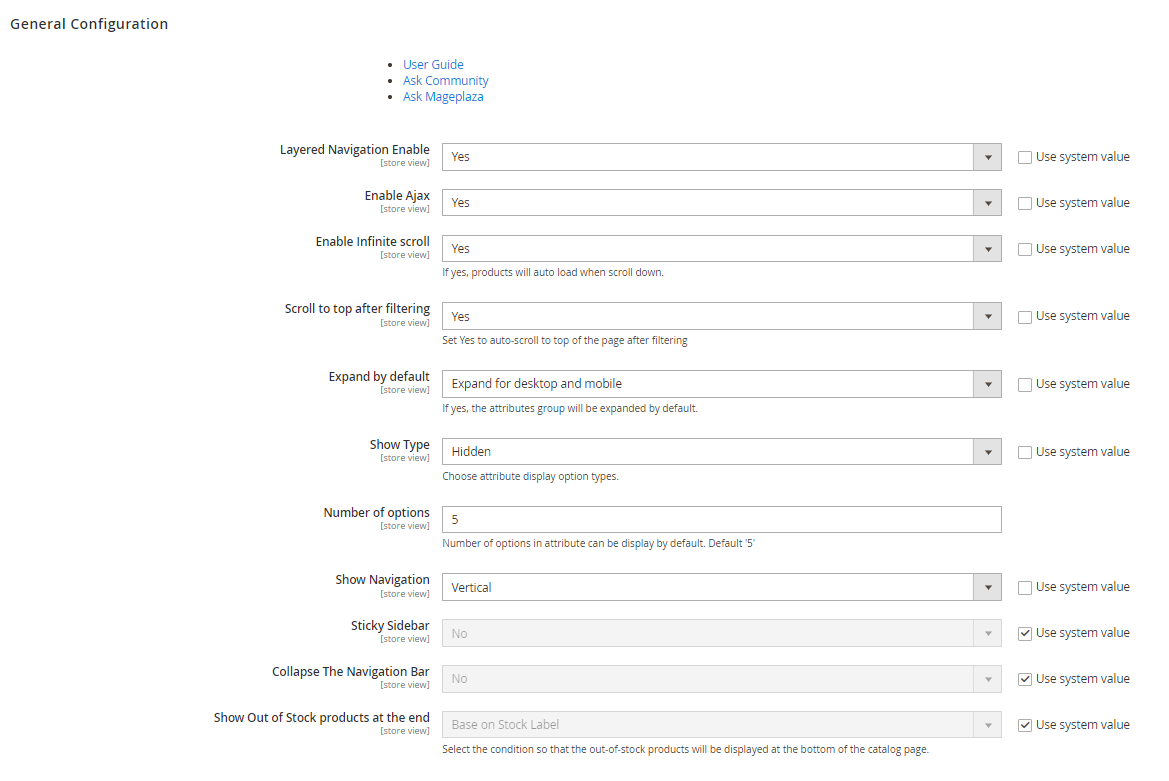
In the Module Enable field: You can choose to use the Module
Layered Navigationor not. Leave as Yes to enable and No to disable.In the Infinite Scroll field
- Continue with the next session. Infinite scroll, also called lazy scrolling on a website, will help automatically load the new products in the list when the shoppers scroll to the bottom without clicking or reloading.
- In the field Infinite scroll, set "Yes" to enable the feature and "No" to disable.
In the Scroll to top after filtering field field
This feature allows the shoppers, after filtering, can automatically back to the top of the products list and start to find the desired items.
On the Scroll to Top after Filtering field, you will have 2 options:
- YES: After choosing a filter or clicking on the
Apply Filterbutton, the site will automatically scroll up to the top page. - NO: After choosing a filter or clicking on the
Apply Filterbutton, the site still stays in its current position.
- YES: After choosing a filter or clicking on the
In the Expand by default field
- No: The shoppers need to click on the attribute group name to expand the filters.
- Expand for desktop or mobile or both: With other options, the attribute set will be expanded for each device type when customers enter the Category page.
In the Show type field: In this session, you can choose the way to display the filter attribute group. There are 3 options:
- Normal
- Hidden
- Scroll
In the Show Navigation field
By default, the Vertical & Horizontal Navigation feature has 3 display styles, so Mageplaza Layered Navigation can match any store design with different purposes.
In the Show Navigation field, choose 1 of 3 options below :
* Vertical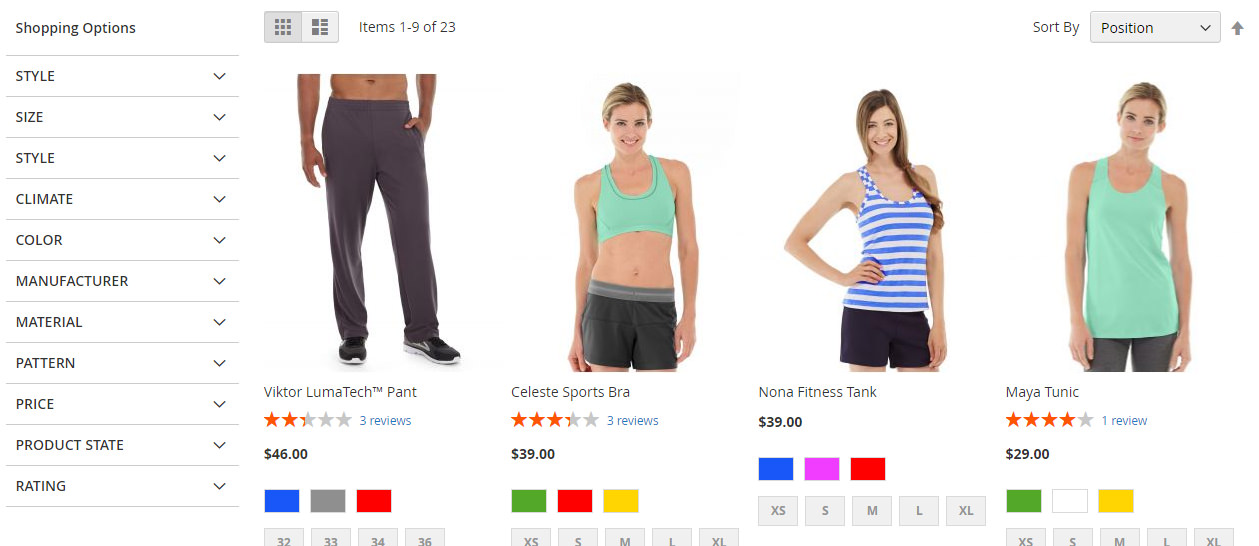
* Horizontal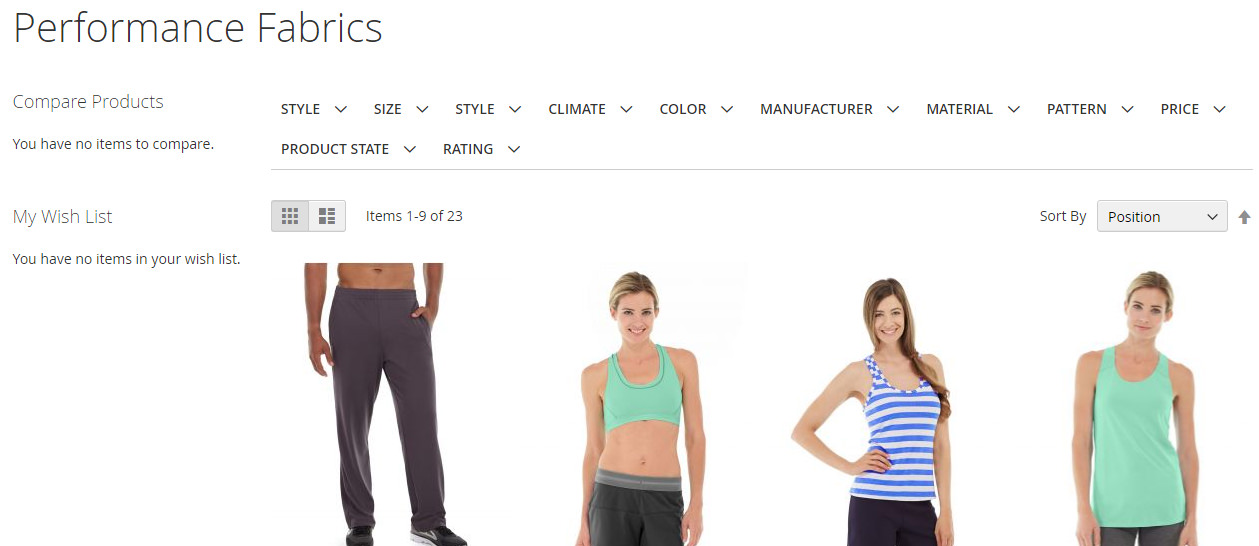
* Both
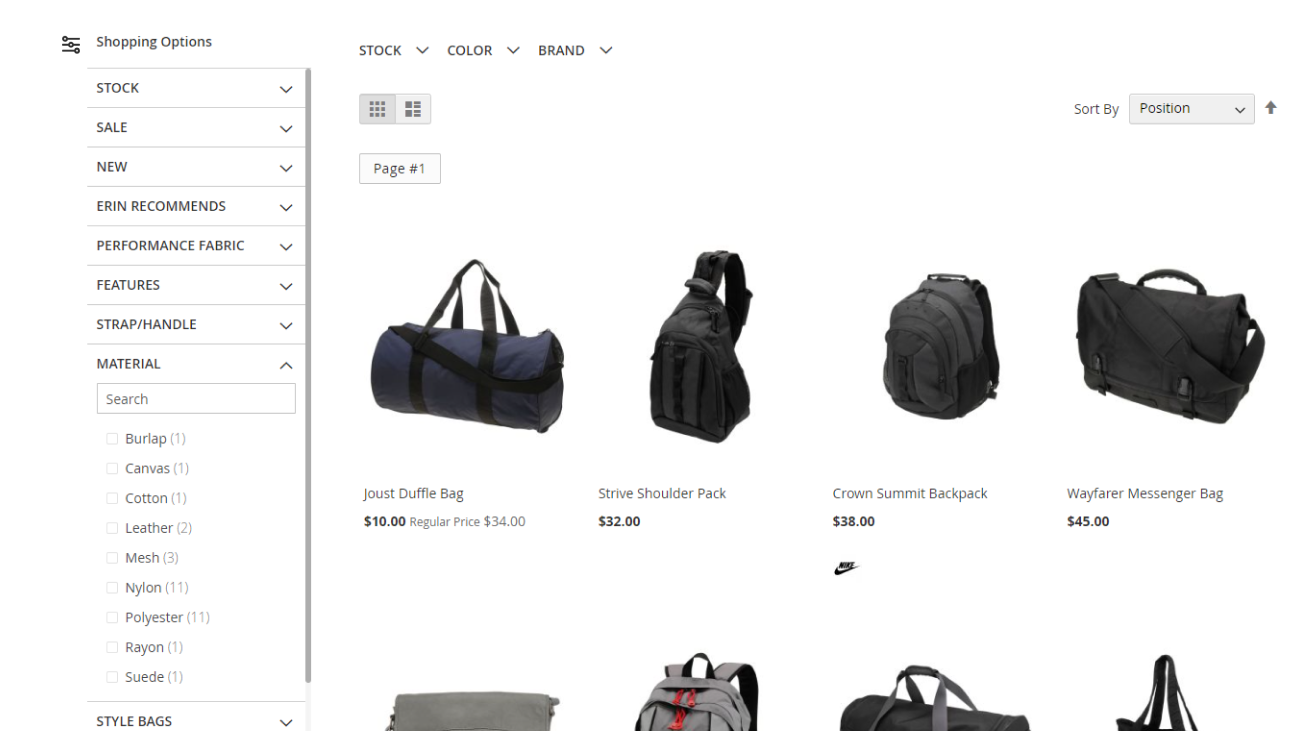
Sticky Sidebar and Collapse The Navigation Bar:
In the config, when the Show Navigation field is selected as Vertical / Both, the Sticky Sidebar and Collapse The Navigation Bar will be shown as these screenshots:
- Sticky Sidebar field will be displayed on the frontend like this screenshot:
- Collapse the navigation bar on the frontend:
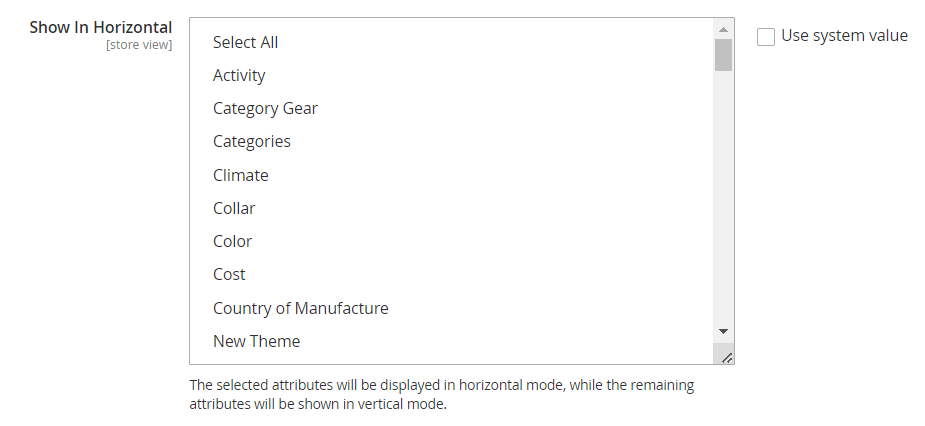
- Show In Horizontal:
This field is only shown when the Show Navigation field is selected as Both. The selected attributes will be displayed in horizontal mode, while the remaining attributes will be shown in vertical mode.
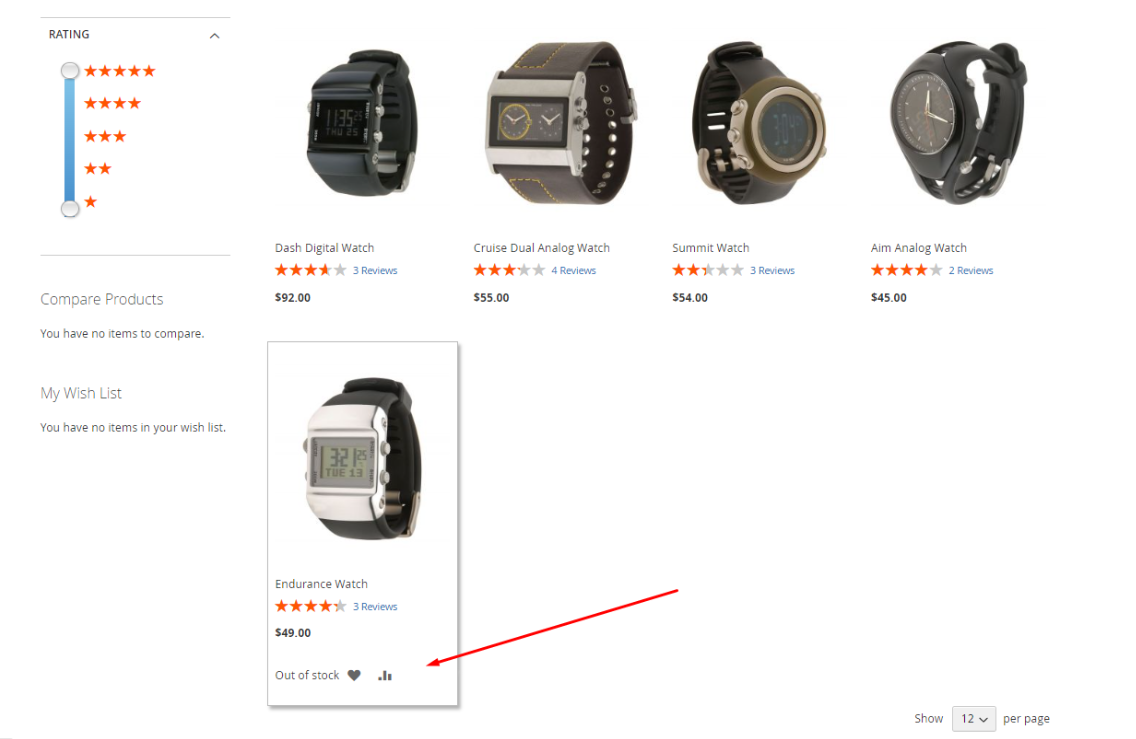
Show Out of Stock products at the end: Select the condition so that the out-of-stock products will be displayed at the bottom of the catalog page.
- Base on Stock Label: Products with out-of-stock labels will be displayed at the bottom of the catalog page.
- Base on qty (<1): Products with quantity lower than 1 will be displayed at the bottom of the catalog page.
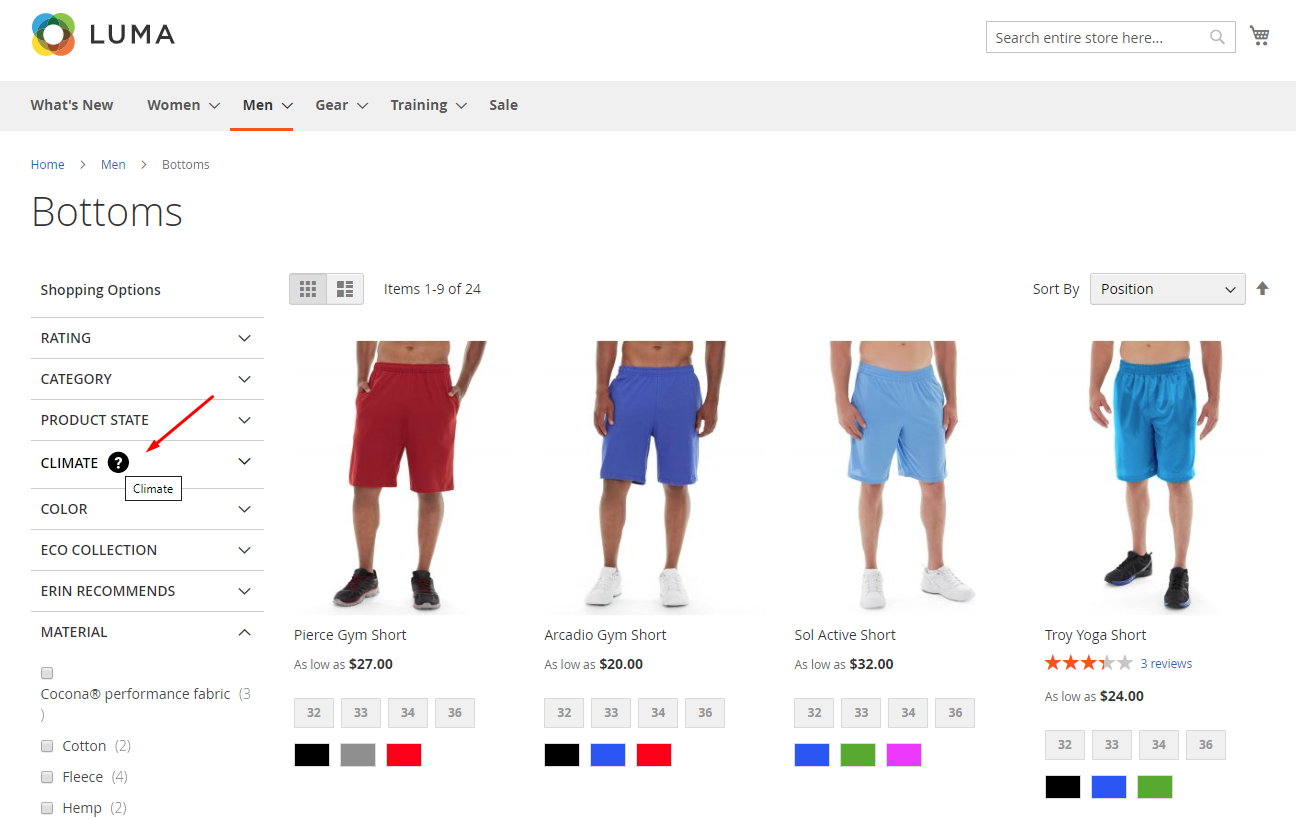
- No: Out-of-stock products stay at the current position.
2. Filter Configuration
This core functionality allows you to configure the interface of your filters.
In the Apply Filter button field
- The Apply Filter button allows the shoppers to choose when to apply the chosen filters. With this button, the shoppers don't need to wait for the page to reload again and again each time they choose a filter.
- In Add Apply Filter button field, set "Yes" to show the button and leave "No" to disable.
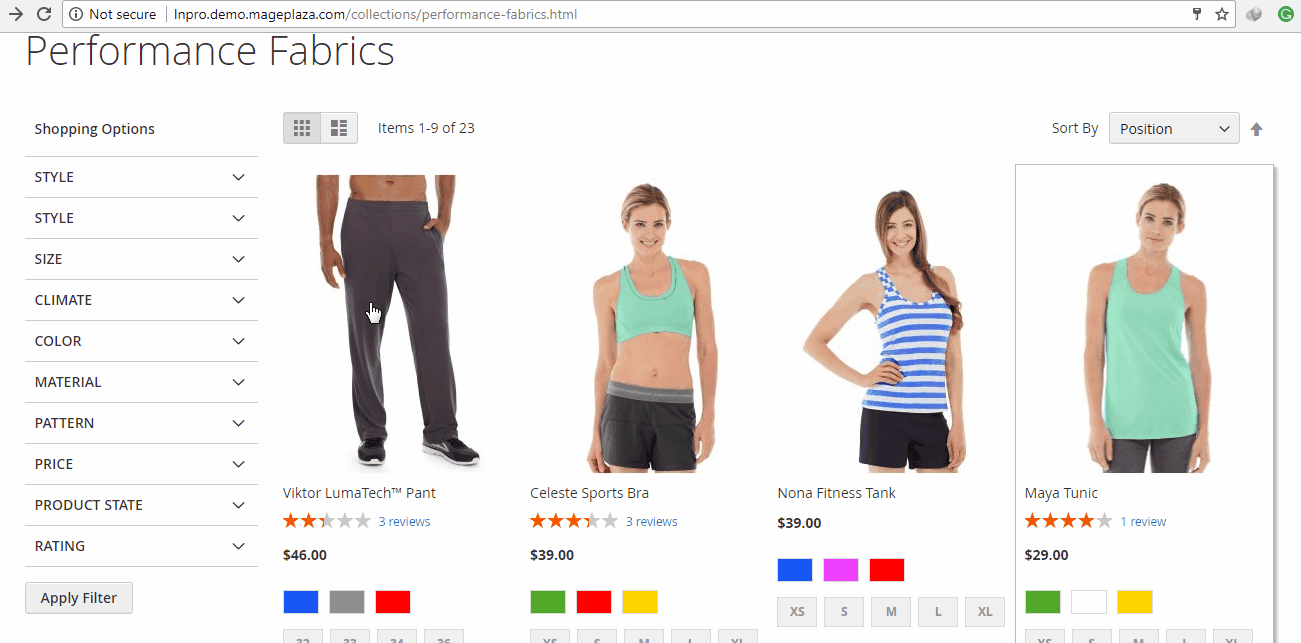
- Here is how the Apply Filter button works; you can choose lots of attributes before applying it. Also, SEO-friendly URL is compatible with Apply Filter's search results. As you can see, this example, choose Insulated and Cold, and the names of those attributes appear on the URL as well.
In the Multi-Filters field
- By enabling this feature, the shoppers are allowed to choose more than 1 filter to find the desired items. You can also filter by multi-choose from multiple categories at the same time. For example: The shopper can choose to filter by Color with Black, White and Size with Small, Large at the same time. This can also be applied to multiple categories.
- To config this feature, go to Enable Multi-filter field, set "Yes/No" to "Enable/ Disable"
In the Quick Lookup Options field
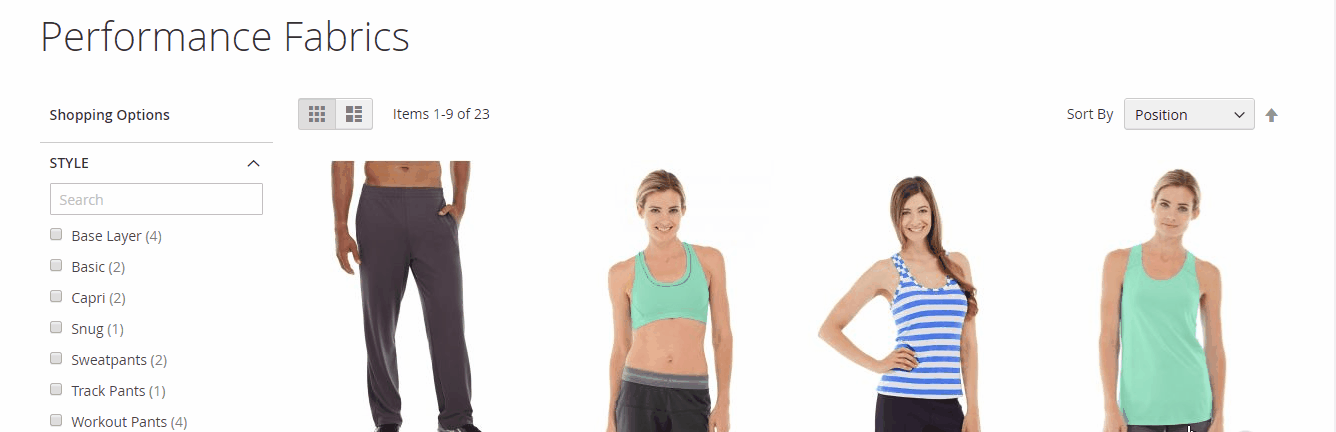
- By enabling this feature, in each of the attribute group, there is a search box. The shoppers only need to insert the letters and the filter whose name contains this letter will be displayed.
- Go to Enable Filter options field to "Enable/ Disable" this feature by setting "Yes/ No".
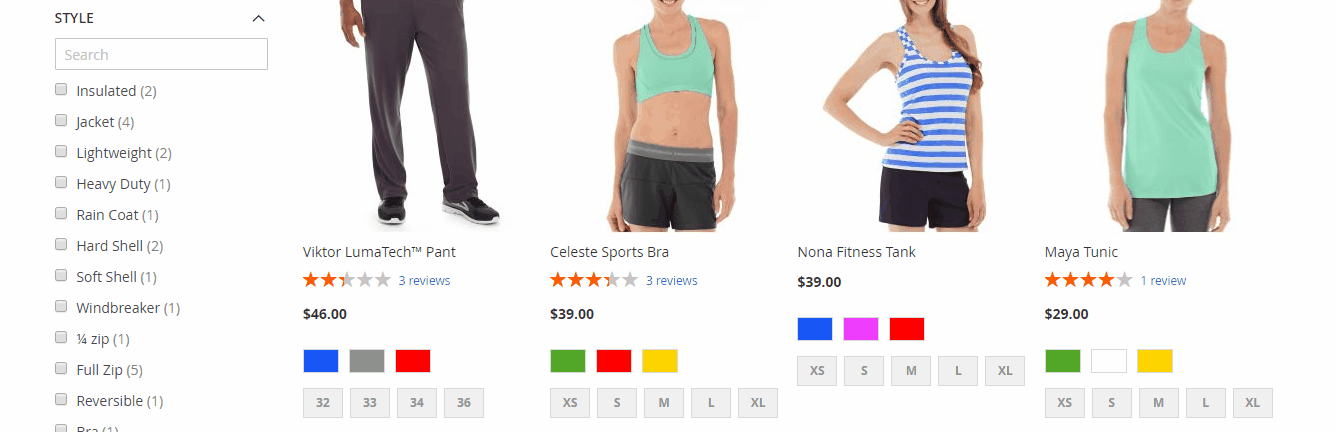
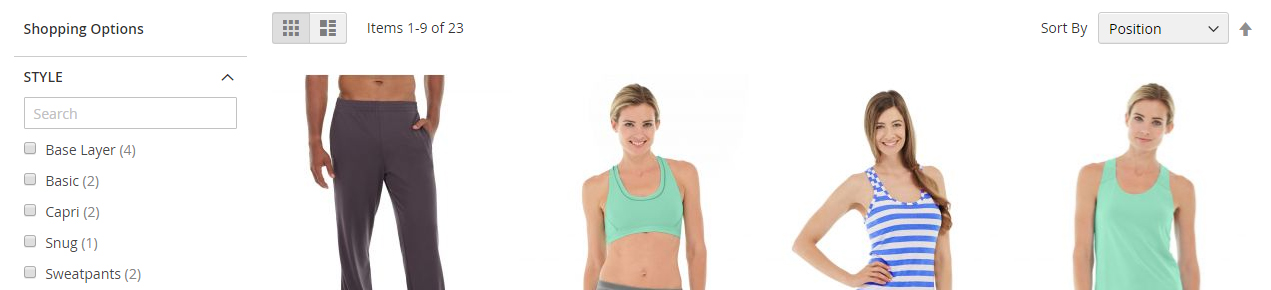
- In the Product Count field: With this feature, there will be a number which is displayed next to the filter. This number allows the shoppers to know how many items which is matched the filter. For example, If the filter is displayed: Cotton(2), that means there are 2 items that match the filter Cotton.

In the Display Product Count field
- Set Yes to display the number to the right of the filter name.
- Set No to hide this number.
In the Display Out-of-stock option field: There are 2 options to choose
- Yes: Show all the attributes and options even if the product is currently out of stock.
- No: Hide all the attributes and options of the product that is currently out of stock.
In the Hide the Single-Select Filter after Selection field:
Yes: The single-select attribute will be hidden after filtering.
No: Show all attributes on the navigation bar after filtering, including single-select attributes.
3. Additional Filter
Mageplaza expands your filtering options beyond core attributes. You can enable filters for:
Product State:
- New: Highlight recently added products.
- On Sale: Showcase products that are currently discounted.
- In Stock: Ensure customers only see available products.
Rating: Allow customers to filter by product rating, helping them find highly-rated products.
3.1. Product State Filter
The Product State Filter feature allows the shoppers to filter the items by the New, Sale, and Stock status. Here is how the Product State Filter configuration will be displayed:
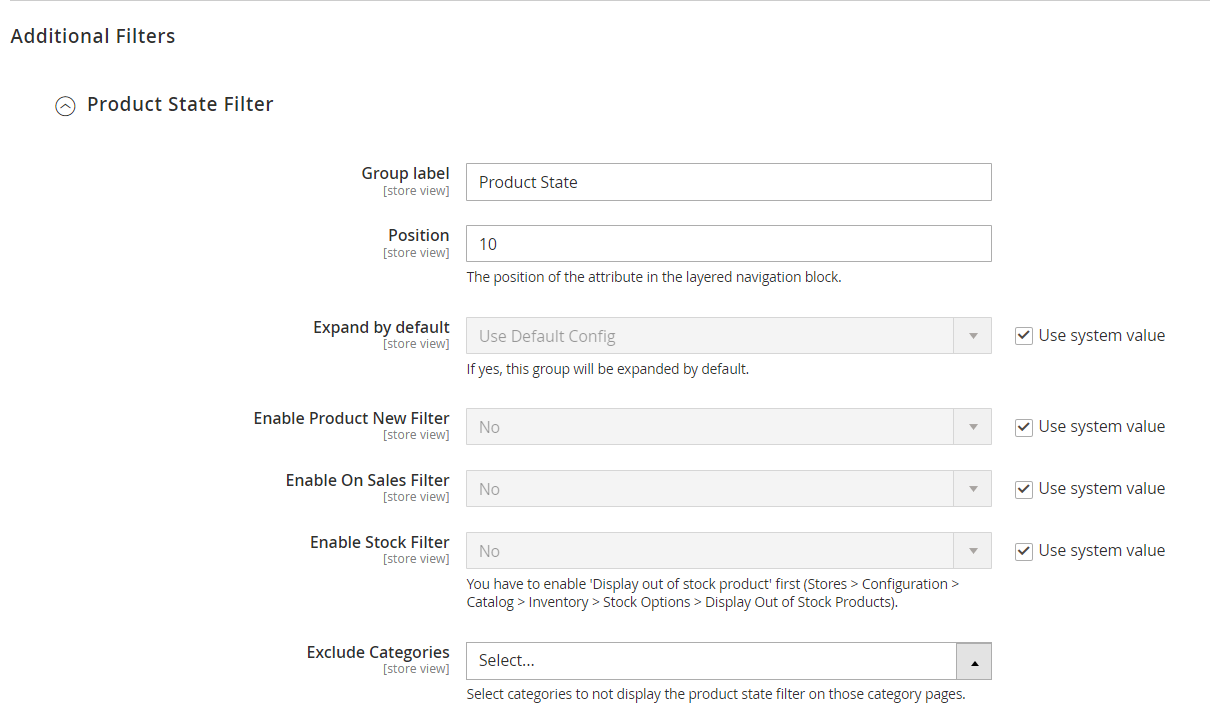
- Group label: The name of the group attribute
- Position: Admin set the displaying priority for Product State Filter. The smaller the number entered, the higher the priority to show first.
- Expand by default: Choose Yes to automatically expand the group attribute
Ratingwhen shoppers go to the collection page. - Enable New Filter, Enable On Sales filter, Enable Stock filter: Choose Yes to enable the filter and leave No to disable.
- New label, On Sales label, Stock label: Add the name for each label filter.
- Exclude Categories: Choose categories to exclude Product State Filter.
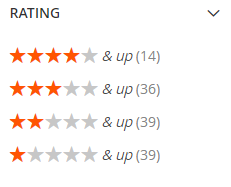
3.2. Rating Filter
This feature allows the shoppers to filter the items by the rating, which follows 5 levels, from 1 star to 5 stars. For example, when you choose the option 4 stars and up, the received result will display the items that have the 4-star and 5-star ratings.
The Rating Filter configuration is available under the Filter Configuration tab.

In the Enable Rating Filter field: Choose "Yes" to enable and display the group attribute Rating on the Layered Navigation and leave "No" to disable this feature. When you choose "Yes", there are 2 more options for the modification:
- In the Group Label: Adding the text as the group attribute's name.
- In the Expand by default: Choose "Yes" to automatically expand the group attribute Rating when shoppers go to the collection page.
- In the Position field: Admin can allow Rating Filter to show at different positions such as Top Sidebar, Bottom Sidebar, and Below Category Filter.
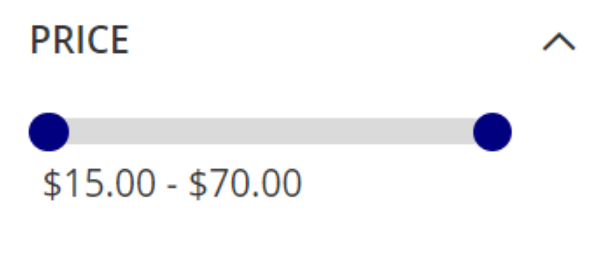
In the Show as Slider field
- Choose "Yes" if you want to display Vertical Slider
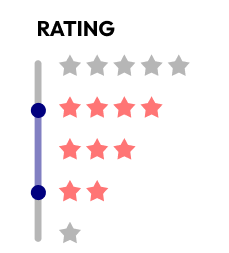
- Choose "No" if you wish to keep the default Horizontal Rating filter.
- Exclude Categories: Choose categories to exclude Rating Filter.
4. SubCategory Slider
This feature allows customers to easily filter products within a specific category and its subcategories. This is particularly useful for stores with deep category hierarchies.
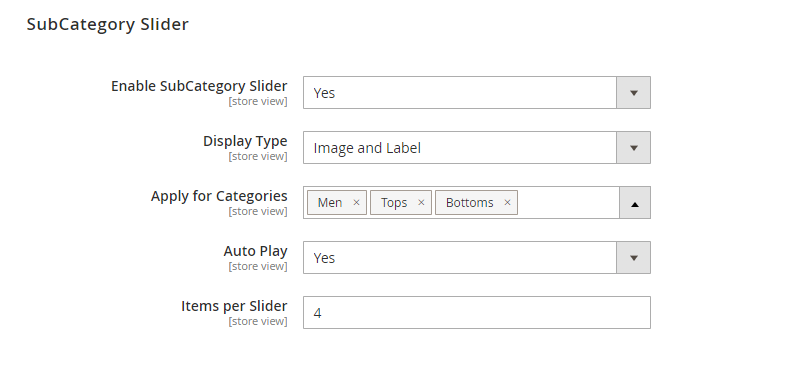
- Enable SubCategory Slider: Slelect Yes to allow showing subcategories as slider on corresponding categories.
- Display Type: Choose displaying type for slider
- Label: Slider only shows the subcategory name included in its category.
- Image and Label: The slider shows the subcategory name and image included in its category.
- Apply for Category: Admins choose a category to be shown in the slider.
- Auto Play: Select Yes to allow slider to be auto-activated
- Items per Slider: Enter the number of item subcategories allowed to be shown on each slider.
5. Design Configuration
With this feature, you can customize the visual appearance of your layered navigation to match your store's theme and branding.
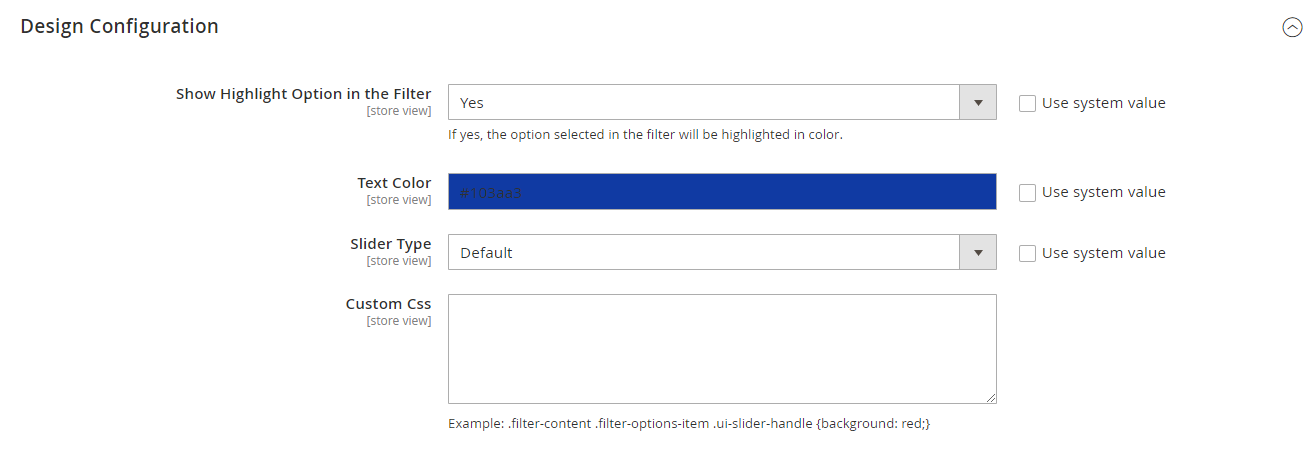
- Show Highlight Option in the Filter: If Yes, selected filtering options will be highlighted in color. Show extra field:
- Text Color: Show colors to highlight the option attributes.

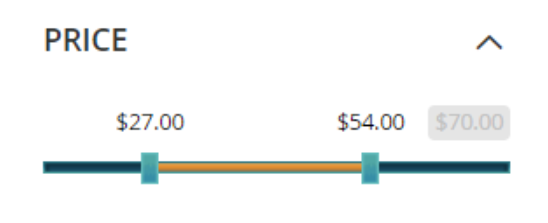
The Slider type field allows you to choose the type of the Price Slider. There are 5 options to choose:
- Default
- Flat UI
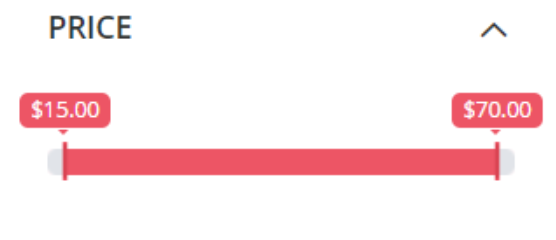
- HTML5
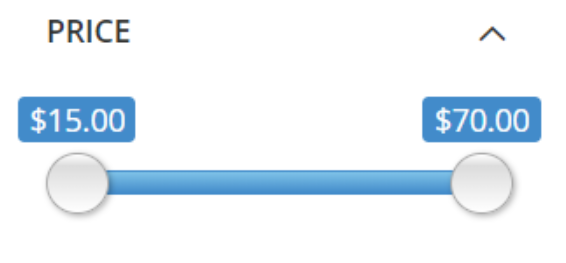
- Modern
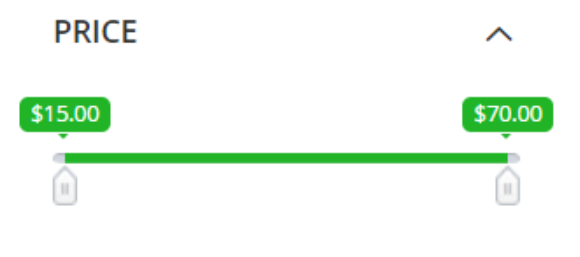
- Nice White
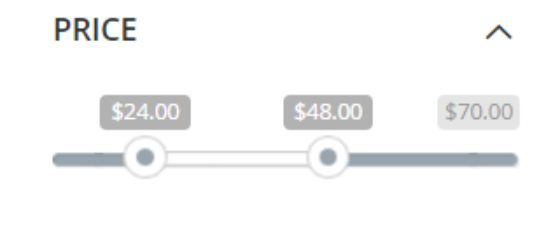
- Simple dark
Note: To make the config on Design Configuration tab works, please make sure you have set the Display type on the Attribute Configuration > Color to be Slider.
6. Custom Products Pages
This advanced feature allows you to define custom layouts for filtered product pages. You can control:
- Page Information: Specify which information is displayed on filtered product pages, such as filter summaries or additional product details.
- Default Attributes: Choose which product attributes are displayed by default on filtered product pages.
By enabling the Custom products page feature, all of your items will be displayed on only 1 page with advanced filtering. That allows the shoppers don't need to find the exact categories page to filter the desired items.
Besides, Mageplaza also provides the SEO config to improve the page's ranking on the search engine result pages.
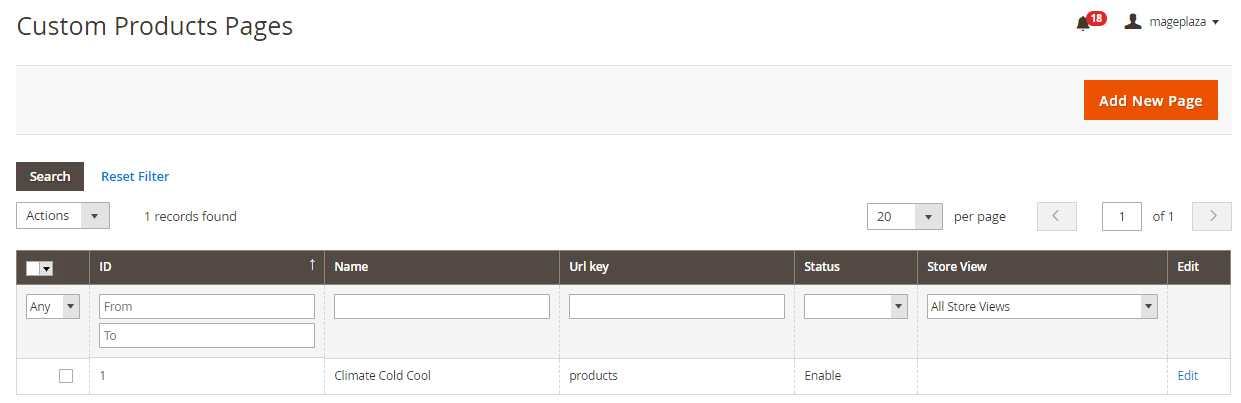
The Custom products page configuration is available under Admin Panel > Mageplaza > Layered Navigation: Custom Products Pages. Choose a product page to edit.
6.1 Page Information
After choosing/creating a specific Product page, choose Page Information and scroll down to see some essential information:
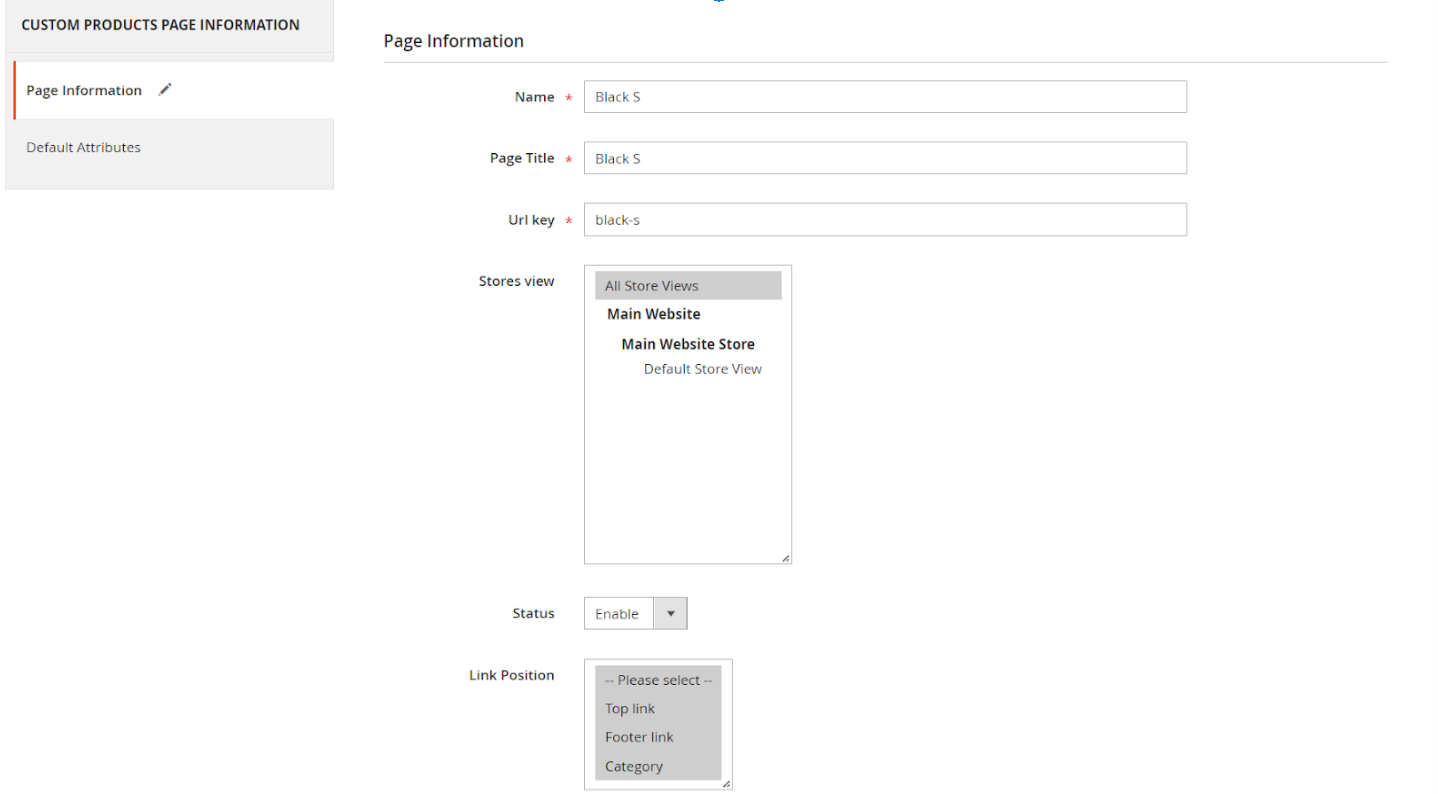

- In the Name field: Enter the name of the custom page in the backend.
- In the Page Title field: Enter the name of the custom page on the frontend.
- In the URL key field: Enter the characters you want to display in the URLs. For example: If you insert 'products', the all products page's URL will be: yourstore.com/products
- In the Store View field: Choose specific store views you want to display
- In the Status field: You can enable/disable the custom product page.
- In the Link Position field: Choose the position of the link.
- In the Description field: Enter the description of Custom Product Pages
- In the CMS Block Display Position field: Select the display position of the CMS Block on Custom Product Pages
- In the CMS Block field: Select the CMS Block displayed on Custom Product Pages
In addition, you can configure the SEO attribute for the all products page to have the best SEO performance. There are 3 fields:
- In the Meta title field: Enter the meta title for the custom product page.
- In the Meta keywords field: Enter the meta keyword for the custom product page.
- In the Meta description field: Enter the meta description for the custom product page.
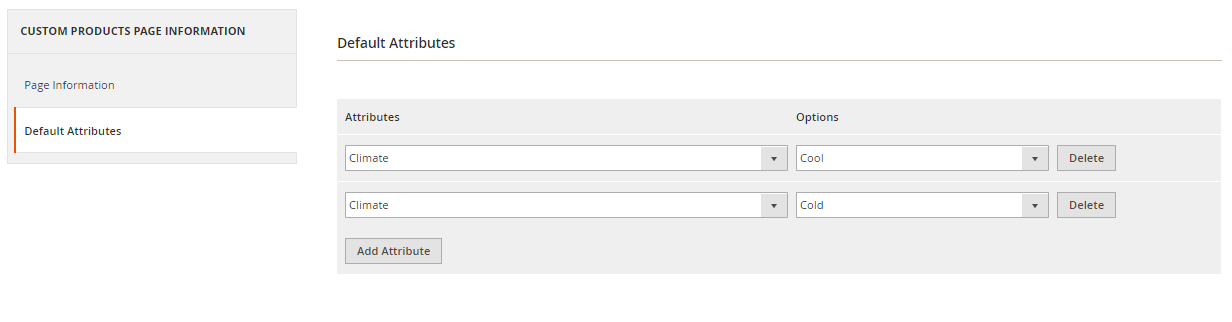
6.2 Default Attributes
Default Attributes allows you to set the default attribute for the all products page. That means when the shoppers open the all products page, you can decide which products will be displayed first.
For example: If you set the option Cool and Cold of the attribute Climate as the Default Attributes, the items which have Cool and Cold will be displayed first when the shoppers go to the Custom Product Pages
7. Attribute Configuration
Gain granular control over individual filter attributes. You can define:
- Attribute Properties: Configure how each attribute is displayed and behaves in the filter, such as setting display labels or enabling multi-selection.
- Filter by Decimal Attributes: Enable filtering for attributes with numerical values, such as price or weight.
- Show Tooltip: Provide additional information about each filter option with hover-over tooltips.
Go to Admin Panel > Stores > Attributes: Product, then choose an attribute and go to Layered Navigation Properties tab.
7.1 Attribute Properties
Example of a specific attribution and its configuration in detail
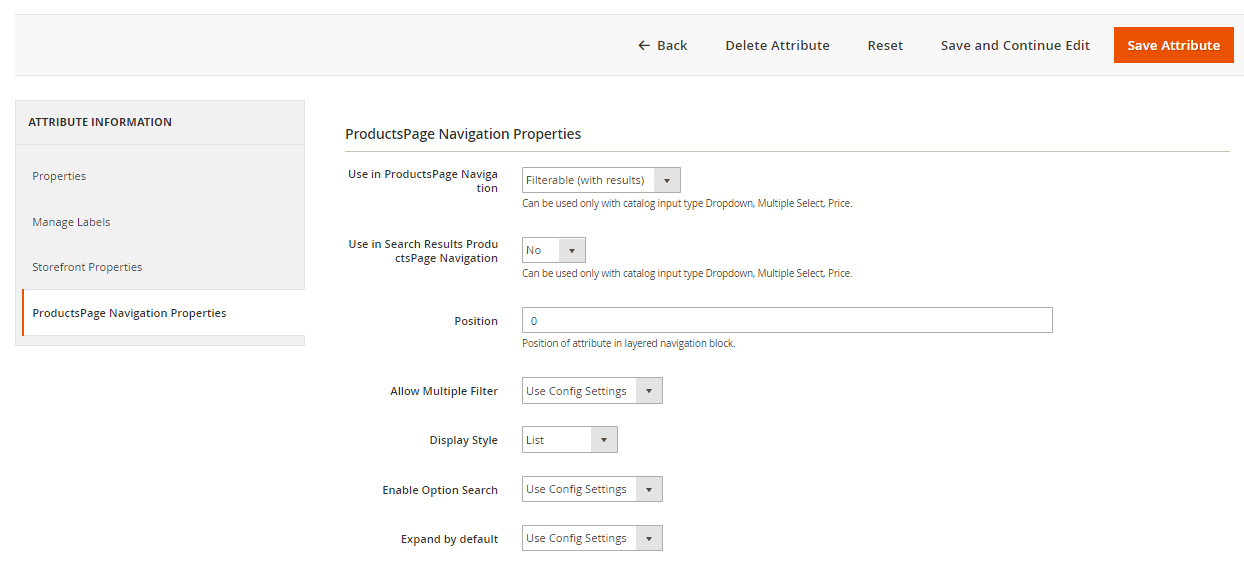
- In the Use in ProductsPage Navigation field: Choose the possibility of being displayed on Layered Navigation or not
- In the Use in Search Results ProductsPage Navigation field: Choose the possibility of being filtered by Layered Navigation or not.
- In the Position field: The attribute that has a bigger position will be placed lower. 0 to set it in default as Magento 2's principle.
- In the Allow Multiple Filter field: By choosing Yes, the shoppers are able to filter by multi-option in this group attribute. For example, You can allow the shoppers to choose more than 1 filter in the
Colorgroup attribute but only choose 1 filter in theStylegroup attribute. - In the Display Style field: Choose the display style of the group attribute. The specific design for each style is mentioned in the next section.
- In the Enable search option field: Choose to enable/ disable the Quick Lookup Option in this attribute group.
- In the Expand by default field: Choose to expand this attribute group automatically or not when the shoppers go to the collection page.
7.2 Filter by decimal attributes
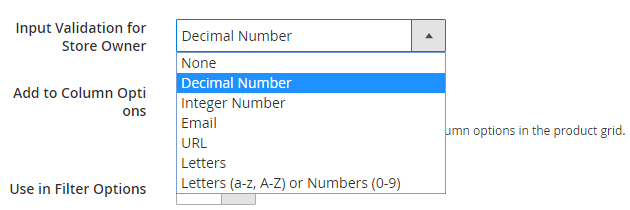
Layered Navigation also allows store owners to set up and visitors to filter decimal attributes.
- In the
Attribute Information > Properties > Advanced Attribute Properties > Input Validation for Store Owner, choose Decimal Number or Intergal Number to set your optional attribute.
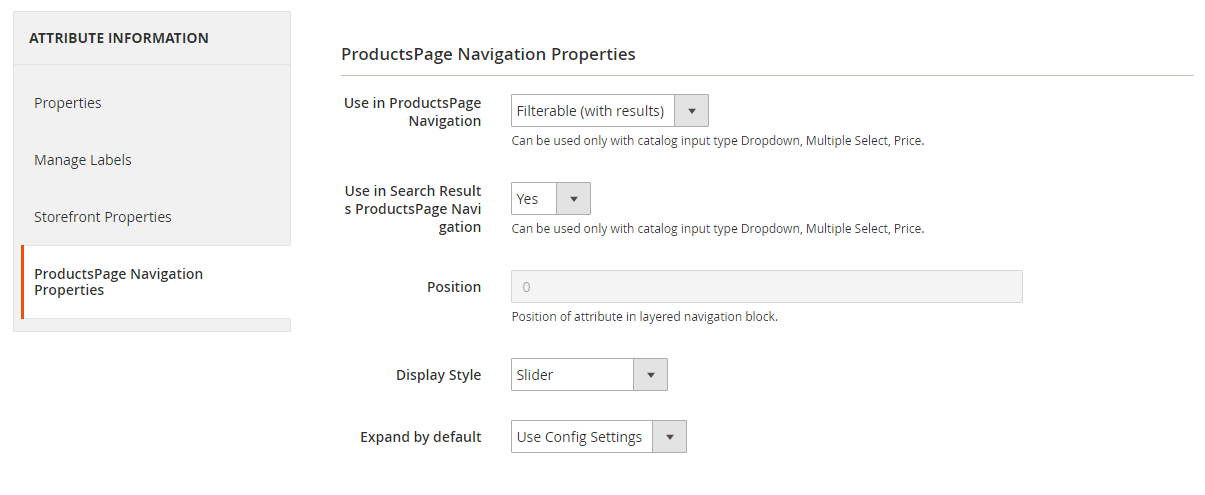
Follow
Attribute Information > ProductsPage Navigation Properties- In the Use in ProductsPage Navigation field choose Filterable (with results)
- In the Use in Search Results ProductsPage Navigation field choose Yes
- In the Display Style field choose your preferred style as Slider, Range or Slider and Range
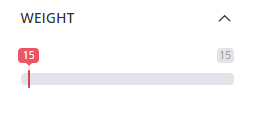
For example, with the Weight option, which product has a weight of 15 lb. On the frontend, the search result can be filtered like:
7.3 Show Tooltip
The new version of Mageplaza Layered Navigation Professional allows store admins to set up the tooltips for each attribute. Tooltip only applies for attribute types: Multiple Select, Dropdown, Price, Visual Swatch, and Text Swatch.
Follow Attribute Information > ProductsPage Navigation Properties
- In the Use in ProductsPage Navigation field choose Filterable (with results)
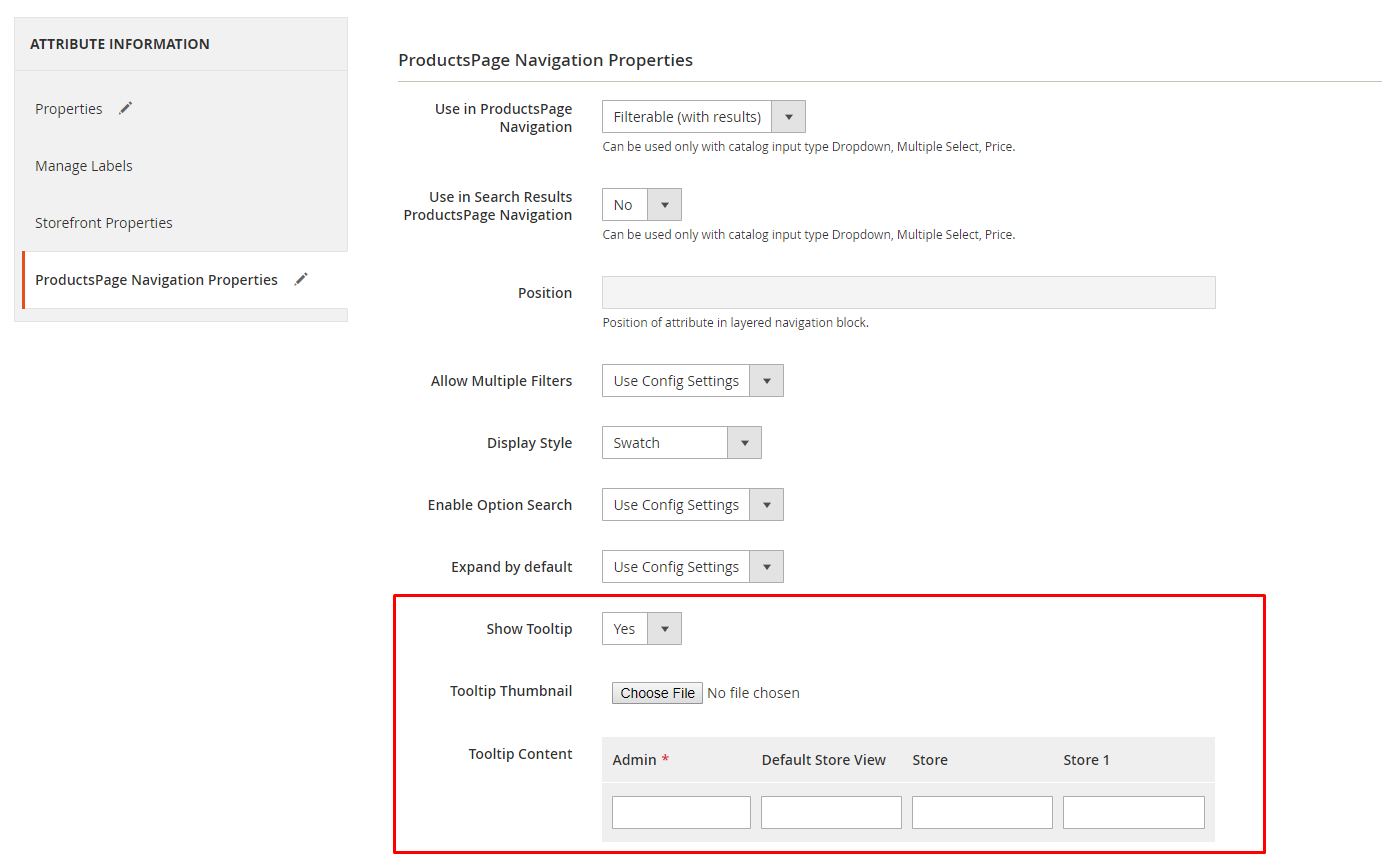
- Show Tooltip: Choose Yes to show Tooltip on attribute filter.
- Tooltip Thumbnail: Click Choose File, admin choose icon for tooltip. Leaving it blank, icon will be default value.
- Tooltip Content: Enter the content for the tooltip.
- If tooltip is left blank, it will be assigned with Admin value.
8. Shop By Brand's configuration
If you've enabled the "Shop by Brand" feature, you can configure its behavior:
- Define which brands are available for filtering
- Customize the display of brand filters
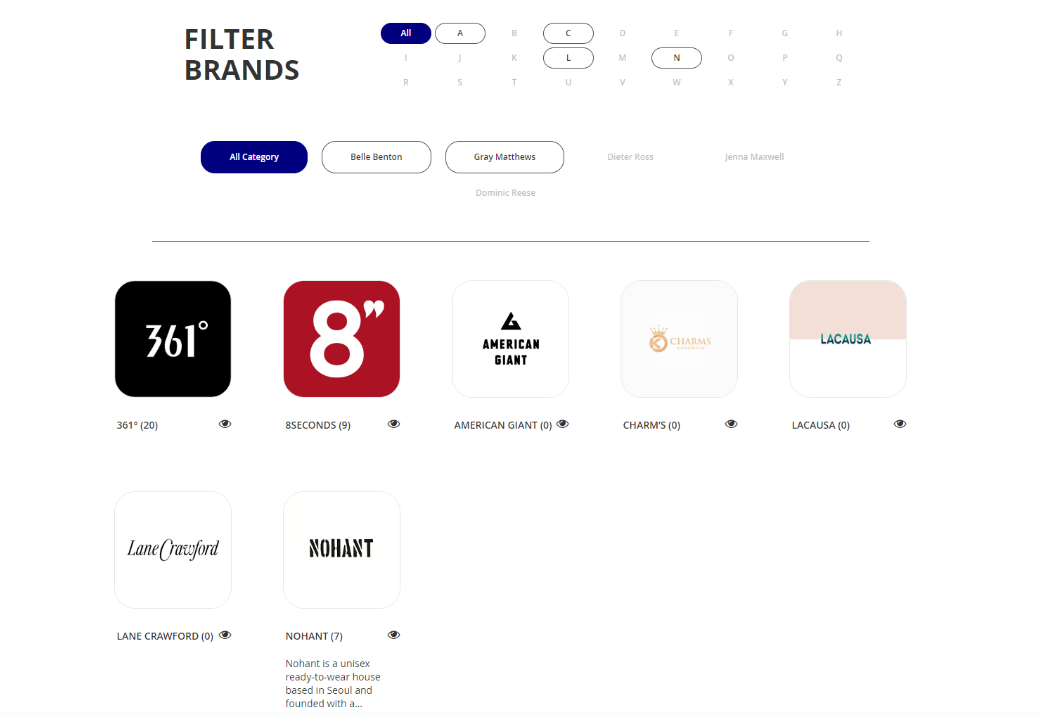
Provided Shop By Brand's User guide can be found here
FAQs
Maintenance
1. Module Update Guide
Keeping your module updated ensures optimal performance. Follow one of these steps to update your module:
By Account Dashboard: Log in to your
Mageplaza account > go to the My Licenses section > click on the Download button > choose the latest version from the popup.By composer: Kindly use the following commands to update the module via composer
composer require mageplaza/mageplaza/module-layered-navigation-m2-ultimate
php bin/magento setup:upgrade
php bin/magento setup:di:compile
Updating a module by Composer ensures efficient dependency management, version control, and integration with development tools, making the process faster and more reliable.
2. Troubleshooting Articles
For common issues and their fixes, refer to these articles:
- How to custom Magento 2 Layered Navigation
- Magento 2.3 Layered Navigation Returns all Products, unfiltered
- Error in /app/code/Mageplaza/LayeredNavigation/Model/Layer/Filter/Price.php
Support and Assistance
1. Customer Support
For any assistance, please visit our Support page or email us at cs@mageplaza.com/ sales@mageplaza.com
2. Create a Ticket
If you have technical issues, please open a ticket at this link.
3. Operating Hours
Our support team is available during the following hours:
- Monday to Friday: 8:00 AM - 23:59 PM
- Saturday: 8:00 AM - 12:00 PM
- Sunday: Closed
Refund Policy
We understand that sometimes things don't go as planned. Please review our refund policy for detailed information:
Frequently Asked Questions (FAQ)
For common questions, please visit our FAQ page: