Social Login Professional
- How to Install Social Login
- How to configure Facebook API
- How to configure Foursquare API
- How to configure GitHub API
- How to configure Google API
- How to configure LinkedIn API
- How to configure Microsoft Live API
- How to configure Twitter API
- How to configure Vkontakte API
- How to configure Yahoo API
- How to configure Pinterest API
- How to configure Zalo API
Overview
Social Login Professional is an improved version of Social Login Standard. This module supports admin to login via store' social account at backend. In addition, the module is added two popup templates: Quick Popup and Popup Slide. For the existing Popup Login template, the admin can configure to display the social login button with 4 locations: left, right, top, bottom.
Social Login Pro is fully compatible with Report, Google Recaptcha, Two-Factor Authentication extension of Mageplaza to help authenticate, eliminate spam, avoid fraud and report information when customers log in or register via social accounts.
How to Configure
I. Configuration
1.1. General configuration
From the Admin Panel, go to Store > Settings > Configuration > Mageplaza Extensions > Social Login, choose General sections
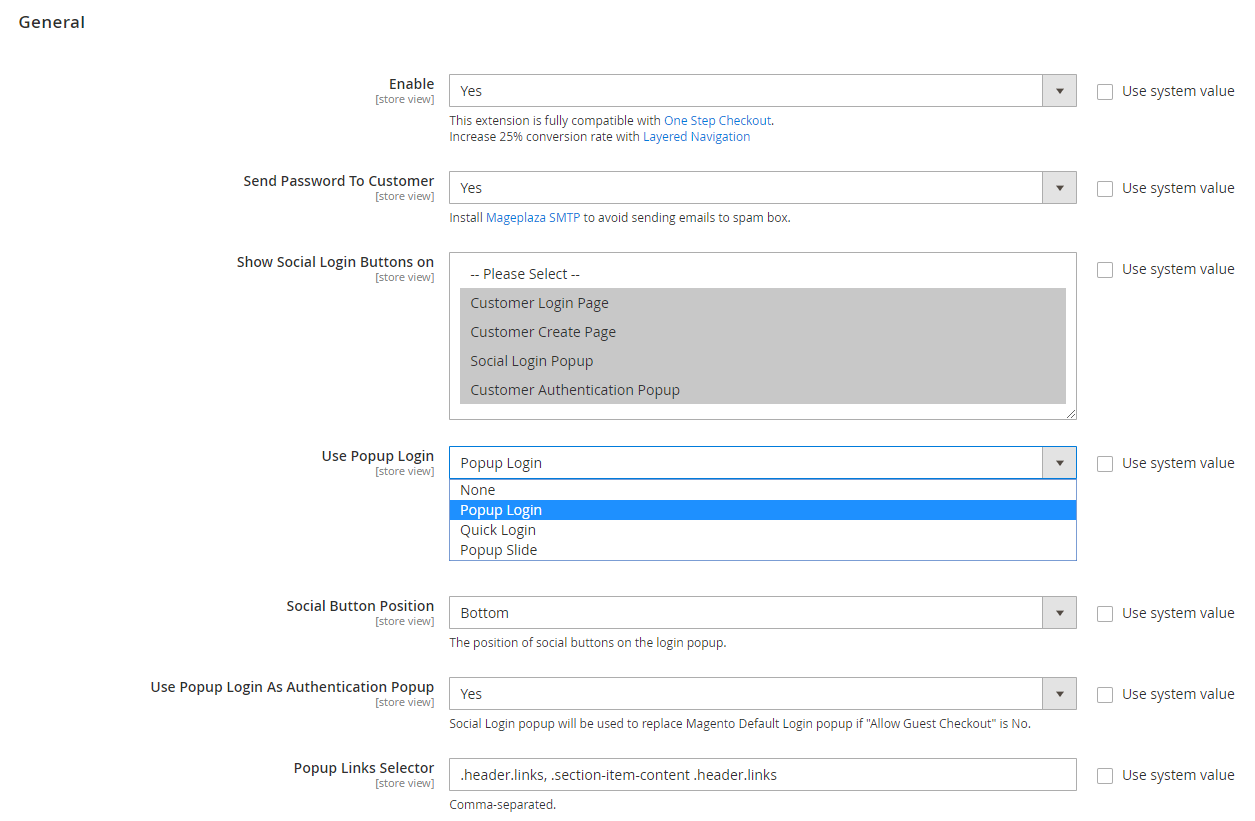
In the Enable field: Select "Yes" to allow customers sign in quickly via social networking sites they are using.
In the Send Password To Customer field: Select "Yes" to activate sending notifications to customers to remind them to change their passwords when signing in via social accounts. They can change their passwords via their emails used to register for that social account.
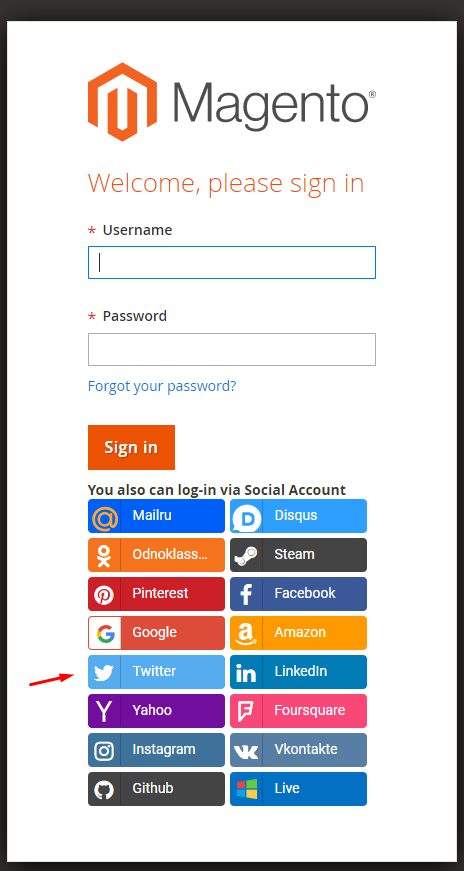
In the Show Social Login Buttons on field:
- Select display page(s) with social login buttons. Show Social Login Buttons on = Customer Login Page will show social login buttons on the login page.
- Can select more than one option
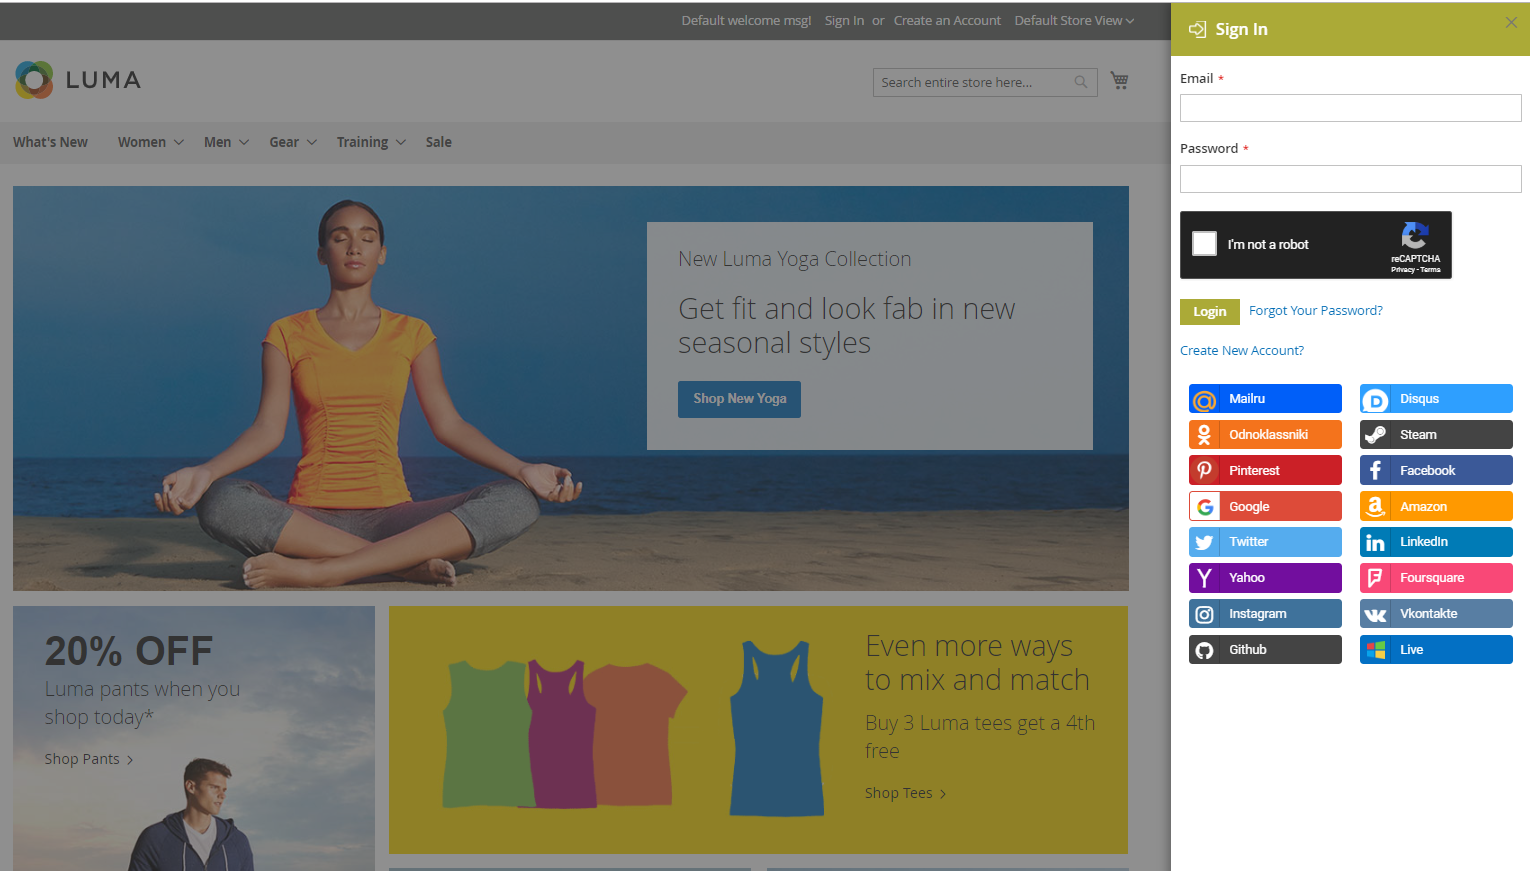
In the Use Popup Login field:
Choose Popup Login to turn on Popup and Show Social Login Buttons in Login Dialog, Create New Account, and Forgot Passwords. Show extra field:
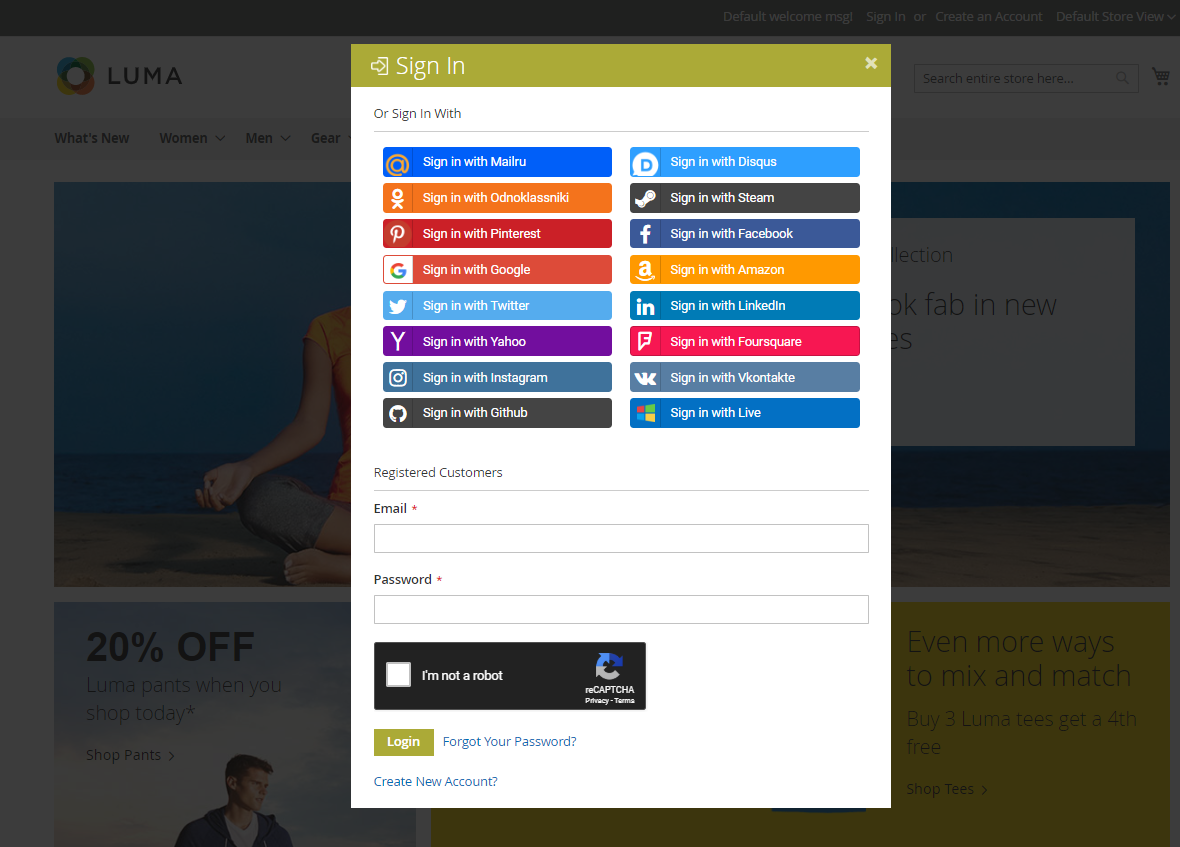
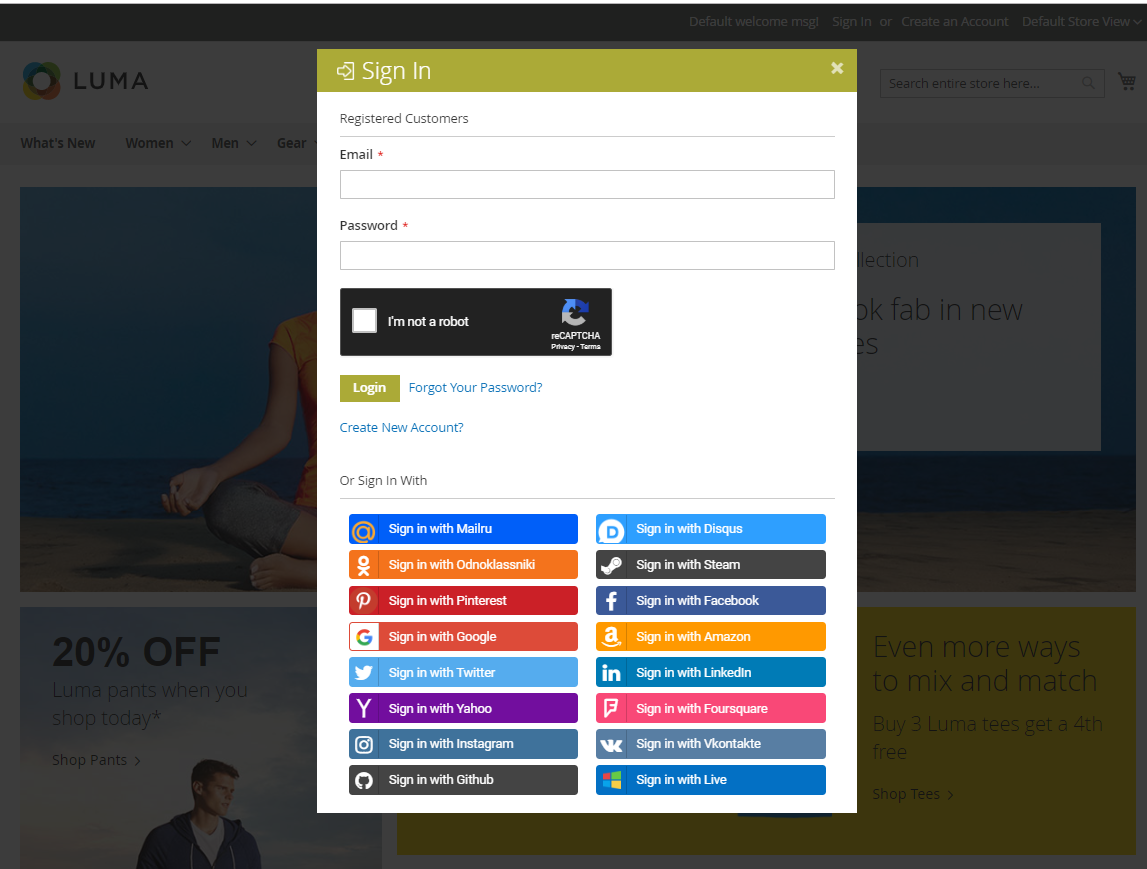
- Social Button Position: Choose posision for showing social login buttons:
- Left: Show social login button at the left side of popup login.
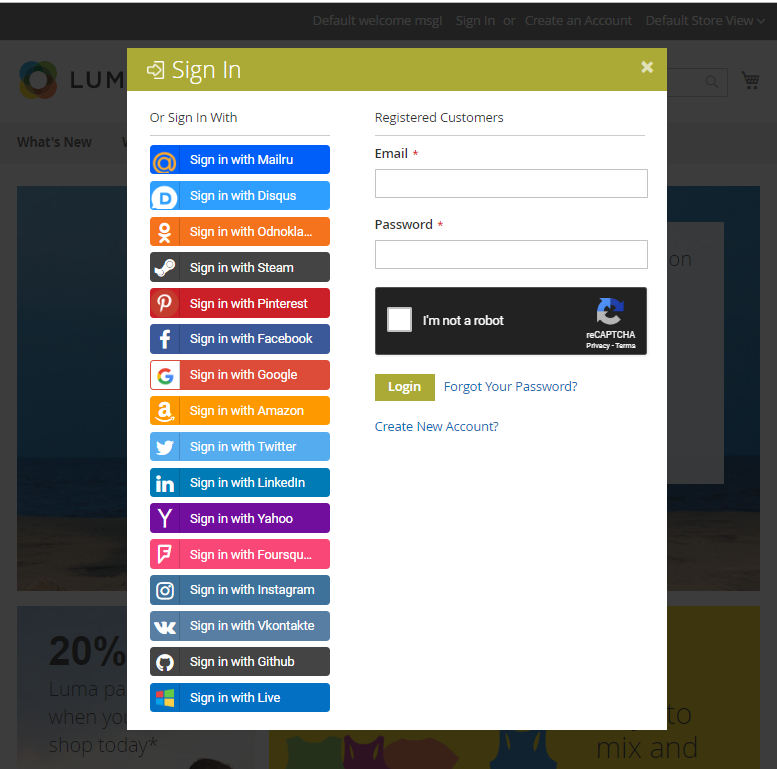
- Right: Show social login button at the right side of popup login.
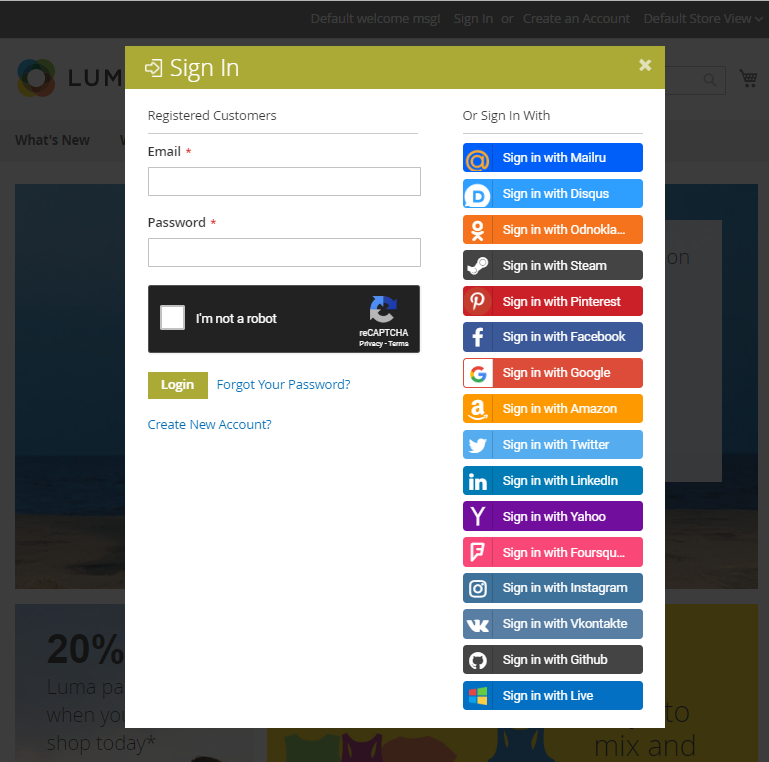
- Top: Show social login button at the top of popup login.
- Bottom: Show social login button at the bottom of popup login.
- Include Social Login buttons in Customer Authentication Popup page
- Left: Show social login button at the left side of popup login.
- Social Button Position: Choose posision for showing social login buttons:
Choose None, popup not show and only show social login buttons at Customer Login page, Create New Account, and Forgot Passwords, Customers Authentication Popup.
Quick Login: Enable Quick Login Popup and social login buttons when Sign In, Create New Account, and Forgot Passwords.
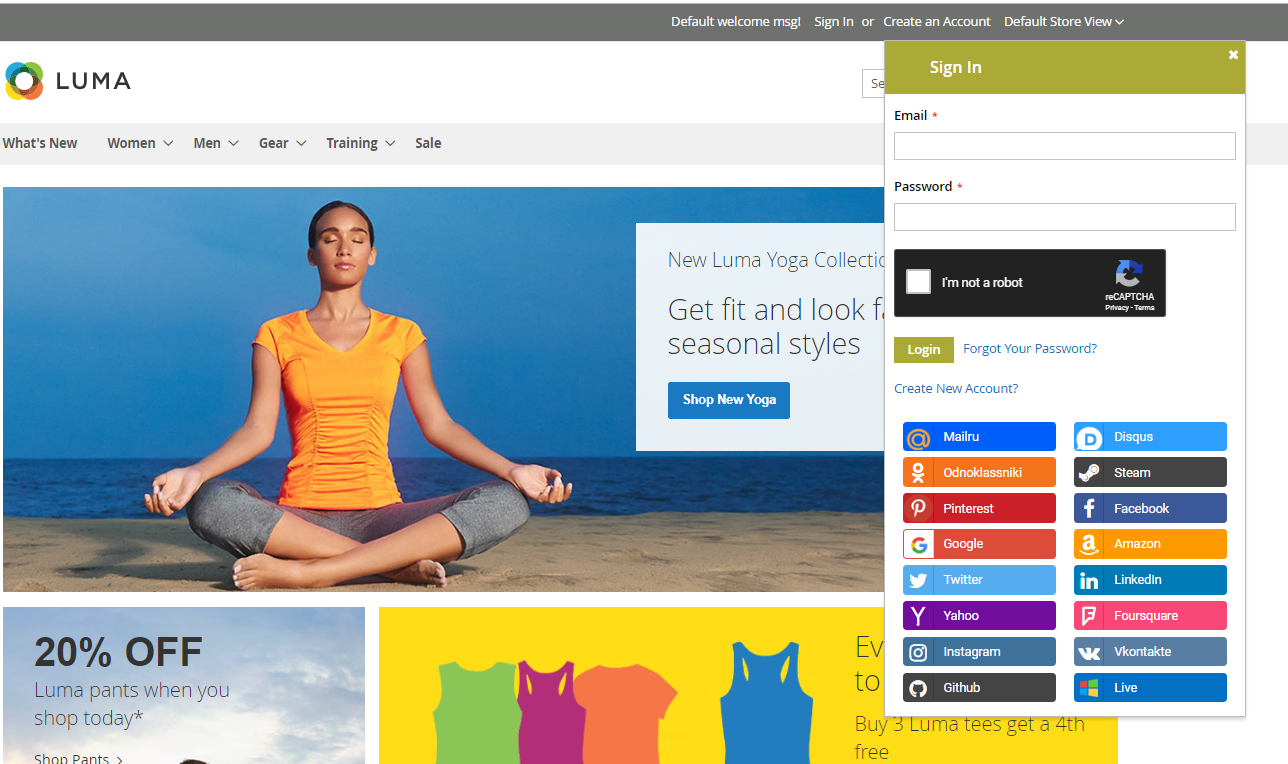
Popup Slide: Enable Popup Slide Popup and social login buttons when Sign In, Create New Account, and Forgot Passwords.
Use Popup Login As Authentication Popup: Select “Yes” to use popup of Social login as Authentication Popup
In the Popup Links Selector field: Customize any default Login and Create button to be a popup-open button by filling in class name of elements that cover these buttons.
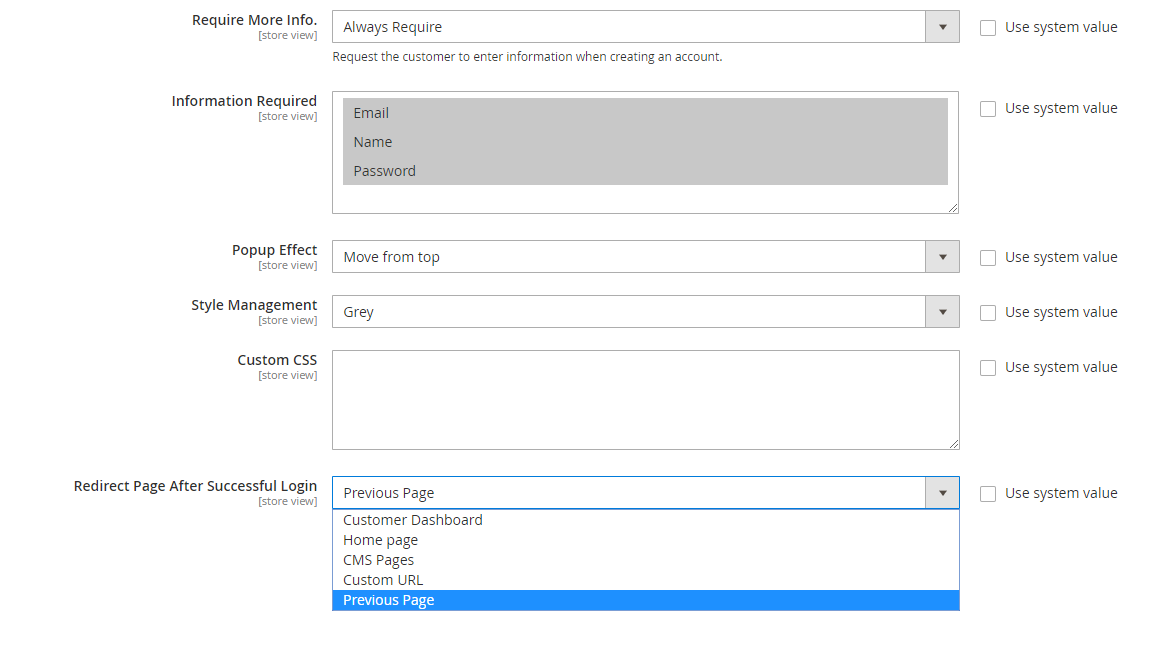
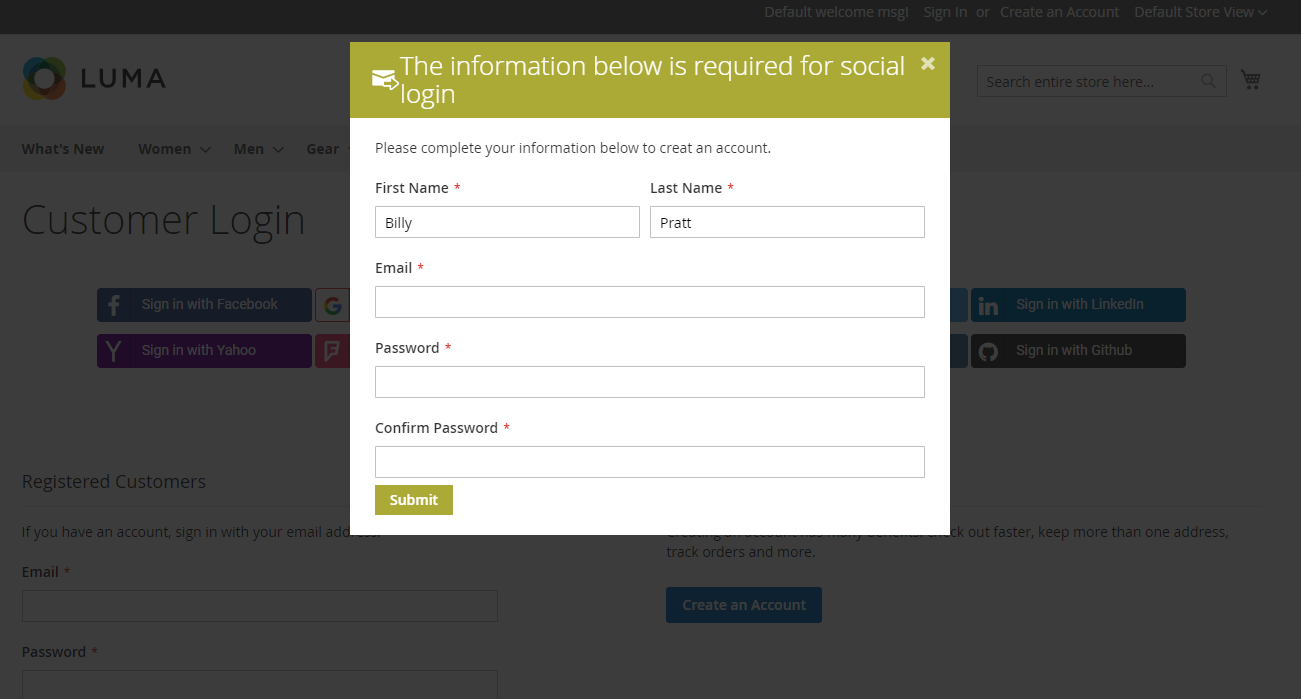
In the Require More Info field: * Select Always Require for always showing popup of information verification when customers register social account.
- Select If social account does not provide E-mail means that only show email confirmation popup when customers register account via the social networks that do not require real email such as Yahoo, Github, etc.
- Choosing either two options above will show an extra field:
- Information Required: Admin can choose to ask additional information of customers after they create social account. The information can be Name, Email, Password. This is a required field and you can choose mutiple iptions here.
- Popup Effect: Admin can select one among popup display effects below
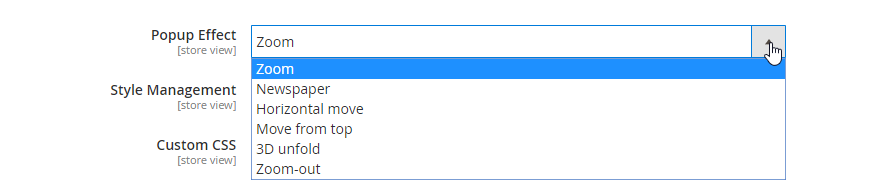
- In the Style Management field: Admin can choose one of the display colors for popup. Style Management = Custom means Admin can select custom the color swatch.
- In the Custom CSS field: You can add CSS code to customize based on your personal preference.
- In the Redirect page after successful login field: Enter the URL that you want to redirect to the users after they complete the login:
- Customer Dashboard: After login successfully, redirect to Customer Dashboard
- Home page: After login successfully, redirect to Home page
- CMS Pages: Redirect customers to a specific CMS page after login. Some CMS Pages can be: 404 Not Found, Home Page, Enable Cookies, Privacy Policy, About us, Customer Service, etc.
- Custom URL: Enter the URL that you want to redirect to the users after they complete the login.
- This sections only apply when the users login via the social network
Configure Social Accounts
I. Facebook sign in
1.1. How to configure Facebook
Go to Store > Settings > Configuration > Mageplaza Extensions > Social Login > Facebook.
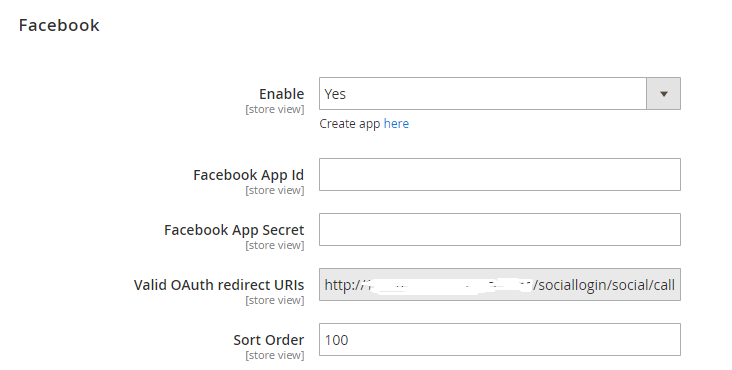
In the Enable field: Select "Yes" to show Sign in with Facebook button
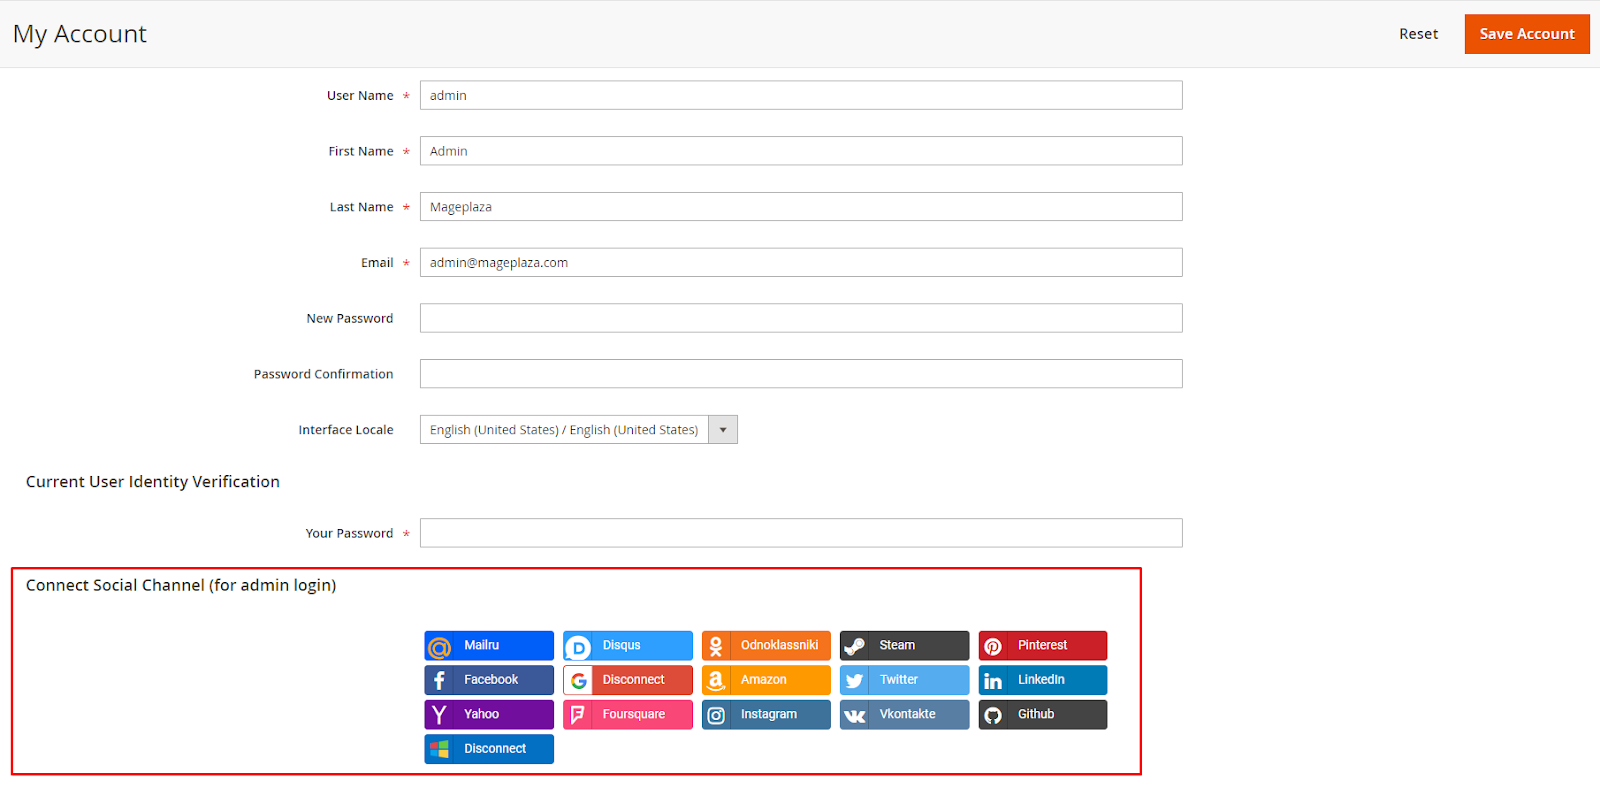
Sign In As Admin: Select “Yes” to allow admin to login your website at backend via Facebook
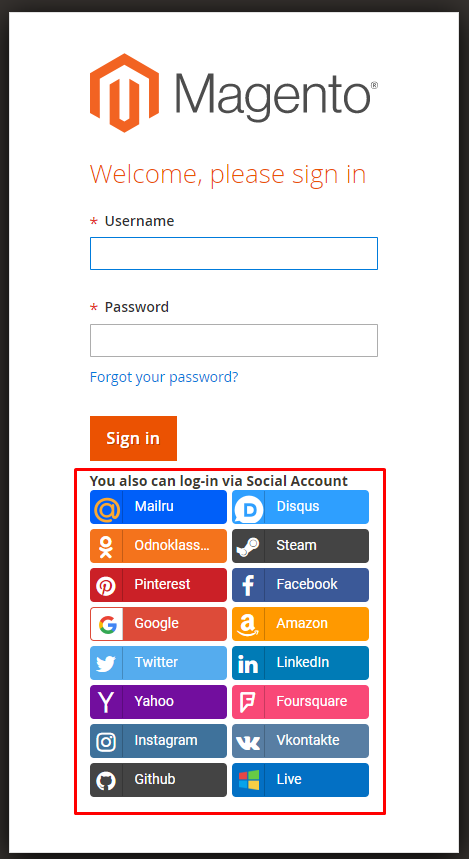
- After turn on this function, social login button is shown at My Account in backend, click to Facebook button to login Facebook account
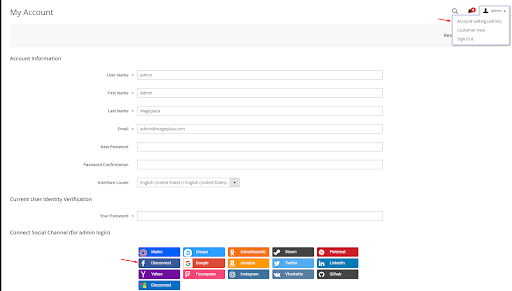
After connecting with Facebook, admin logout current account at backend and login by Facebook account.

- In the Sort Order field: The order to show social login buttons. Order will be arranged as following: number, special symbol, uppercase, lowercase.
- Instruction to create Facebook API can be found here.
1.2. Login using Facebook
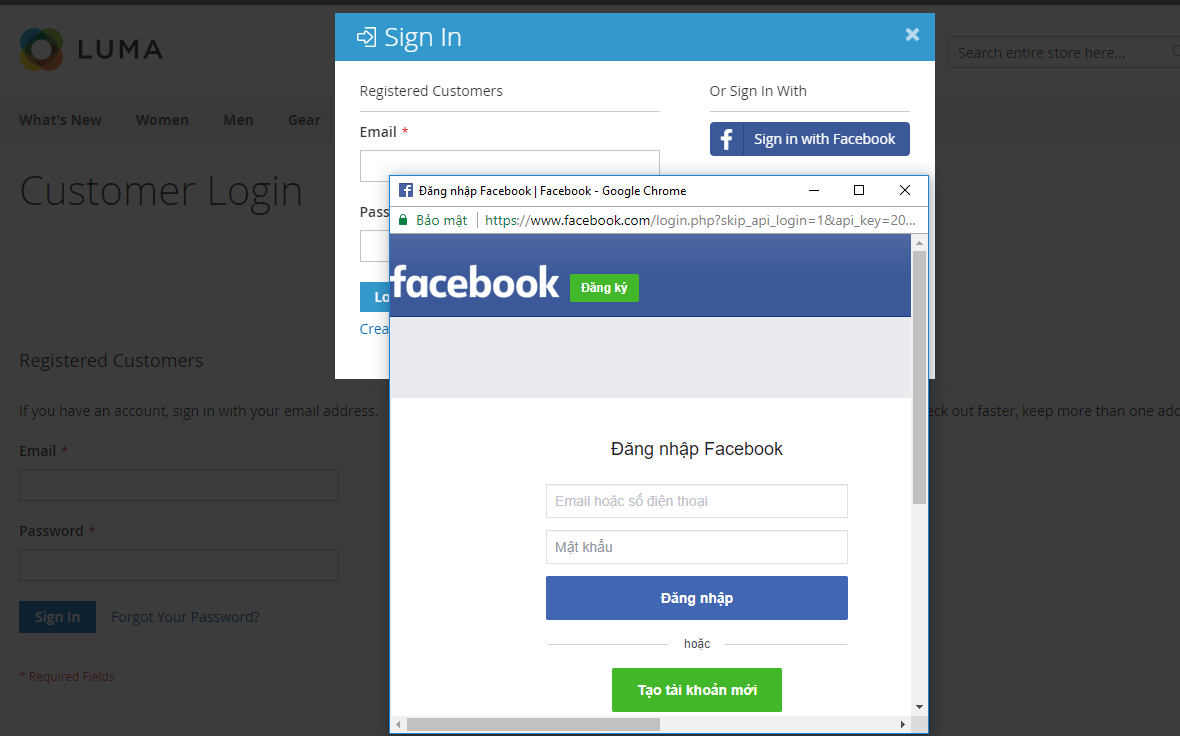
Facebook Login dialog will be shown after clicking on Sign in with Facebook button.
II. Google Sign in
2.1. How to configure Google
Go to Store > Settings > Configuration > Mageplaza Extensions > Social Login > Google.

In the Enable field: Select "Yes" to show Sign in with Google button
Sign In As Admin: Select “Yes” to allow admin to login your website at backend via Google
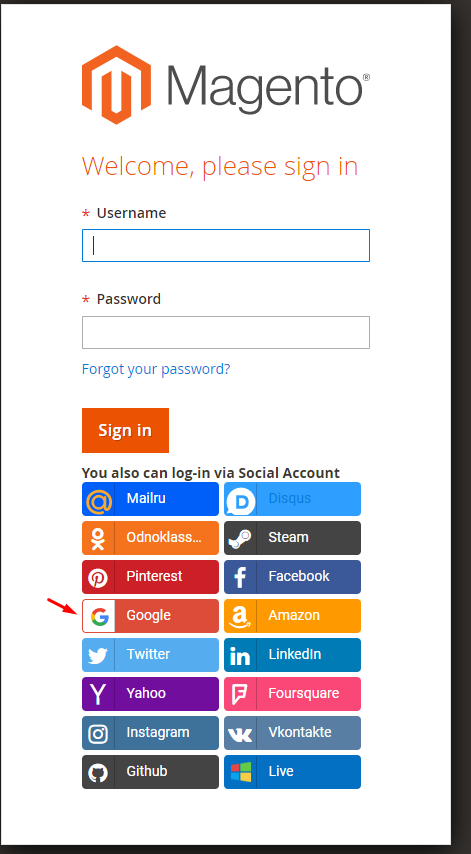
- After turning on this function, social login button is shown at My Account in backend, click to Google button to login via Google account
- After connecting with Google, admin logout current account at backend and login by Google account.
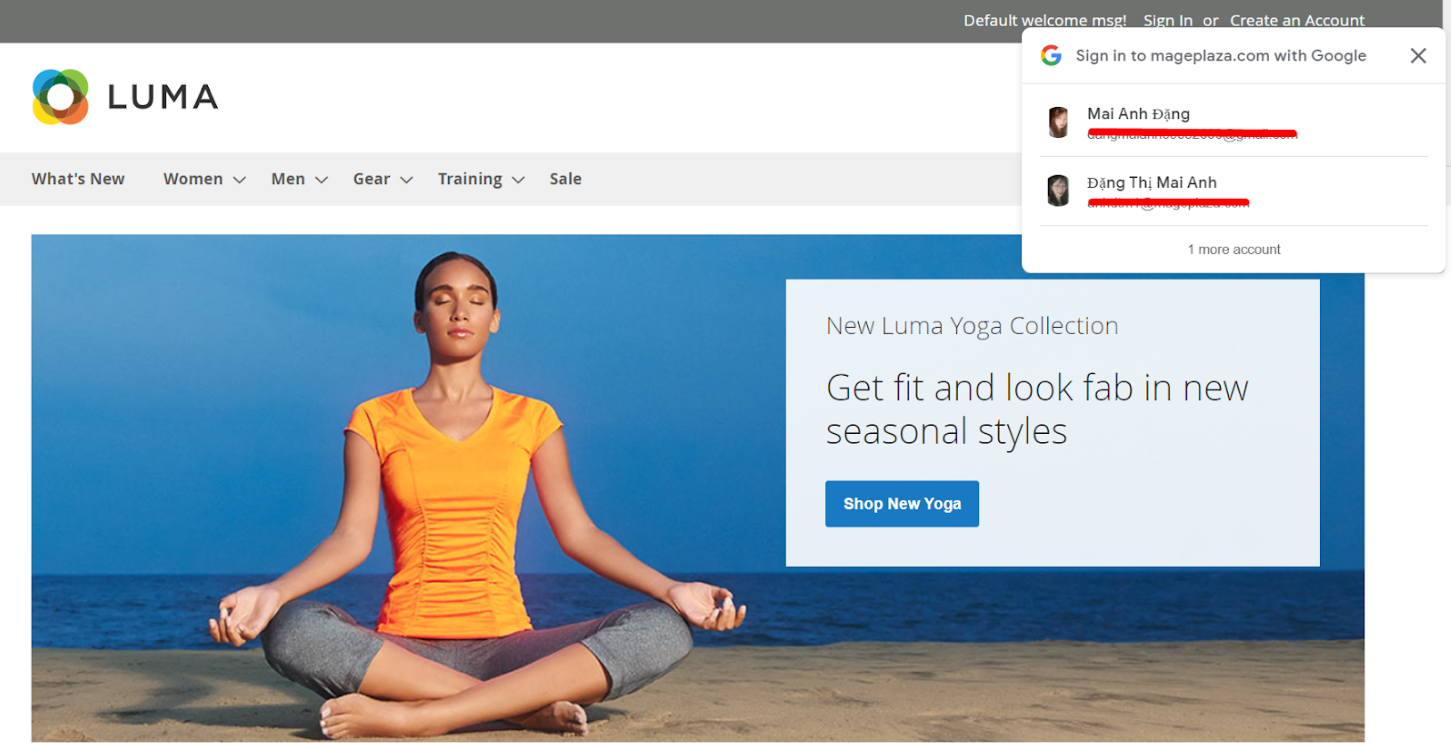
- Enable One tap sign up and sign in: Select Yes to sign in using the Google account in the browser via the popup.
- In the Sort Order field: The order to show social login buttons. Order will be arranged as following: number, special symbol, uppercase, lowercase.
- Instruction to create Google API can be found here.
2.2. Login using Google
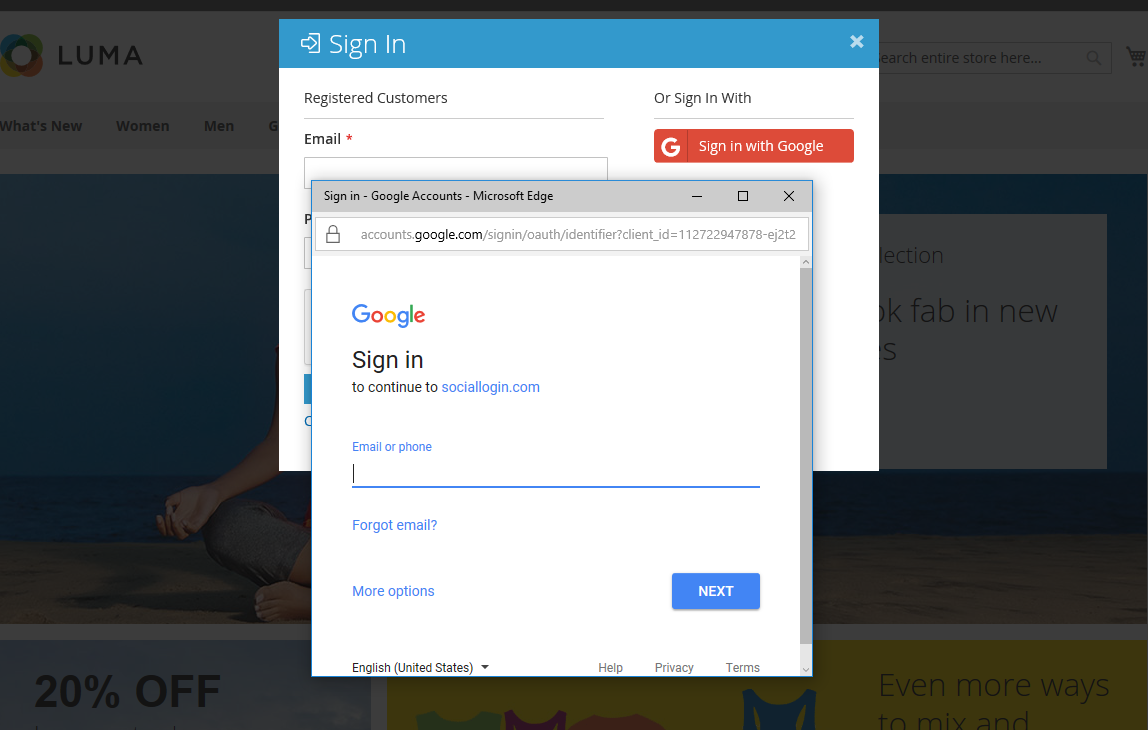
Google Login dialog will be shown after clicking on Sign in with Google button
III. Amazon Sign in
3.1. How to configure Amazon
Go to Store > Settings > Configuration > Mageplaza Extensions > Social Login > Amazon.
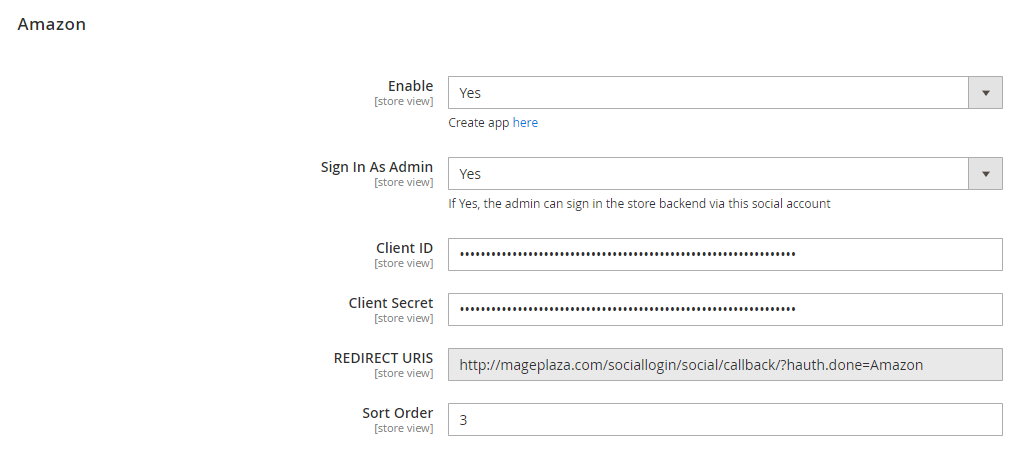
In the Enable field: Select "Yes" to show Sign in with Amazon button
Sign In As Admin: Select “Yes” to allow admin to login your website at backend via Amazon
- After turn on this function, social login button is shown at My Account in backend, click to Amazon button to login via Amazon account
After connecting with Amazon, admin logout current account at backend and login by Amazon account.
- In the Sort Order field: The order to show social login buttons. Order will be arranged as following: number, special symbol, uppercase, lowercase.
3.2. Login using Amazon
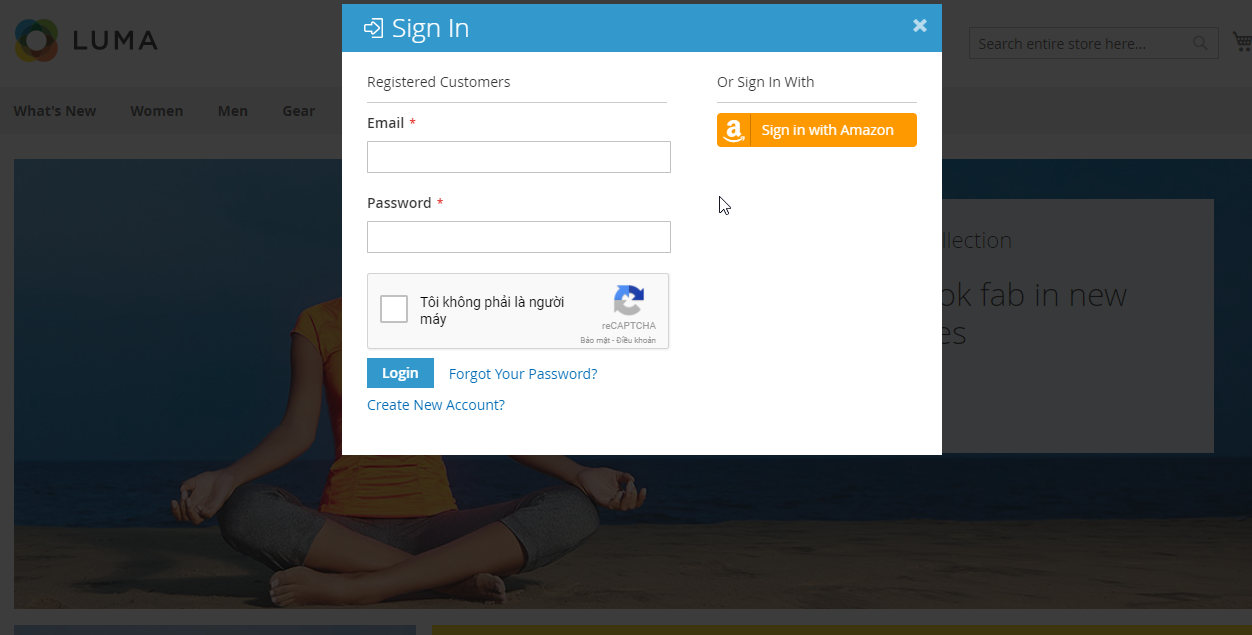
Amazon Login dialog will be shown after clicking on Sign in with Amazon button.
IV. Twitter Sign in
4.1. How to configure Twitter
Go to Store > Settings > Configuration > Mageplaza Extensions > Social Login > Twitter.
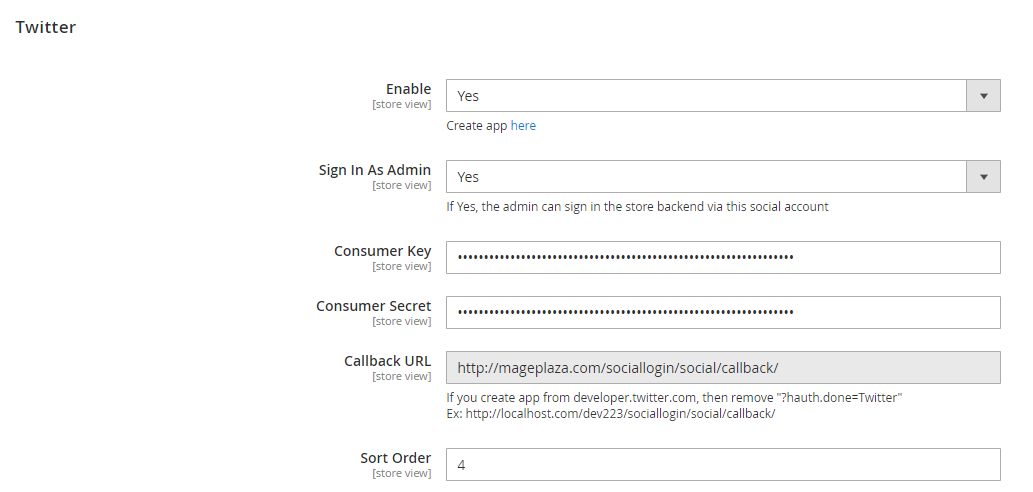
In the Enable field: Select "Yes" to show Sign in with Twitter button
Sign In As Admin: Select “Yes” to allow admin to login your website at backend via Twitter
- After turn on this function, social login button is shown at My Account in backend, click to Twitter button to login via Twitter account

After connecting with Twitter, admin logout current account at backend and login by Twitter account.
- In the Sort Order field: The order to show social login buttons. Order will be arranged as following: number, special symbol, uppercase, lowercase.
- Instruction to create Twitter API can be found here.
4.2. Login using Twitter
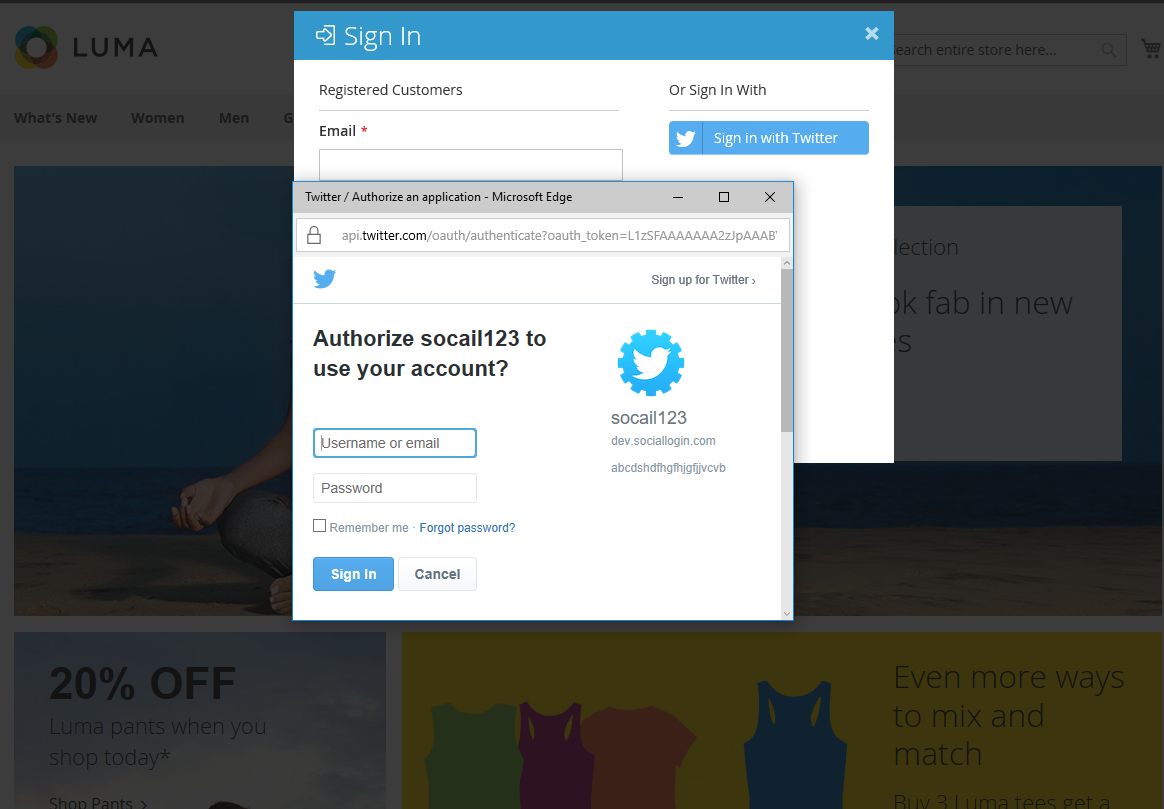
Twitter Login dialog will be shown after clicking on Sign in with Twitter button.
V. LinkedIn Sign in
5.1. How to configure LinkedIn
Go to Store > Settings > Configuration > Mageplaza Extensions > Social Login > Linkedln
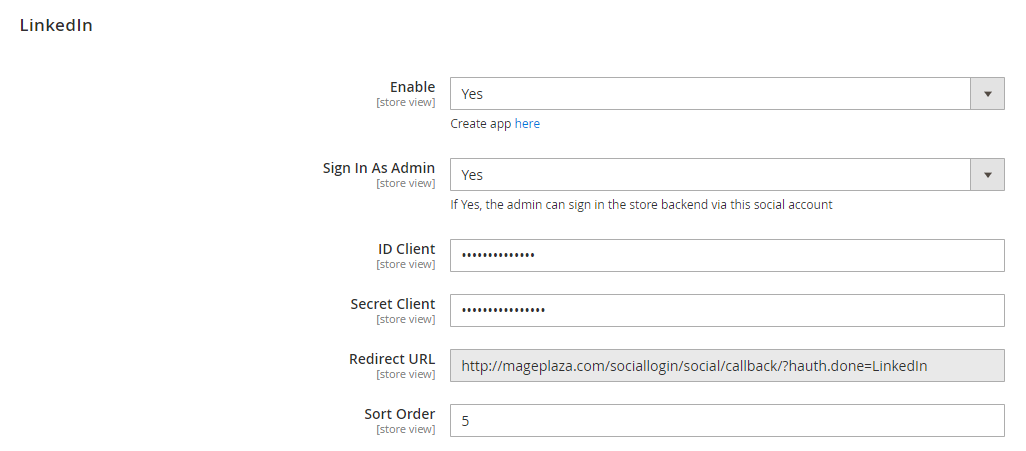
In the Enable field: Select "Yes" to show Sign in with LinkedIn button
Sign In As Admin: Select “Yes” to allow admin to login your website at backend via LinkedIn
- After turn on this function, social login button is shown at My Account in backend, click to LinkedIn button to login via LinkedIn account

After connecting with LinkedIn, admin logout current account at backend and login by LinkedIn account.

- In the Sort Order field: The order to show social login buttons. Order will be arranged as following: number, special symbol, uppercase, lowercase.
- Instruction to create LinkedIn API can be found here.
5.2. Login using LinkedIn
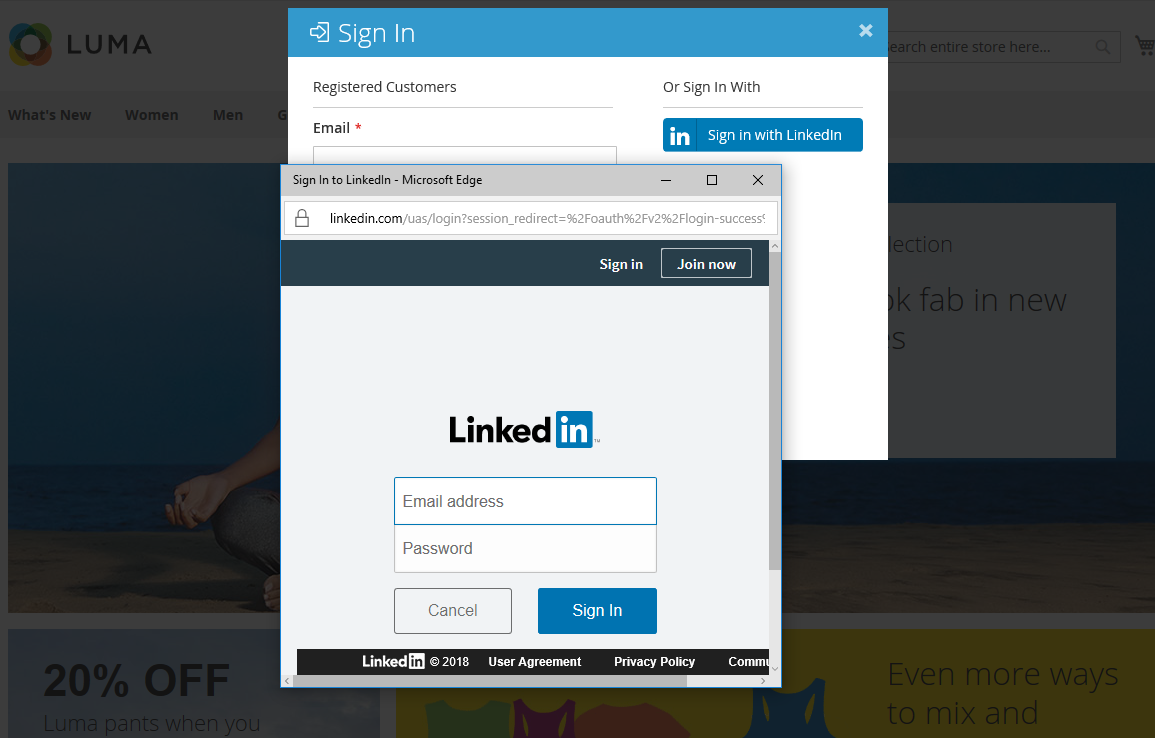
LinkedIn Login dialog will be shown after clicking on Sign in with LinkedIn button.
VI. Yahoo Sign in
6.1. How to configure Yahoo
Go to Store > Settings > Configuration > Mageplaza Extensions > Social Login > Yahoo.
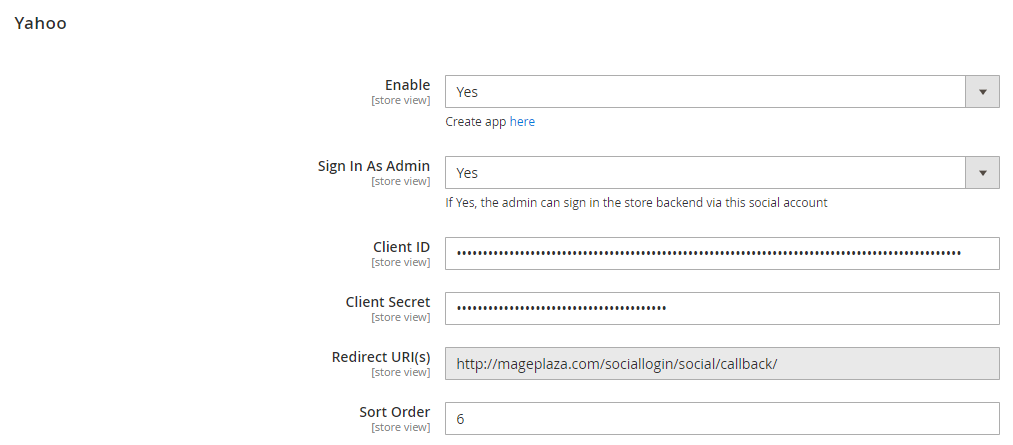
In the Enable field: Select "Yes" to show Sign in with Yahoo button
Sign In As Admin: Select “Yes” to allow admin to login your website at backend via Yahoo
- After turn on this function, social login button is shown at My Account in backend, click to Yahoo button to login via Yahoo account

After connecting with Yahoo, admin logout current account at backend and login by Yahoo account.

- In the Sort Order field: The order to show social login buttons. Order will be arranged as following: number, special symbol, uppercase, lowercase.
- Instruction to create Yahoo API can be found here.
6.2. Login using Yahoo
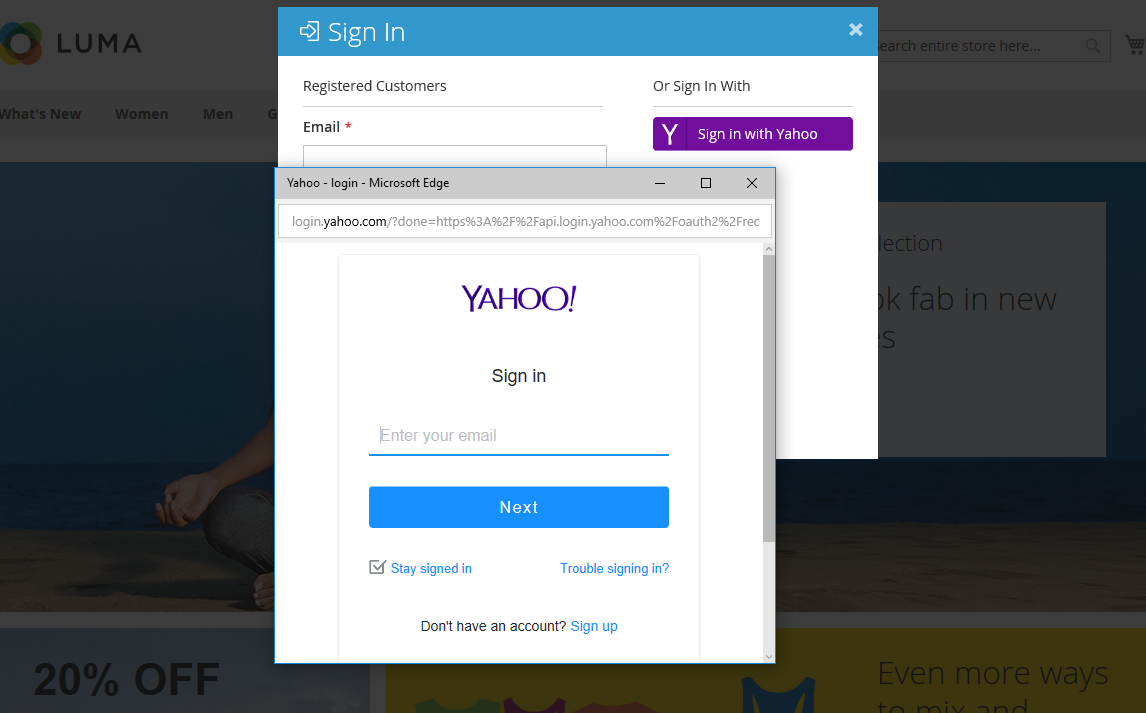
Yahoo Login dialog will be shown after clicking on Sign in with Yahoo button.
VII. Foursquare Sign in
7.1. How to configure Foursquare
Go to Store > Settings > Configuration > Mageplaza Extensions > Social Login > Foursquare.

In the Enable field: Select "Yes" to show Sign in with Foursquare button
Sign In As Admin: Select “Yes” to allow admin to login your website at backend via Foursquare
- After turn on this function, social login button is shown at My Account in backend, click to Foursquare button to login via Foursquare account

After connecting with Foursquare, admin logout current account at backend and login by Foursquare account.

- In the Sort Order field: The order to show social login buttons. Order will be arranged as following: number, special symbol, uppercase, lowercase.
- Instruction to create Foursquare API can be found here.
7.2. Login using Foursquare
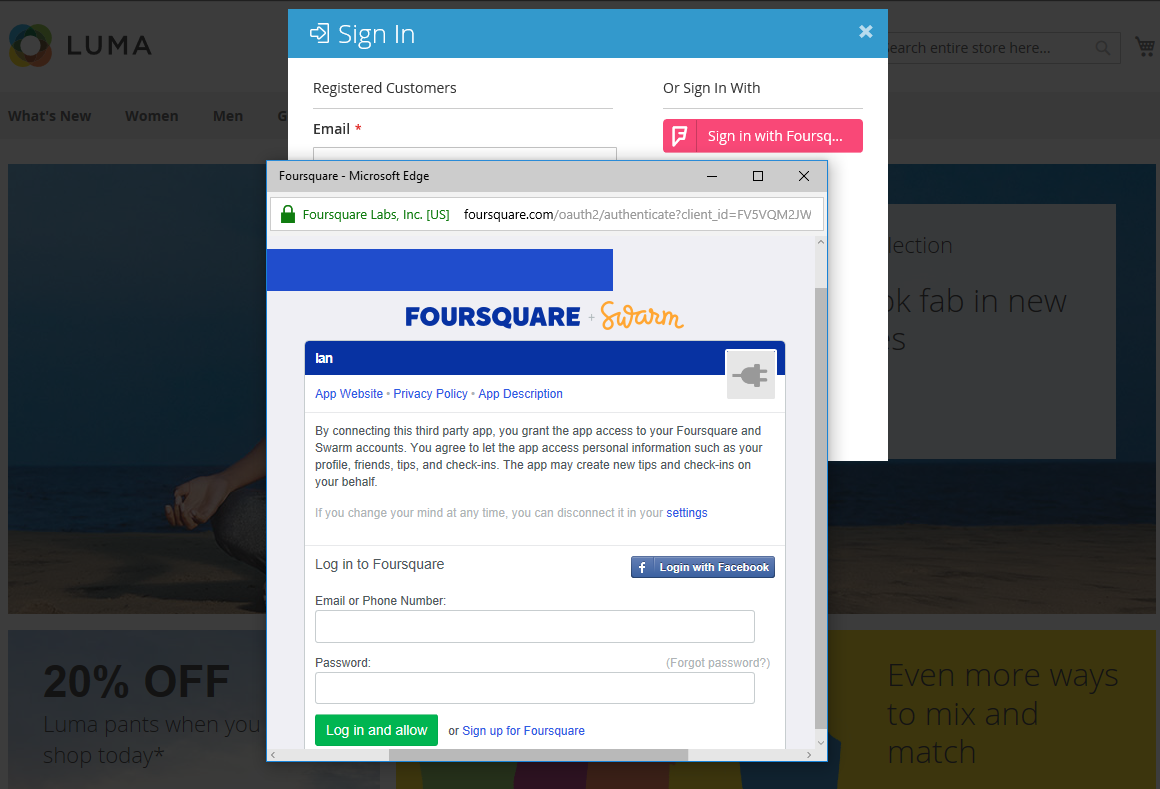
Foursquare Login dialog will be shown after clicking on Sign in with Foursquare button.
VIII. Instagram Sign in
8.1. How to configure Instagram
Go to Store > Settings > Configuration > Mageplaza Extensions > Social Login > Instagram.
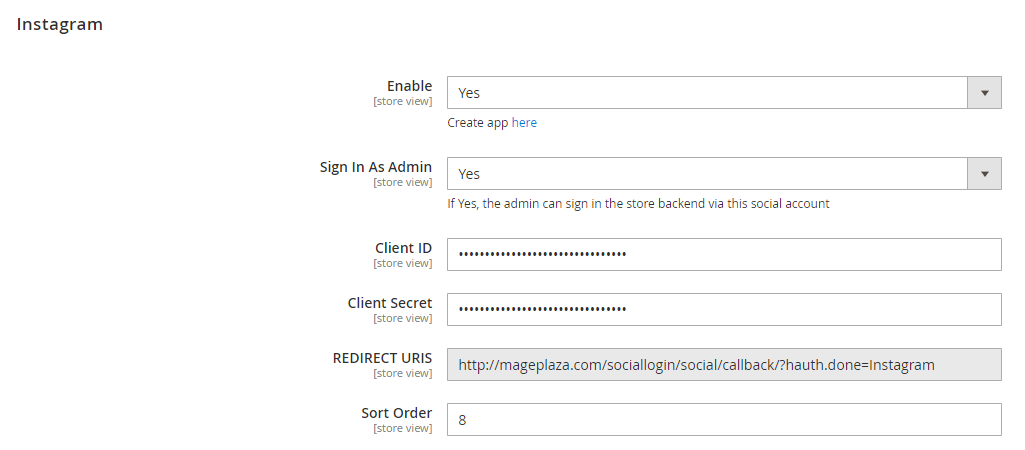
In the Enable field: Select "Yes" to show Sign in with Instagram button
Sign In As Admin: Select “Yes” to allow admin to login your website at backend via Instagram
- After turn on this function, social login button is shown at My Account in backend, click to Instagram button to login via Instagram account

After connecting with Instagram, admin logout current account at backend and login by Instagram account.

- In the Sort Order field: The order to show social login buttons. Order will be arranged as following: number, special symbol, uppercase, lowercase.
- Instruction to create Instagram API can be found here.
8.2. Login using Instagram
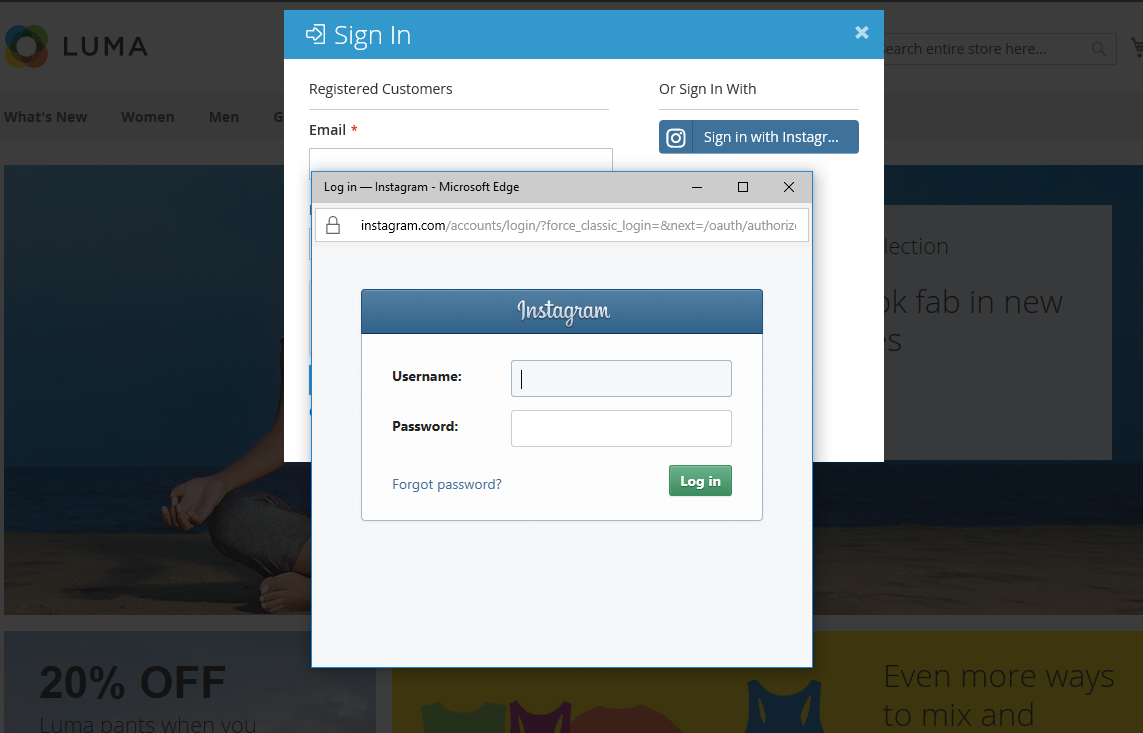
Instagram Login dialog will be shown after clicking on Sign in with Instagram button.
IX. Vkontakte Sign in
9.1. How to configure Vkontakte
Go to Store > Settings > Configuration > Mageplaza Extensions > Social Login > Vkontakte.
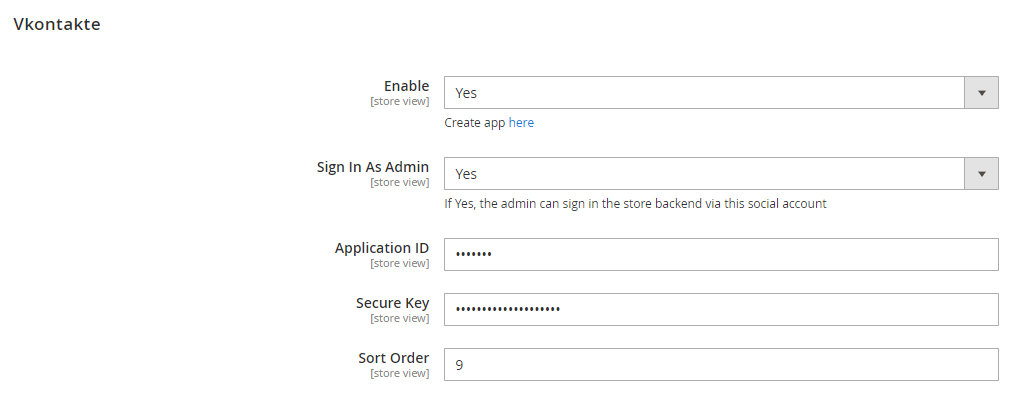
In the Enable field: Select "Yes" to show Sign in with Vkontakte button
Sign In As Admin: Select “Yes” to allow admin to login your website at backend via Vkontakte
- After turn on this function, social login button is shown at My Account in backend, click to Vkontakte button to login via Vkontakte account

After connecting with Vkontakte, admin logout current account at backend and login by Vkontakte account.

- In the Sort Order field: The order to show social login buttons. Order will be arranged as following: number, special symbol, uppercase, lowercase.
- Instruction to create Vkontakte API can be found here.
9.2. Login using Vkontakte
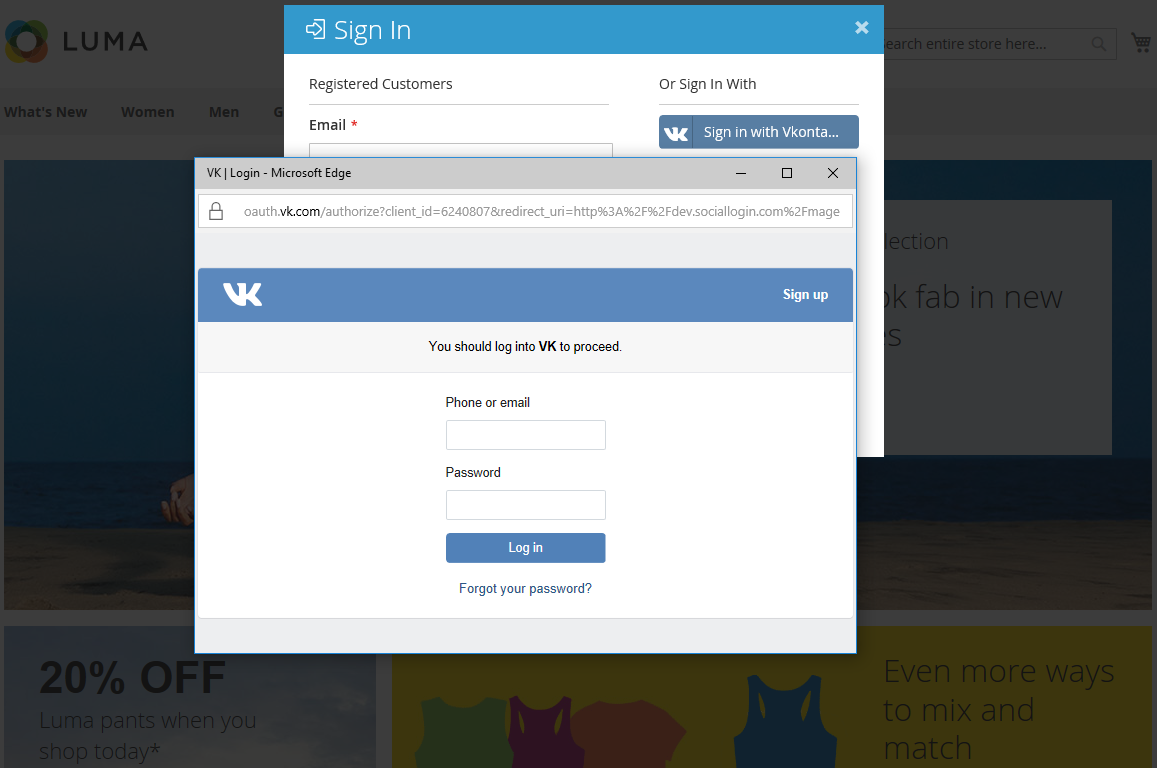
Vkontakte Login dialog will be shown after clicking on Sign in with Vkontakte button.
X. Github Sign in
10.1. How to configure Github
Go to Store > Settings > Configuration > Mageplaza Extensions > Social Login > Github.
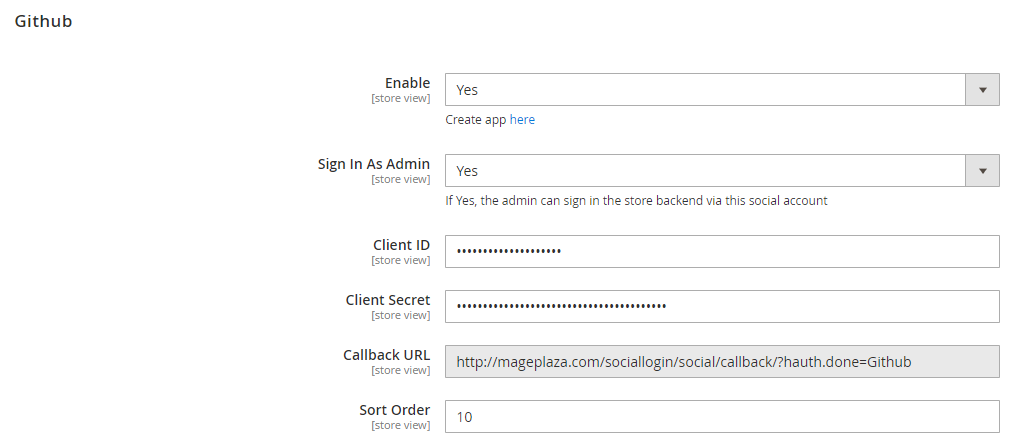
In the Enable field: Select "Yes" to show Sign in with Github button
Sign In As Admin: Select “Yes” to allow admin to login your website at backend via Github
- After turn on this function, social login button is shown at My Account in backend, click to Github button to login via Github account

After connecting with Github, admin logout current account at backend and login by Github account.

- In the Sort Order field: The order to show social login buttons. Order will be arranged as following: number, special symbol, uppercase, lowercase.
- Instruction to create Github API can be found here.
10.2. Login using Github
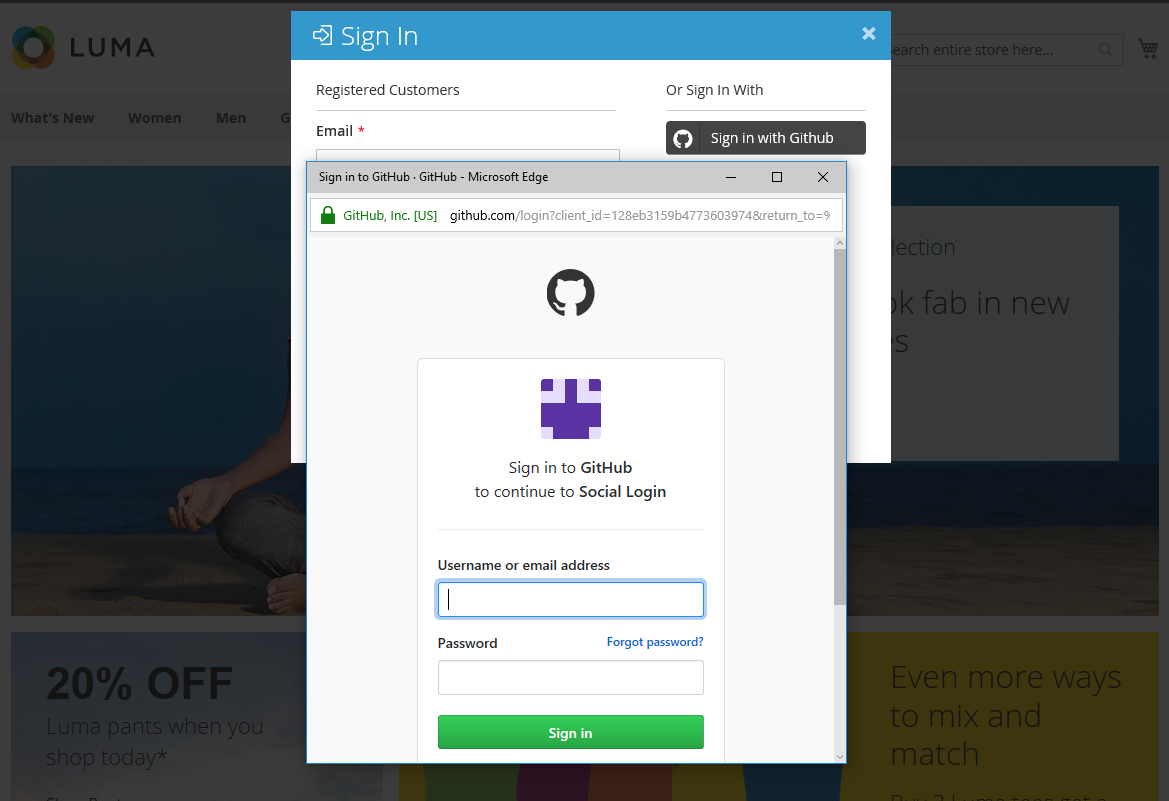
Github Login dialog will be shown after clicking on Sign in with Github button.
XI. Disqus Sign in
11.1 How to configure Disqus
Go to Store > Settings > Configuration > Mageplaza Extensions > Social Login > Disqus

In the Enable field: Choose Yes to display the Signin button with Disqus
Sign In As Admin: Select “Yes” to allow admin to login your website at backend via Disqus
- After turn on this function, social login button is shown at My Account in backend, click to Disqus button to login via Disqus account

After connecting with Disqus, admin logout current account at backend and login by Disqus account.
- In the Sort Order field: This field shows the order to display the social login button. The order will be sorted as the following:
number, special characters, uppercase letters, lowercase letters.
11.2 Login using Disqus
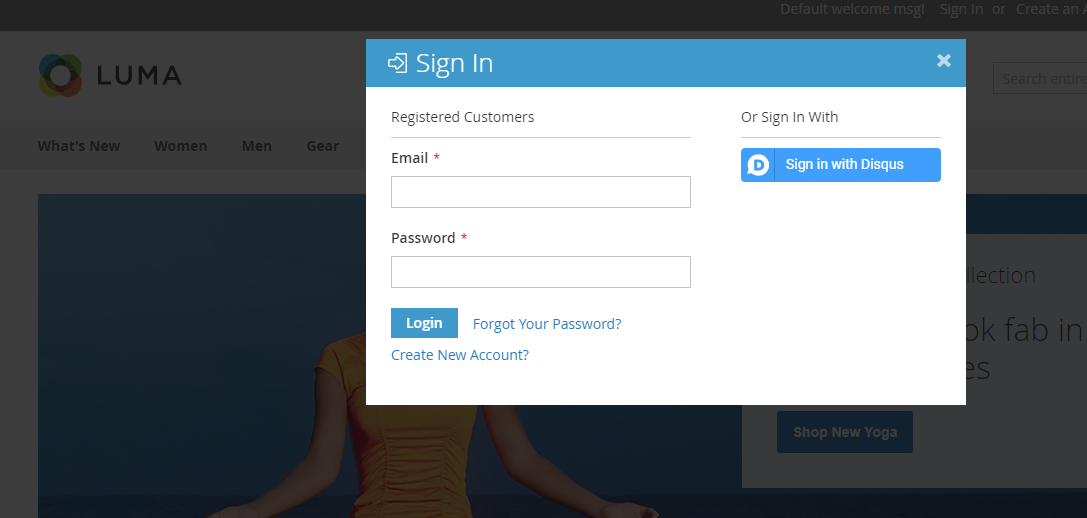
- The Disqus login dialog will be displayed after clicking the Login button with Disqus.
XII. Mailru Sign in
12.1 How to configure Mailru
Go to Store > Settings > Configuration > Mageplaza Extensions > Social Login > Mailru

In the Enable field: Choose Yes to enable the login button with Mailru
Sign In As Admin: Select “Yes” to allow admin to login your website at backend via Mailru
- After turn on this function, social login button is shown at My Account in backend, click to Mailru button to login via Mailru account

After connecting with Mailru, admin logout current account at backend and login by Mailru account.

- In the Sort Order field: This field shows the order to display the social login button. The order will be sorted as the following:
number, special characters, uppercase letters, lowercase letters.
12.2 Login using Mailru
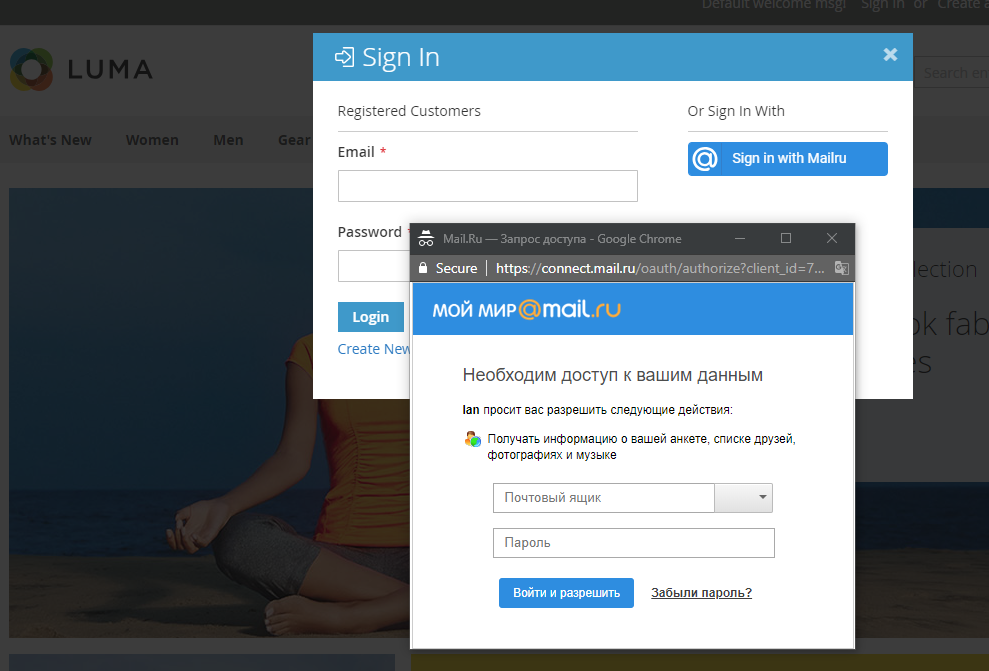
- The Mailru login dialog will be displayed after clicking the Login button with Mailru.
XIII. Odnoklassniki Sign in
13.1 How to configure Odnoklassniki
Go to Store > Settings > Configuration > Mageplaza Extensions > Social Login > Odnoklassniki
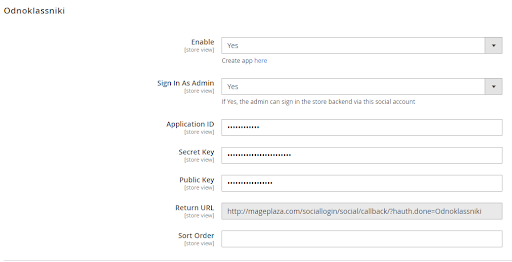
In the Enable field: Choose Yes to enable the login button with Odnoklassniki
Sign In As Admin: Select “Yes” to allow admin to login your website at backend via Odnoklassniki
- After turn on this function, social login button is shown at My Account in backend, click to Odnoklassniki button to login via Odnoklassniki account

After connecting with Odnoklassniki, admin logout current account at backend and login by Odnoklassniki account.

- In the Sort Order field: This field shows the order to display the social login button. The order will be sorted as the following:
number, special characters, uppercase letters, lowercase letters.
13.2 Login using Odnoklassniki
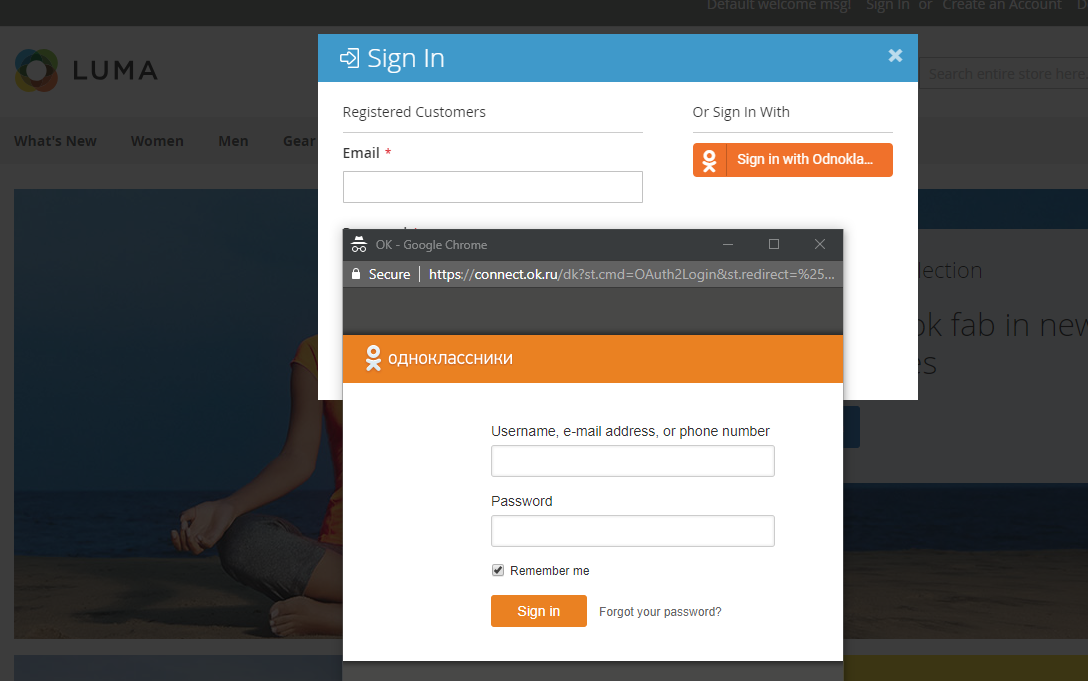
- The Odnoklassniki login dialog will be displayed after clicking the Login button with Odnoklassniki.
XIV. Steam Sign in
14.1 How to configure Steam
Go to Store > Settings > Configuration > Mageplaza Extensions > Social Login > Steam

In the Enable field: Choose Yes to enable the login button with Steam
Sign In As Admin: Select “Yes” to allow admin to login your website at backend via Steam
- After turn on this function, social login button is shown at My Account in backend, click to Steam button to login via Steam account

After connecting with Steam, admin logout current account at backend and login by Steam account.
- In the Sort Order field: This field shows the order to display the social login button. The order will be sorted as the following:
number, special characters, uppercase letters, lowercase letters.
14.2 Login using Steam
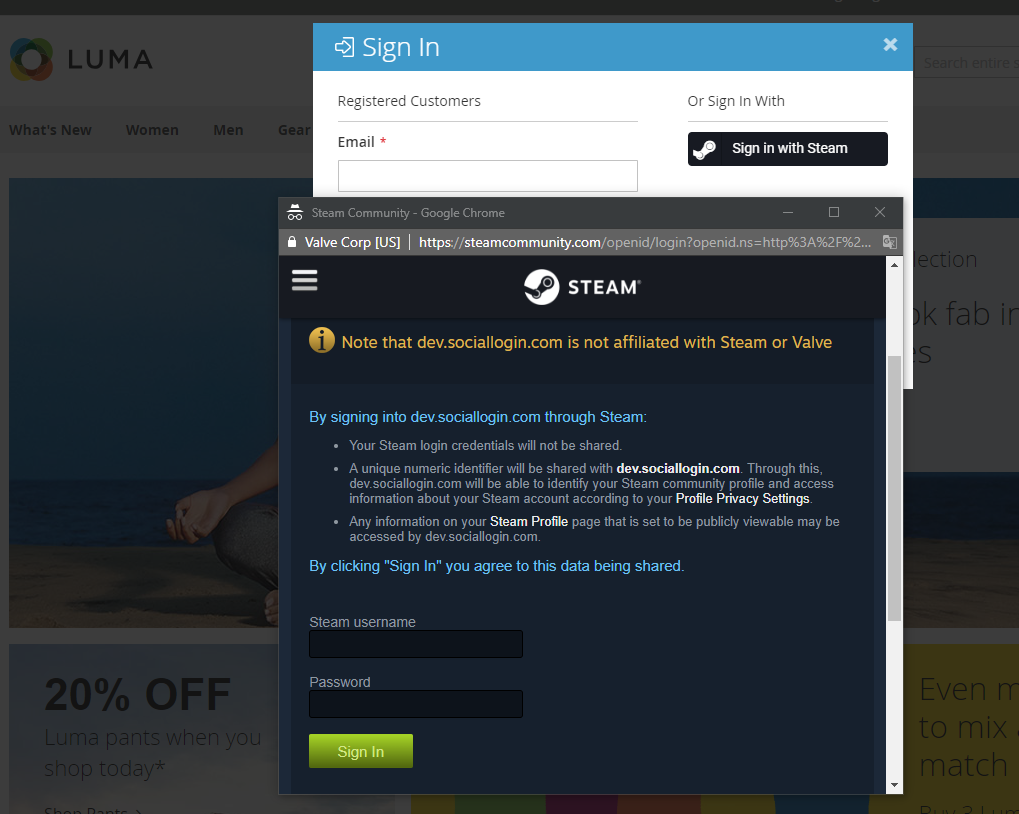
- The Steam login dialog will be displayed after clicking the Login button with Steam.
XV. Live Sign in
15.1. How to configure Live
Go to Store > Settings > Configuration > Mageplaza Extensions > Social Login > Live
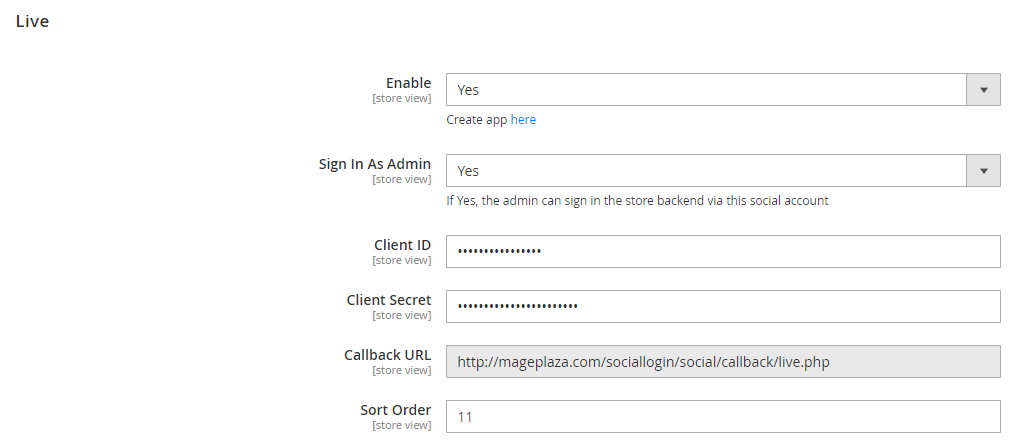
In the Enable field: Choose Yes to enable the login button with Live
Sign In As Admin: Select “Yes” to allow admin to login your website at backend via Live
- After turn on this function, social login button is shown at My Account in backend, click to Live button to login via Live account

After connecting with Live, admin logout current account at backend and login by Live account.

- In the Sort Order field: This field shows the order to display the social login button. The order will be sorted as the following:
number, special characters, uppercase letters, lowercase letters.
15.2. Login using Live
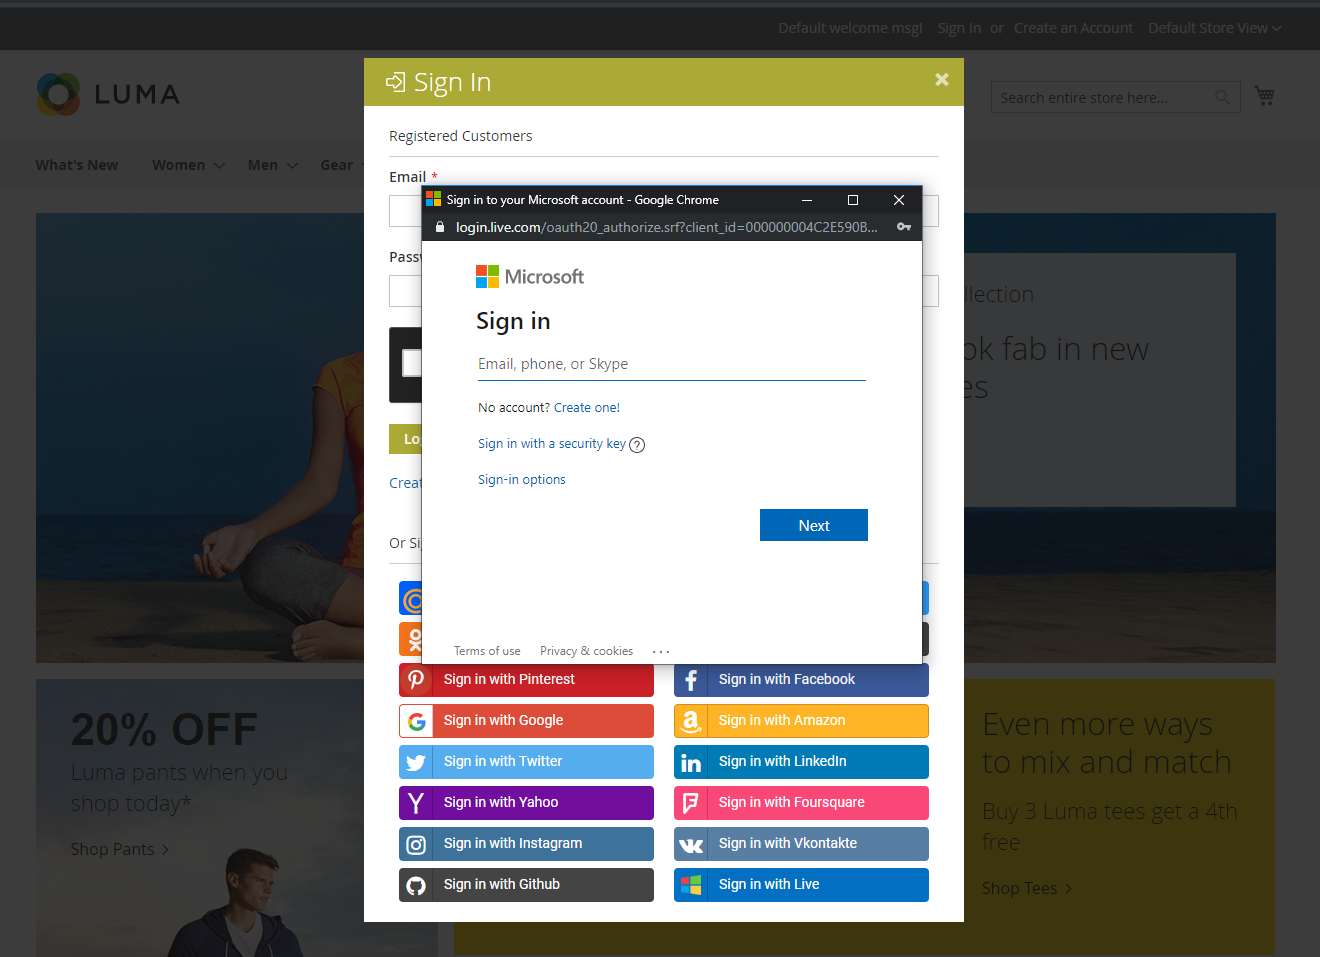
The Live login dialog will be displayed after clicking the Login button with Live
XVI. Pinterest Sign in
16.1. How to configure Pinterest
Go to Store > Settings > Configuration > Mageplaza Extensions > Social Login > Pinterest
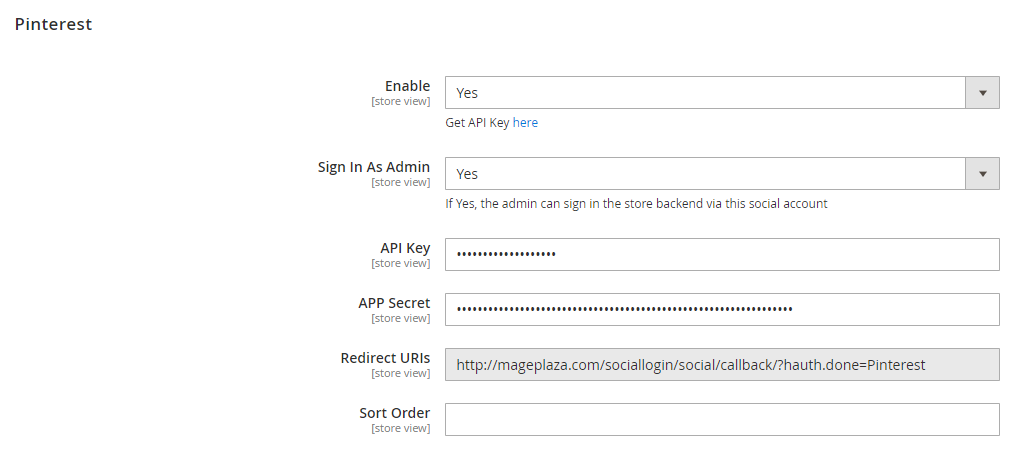
In the Enable field: Choose Yes to enable the login button with Pinterest
Sign In As Admin: Select “Yes” to allow admin to login your website at backend via Pinterest
- After turn on this function, social login button is shown at My Account in backend, click to Pinterest button to login via Pinterest account

After connecting with Pinterest, admin logout current account at backend and login by Pinterest account.

- In the Sort Order field: This field shows the order to display the social login button. The order will be sorted as the following:
number, special characters, uppercase letters, lowercase letters.
16.2. Login using Pinterest
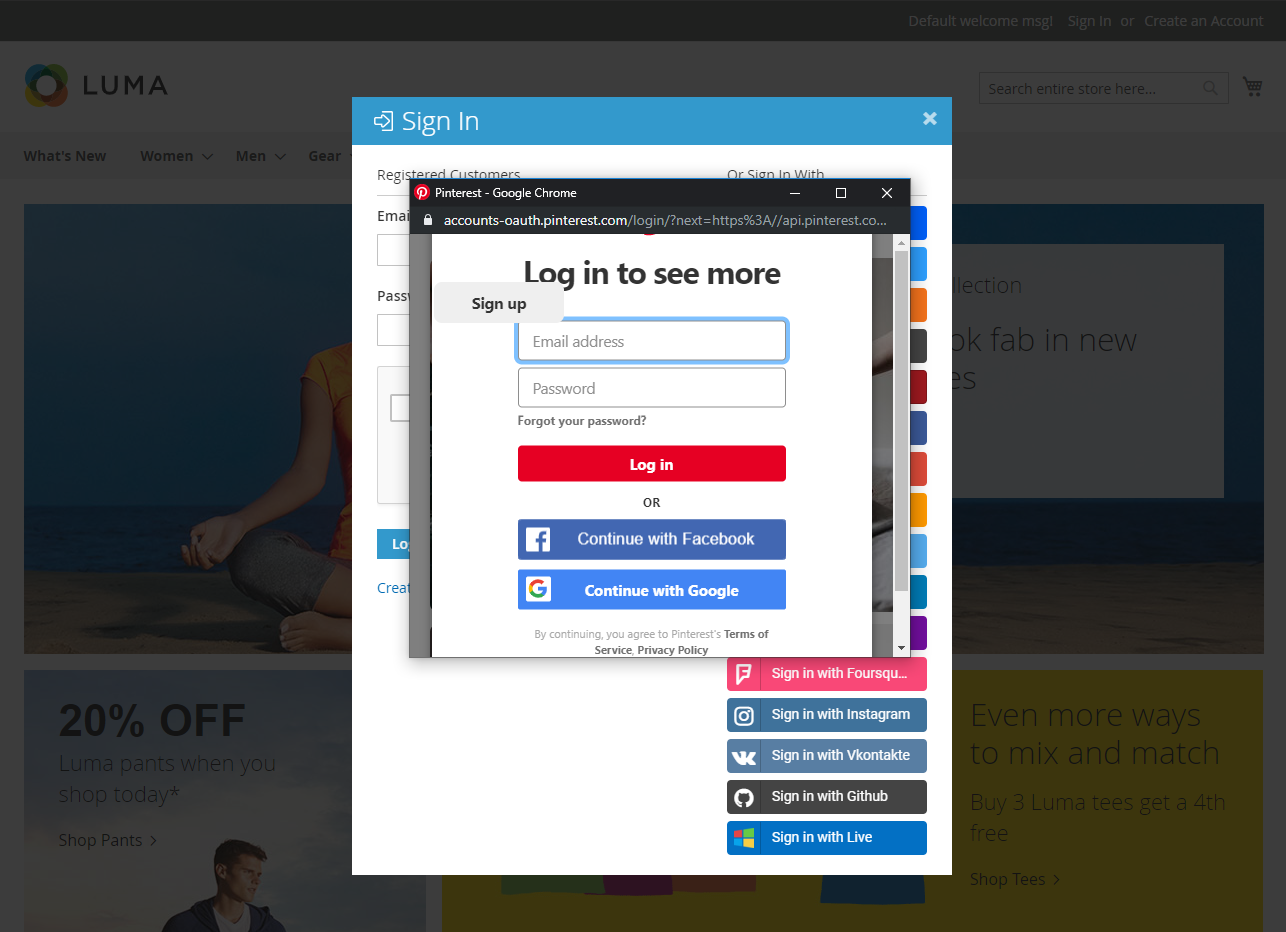
The Pinterest login dialog will be displayed after clicking the Login button with Pinterest
XVII. Compatible with Mageplaza extension
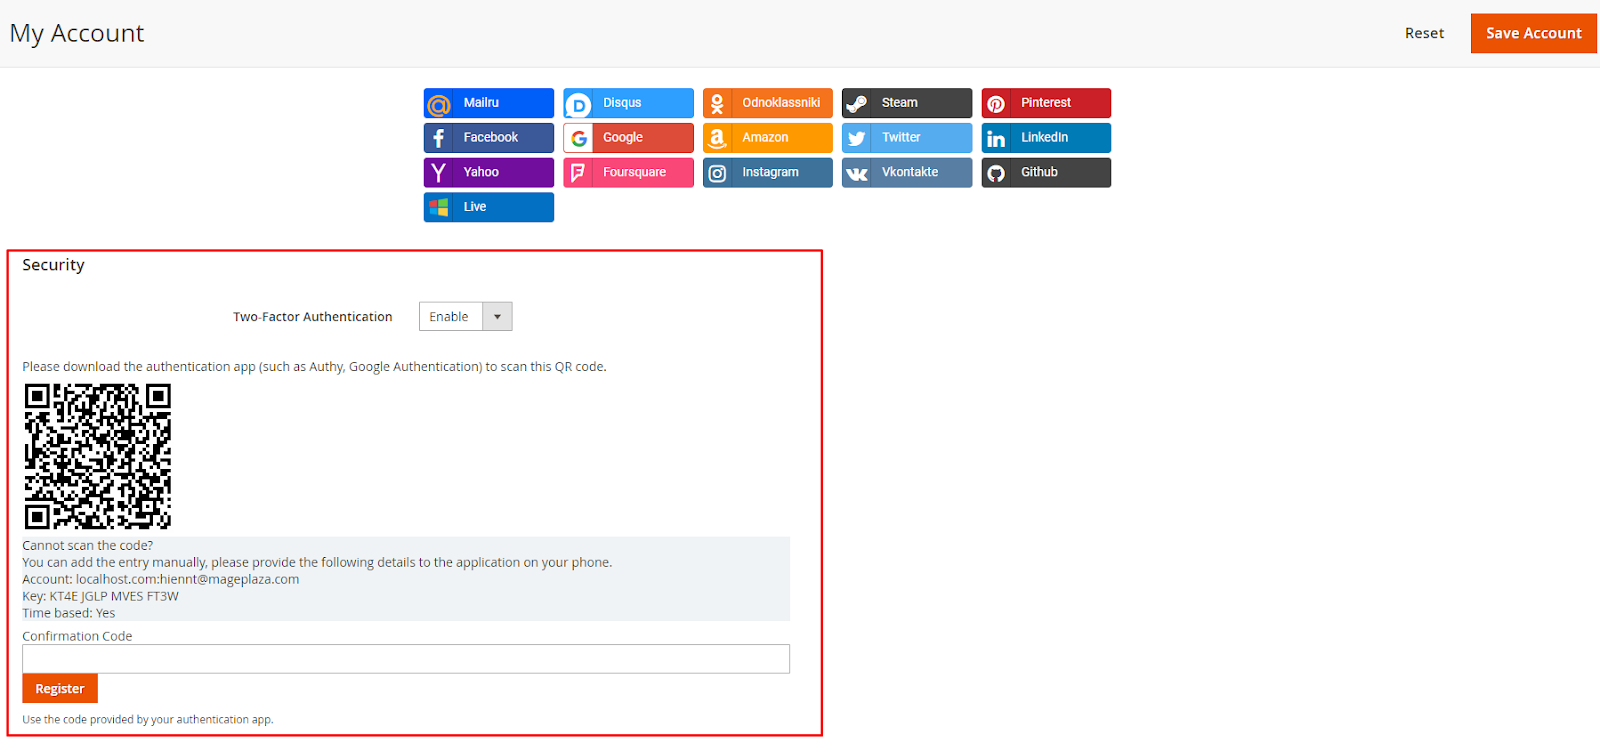
17.1. Compatible with Two-Factor Authentication
Mageplaza's Social Login extension is fully compatible with Two-Factor Authentication to ensure security for stores backend when logging in via social accounts. This extension supports three commonly used authentication authors: Authy, Duo or Google Authenticator. To learn how to configure for Two-Factor Authentication, refer the guide here.
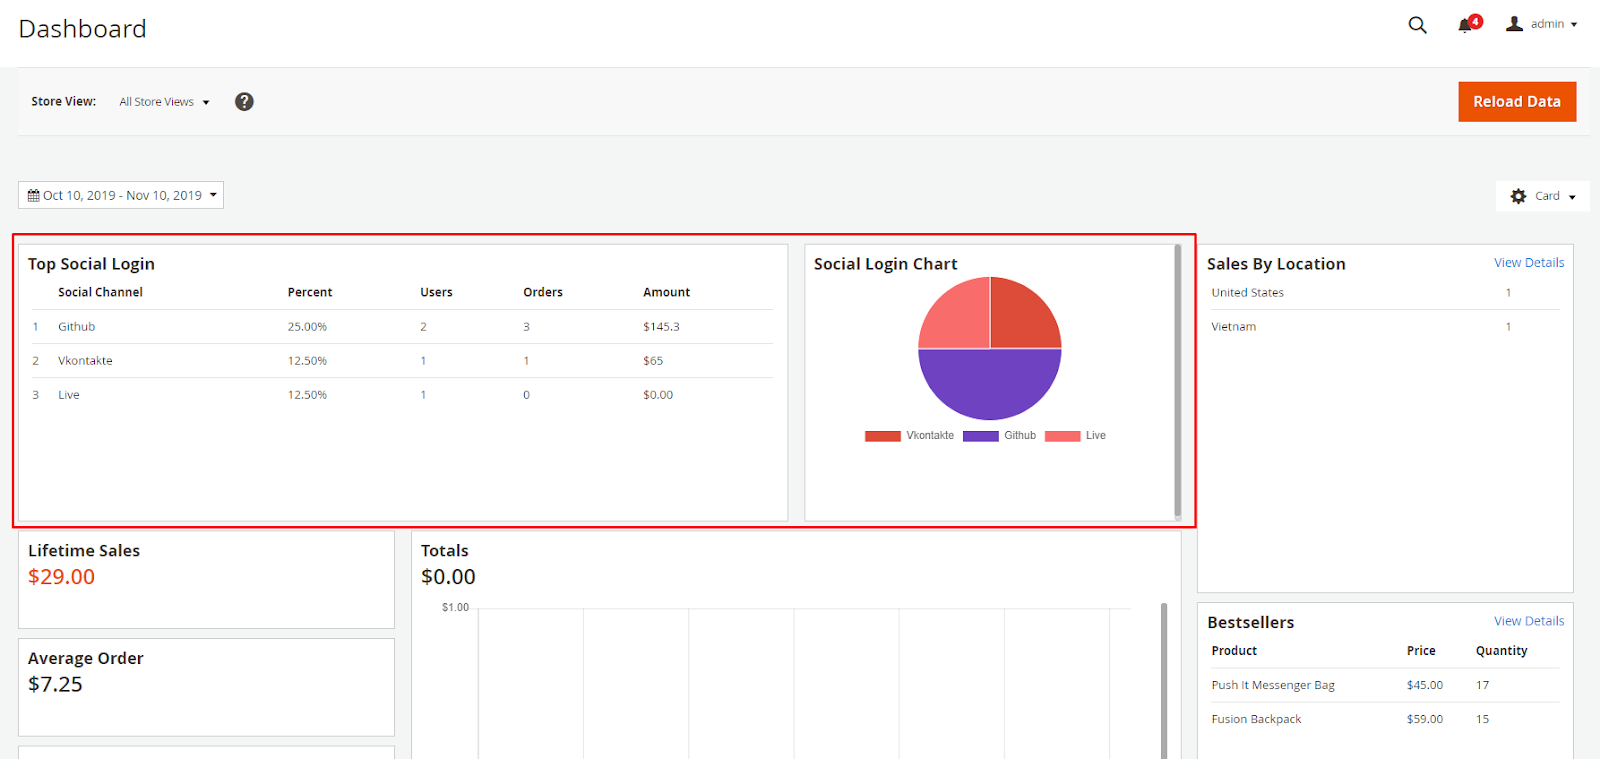
17.2. Compatible with Report
Mageplaza's Social Login extension is fully compatible with the Report extension to provide statistics of each social account including information: User, Order, Amount, so on via Social login chart.
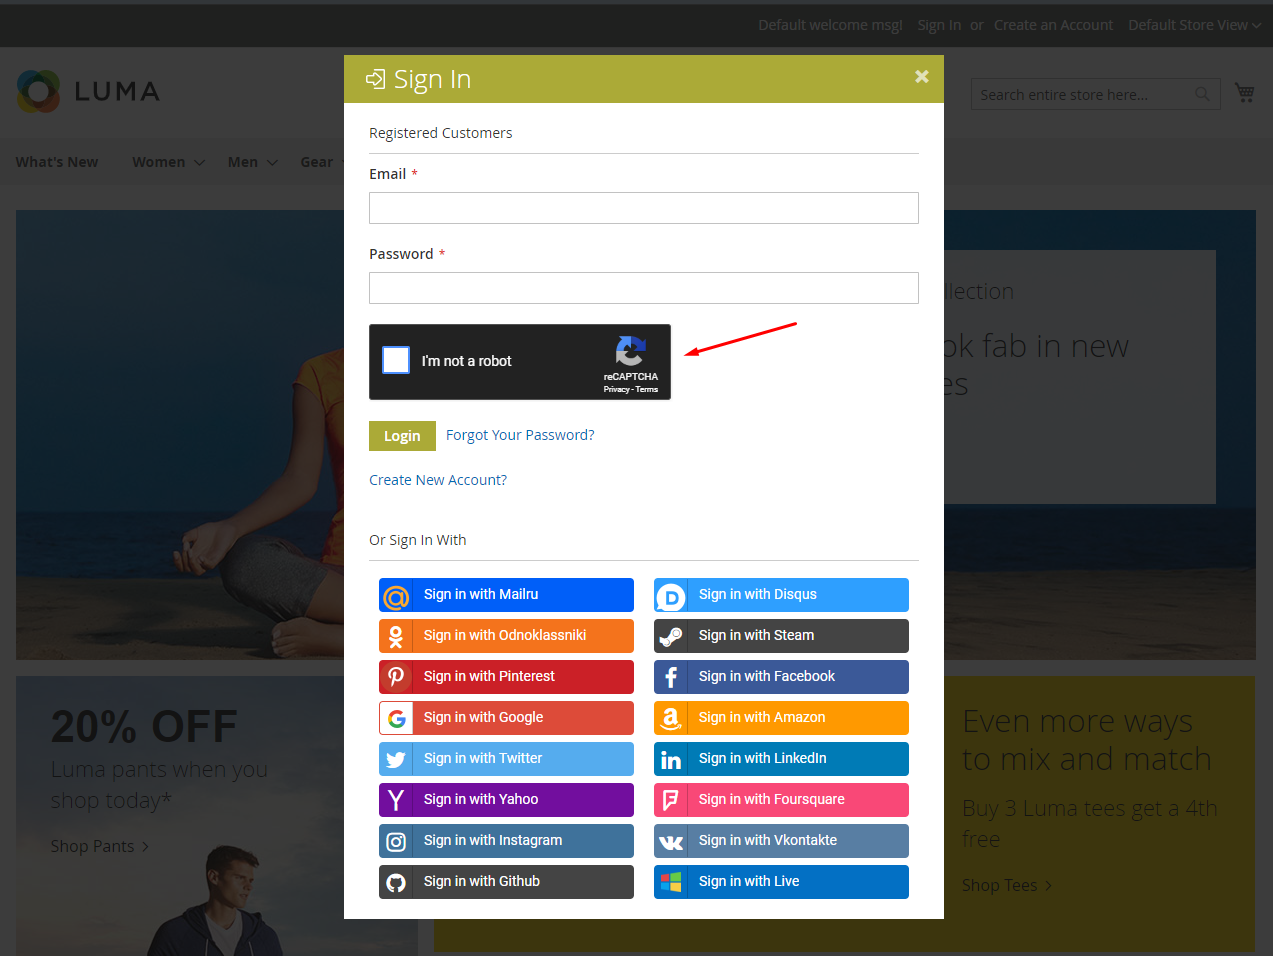
17.3. Compatible with Google Recaptcha.
Mageplaza's Social Login extension is fully compatible with Google Recaptcha which helps process authentication when customers login, register an account, etc on your site to avoid spam or phishing.